In this session, we were introduced to NUKE, a note-based digital compositing application.
First of all, we are going to highlight some useful shortcuts:
- F Fit to screen
- Alt Drag
- + – Zoom
- B See blue channel
- G See green channel
- R See red channel
- A Alpha channel
- M Merge
- D Disable
- Tab Add note
- R read
- Spacebar See in full screen.
- 1, 2, 3… Viewers
Rotoscopy
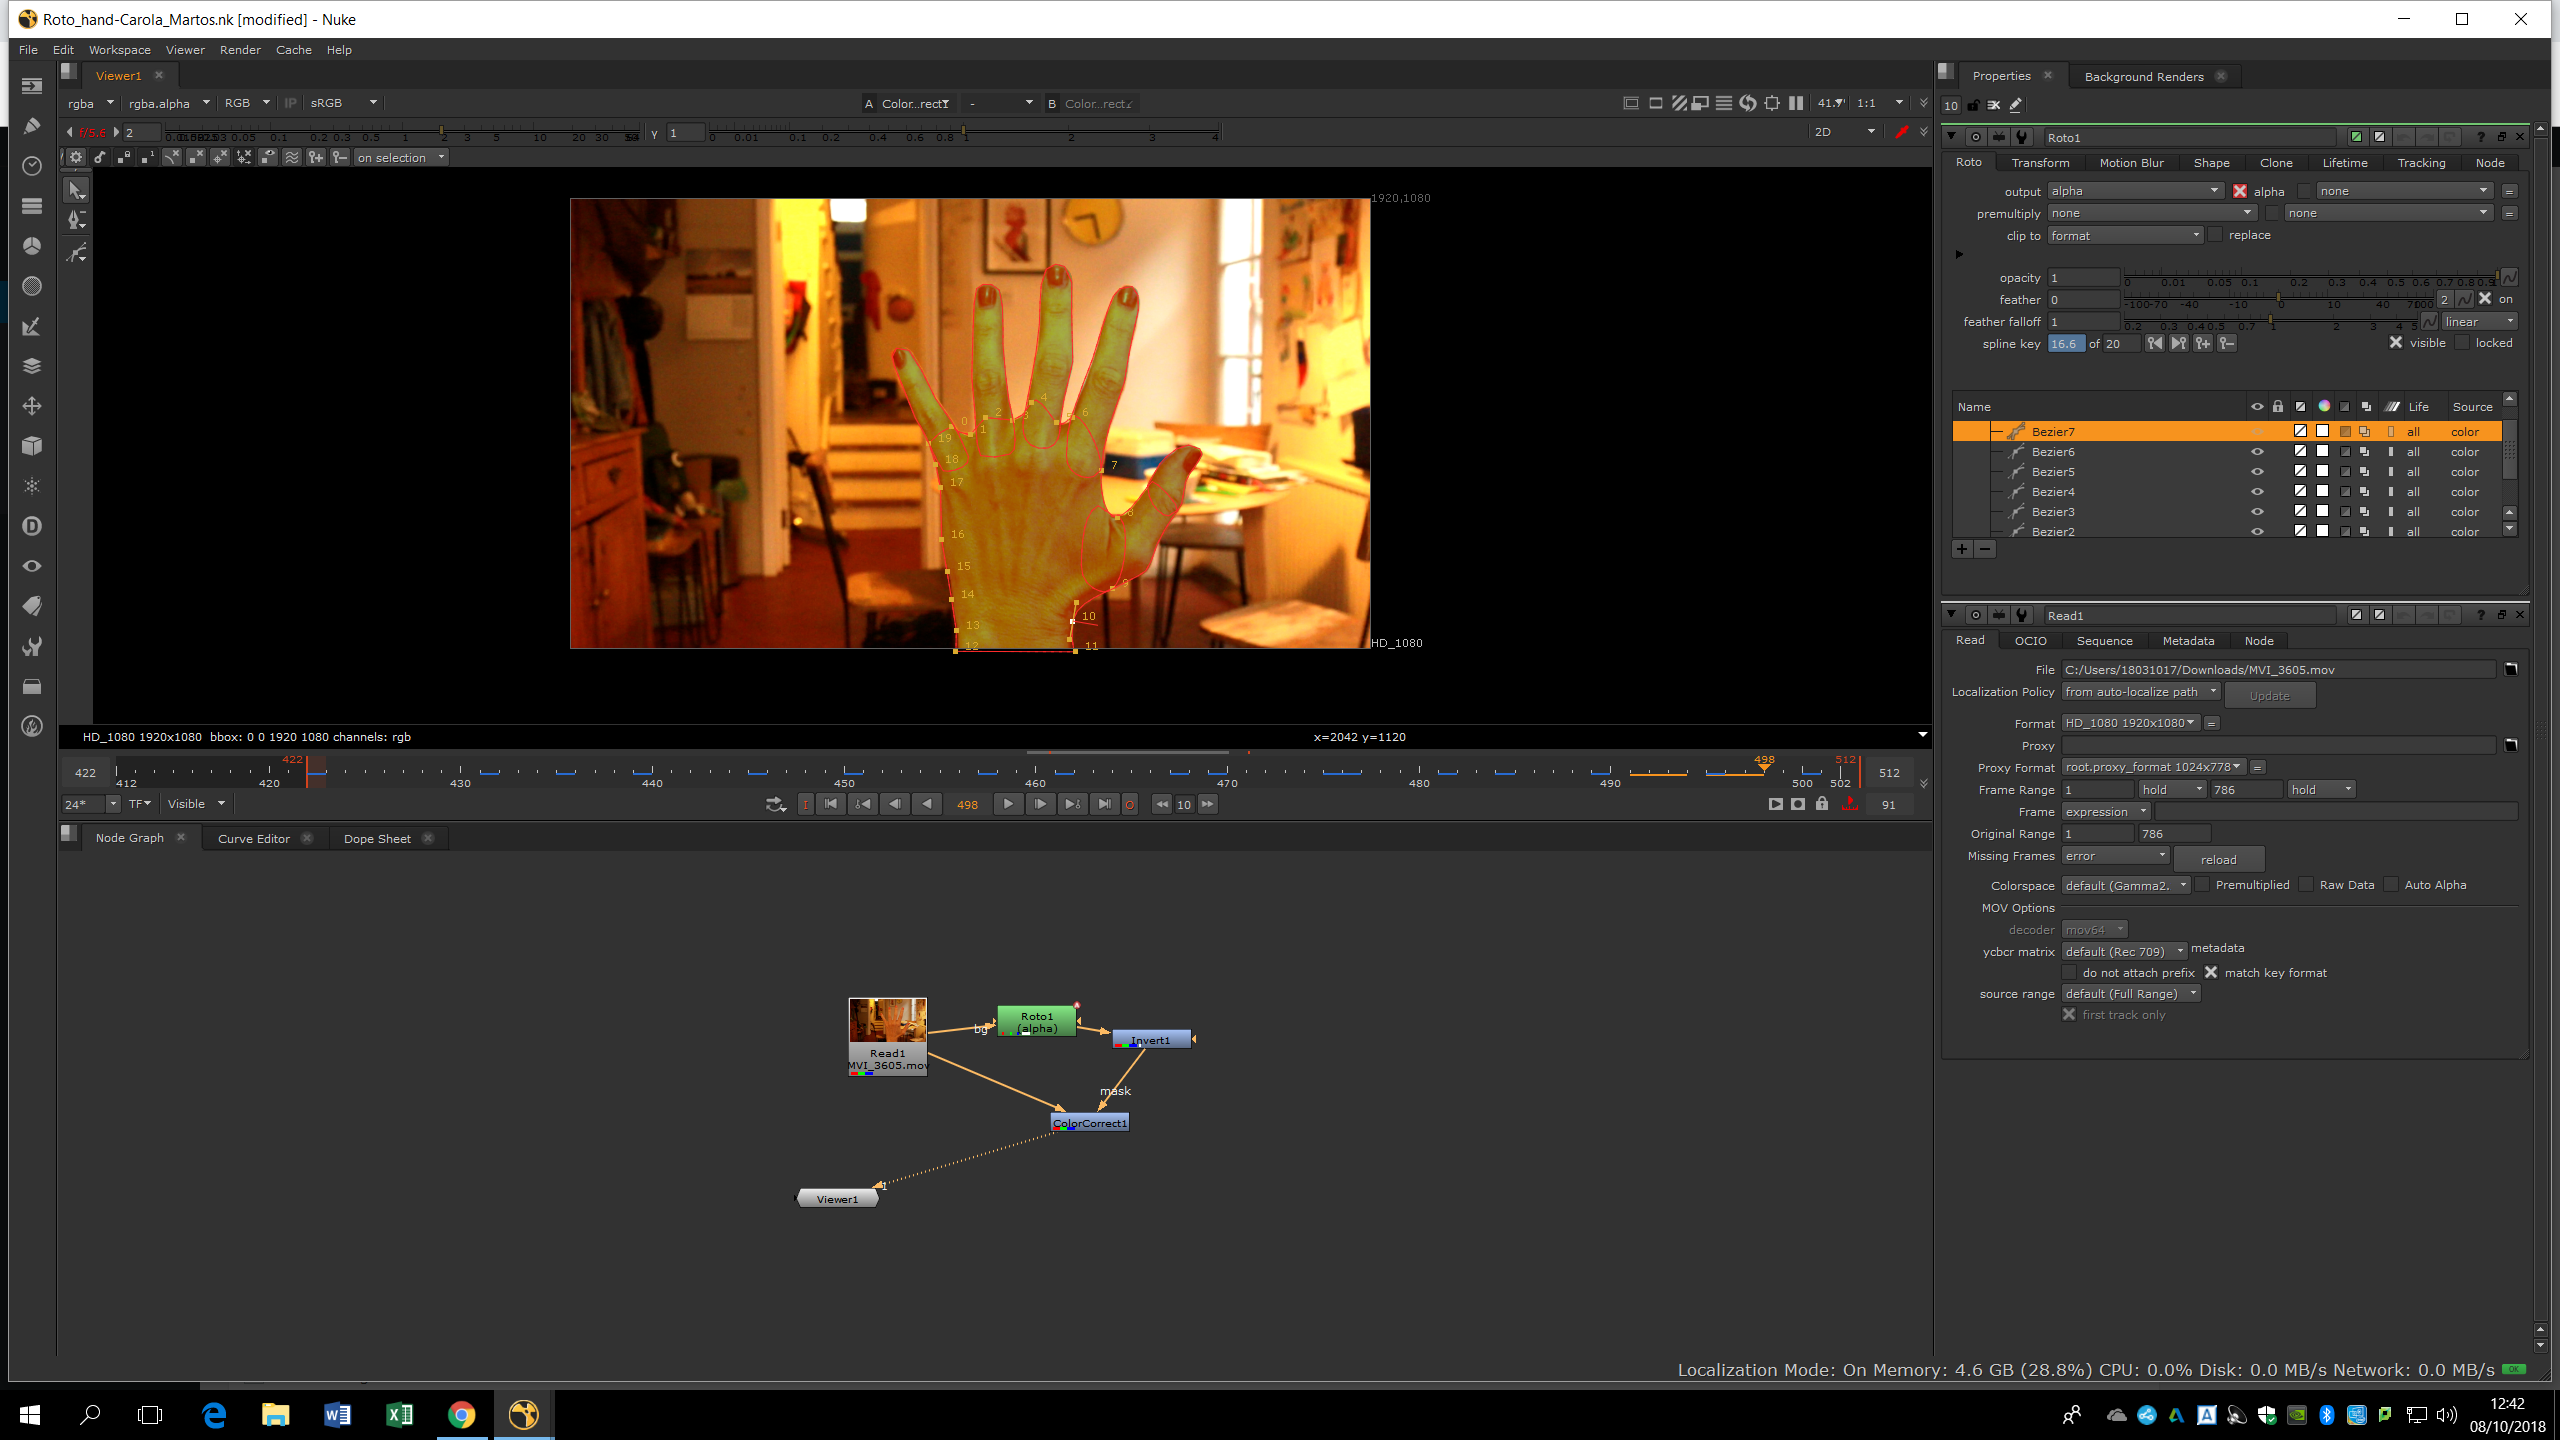
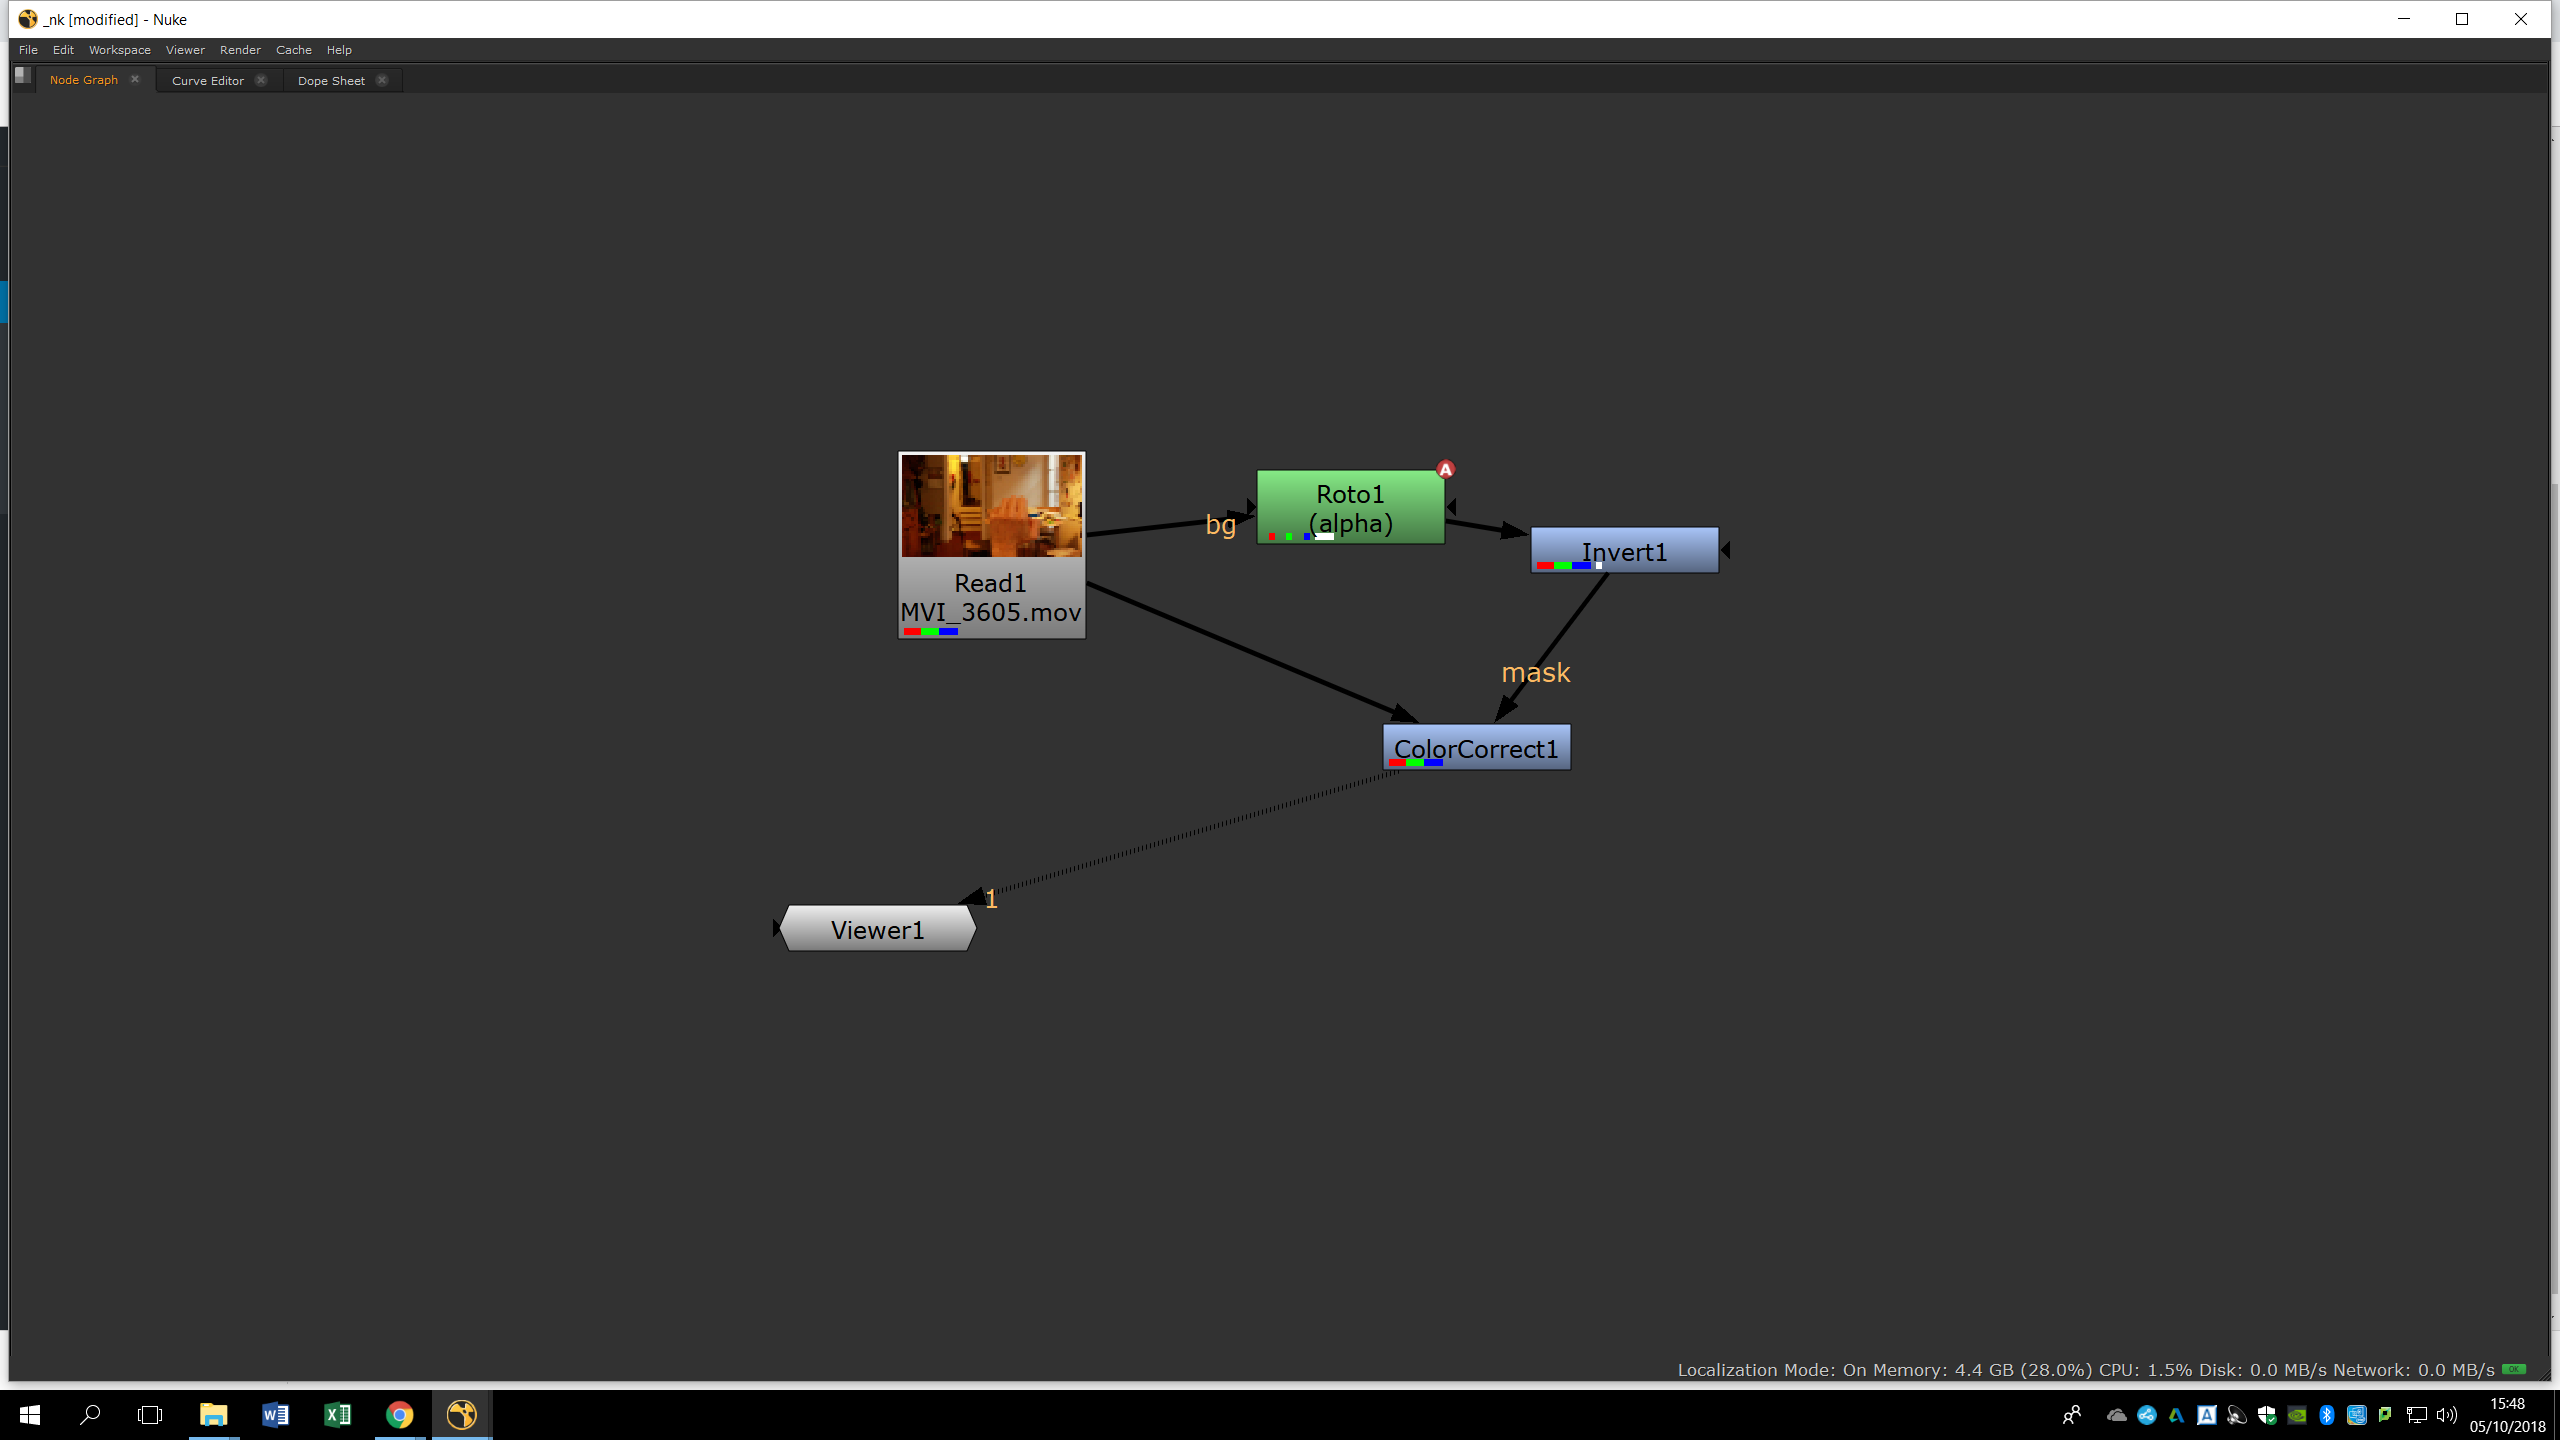
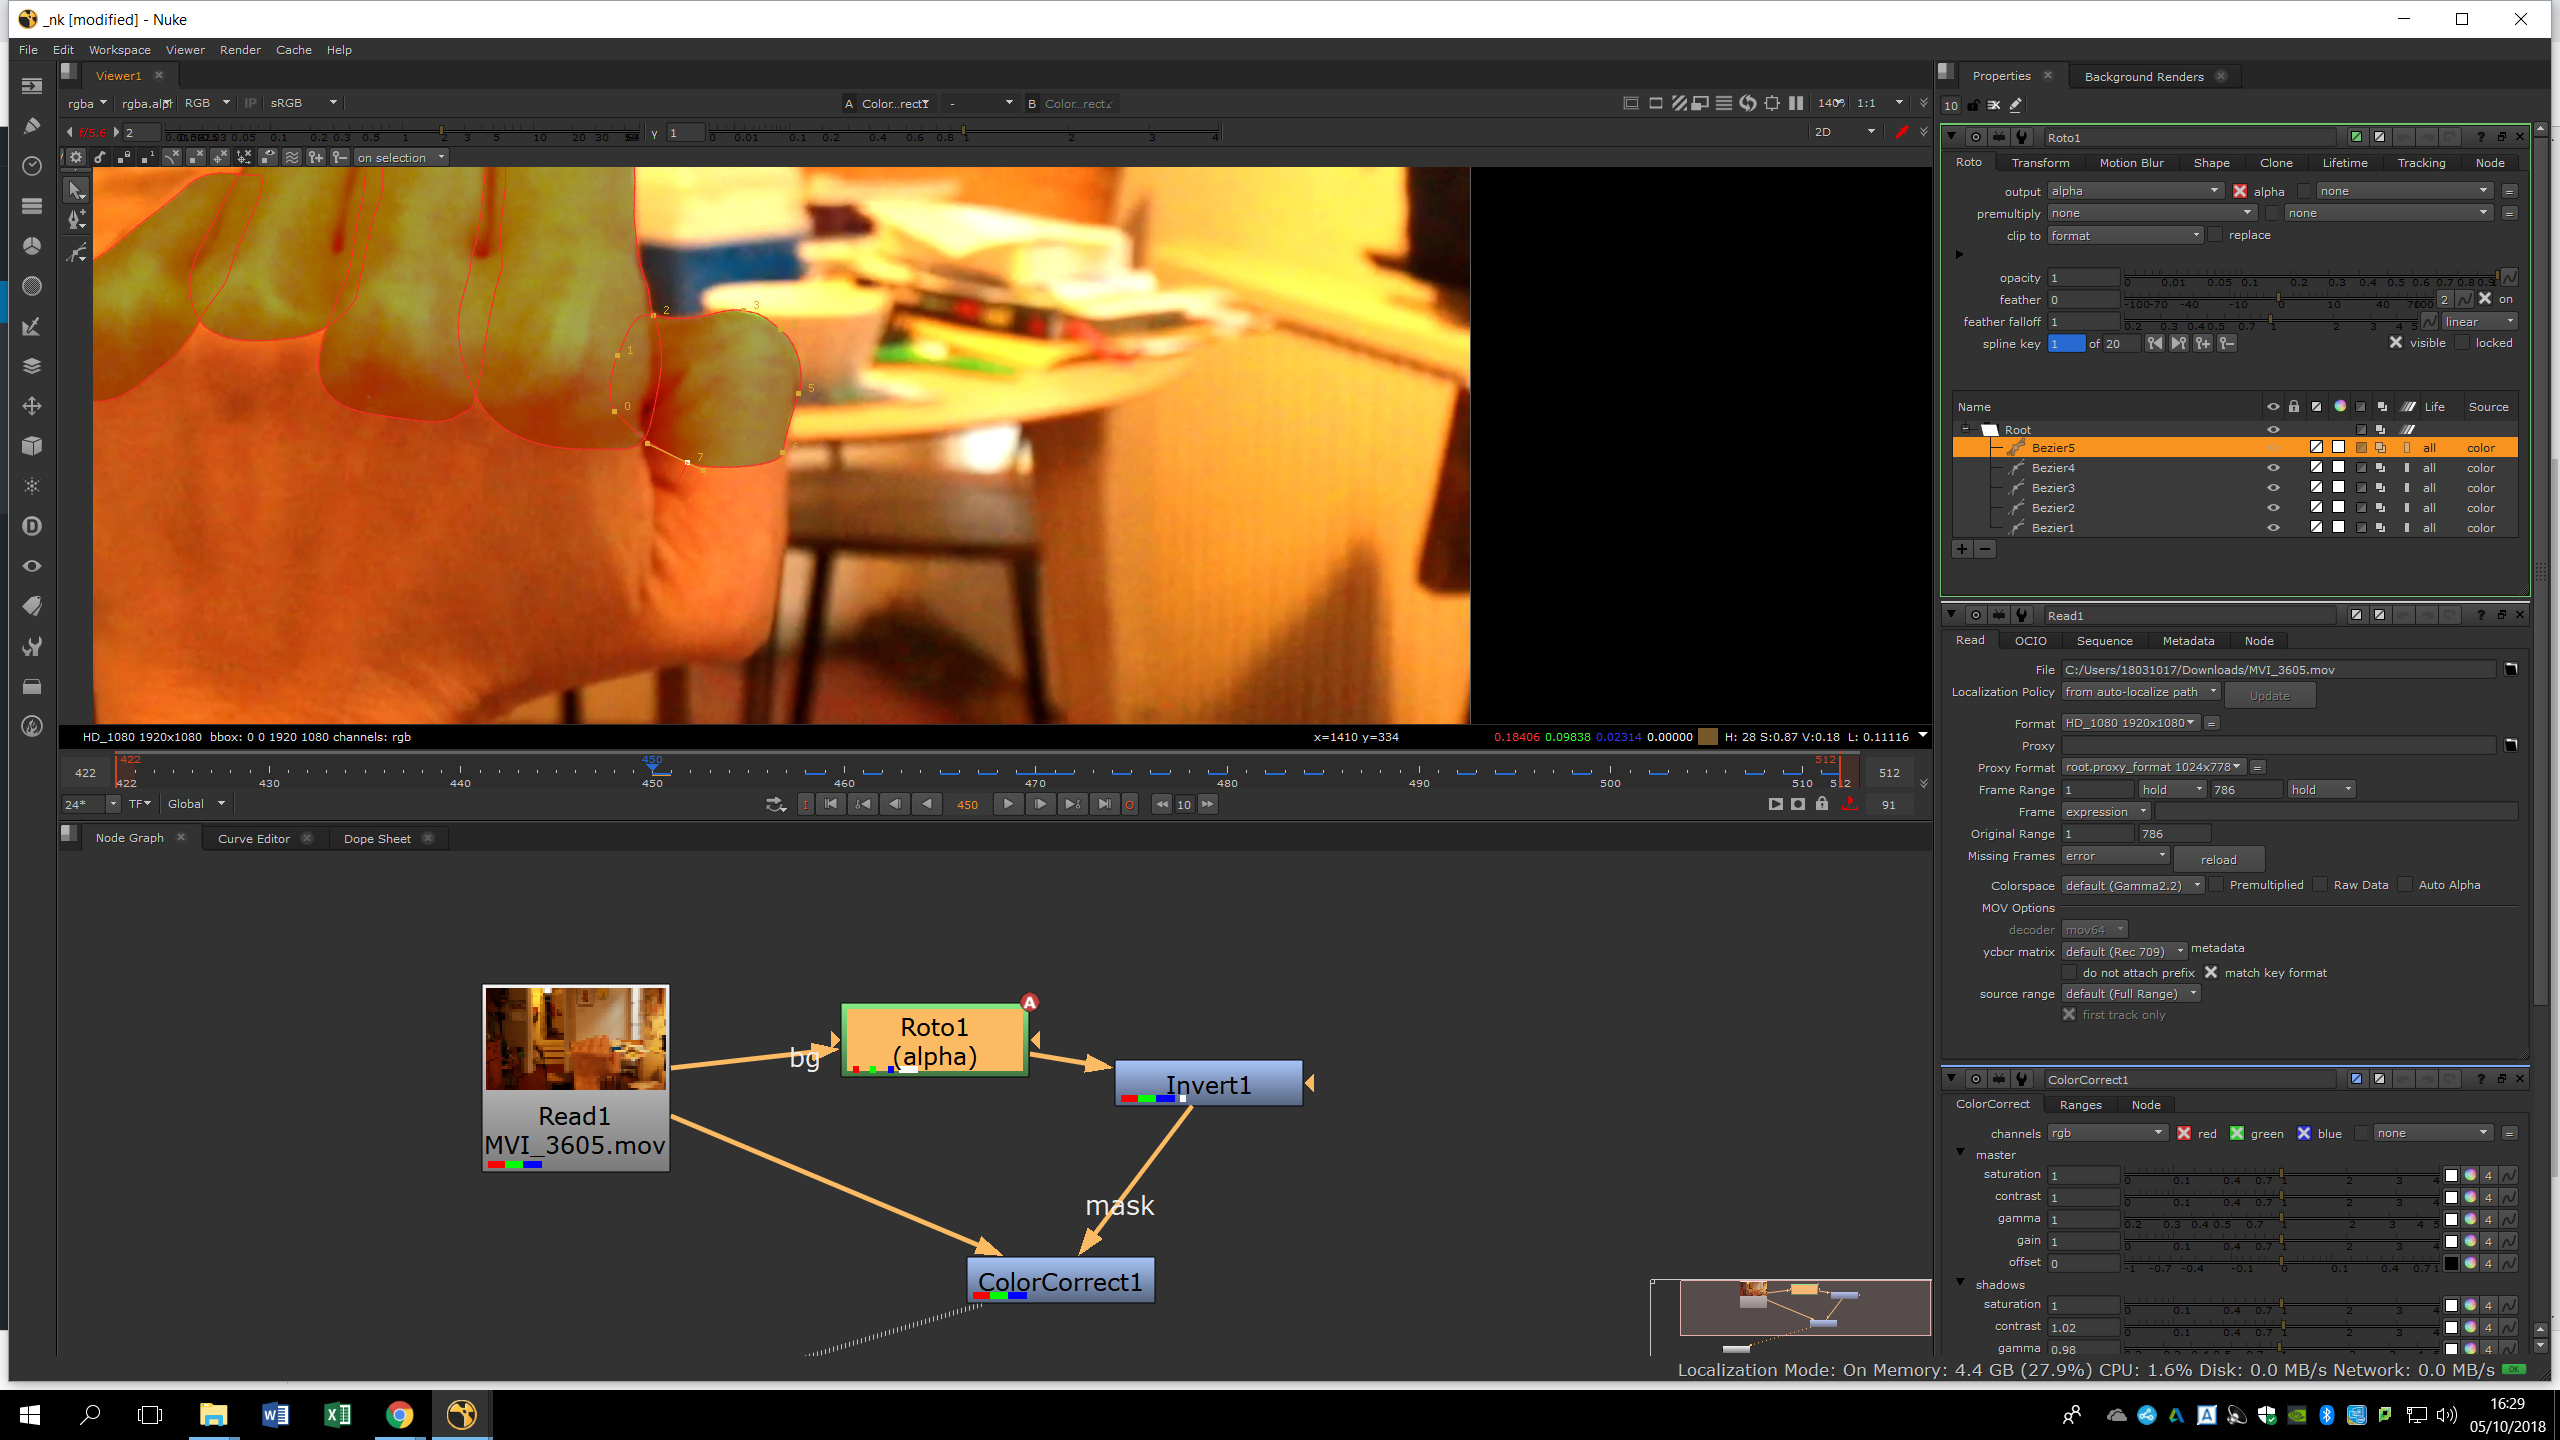
In this first introduction we are going to learn how to do a rotoscopy. For that, we will press tab in the note window and add the note called roto. To have a better preview of the roto area, we can add a color correction note. In this way, the area that is included in our roto is going to be seen in another color in comparison with the original footage, making it easier to recognize.
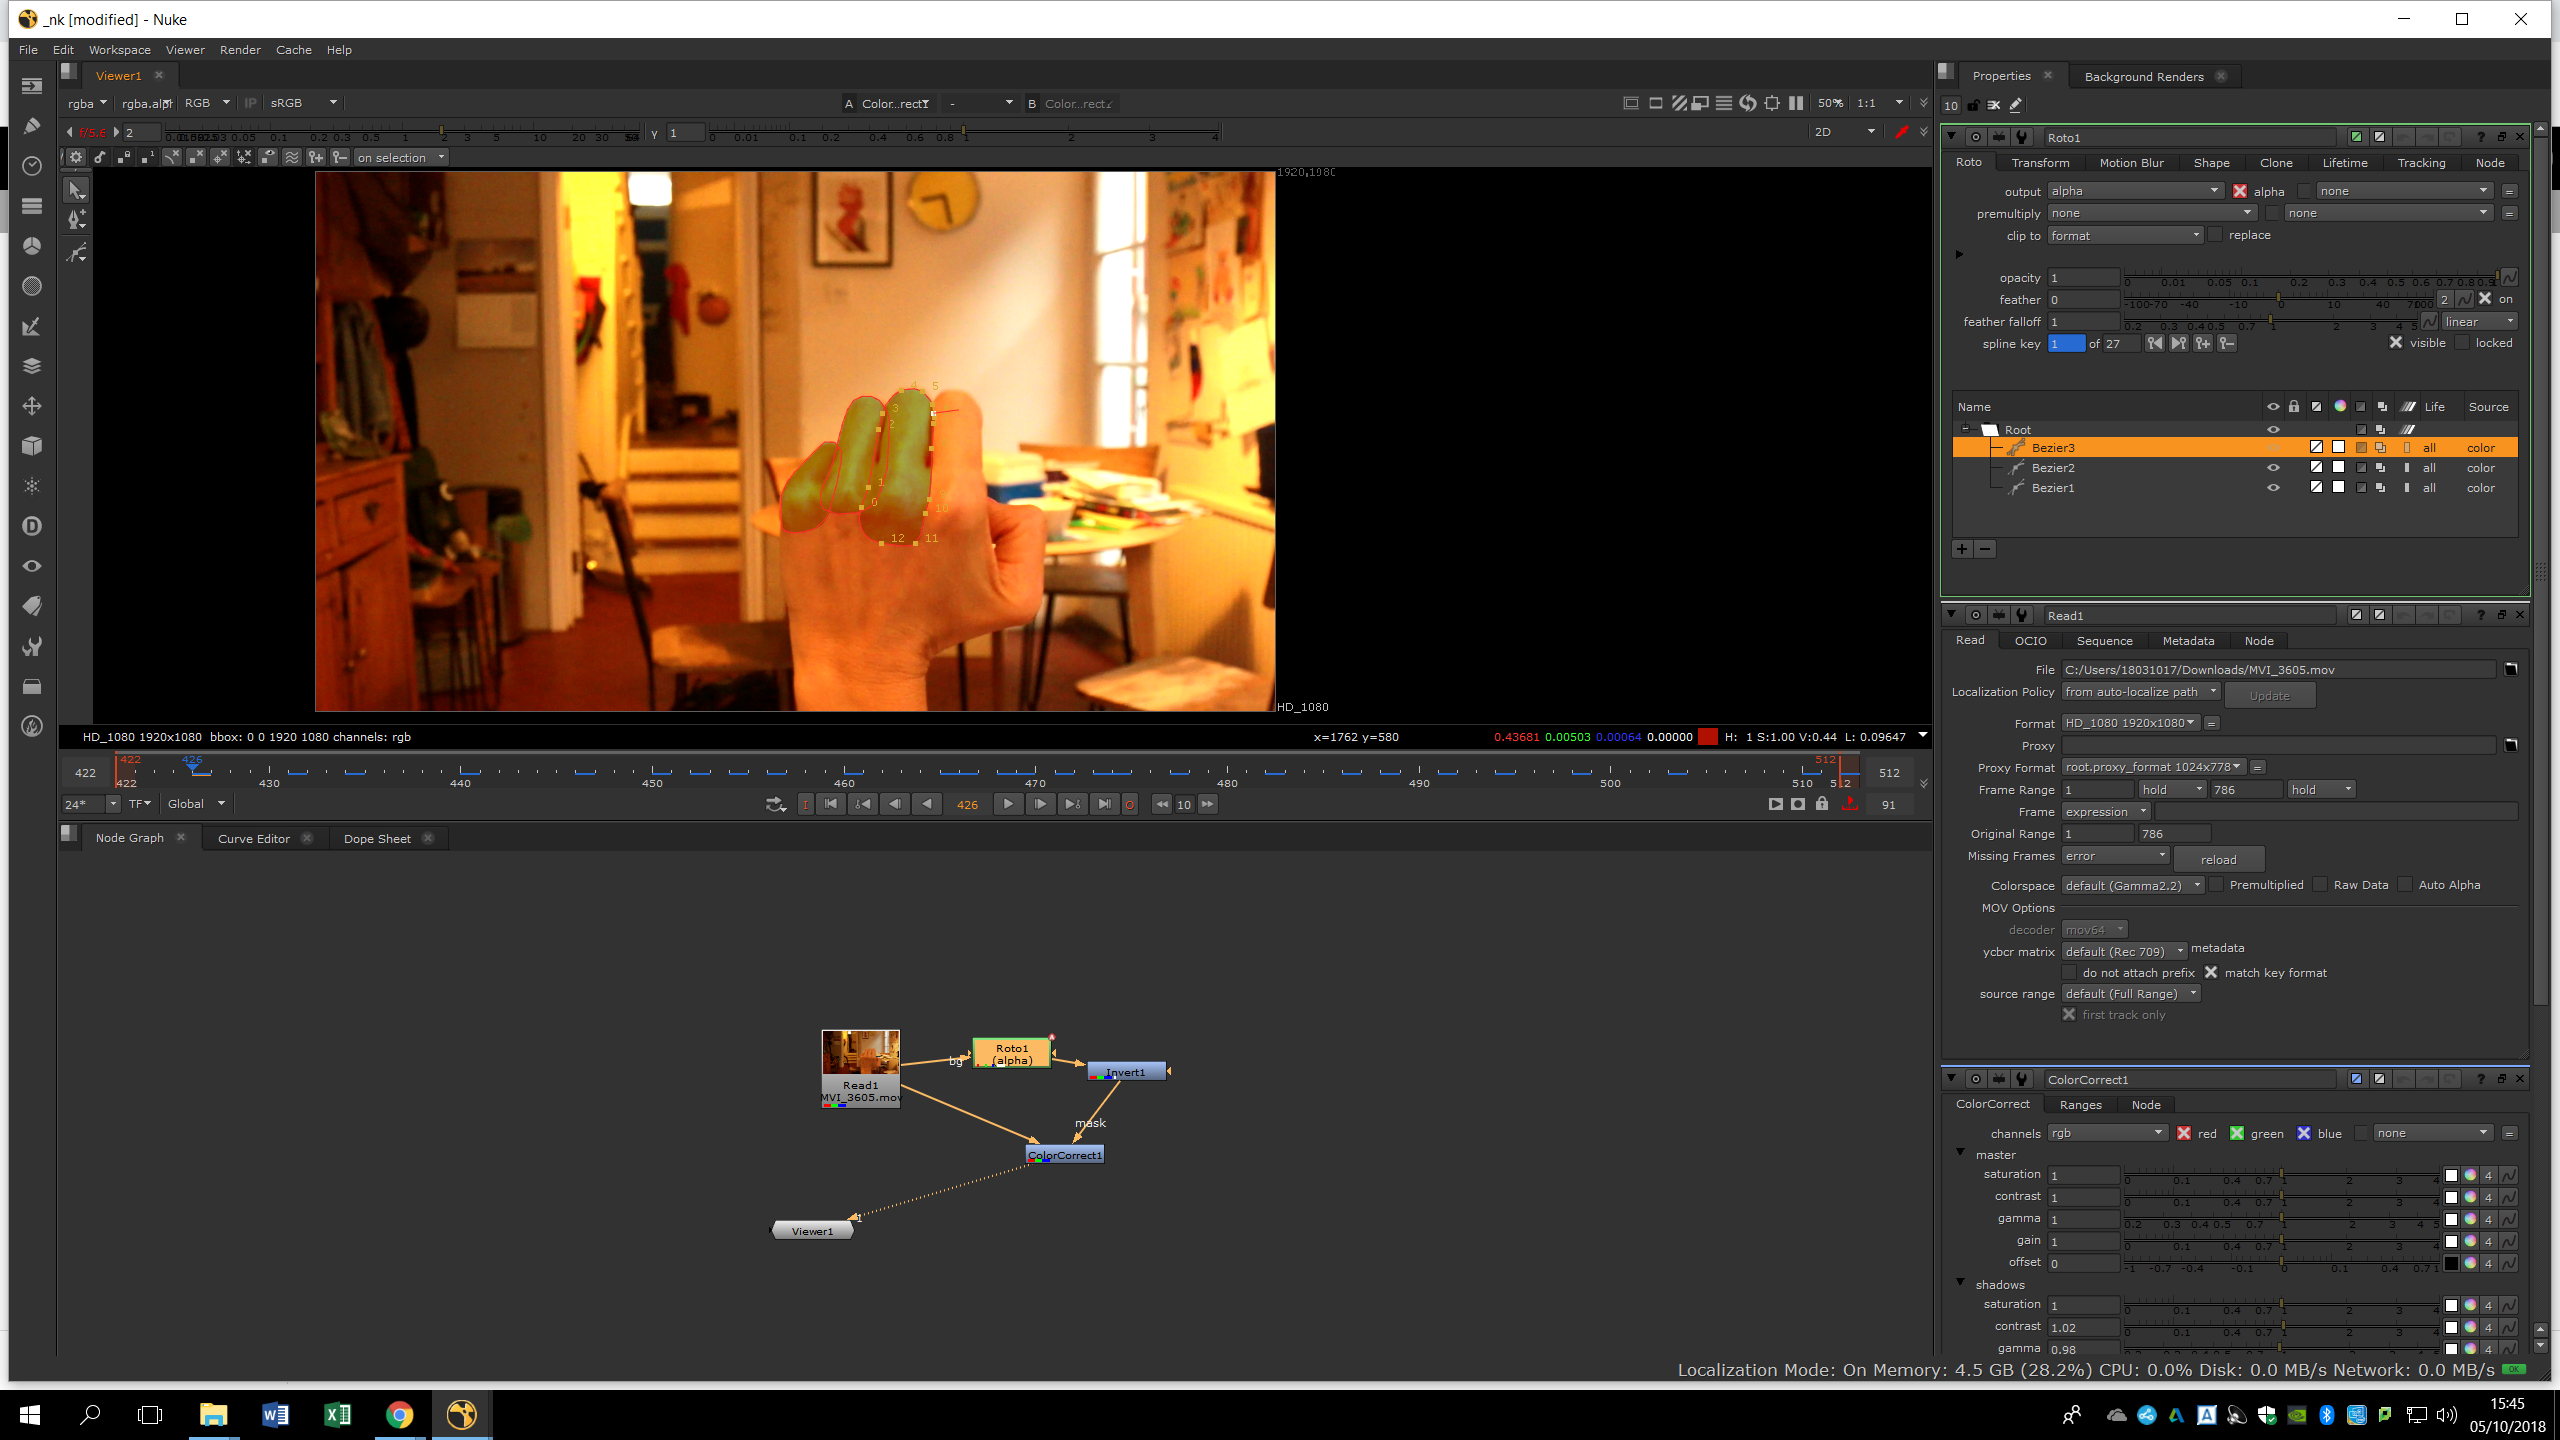
To make the roto process easier, we should break the shape we want to roto into different areas. We will roto those areas independently, in this way the changes in the shapes are not so notable and we could have a more accurate results. To roto, we use the tool of the pencil in the Bezier mode, and we will need to draw over the image following the border of the element we want to roto. Every couple of frames – depending on the amount of movement of the object we should change the shape and add another key frame. In this way, Nuke will automatically interpolate the position of the points and will create an animation which matches with the original movement. If the animation doesn’t match, we should add more key frames. Even so, it is advisable to have the minimum of key frames in order to avoid the bubbling and have a fluent animation.
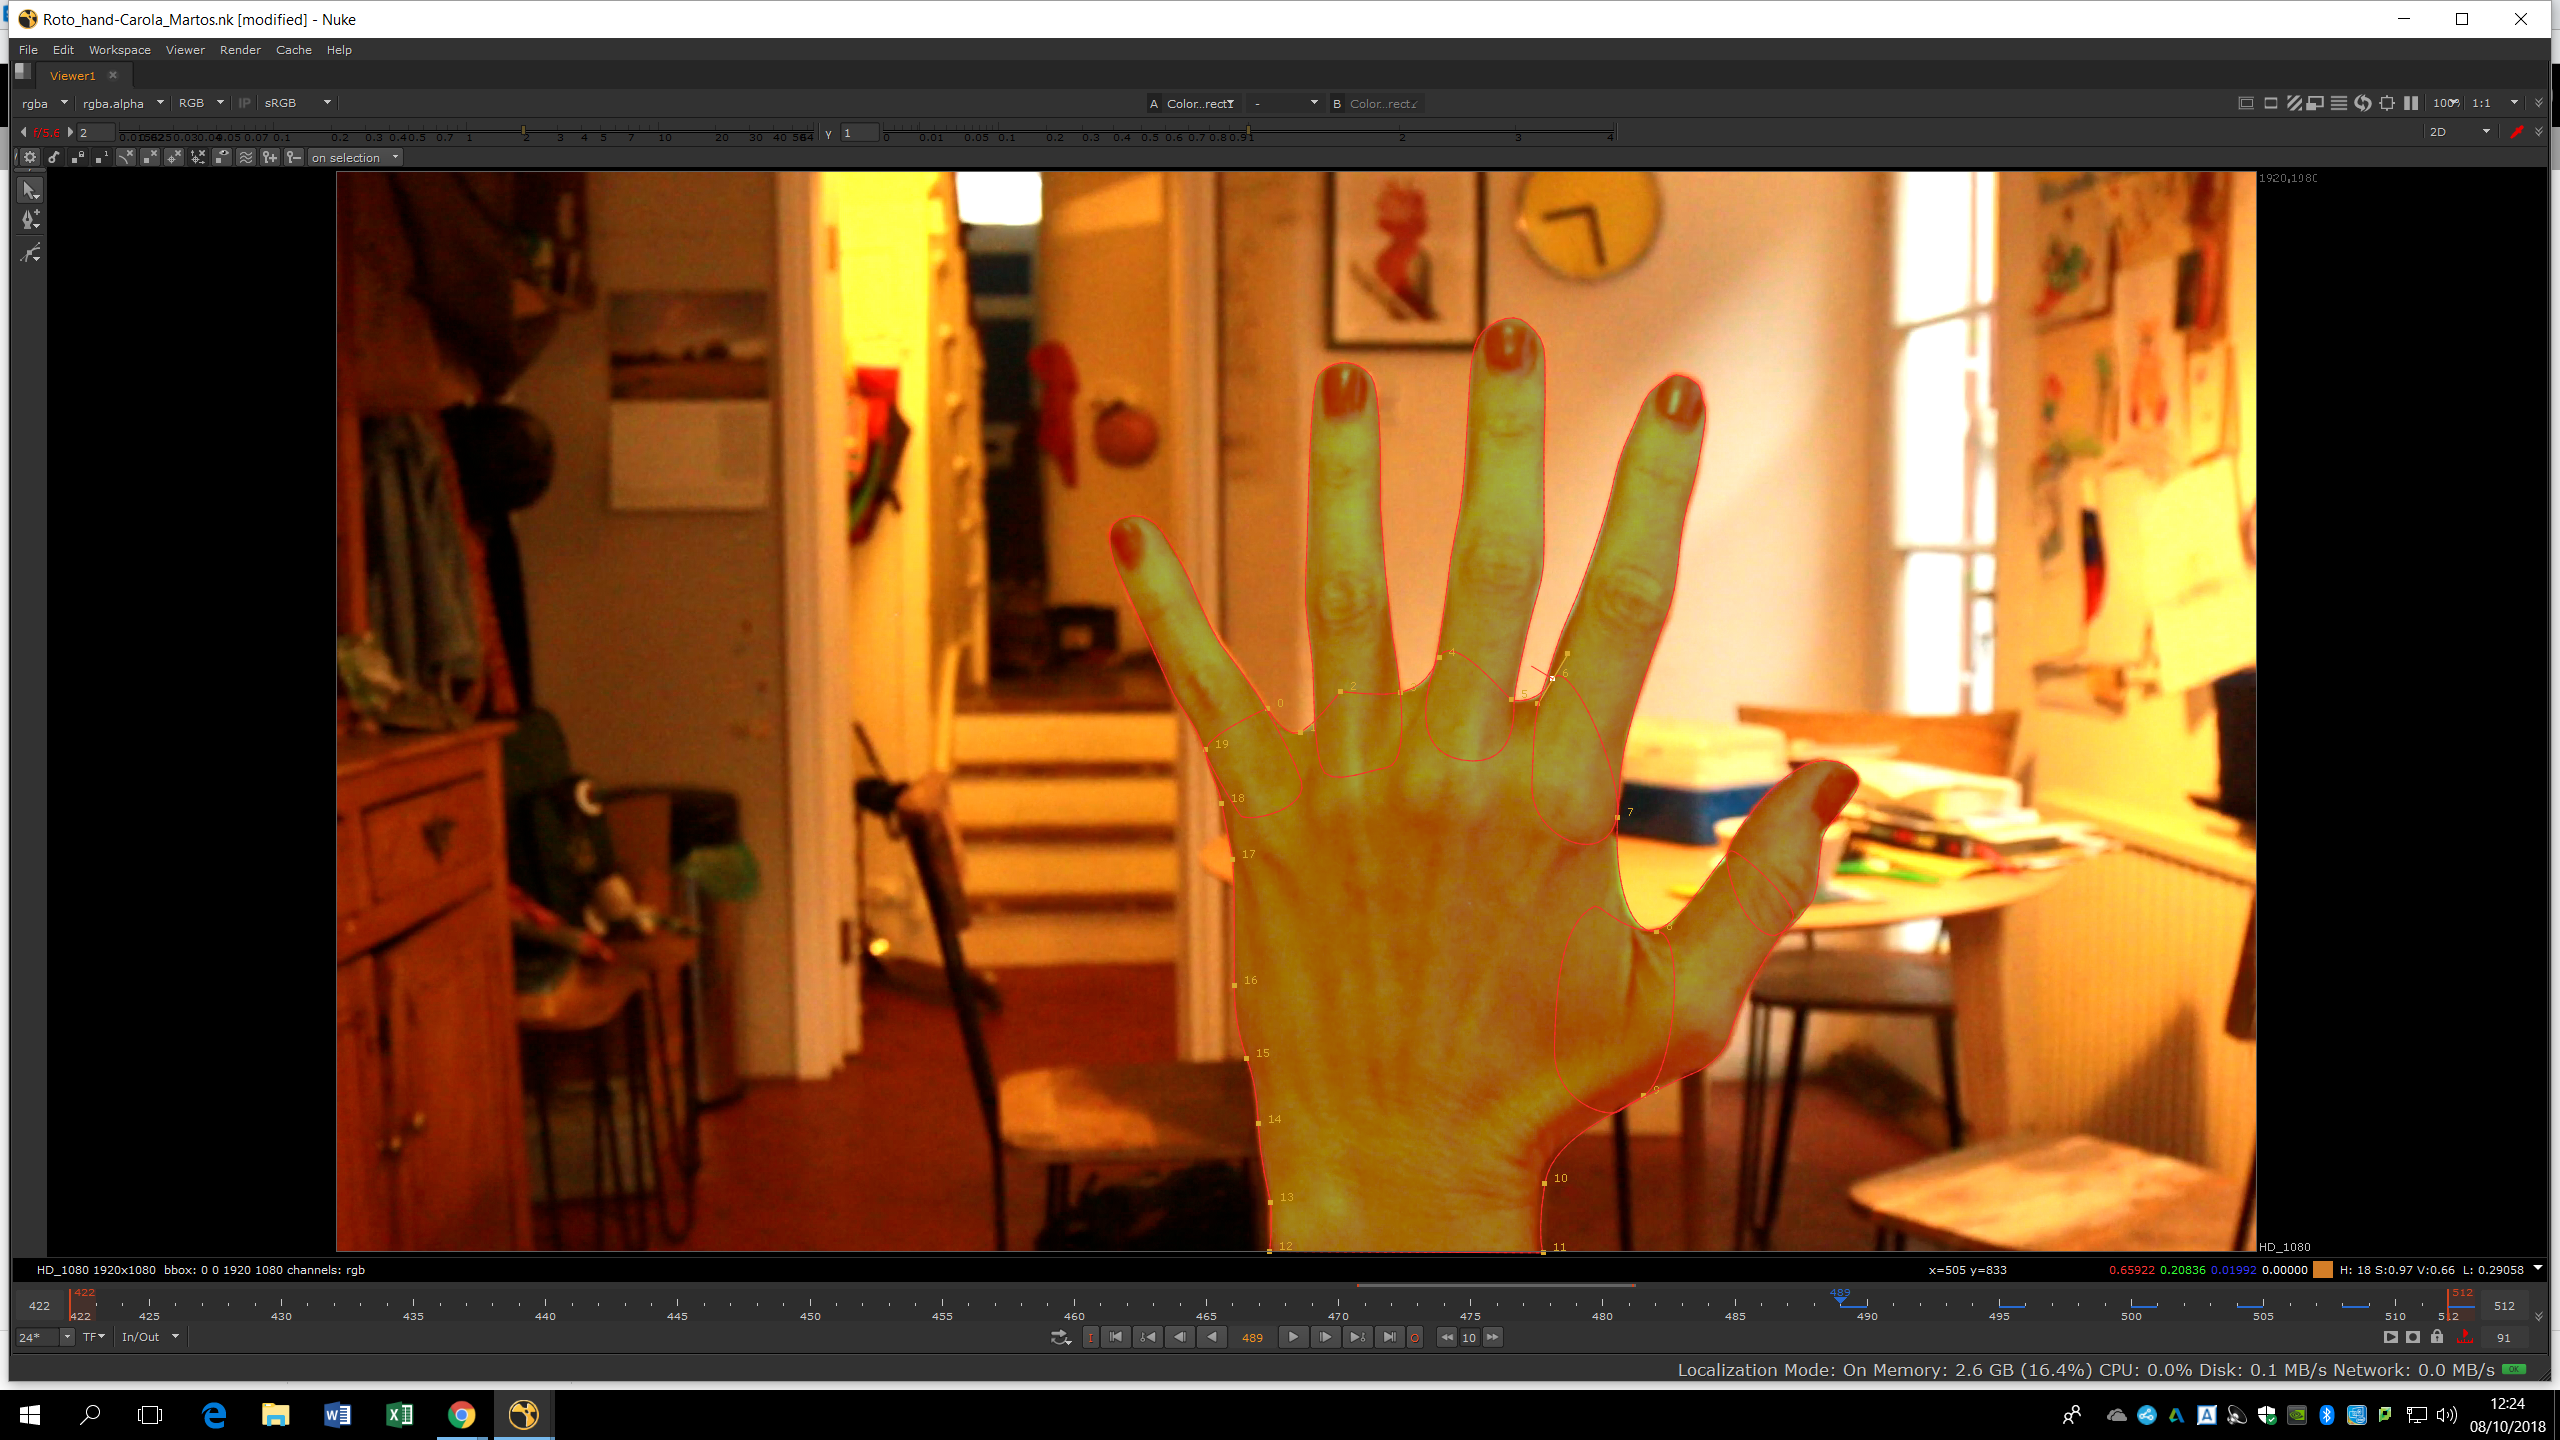
As we can see, we separated the hand from the fingers. Each finger in one shape, except the thumb, which is separated in two shapes.
Finally, when all the shapes are finished, we will see how the total area of the hand is accurately rotoscopied in one shape. Then, we can go frame by frame adding more key frames to the rotoscopy to refine the borders and do the roto even more accurate.