In this Nuke session we are going to learn how to do a camera tracking.
First of all, we are going to distort the image since it has a lot of lens distortion. Therefore, we are going to move the lens distortion to flat it up. We should do a research if we do not know about lens distortion.
We will choose a frame range to work with.
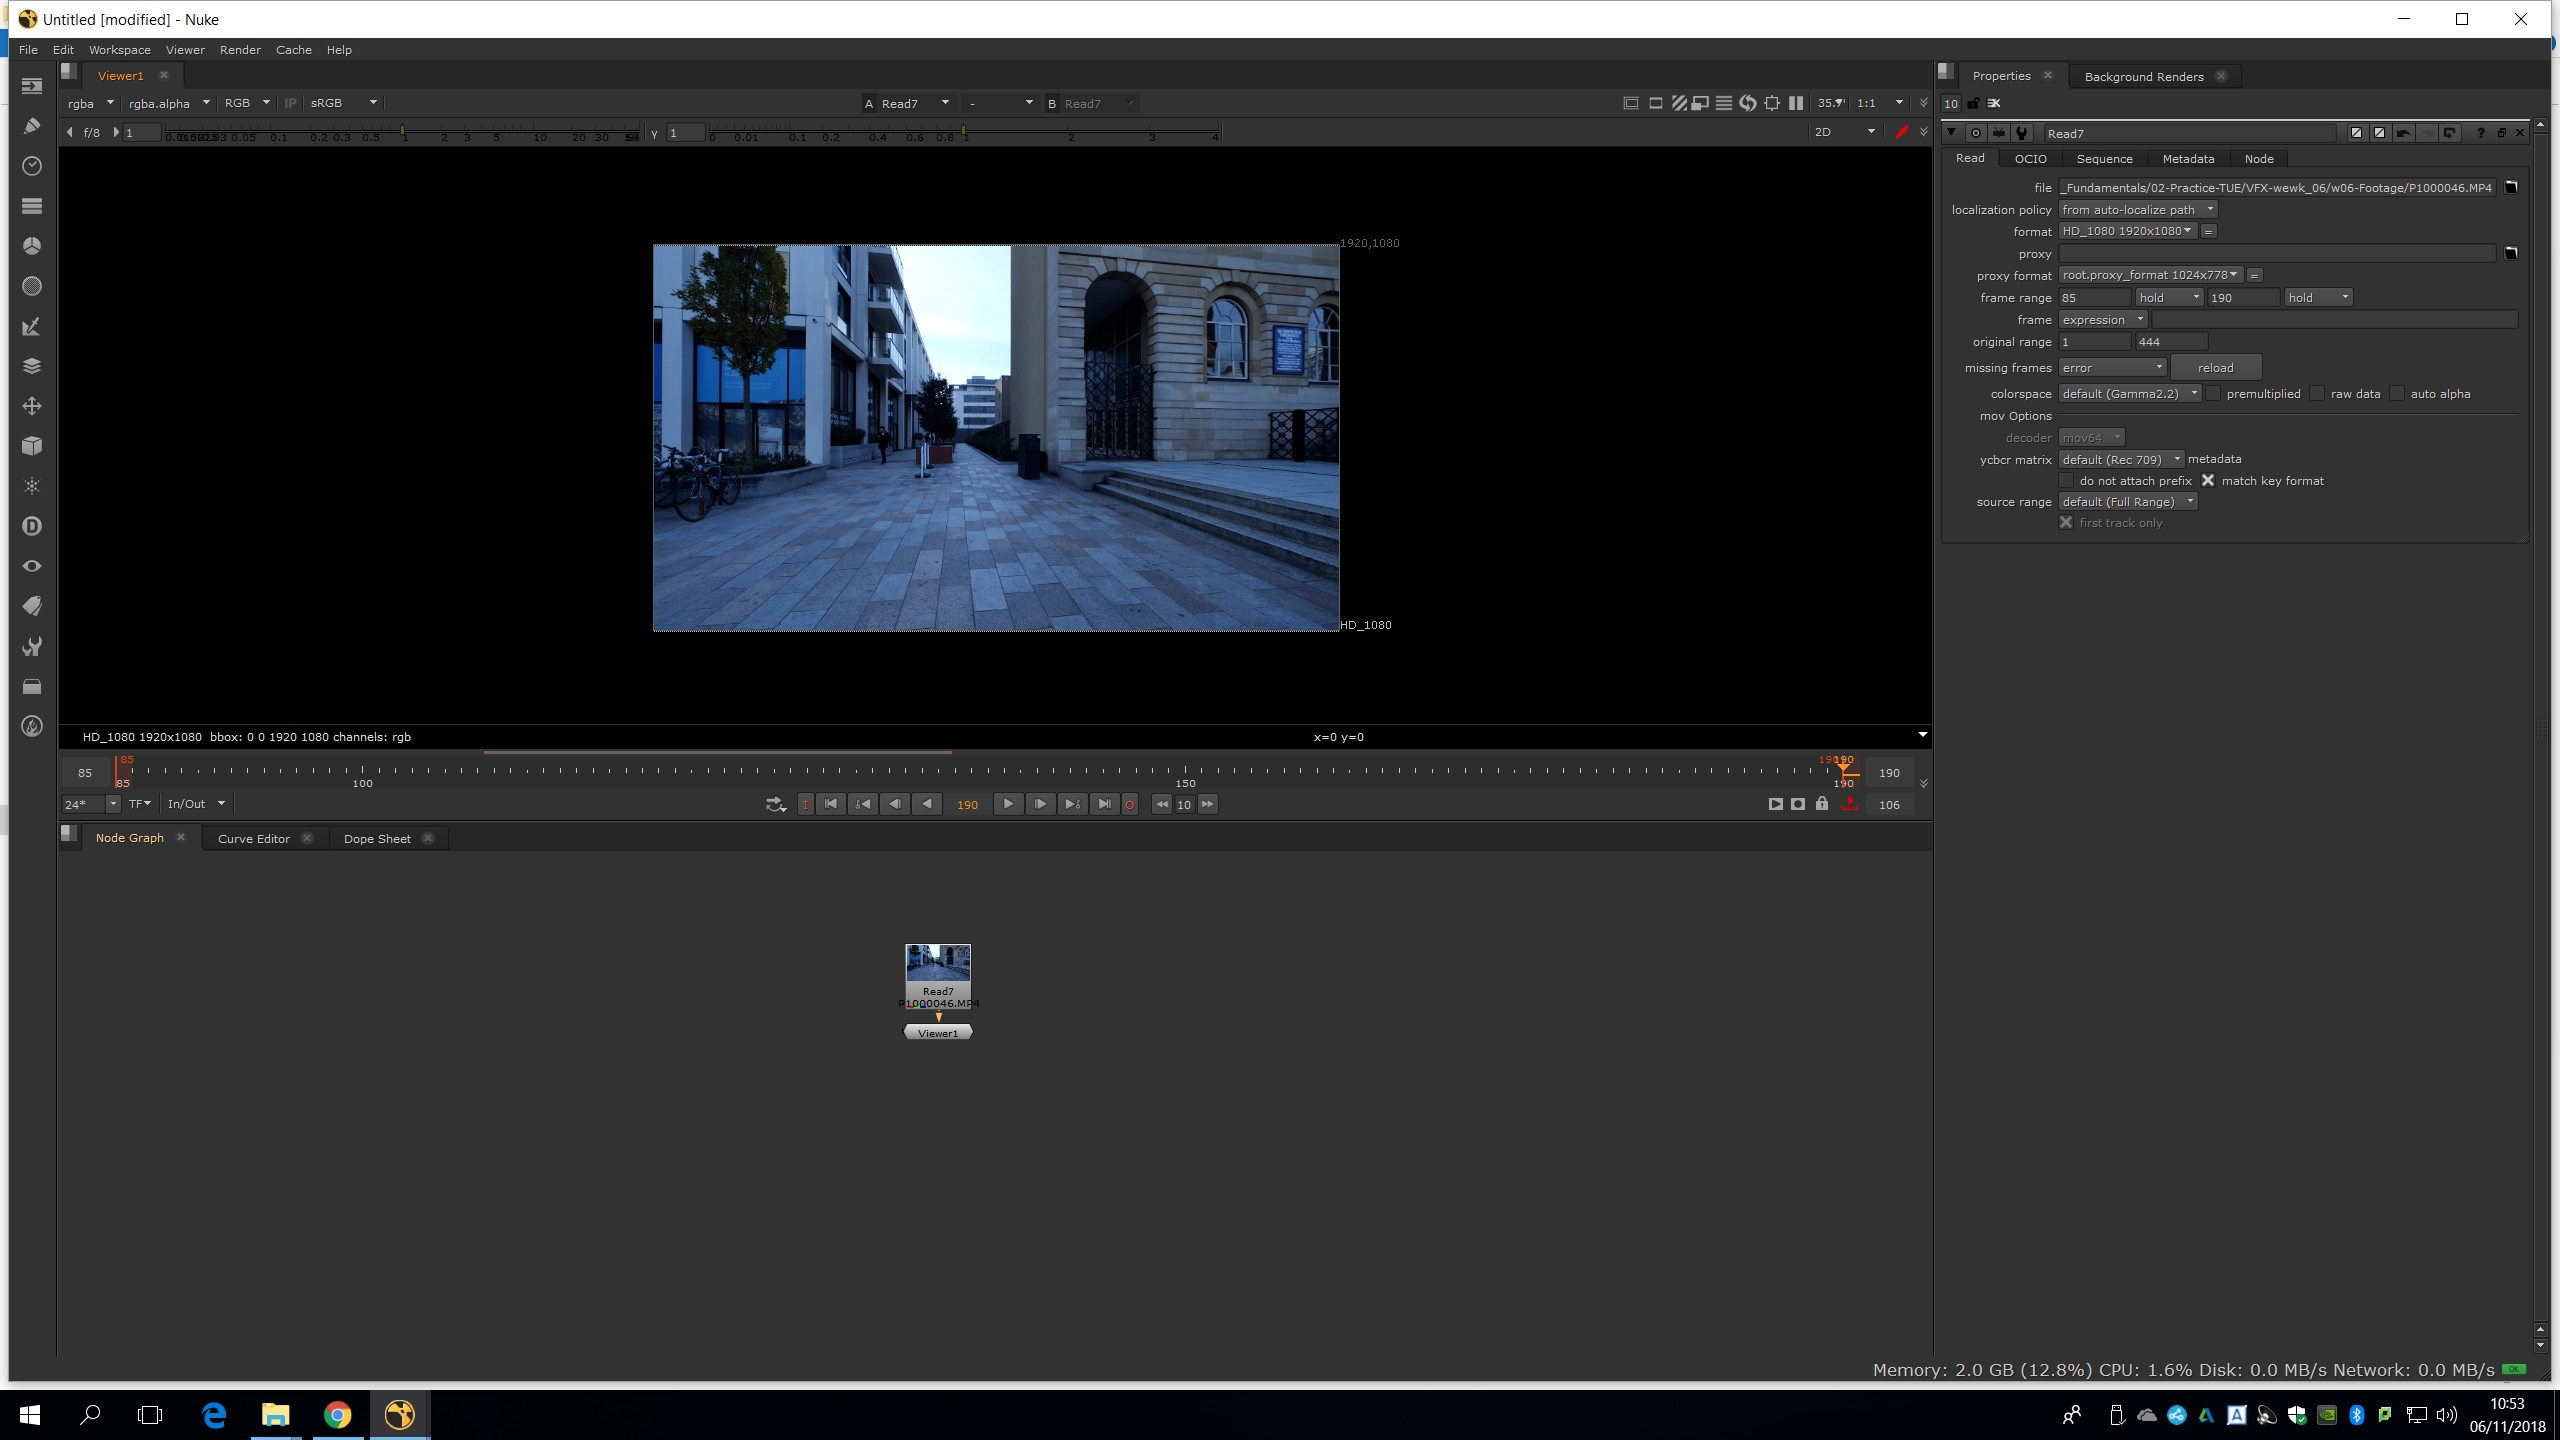
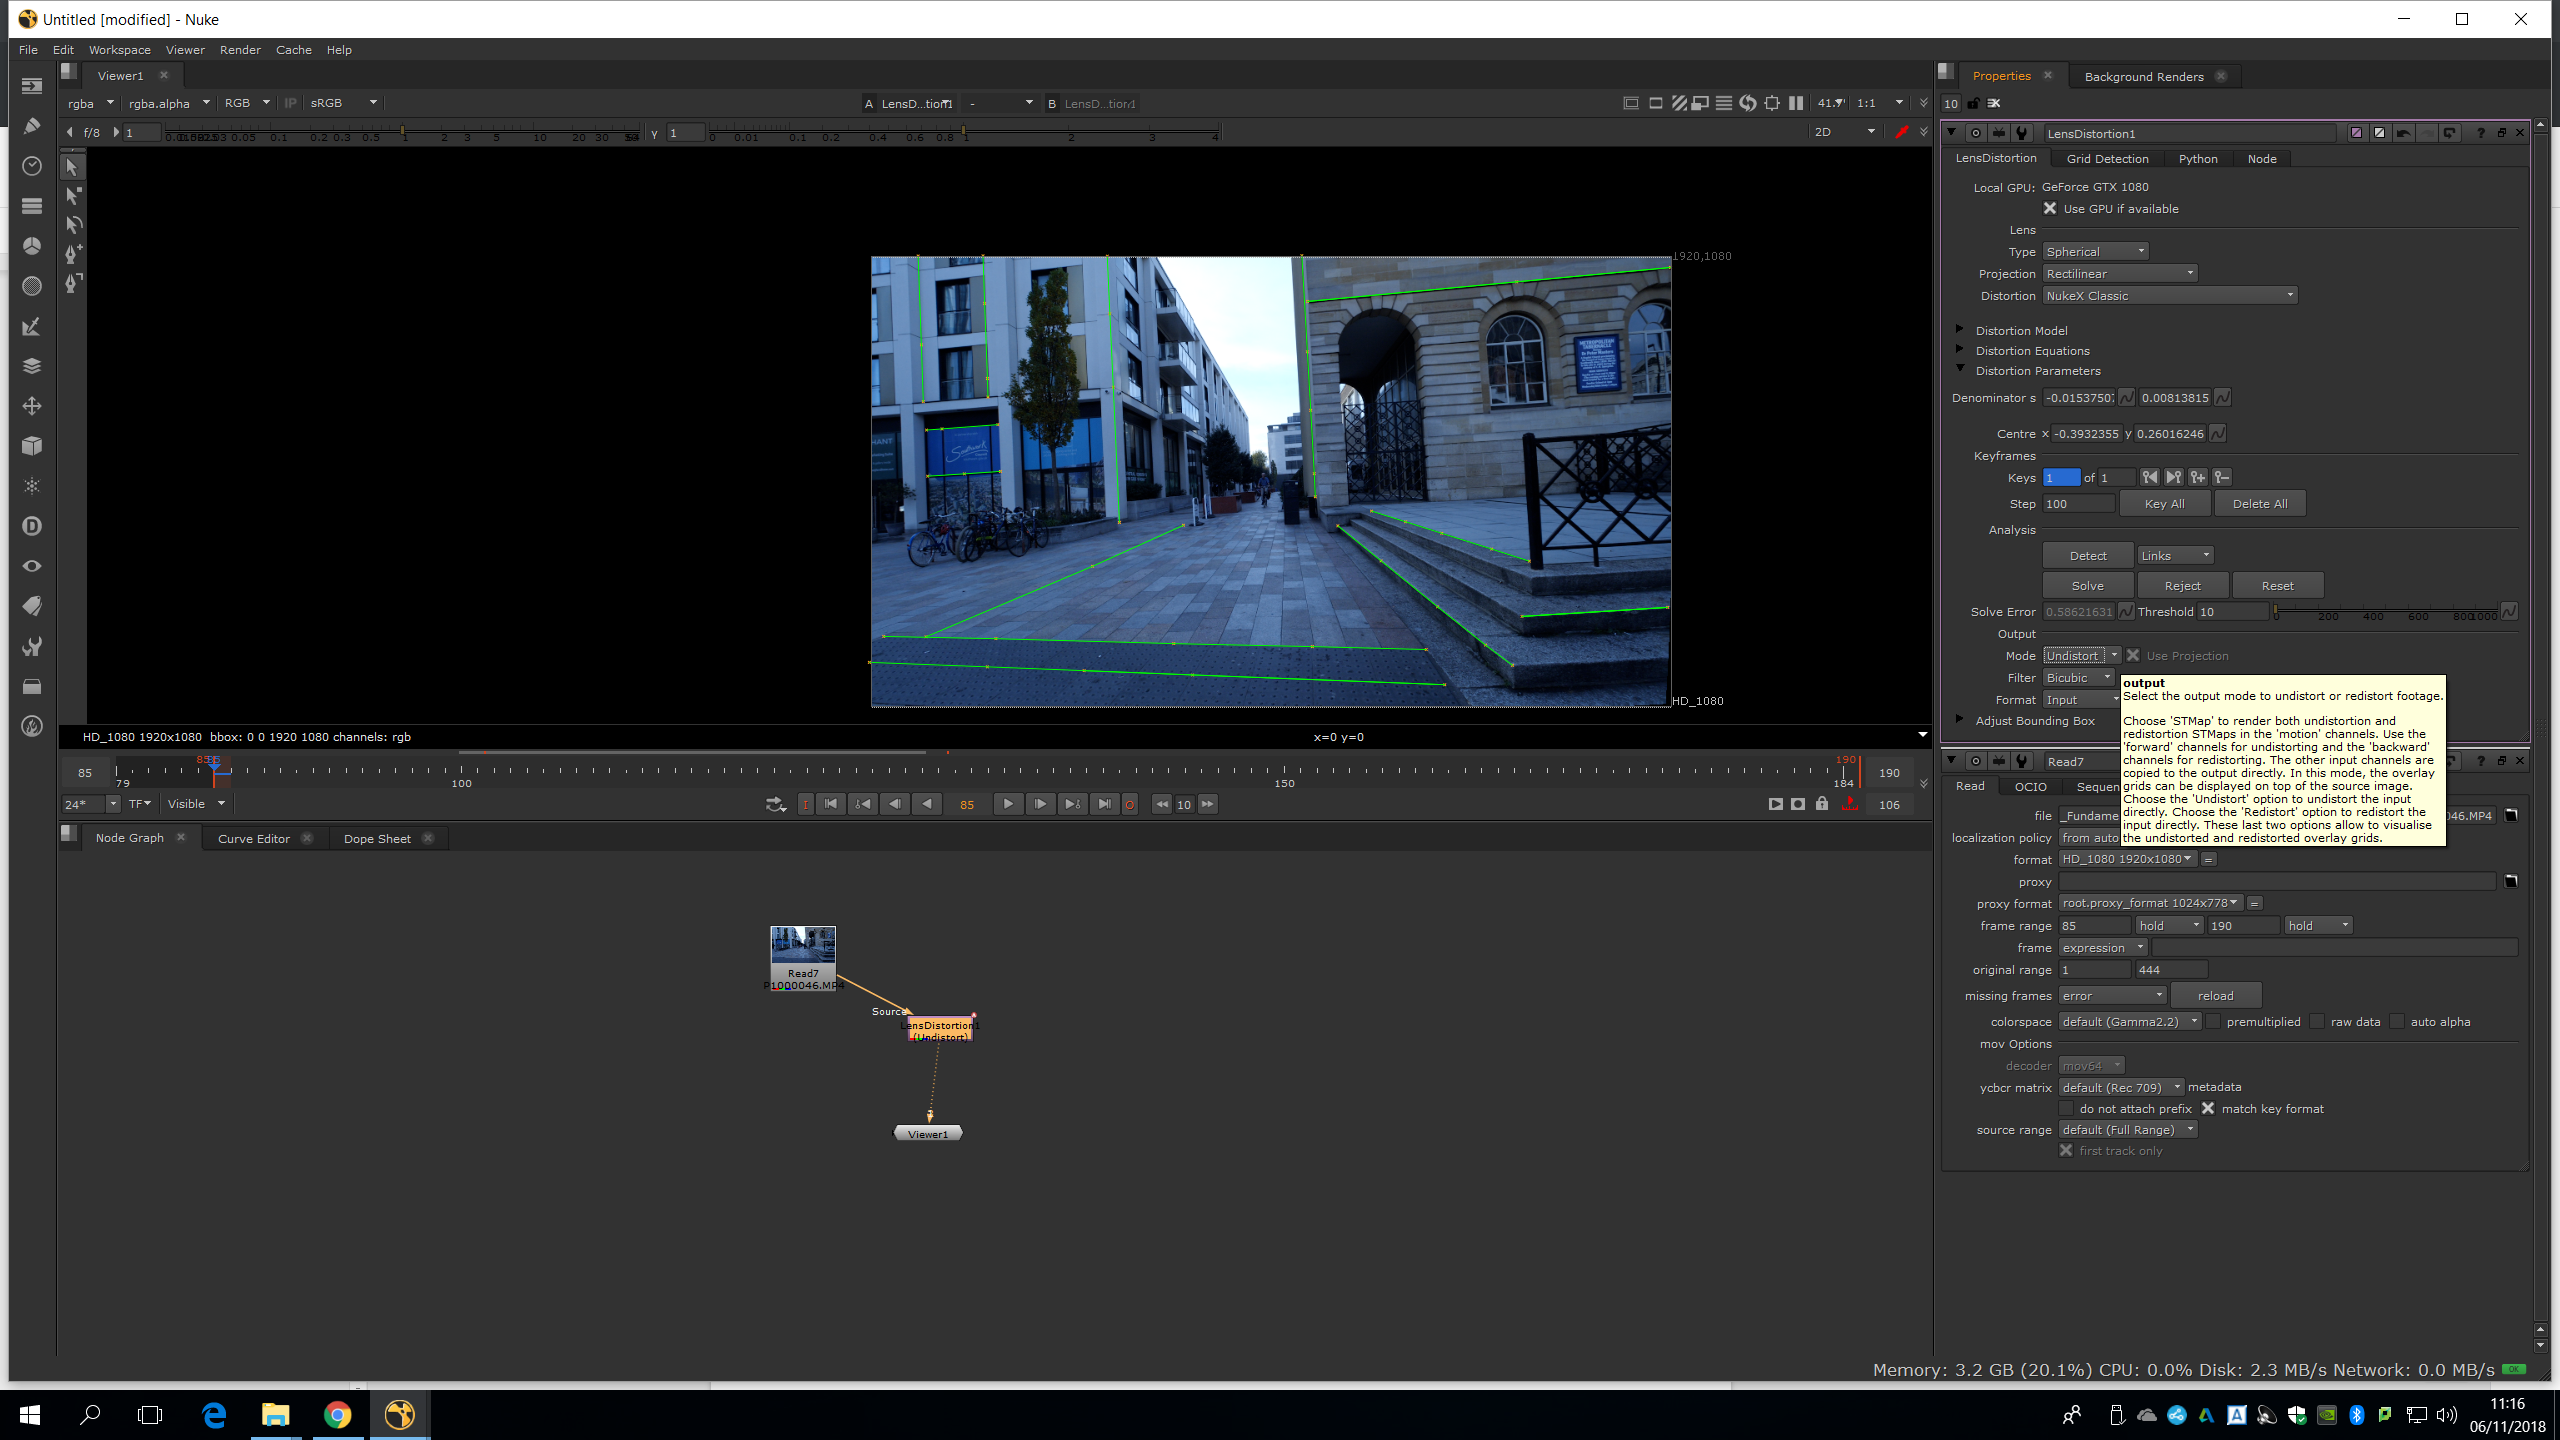
Now, we choose a frame. In this case, we will choose the frame 85. Then, we will bring up a lens distortion and we start drawing over the straight lines.
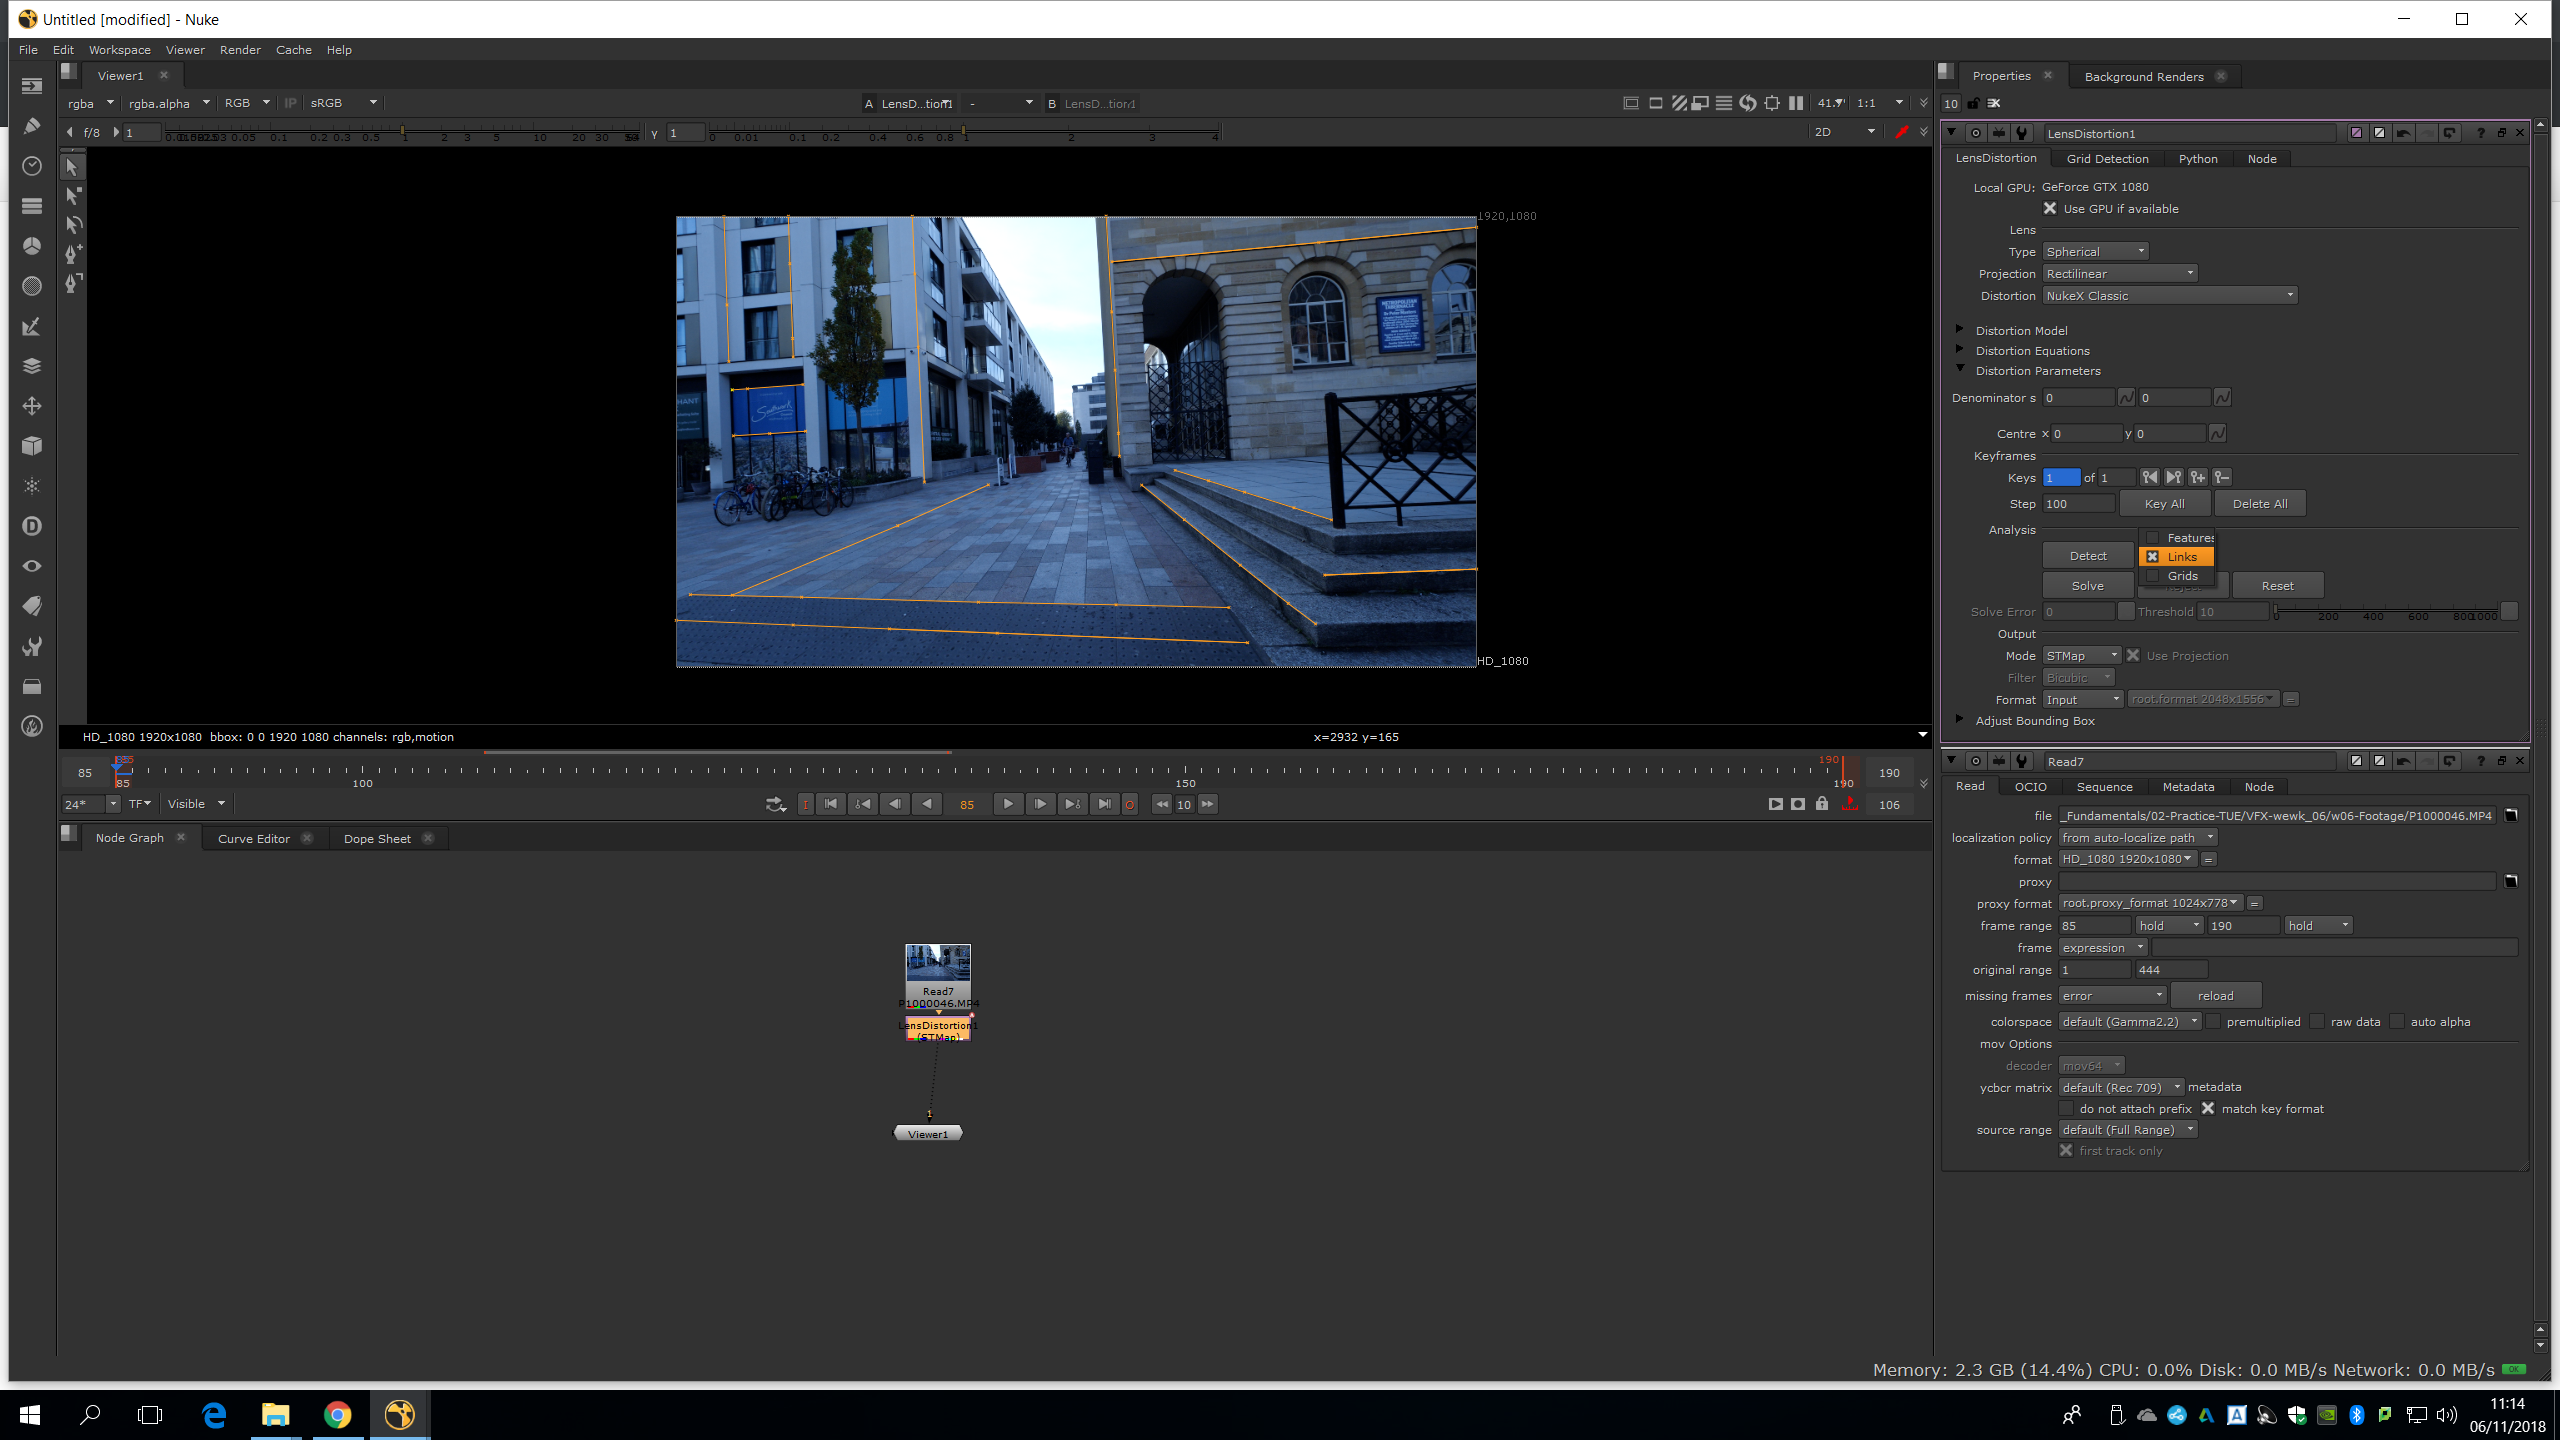
As much long the lines are, the better. We should do several points since the line is not totally straight because of the lens distortion. Once we have done enough, we will press Links and then Solve.
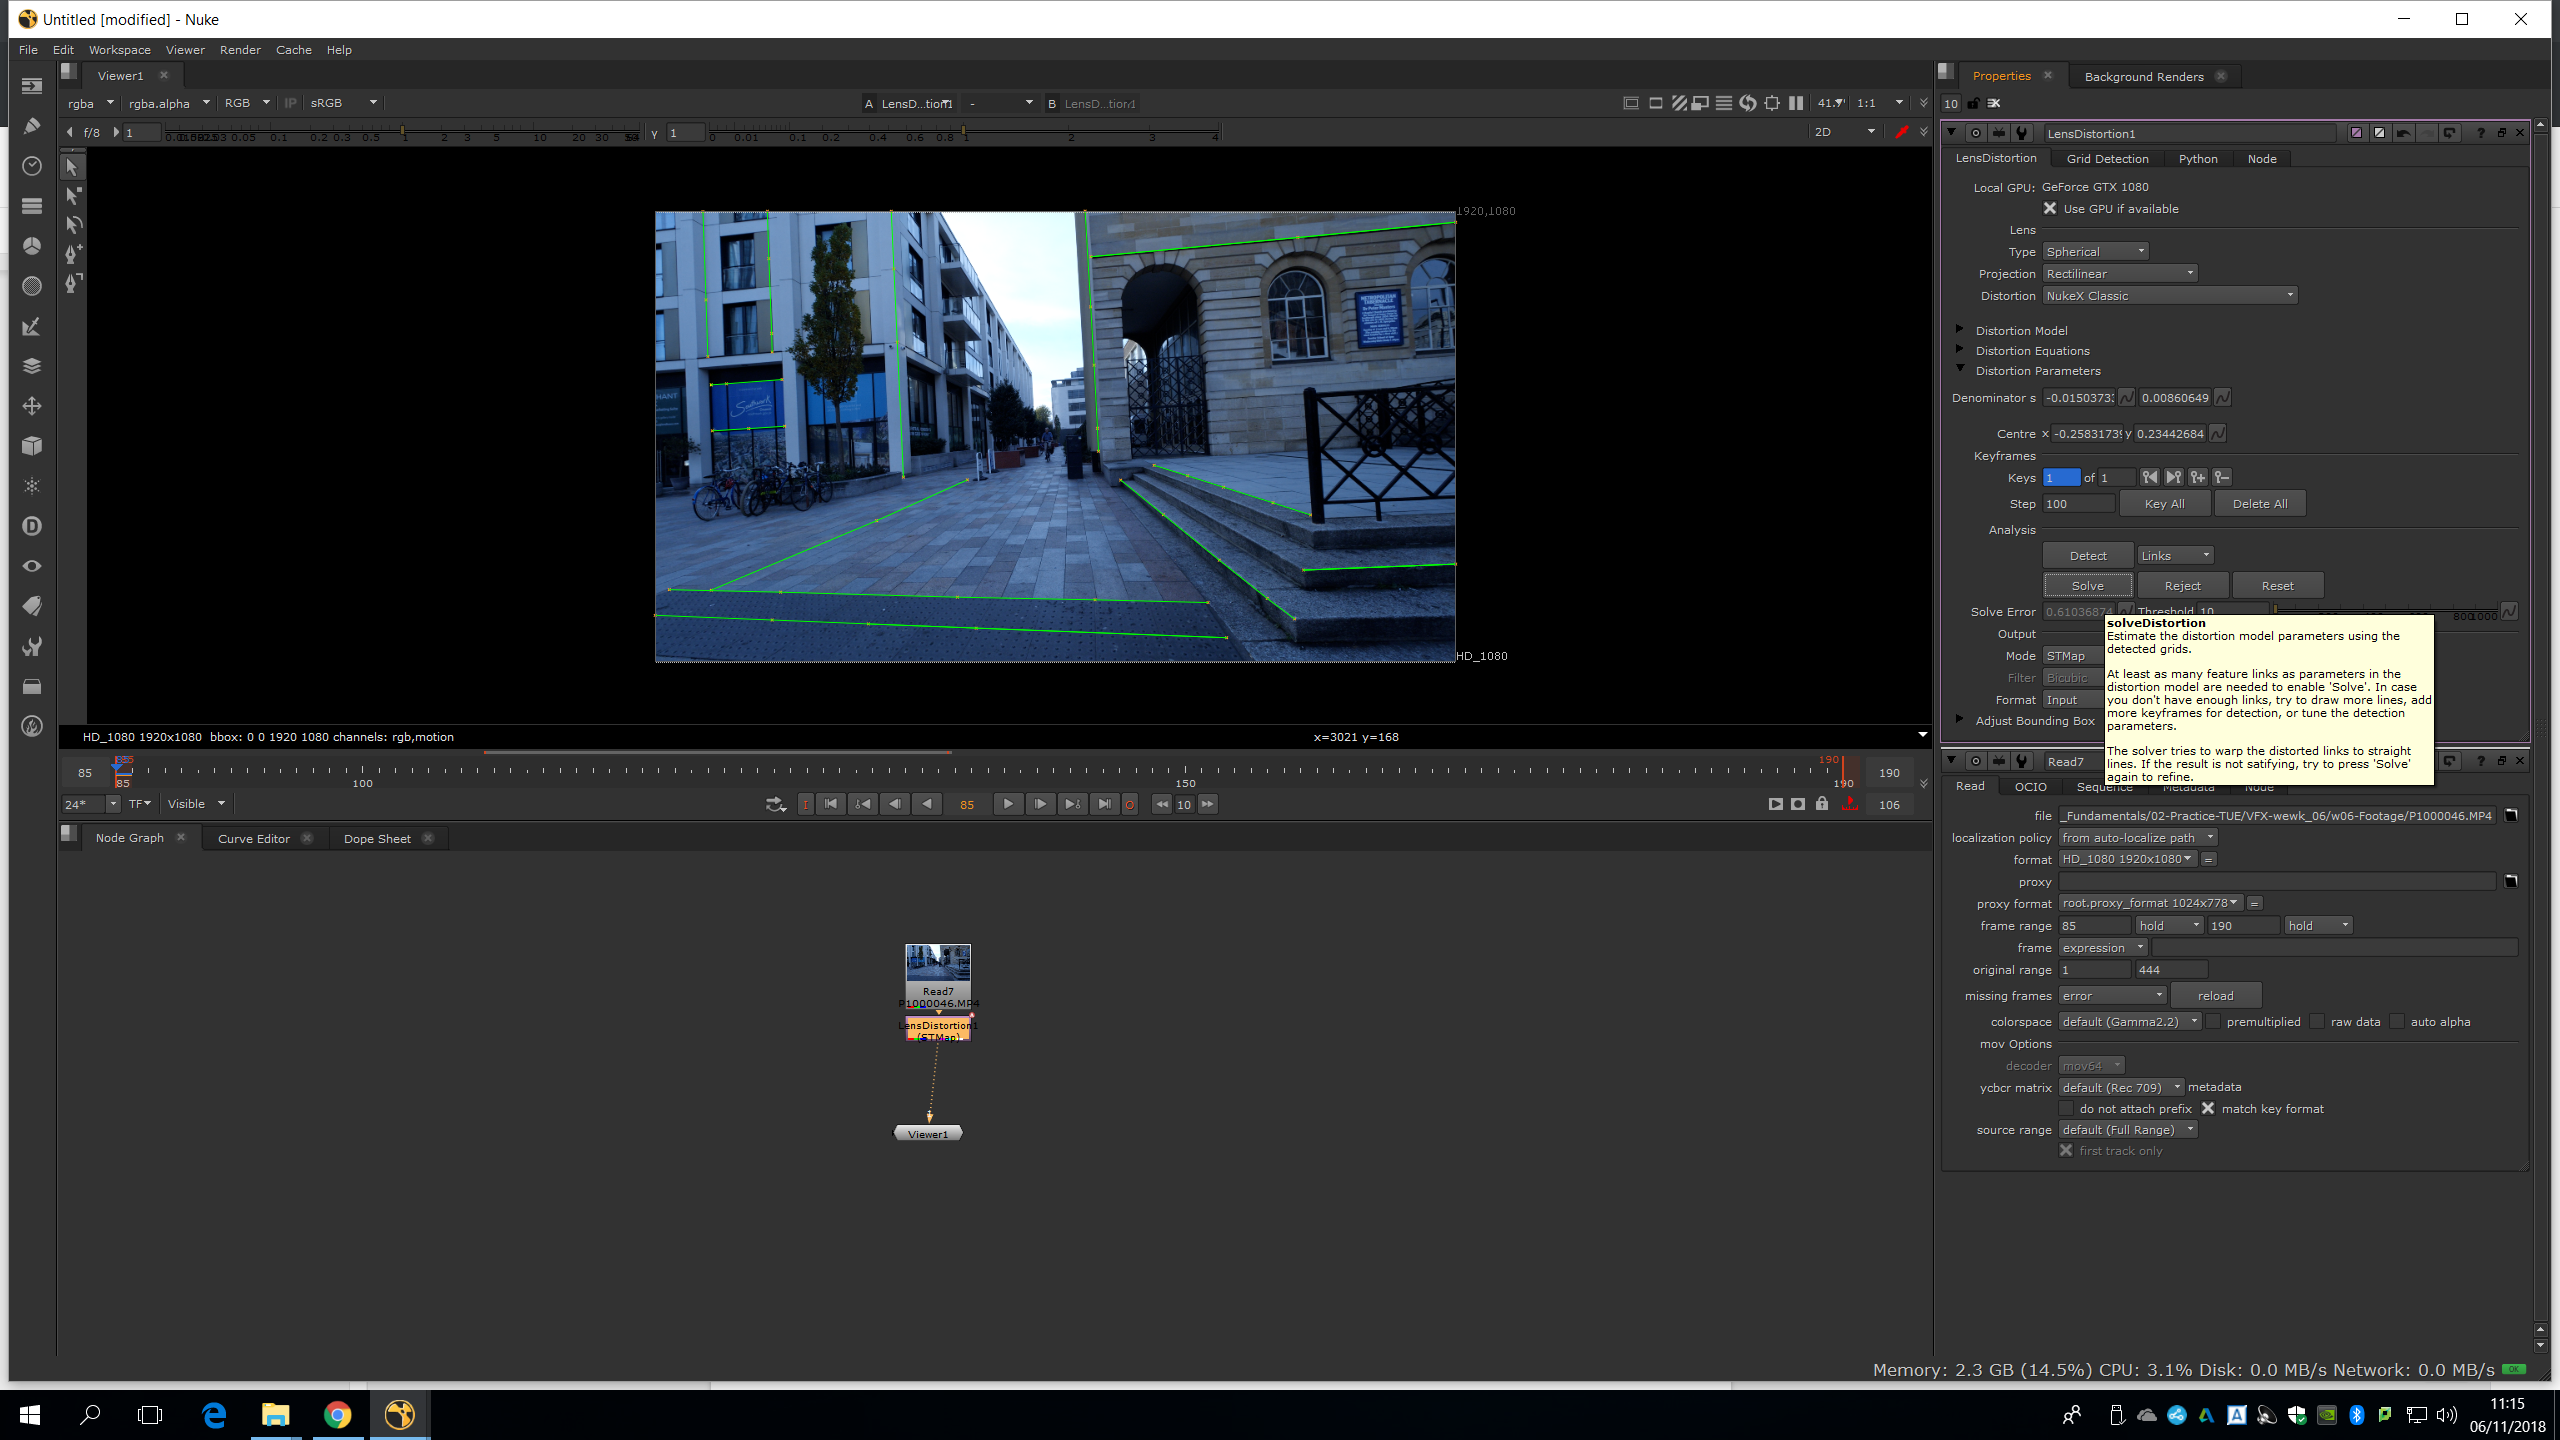
And then we change the mode to undistort.
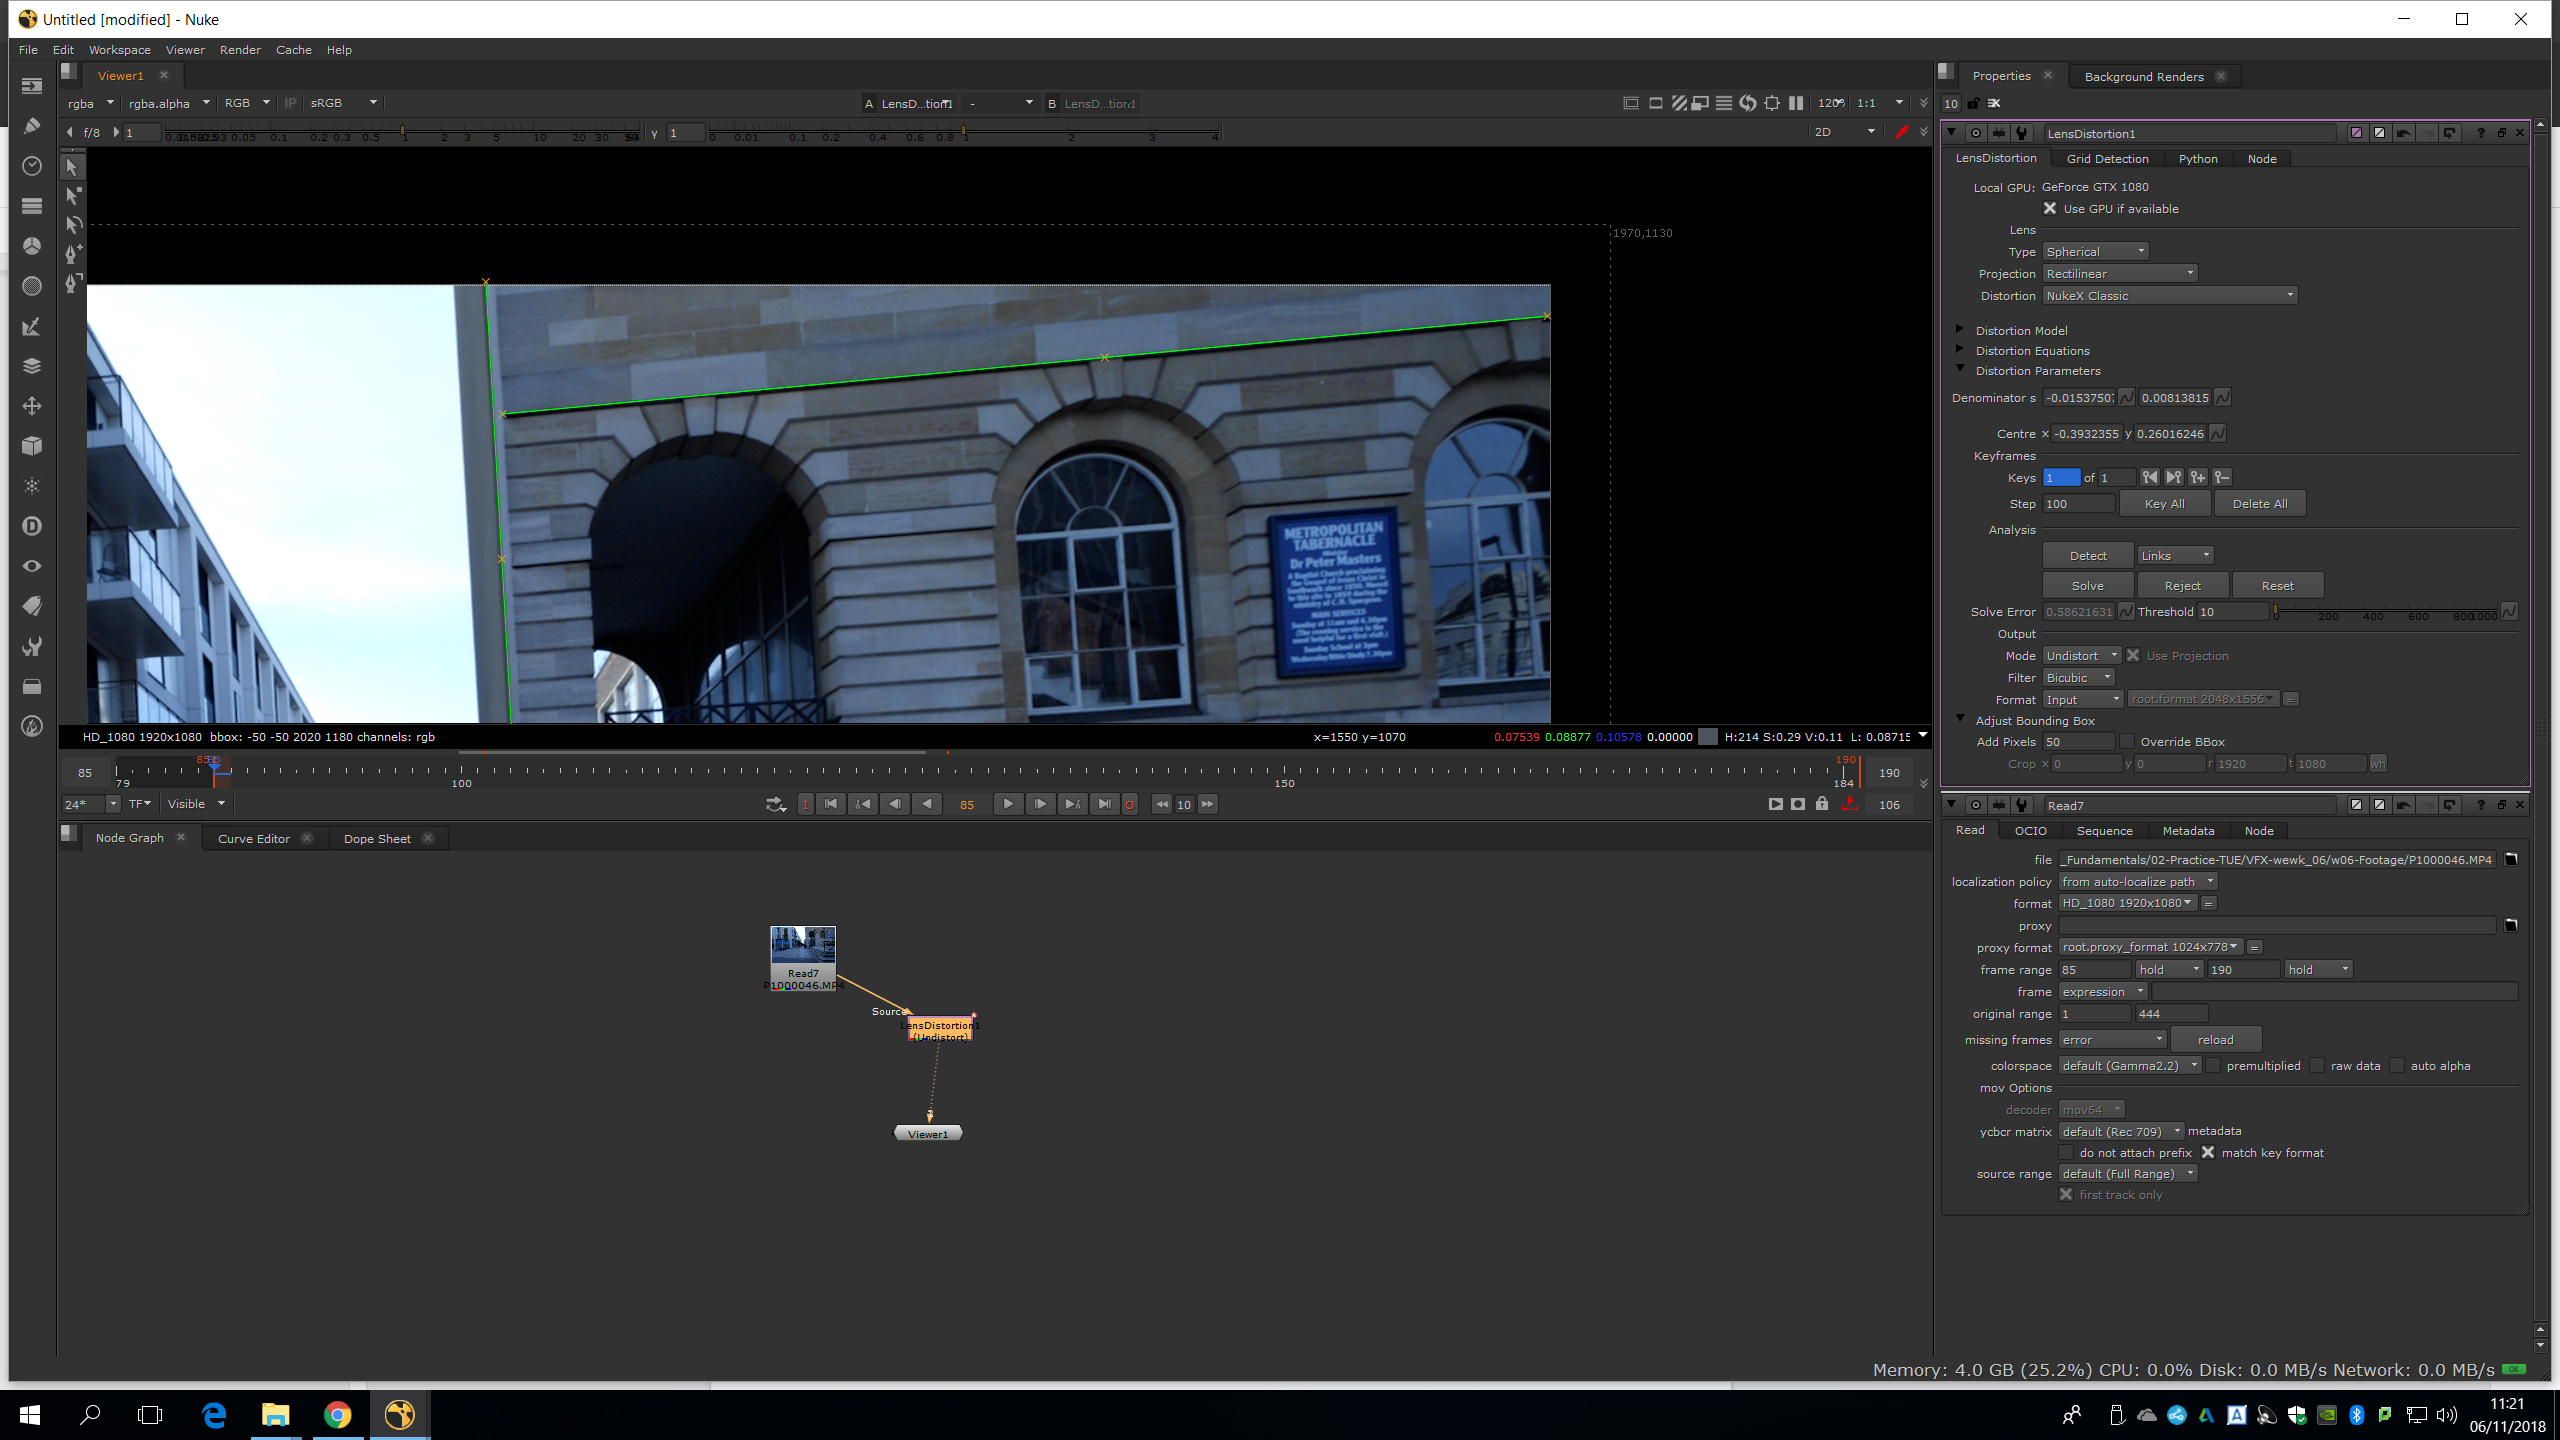
As we mentioned before, we would rather do long lines than short ones, and do more than one point because lines might not be straight (that’s why we have distortion). Once applied, we will need to compare it with the original footage.
We notice that before and after the image is changing. Also, we are using pixels at the edge, because the image is getting larger and the distortion is taking off. In the lens distortion mode, we can add pixels in the bounding box. We will start adding 50.
Now, if we fit transform, we can see the bounding box and we will change the add pixels back to 0, to see that it is working. 
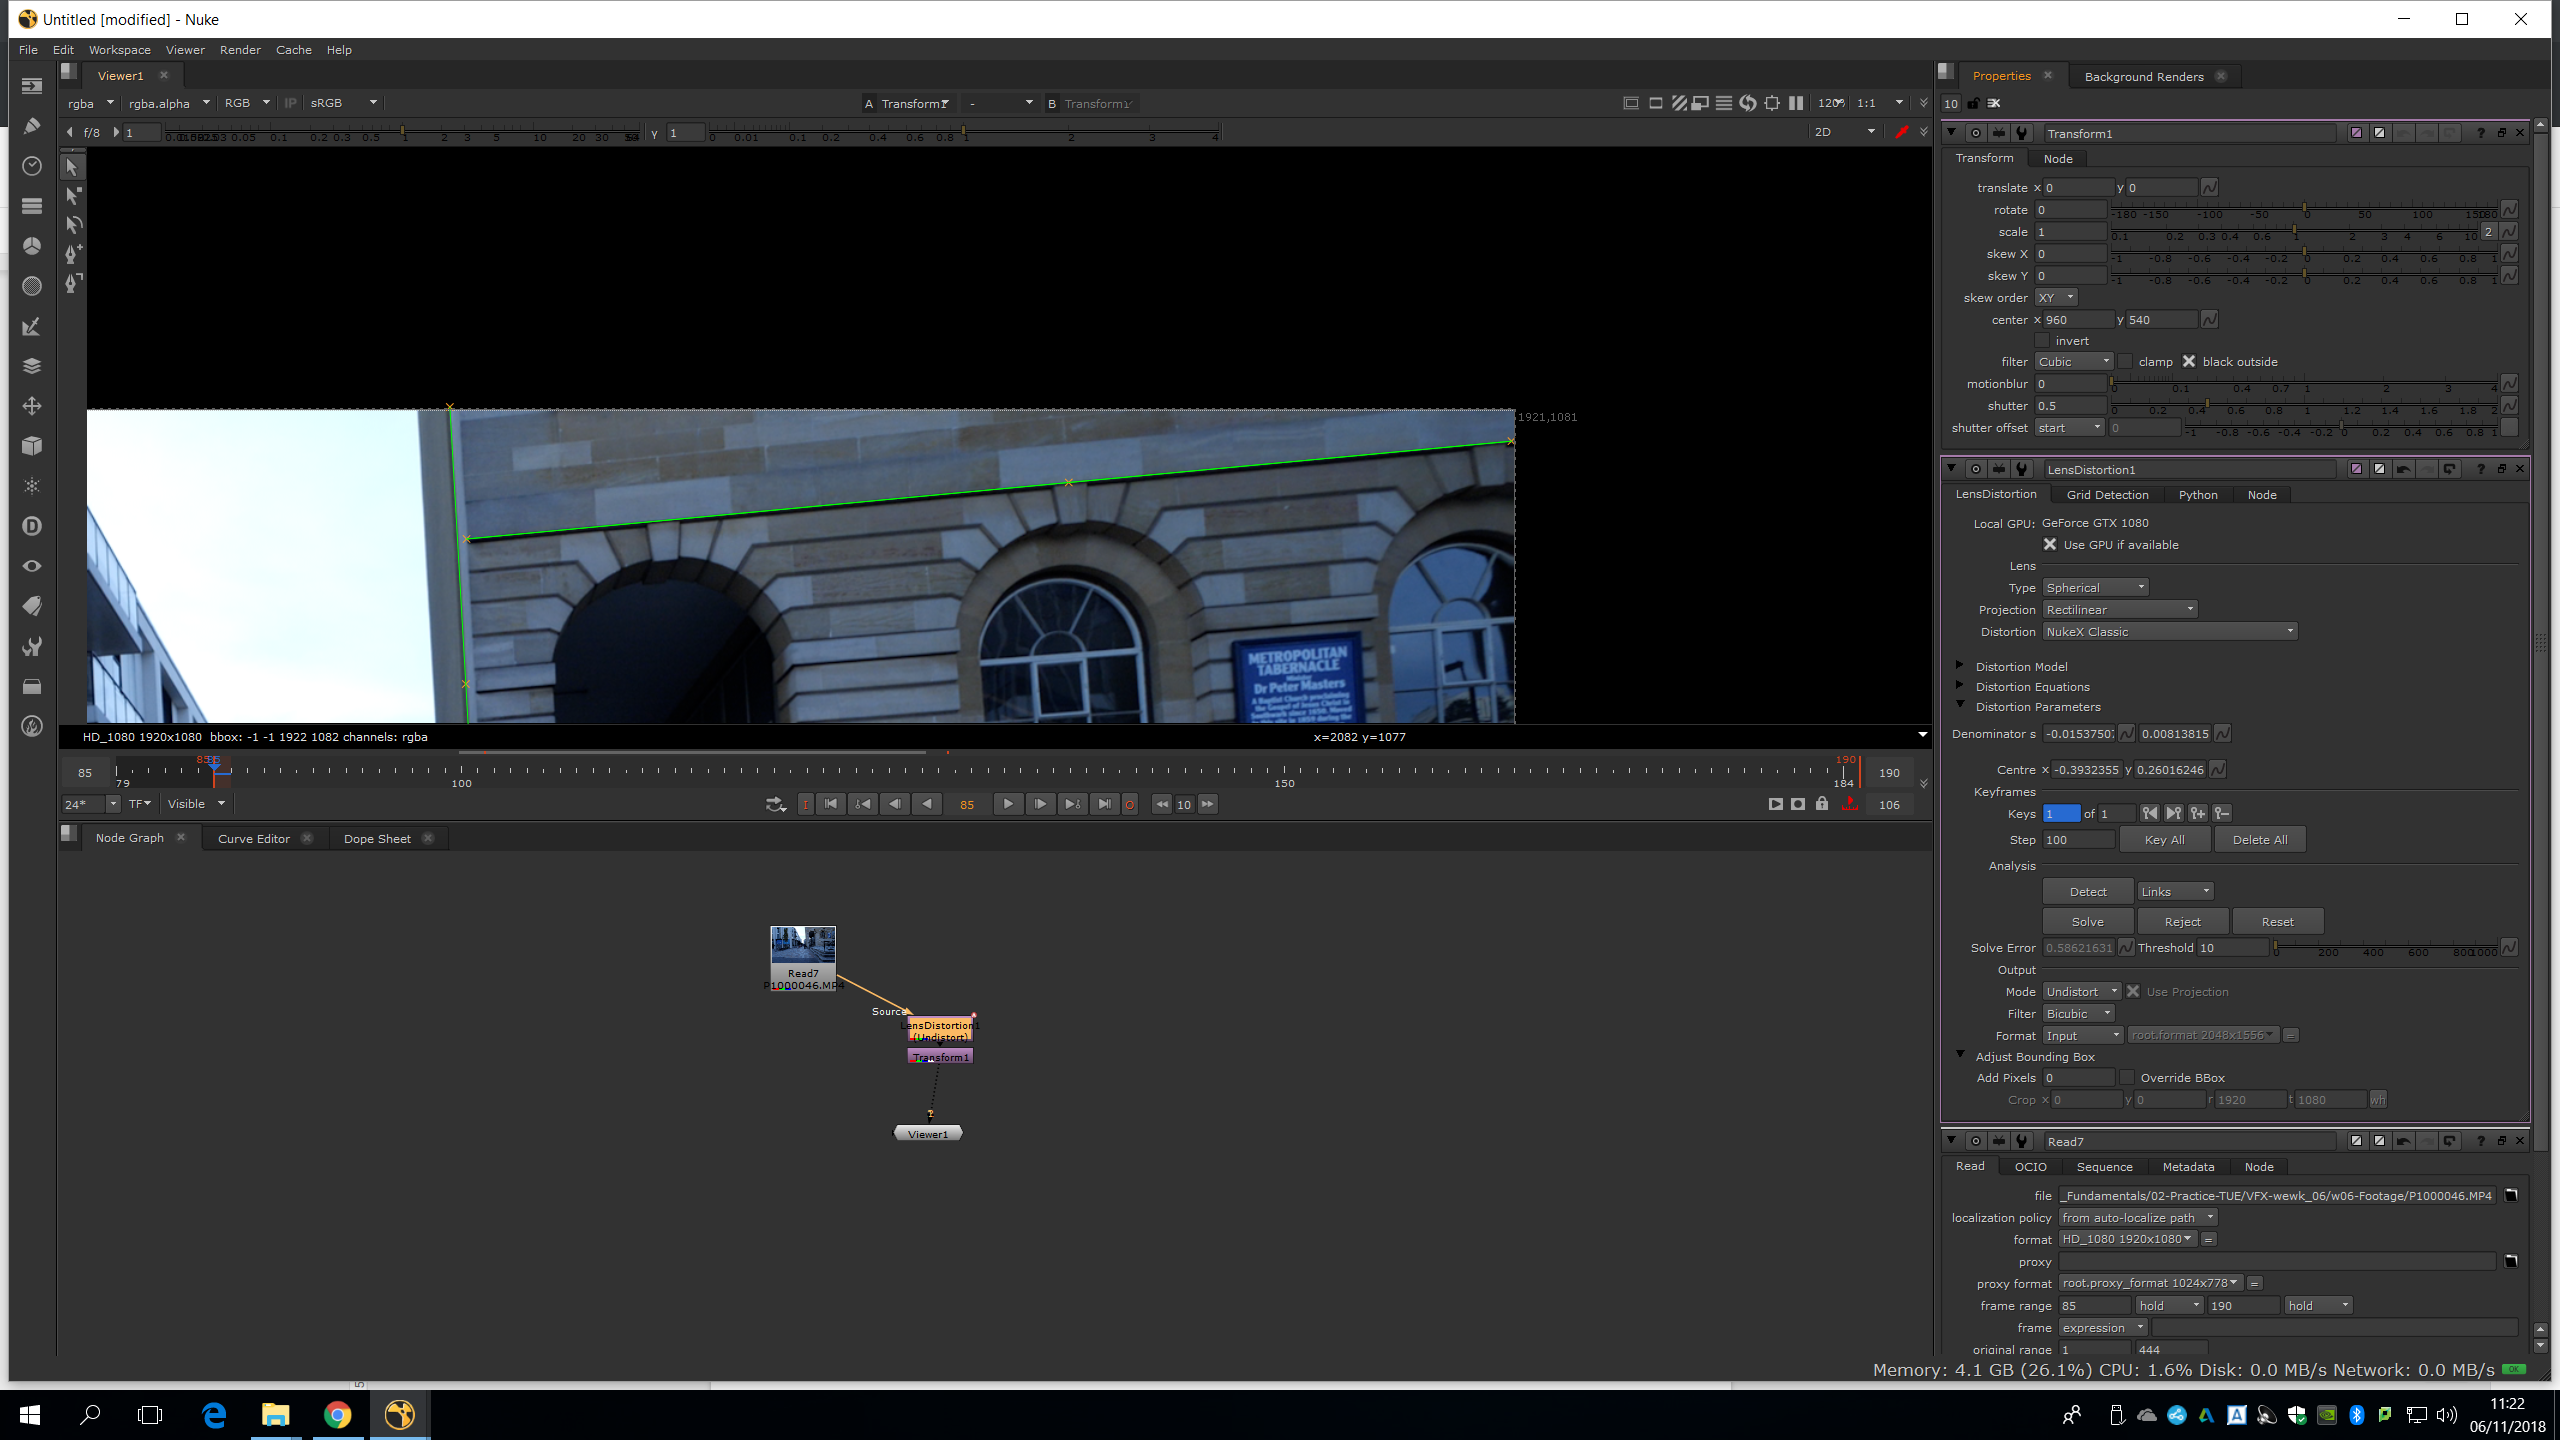
We can see it is working. We will fianlly set it to 15 and then we will delete the transform.
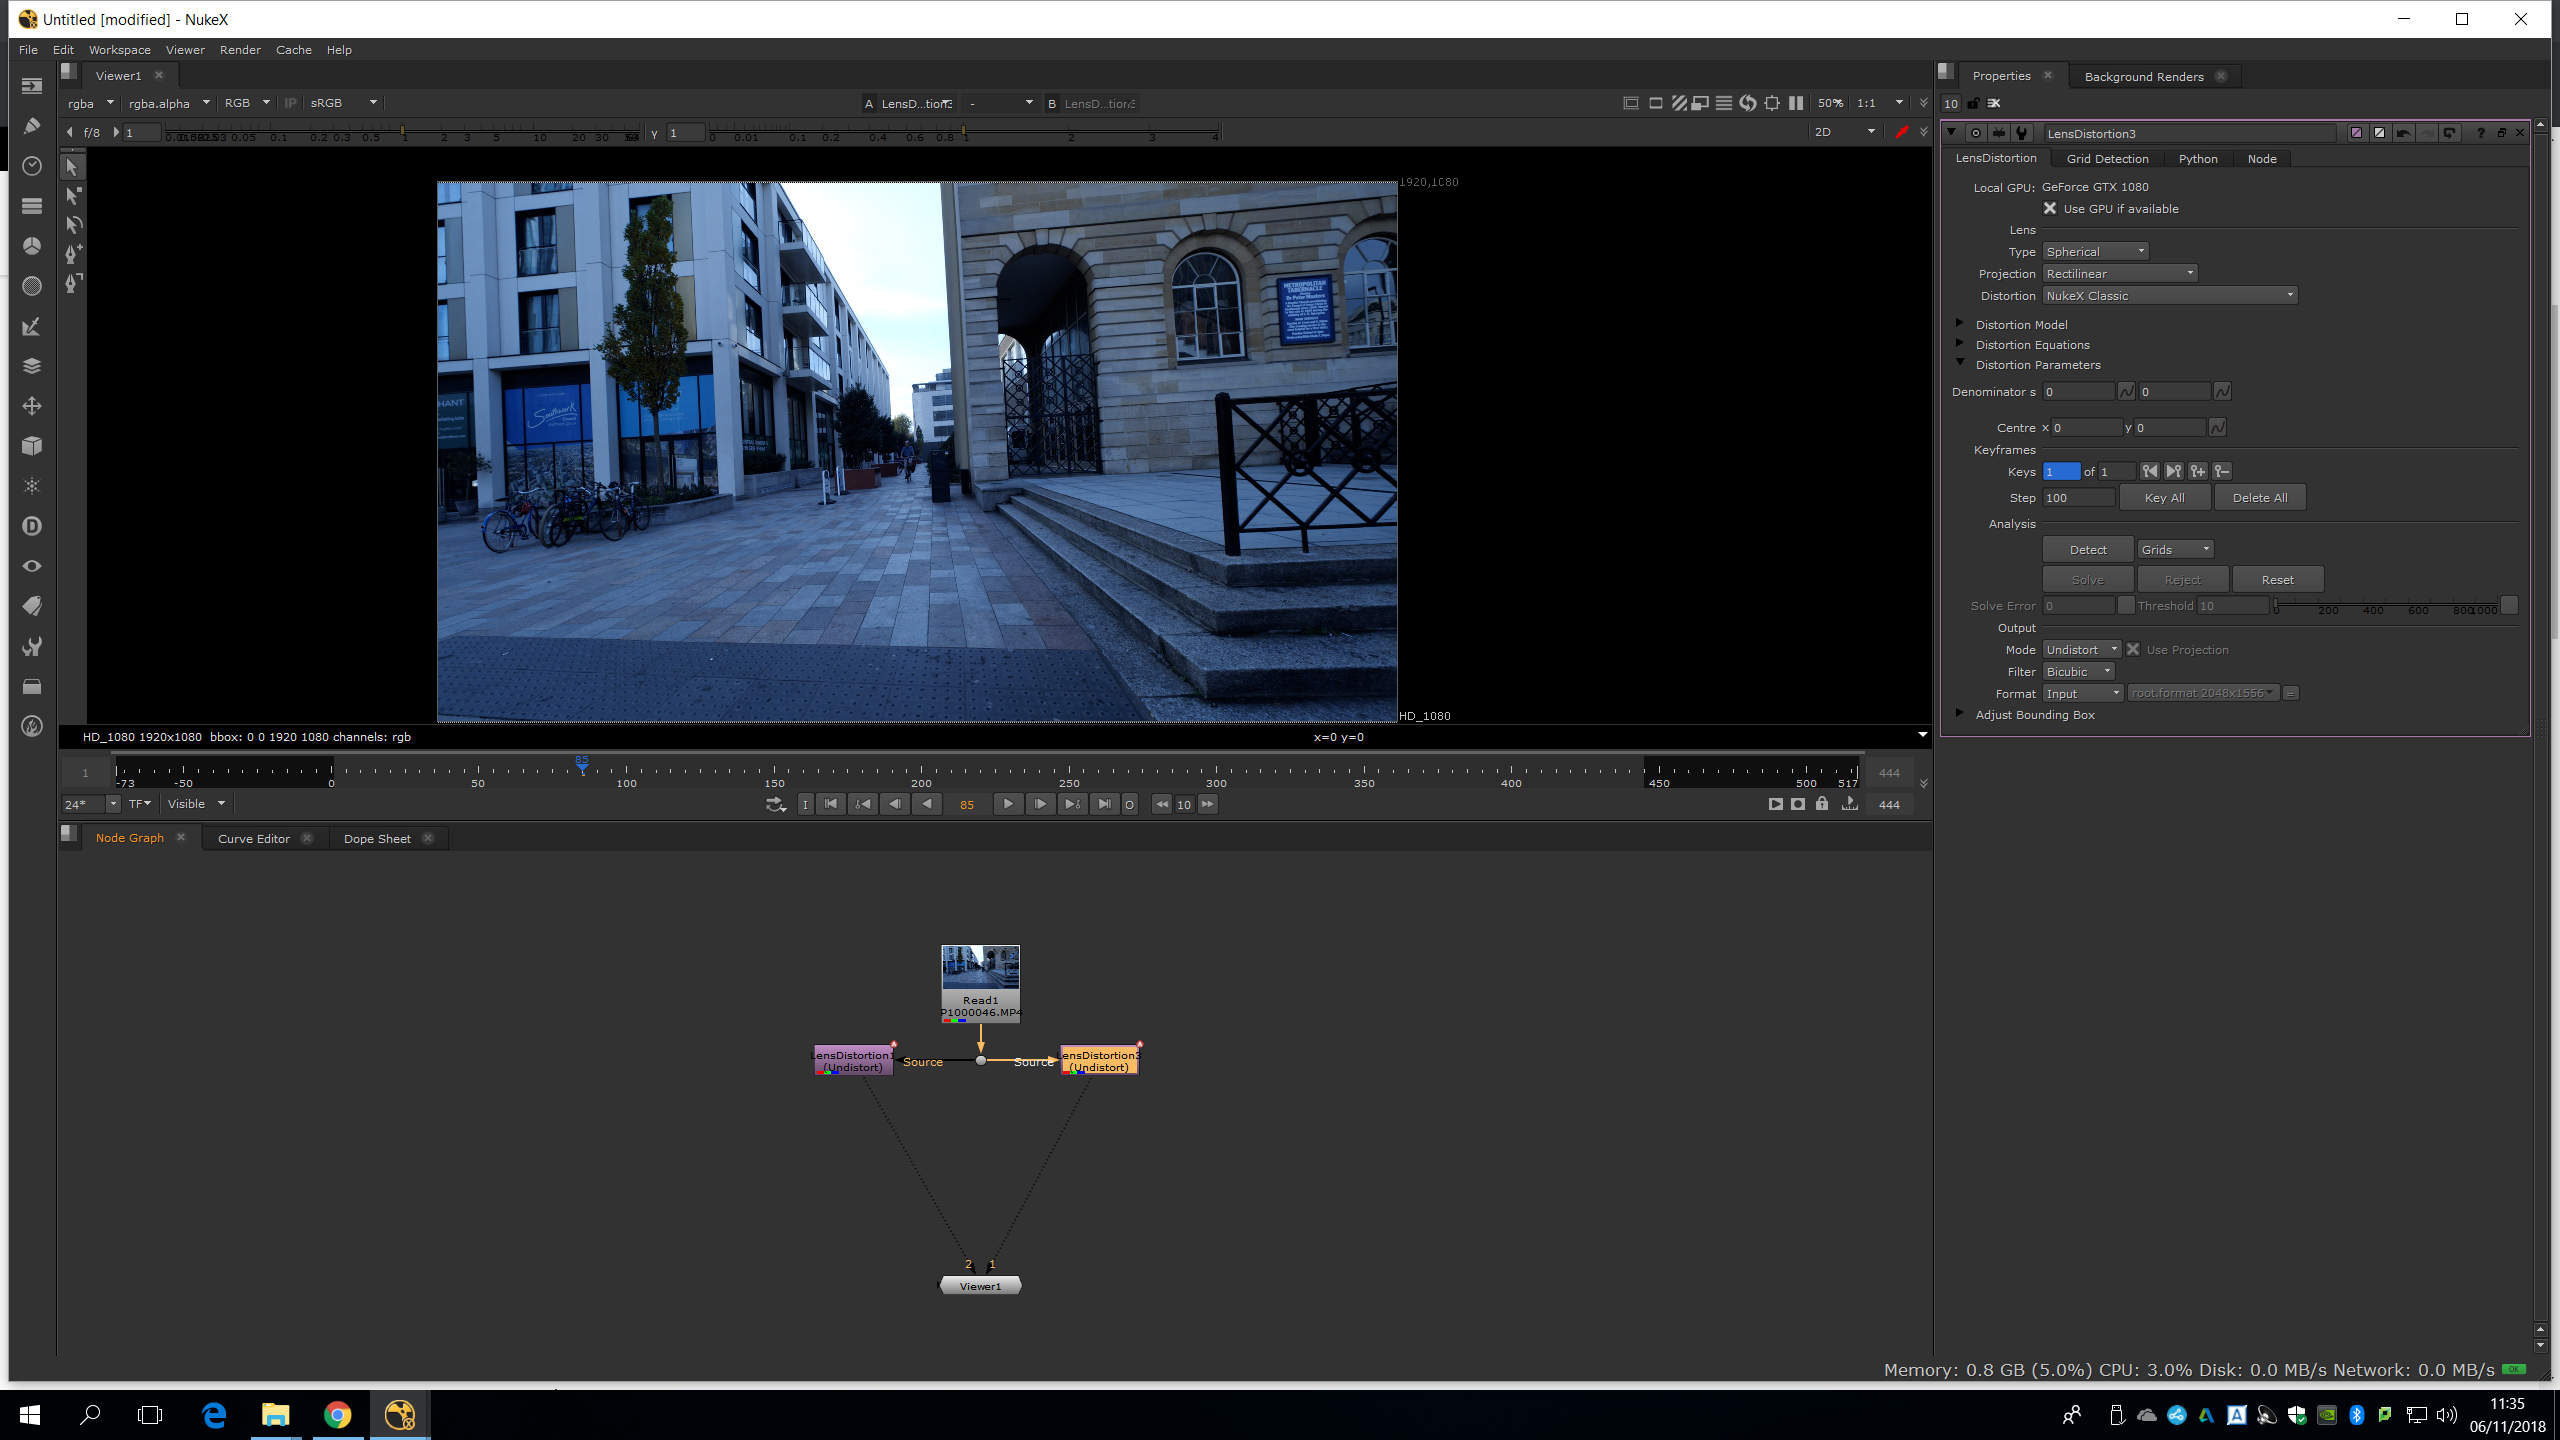
Actually, the lens distortion is not working well so we will put it on a side and try with another lens distortion note. This time we will play with the settings.
Now, we will go ahead with the camera tracking. We will maybe need to repeat the process several time until a good result is achieved. We will make the camera tracking missing the lens undistortion, so we will plug it straight into the footage. Before to track the scene, we will need to do a roto into the plate. With it, will mask out the areas of movement. We do not need this roto to be accurate, so we can do a garbage mask.
First of all, we will roto the two persons so we take out their movement.
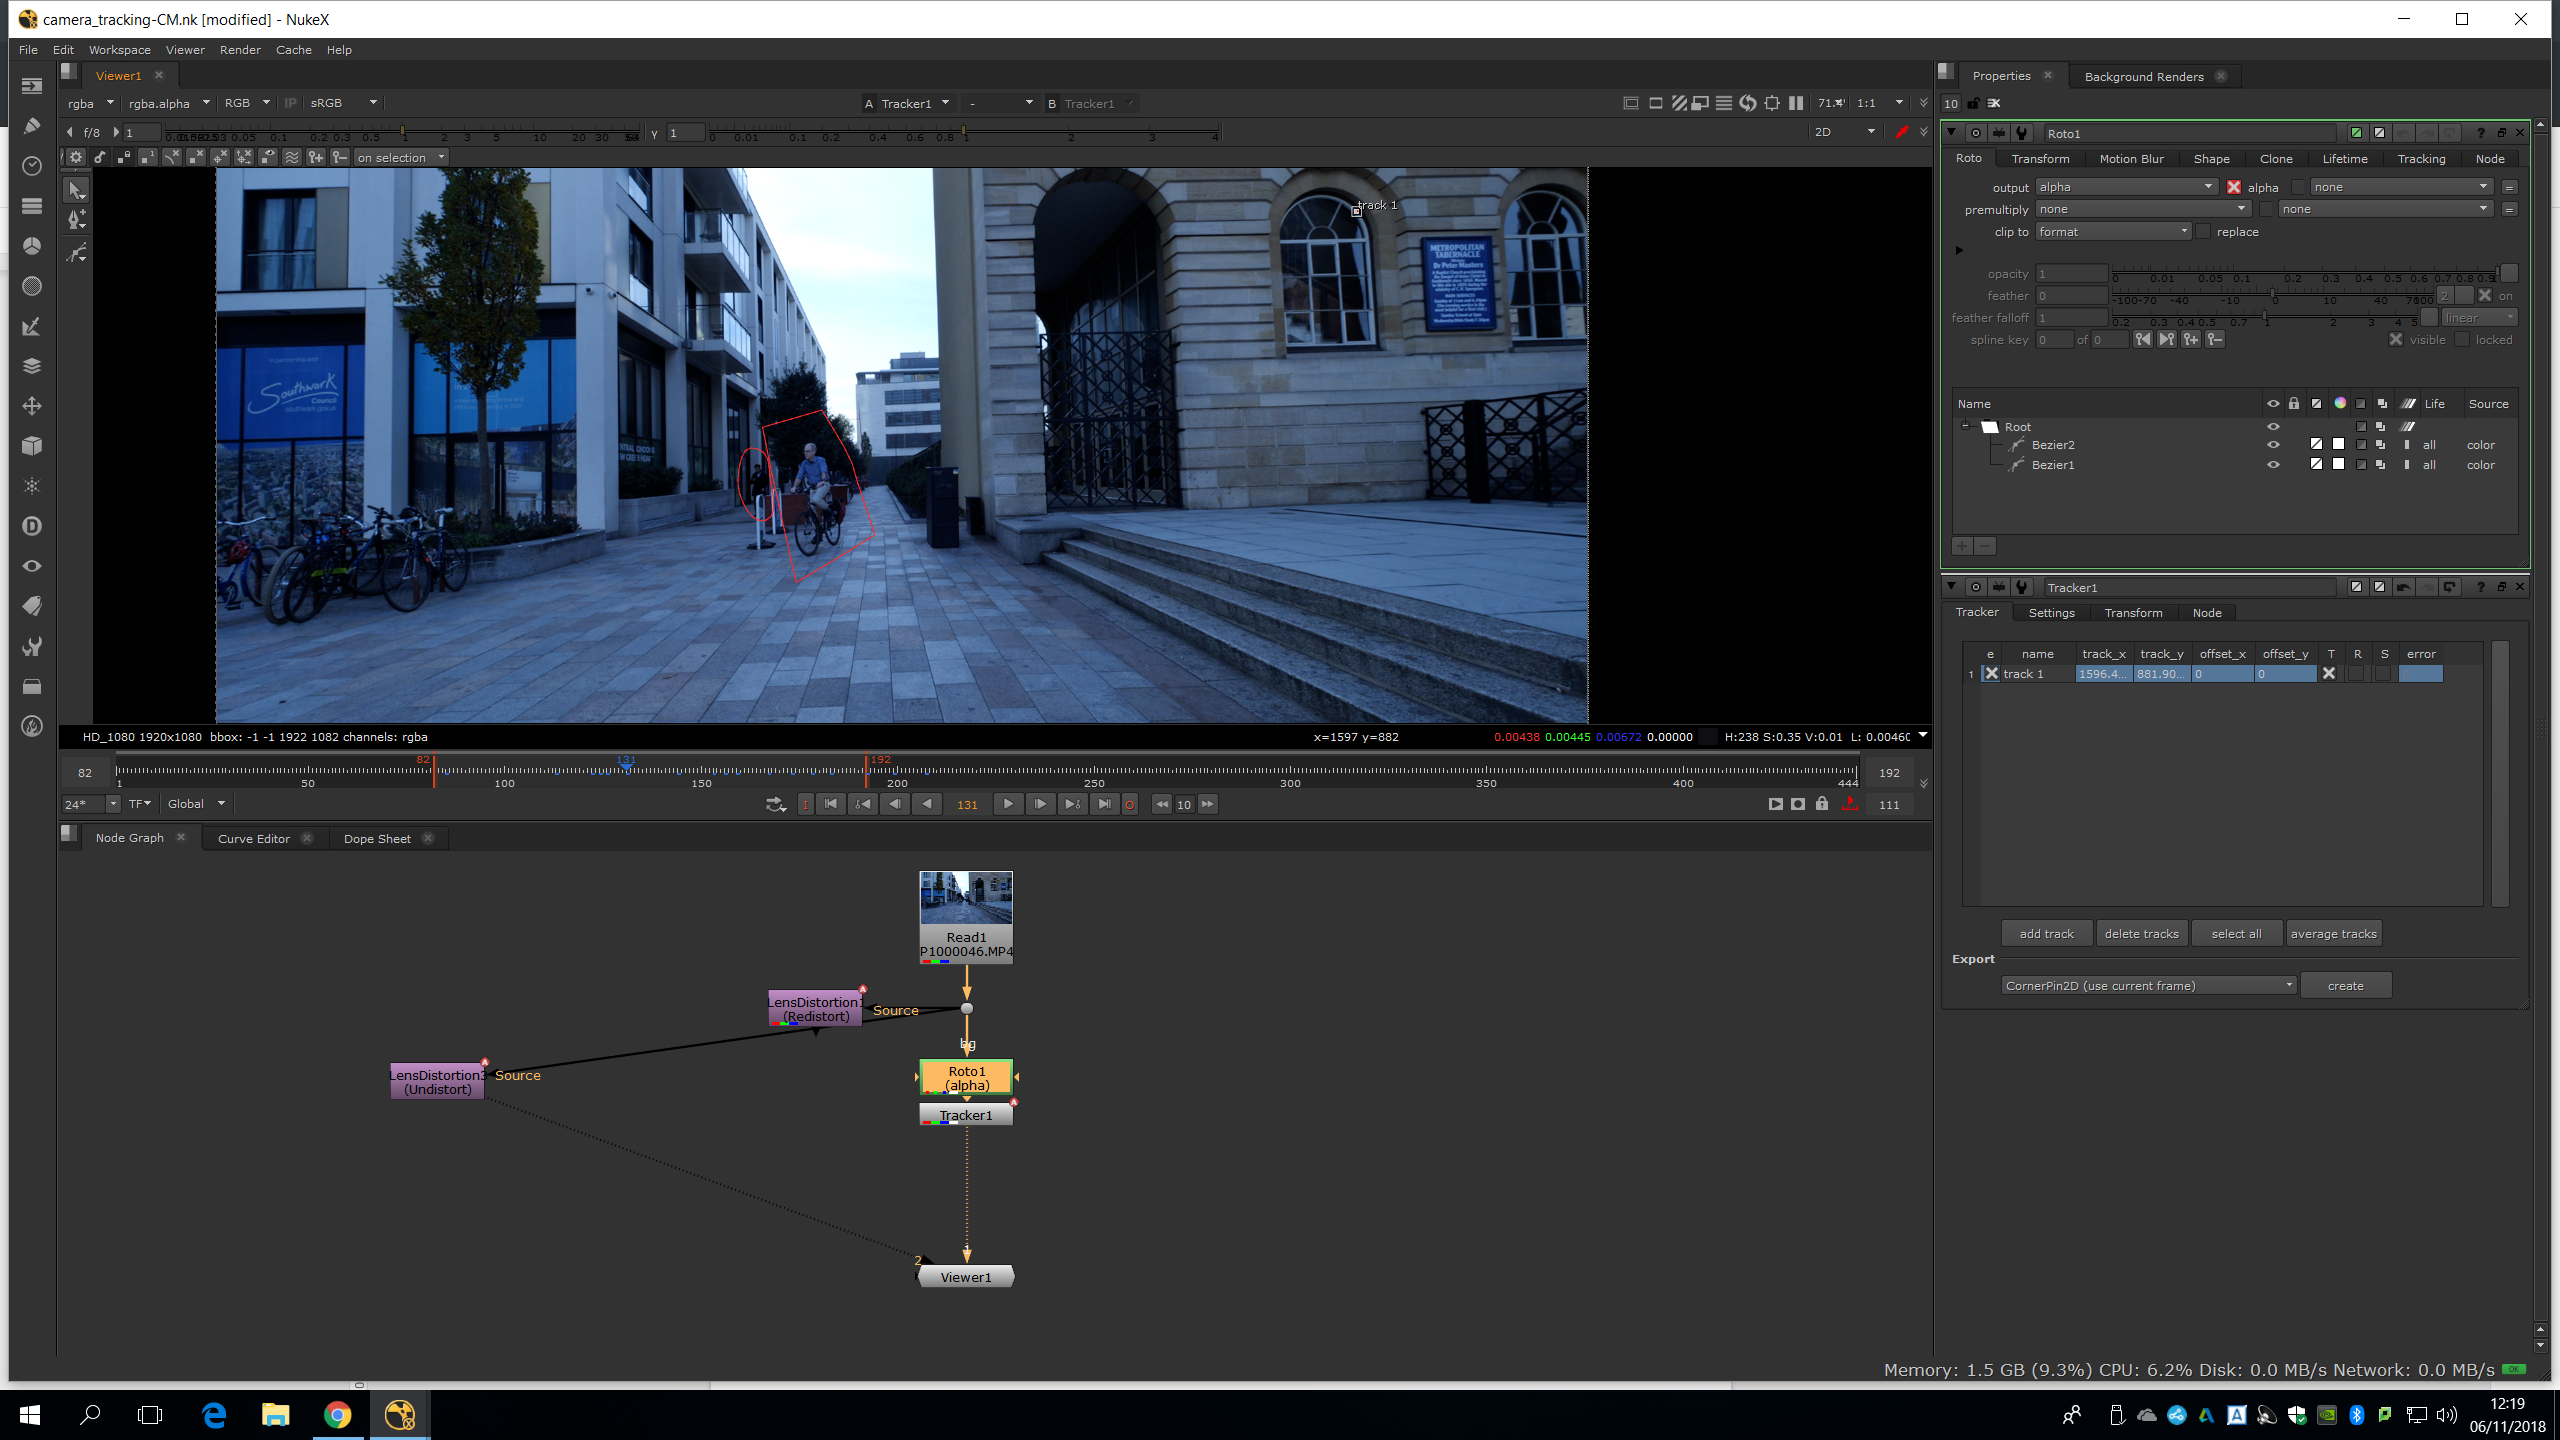
We will need to animate the roto along the timeline. Then we, will delete the reflections of the windows which are also moving. For that, we will add a tracker in the window.
We will make the inside region quite small to make reflections.
After we made the tracking, we will link it to the roto to take out the shine. Therefore, we will have a still mask of the windows which follows its movement, so we won’t need to animate it.

We will need to do it with both windows. Once we have rotoscopied out all the movement, we can add a camera tracker.
Before doing that, we would like to add a graded note to add more contrast and a sharpen note to rough the edges, so the tracking will be easier.
We will choose Free camera, as it is the camera movement of the footage. Then, we can choose a preset of the camera, and if we do not find it, we can Google the camera model we have used to shoot the footage and type the Film Back Size ourselves.
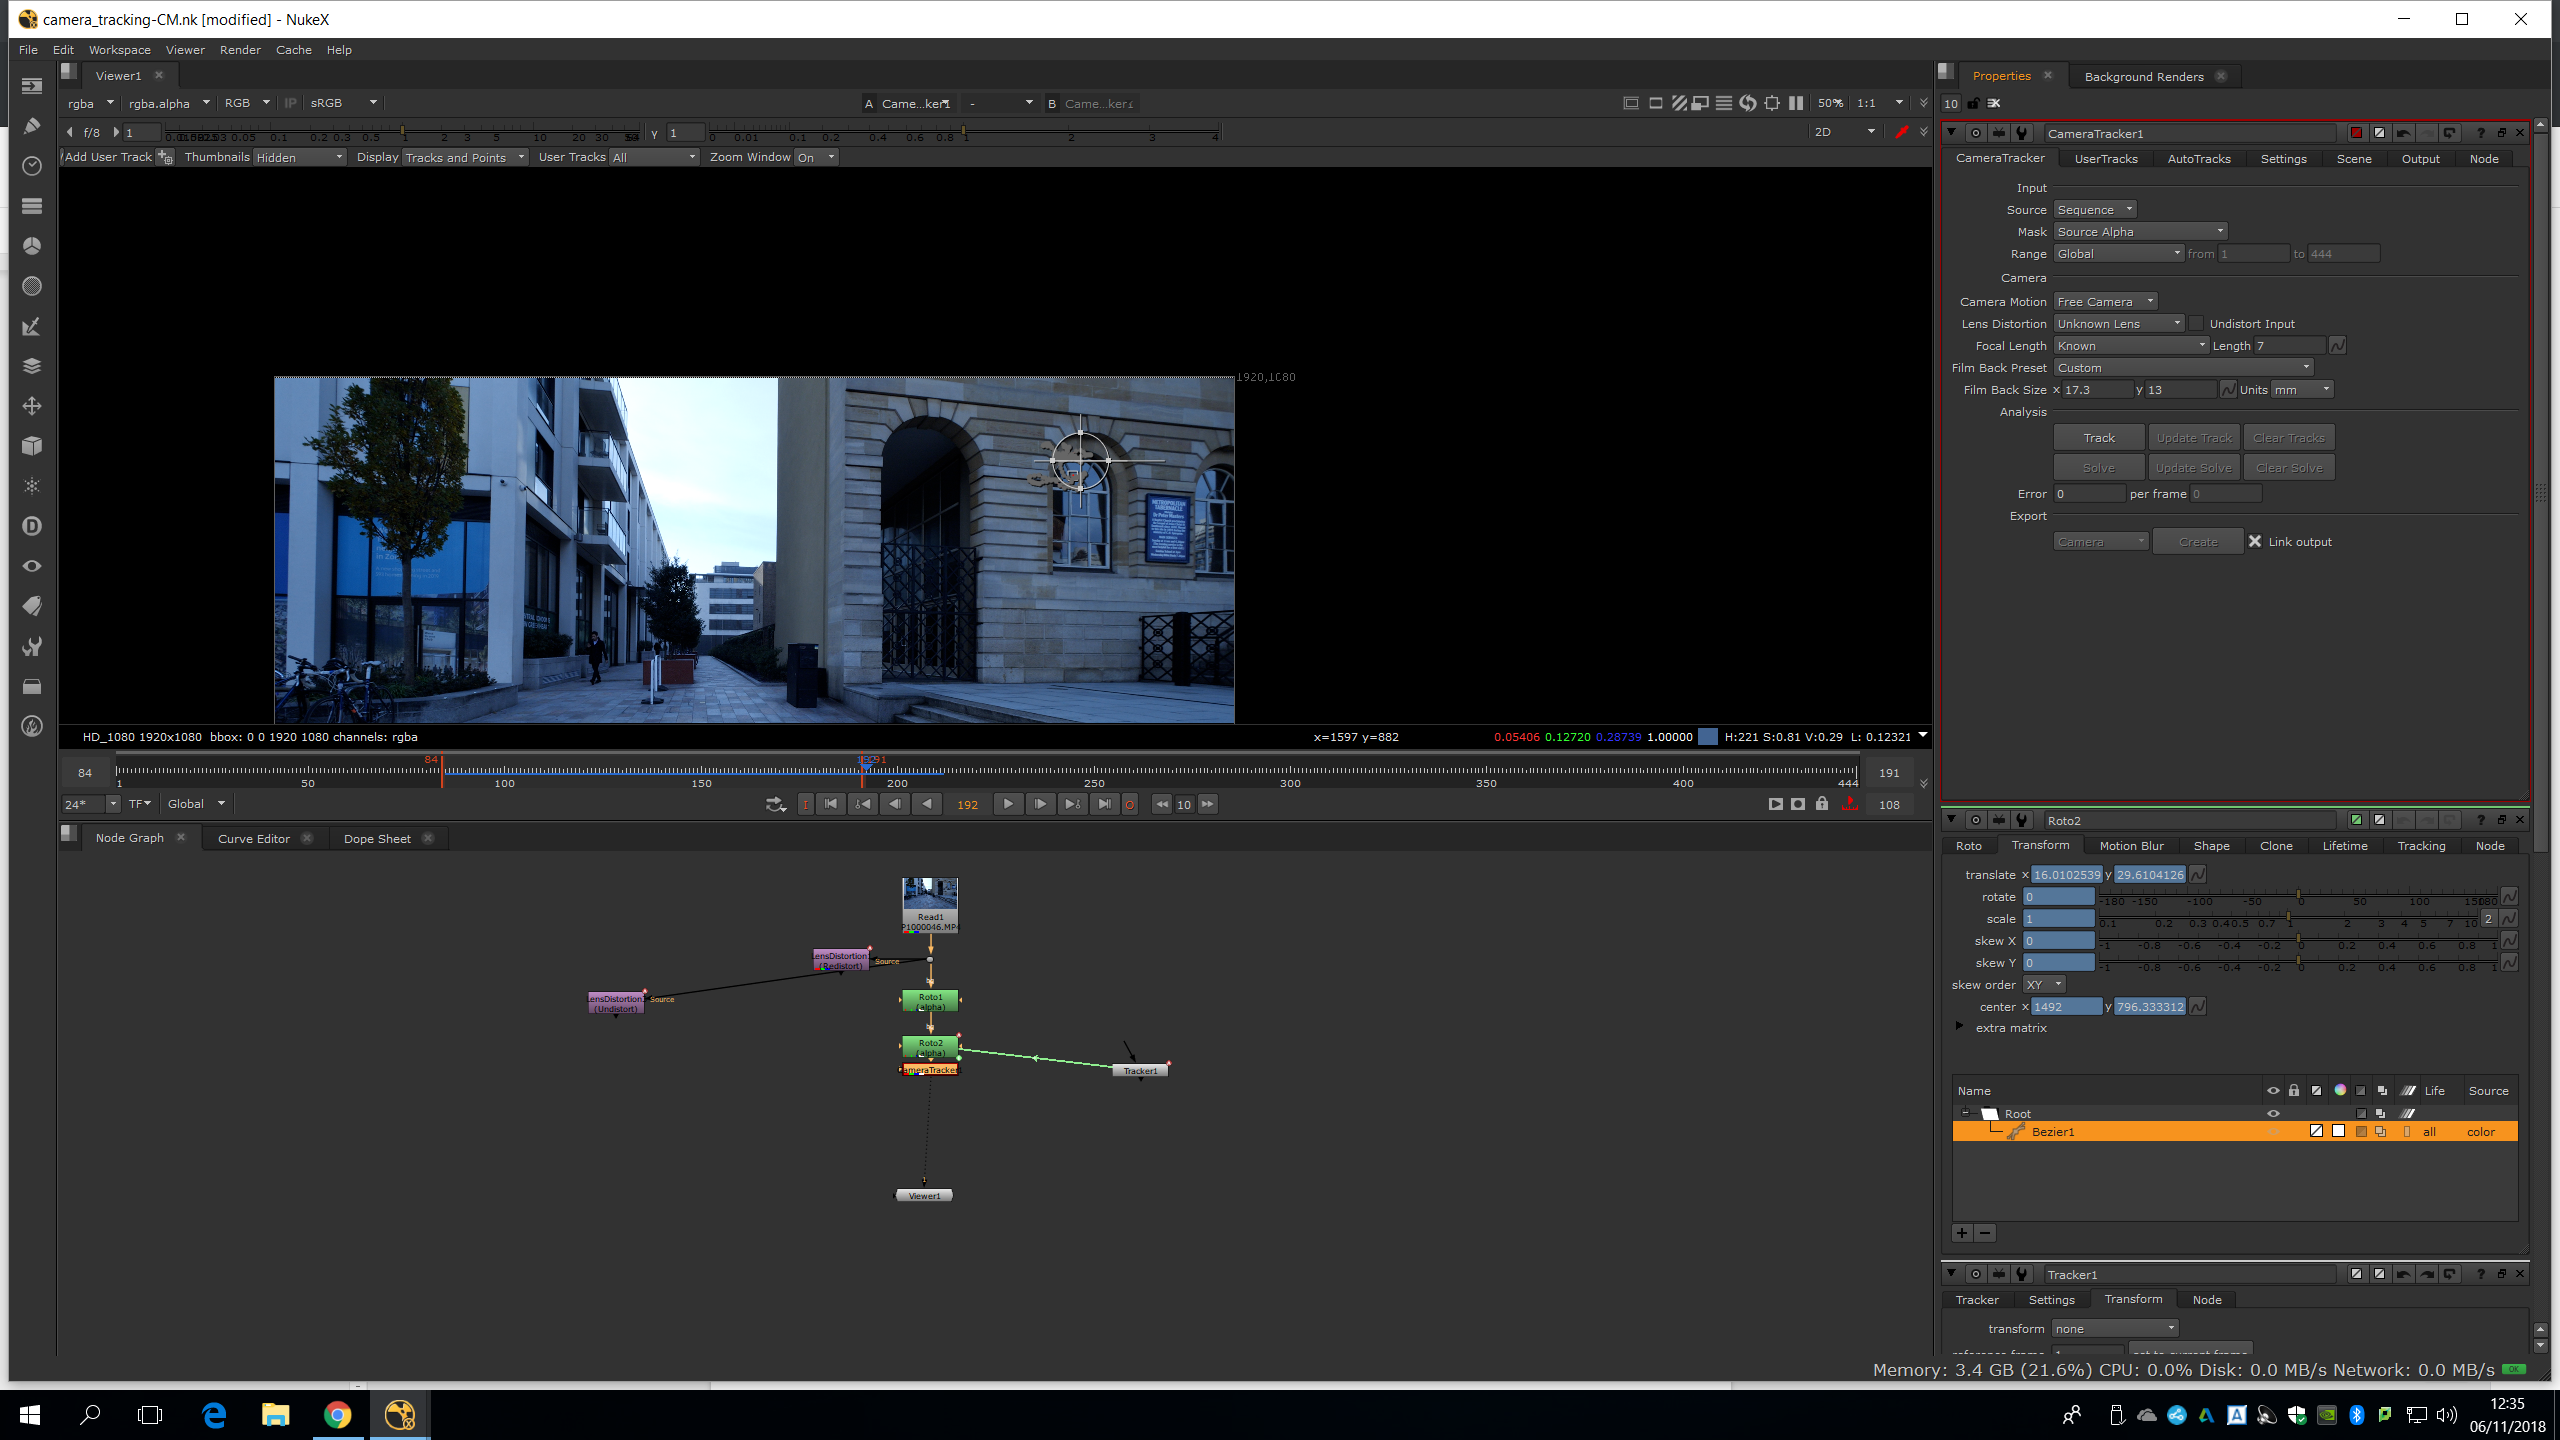
No specific settings are going to give you a better track, so we need to to several tests.
There are some things to be aware which can affect to our tracking, like clouds moving with the sky. We must delete everything is moving beforehand.
The important is how many tracks are turning red. We will set the length into 56, so every tracking mark which is less than 56 frames long will be automatically rejected.
Once we have all this settled, we will do the tracking, and everything which is masked w
on’t be tracked. We will need to go to settings and put 500 track markets and 22 units of separation distance.
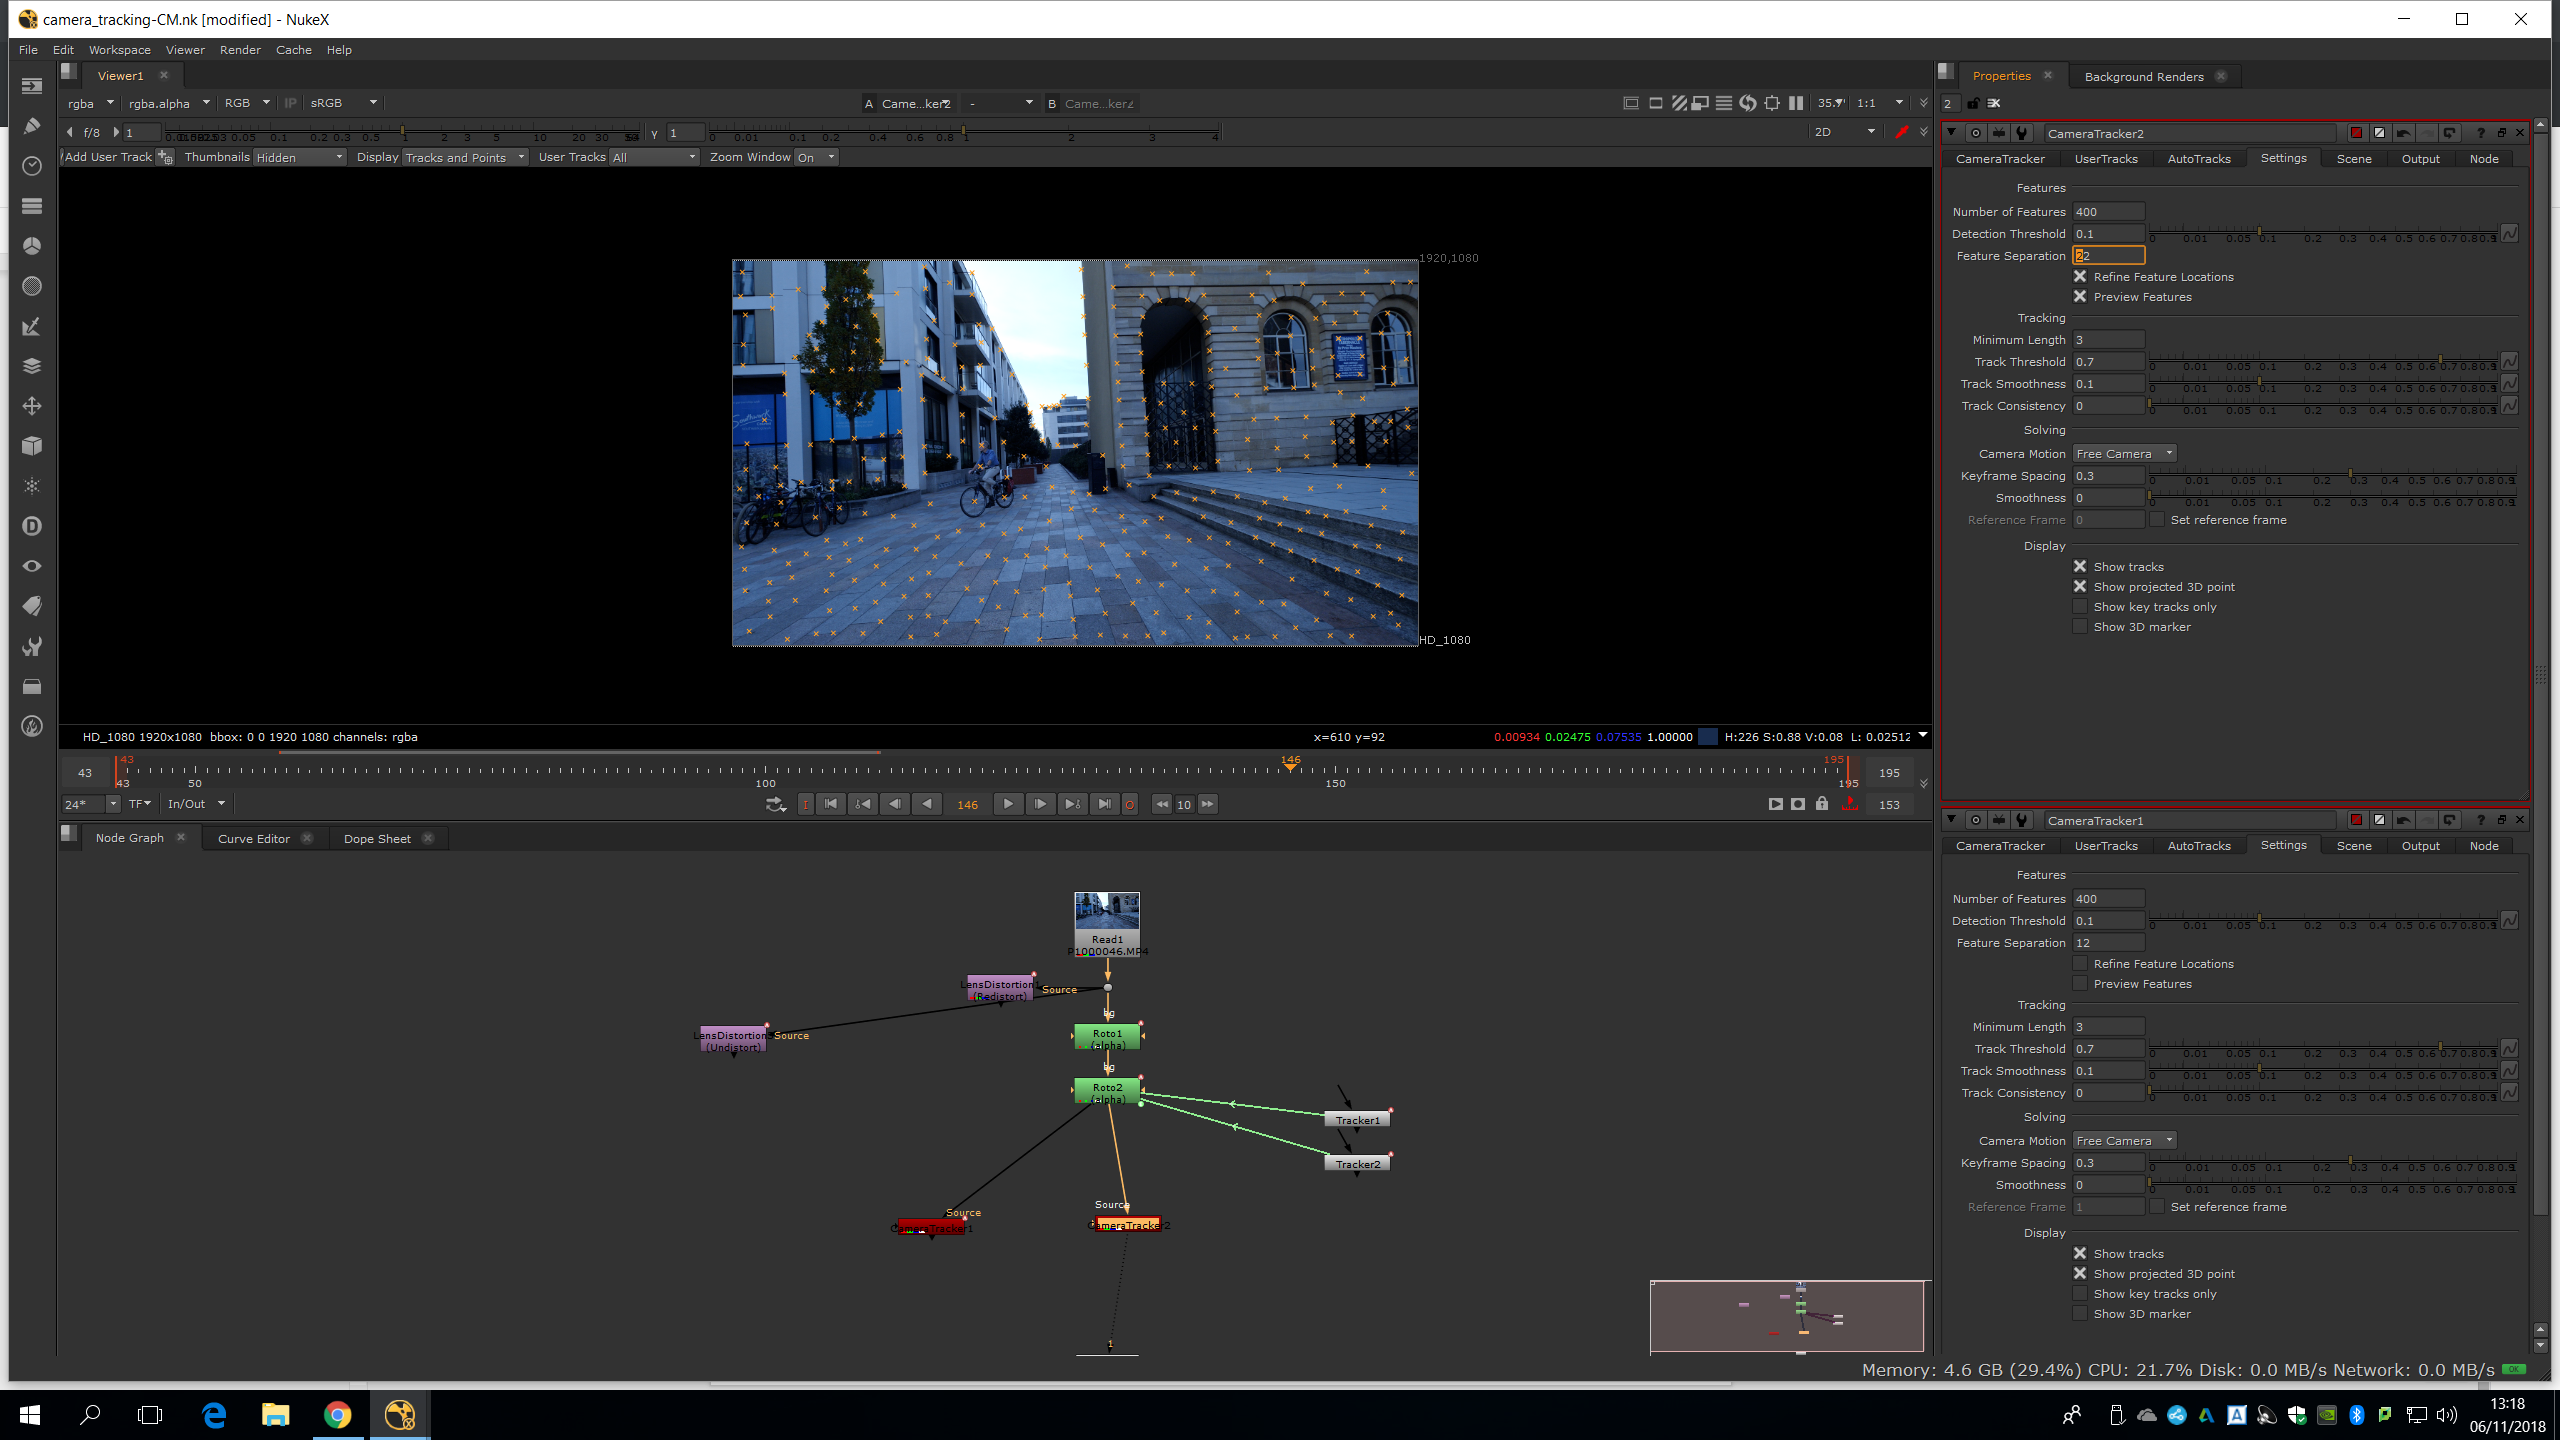
Then we press track and once is done we press solve. 
As we can see, we have an error of 1.35. We always would like to keep the error lower than one. In order to achieve it, we will need to decrease the max error and increase the min length. Then, we will need to select Delete Unsolved and Delete Rejected. Once we redo the track, we will see how our error is lower than one.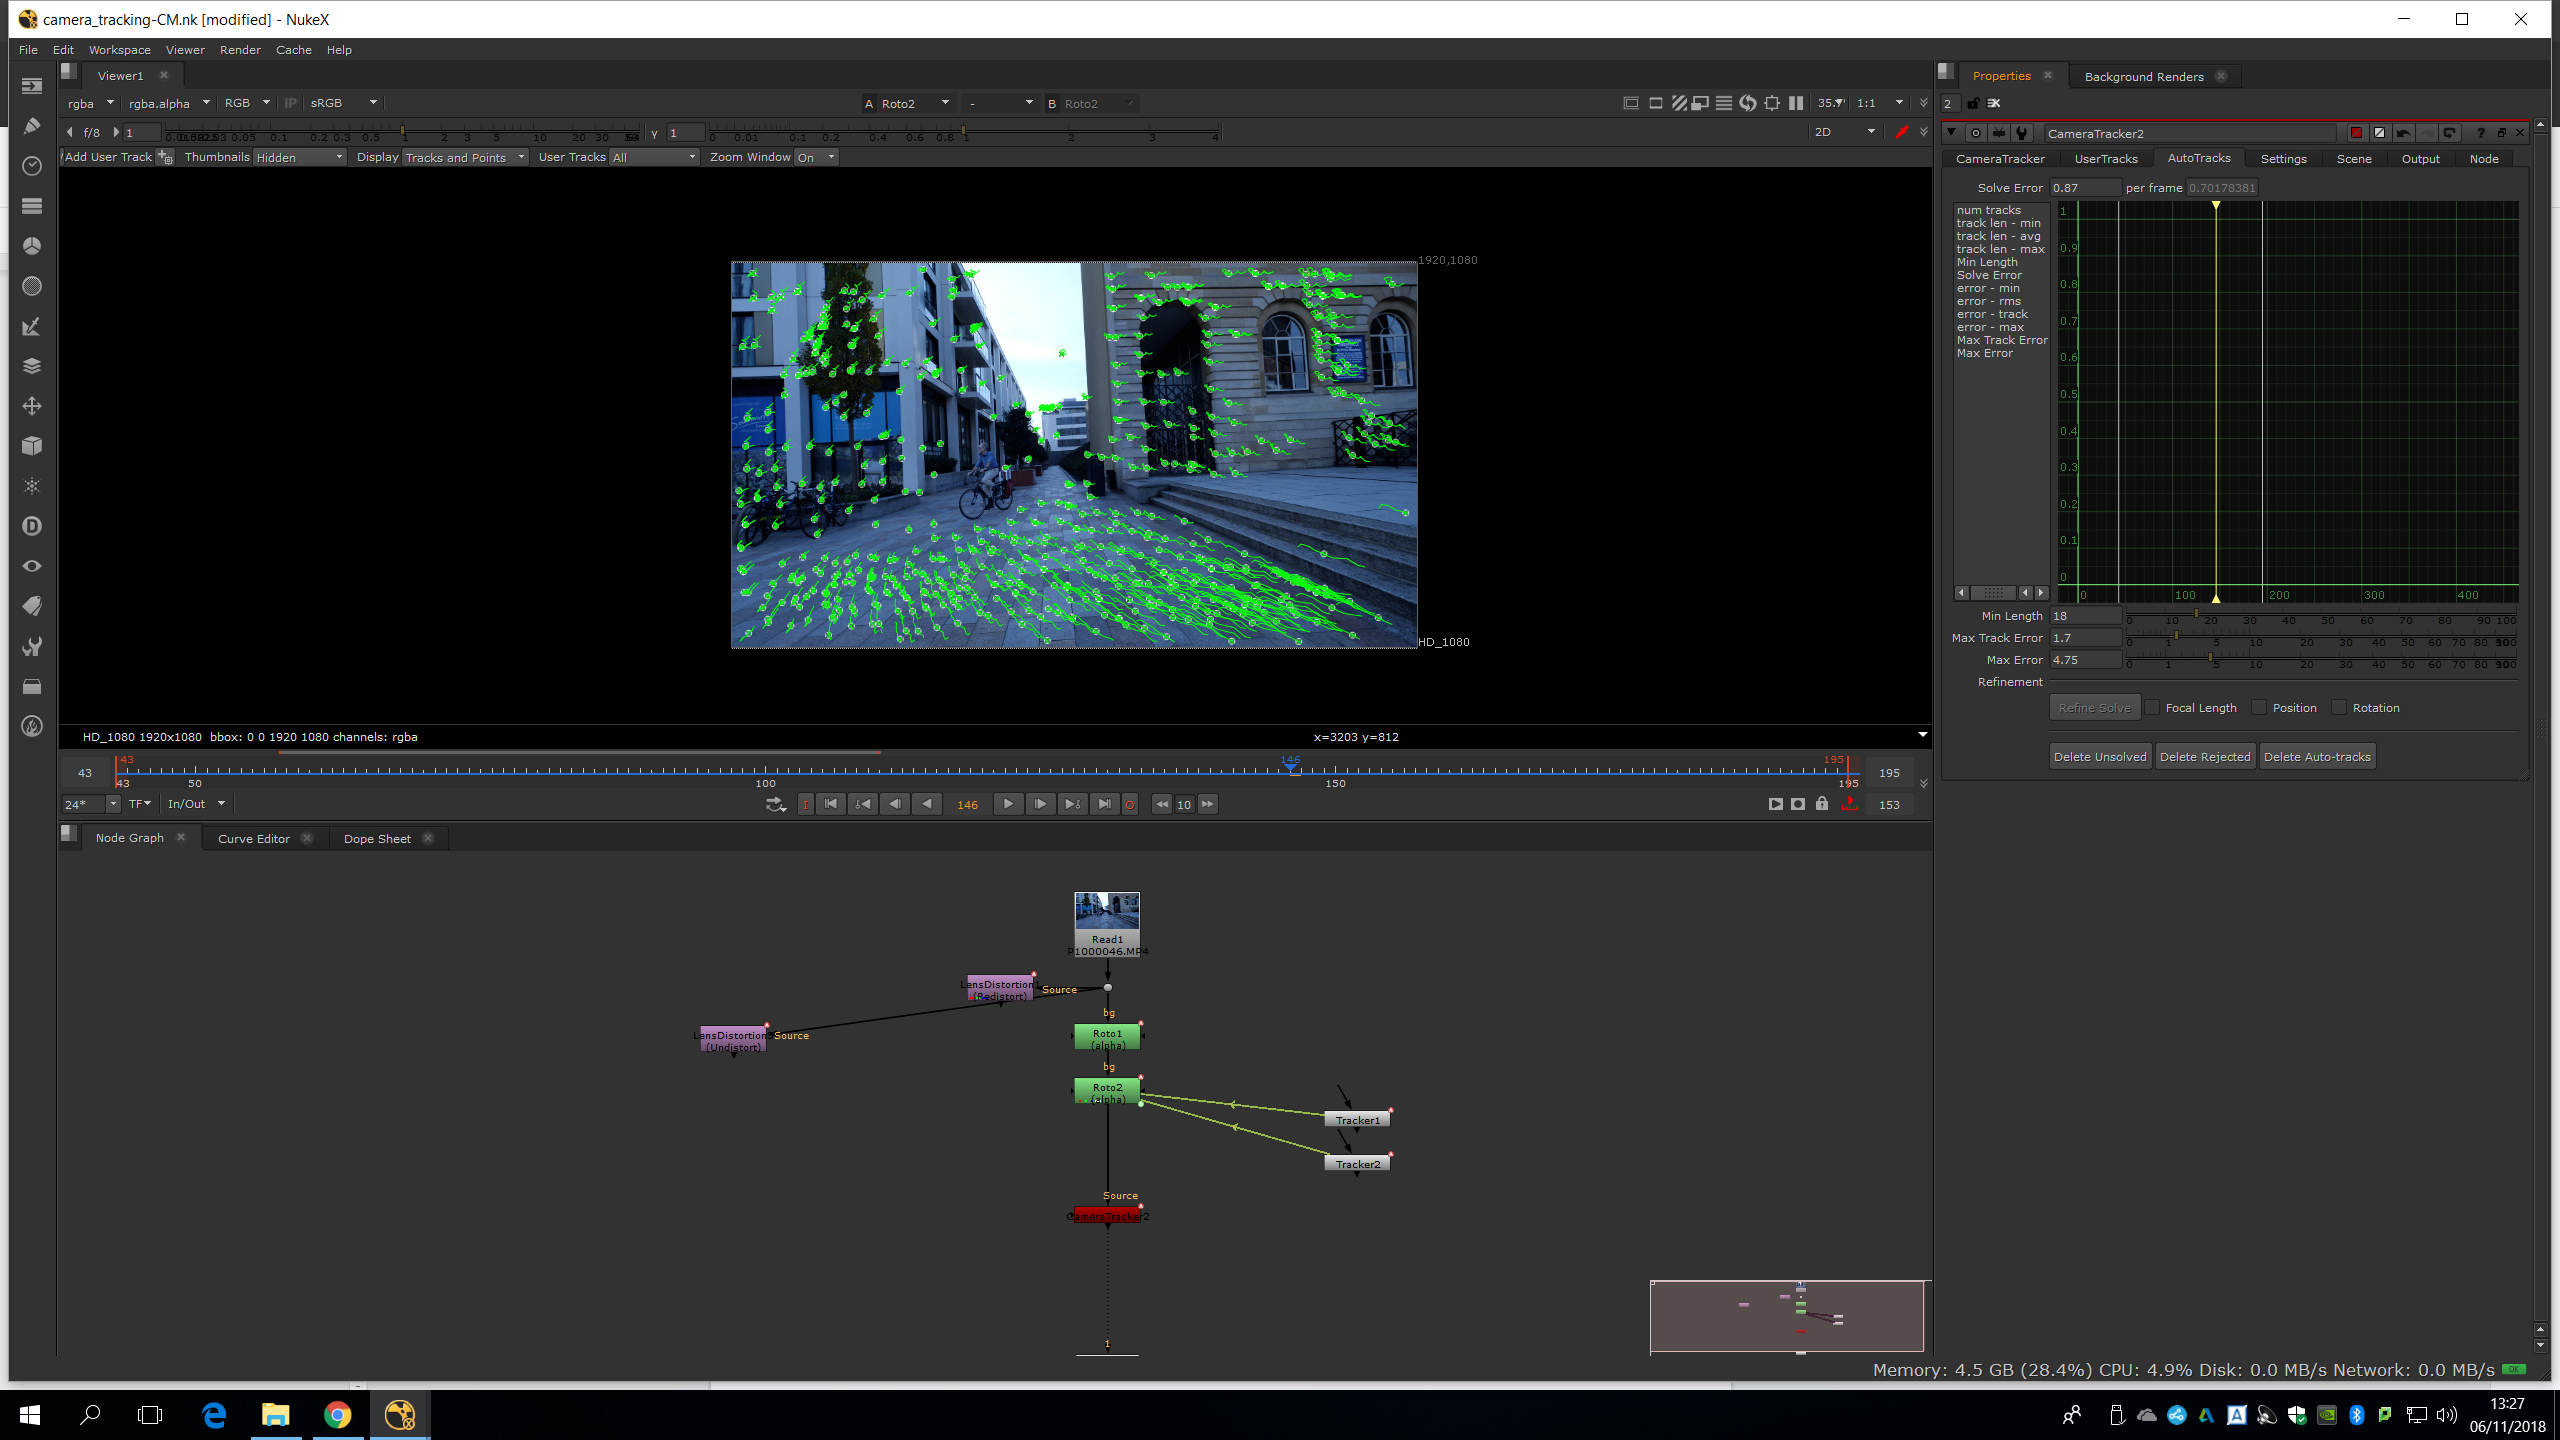
Now we can create a scene. For that, we can click Scene+ and then Create.

Now, we can see the camera and the camera movement, and all the points floating in a 3D environment. If we press TAB we will flip between 2D and 3D environments.
The program recognize that everything is static and is the camera the one which is moving, that is the reason why we needed to delete any external movement.
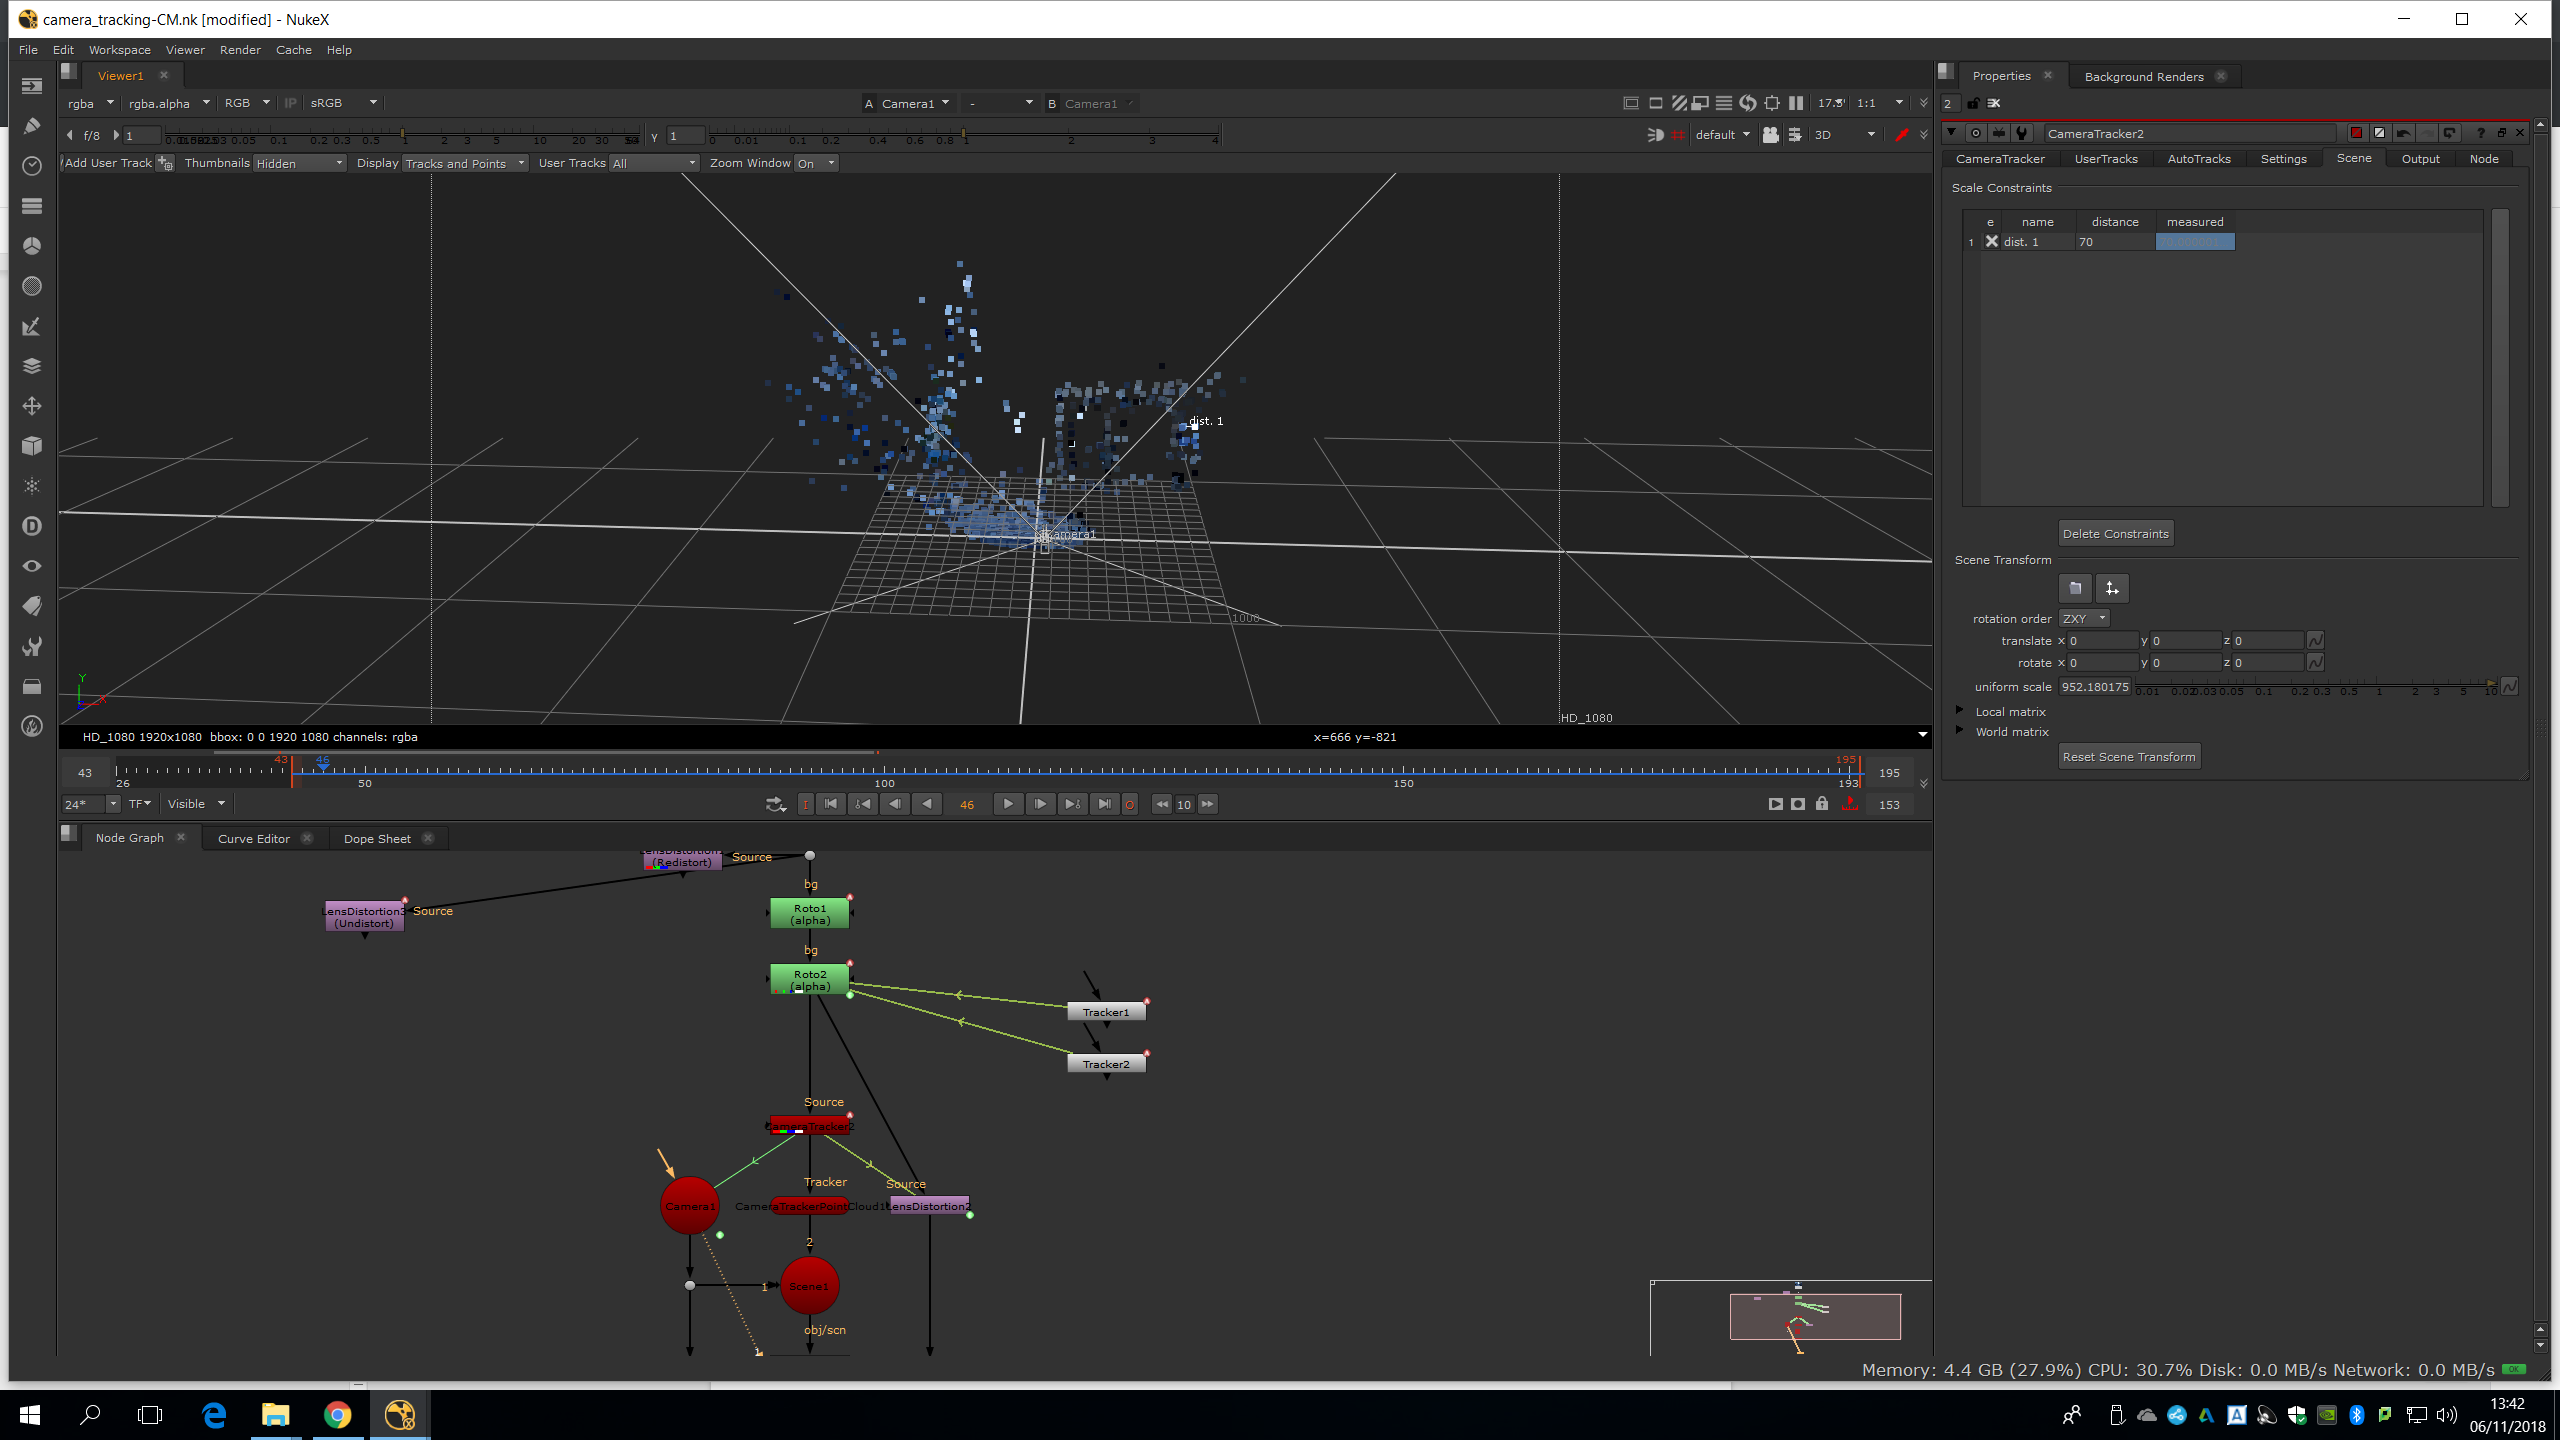
Our camera looks really big, so we will make it smaller. We did not take simulations on set, so we are going to set it approximately. Therefore, we are going to choose two points and tell nuke the estimated distance. To select two points we will need to select one point, press shift and select another point.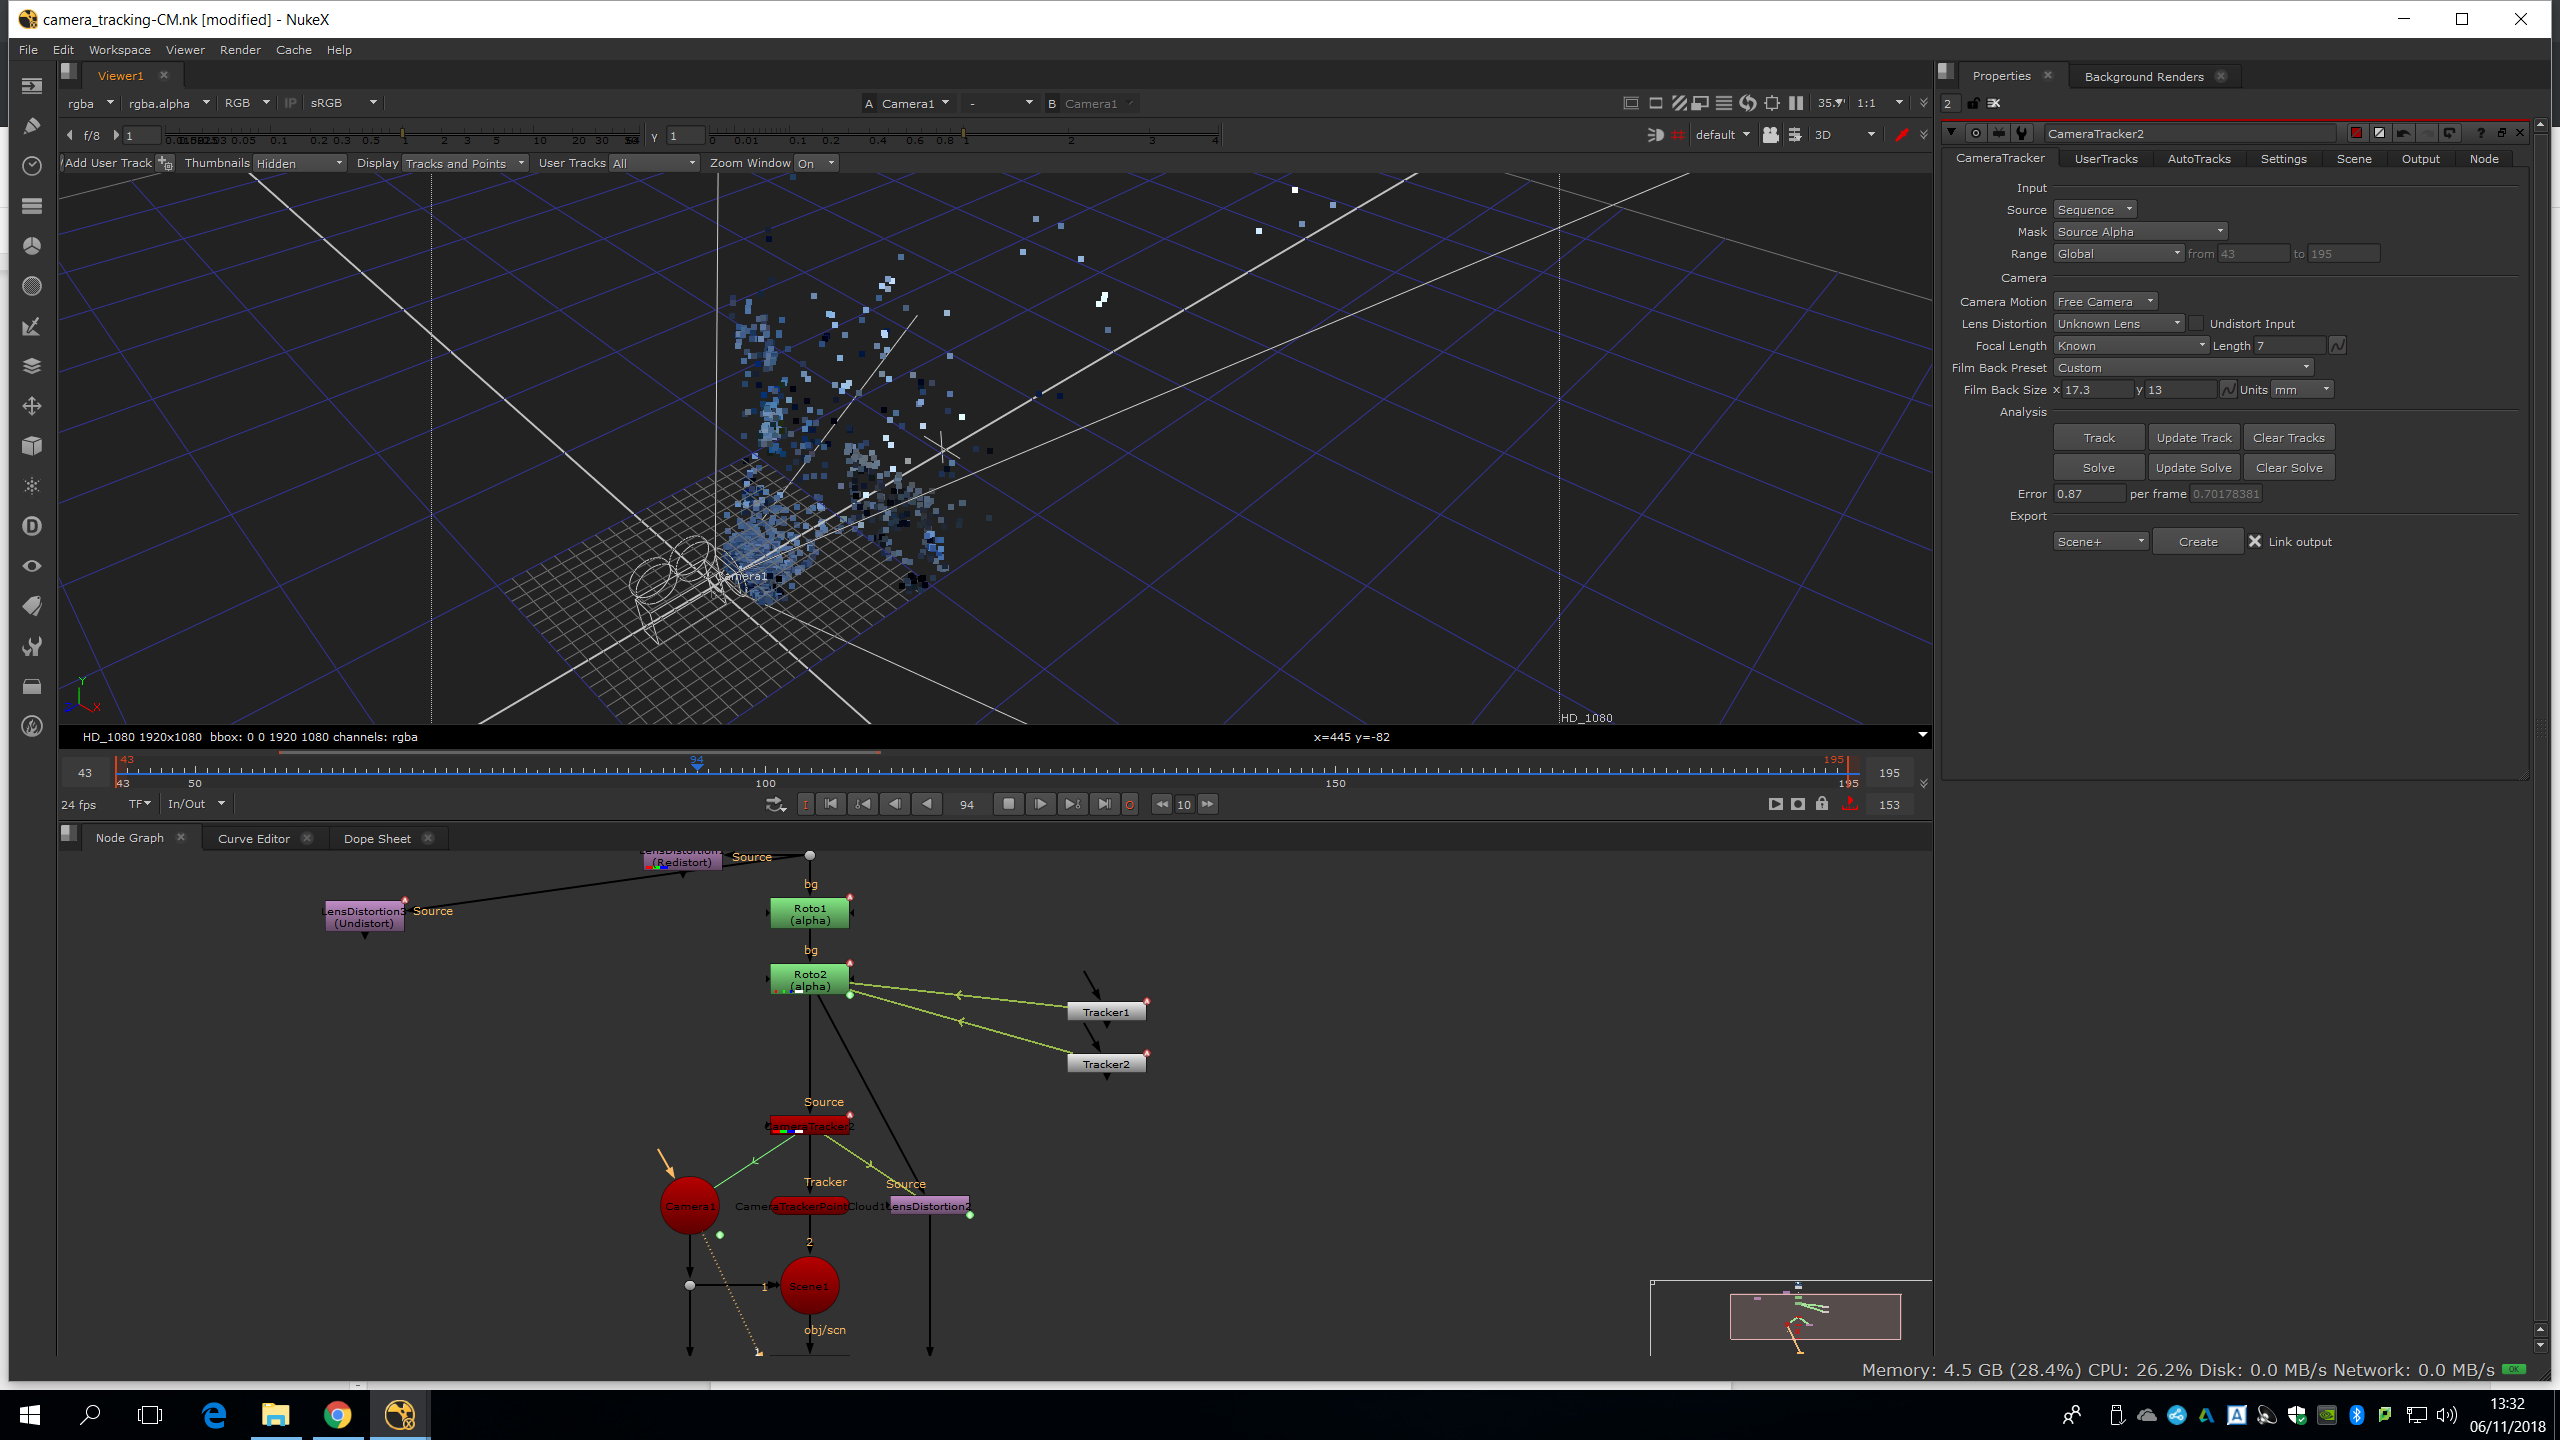
Rigt click, and select add measure. Now, we would be able to add the measure in the scene tab. 

We will guess the distance as it was 70 cm, and we will type it in.
Now the camera looks much smaller. 
Now we are going to set the ground plane. For that, we will go back to the 2D vision, then we select the dots in the ground and with the right click we choose ground plane>set to selected.

Now, we can see i the 3D vision how everything is slightly higher, and the points selected are in the ground level. 
Now, we will define X and Y axes. For that, we will choose 2 points in the same axe in the X plane, we will selec them ans choose with the right button ground plane > set X
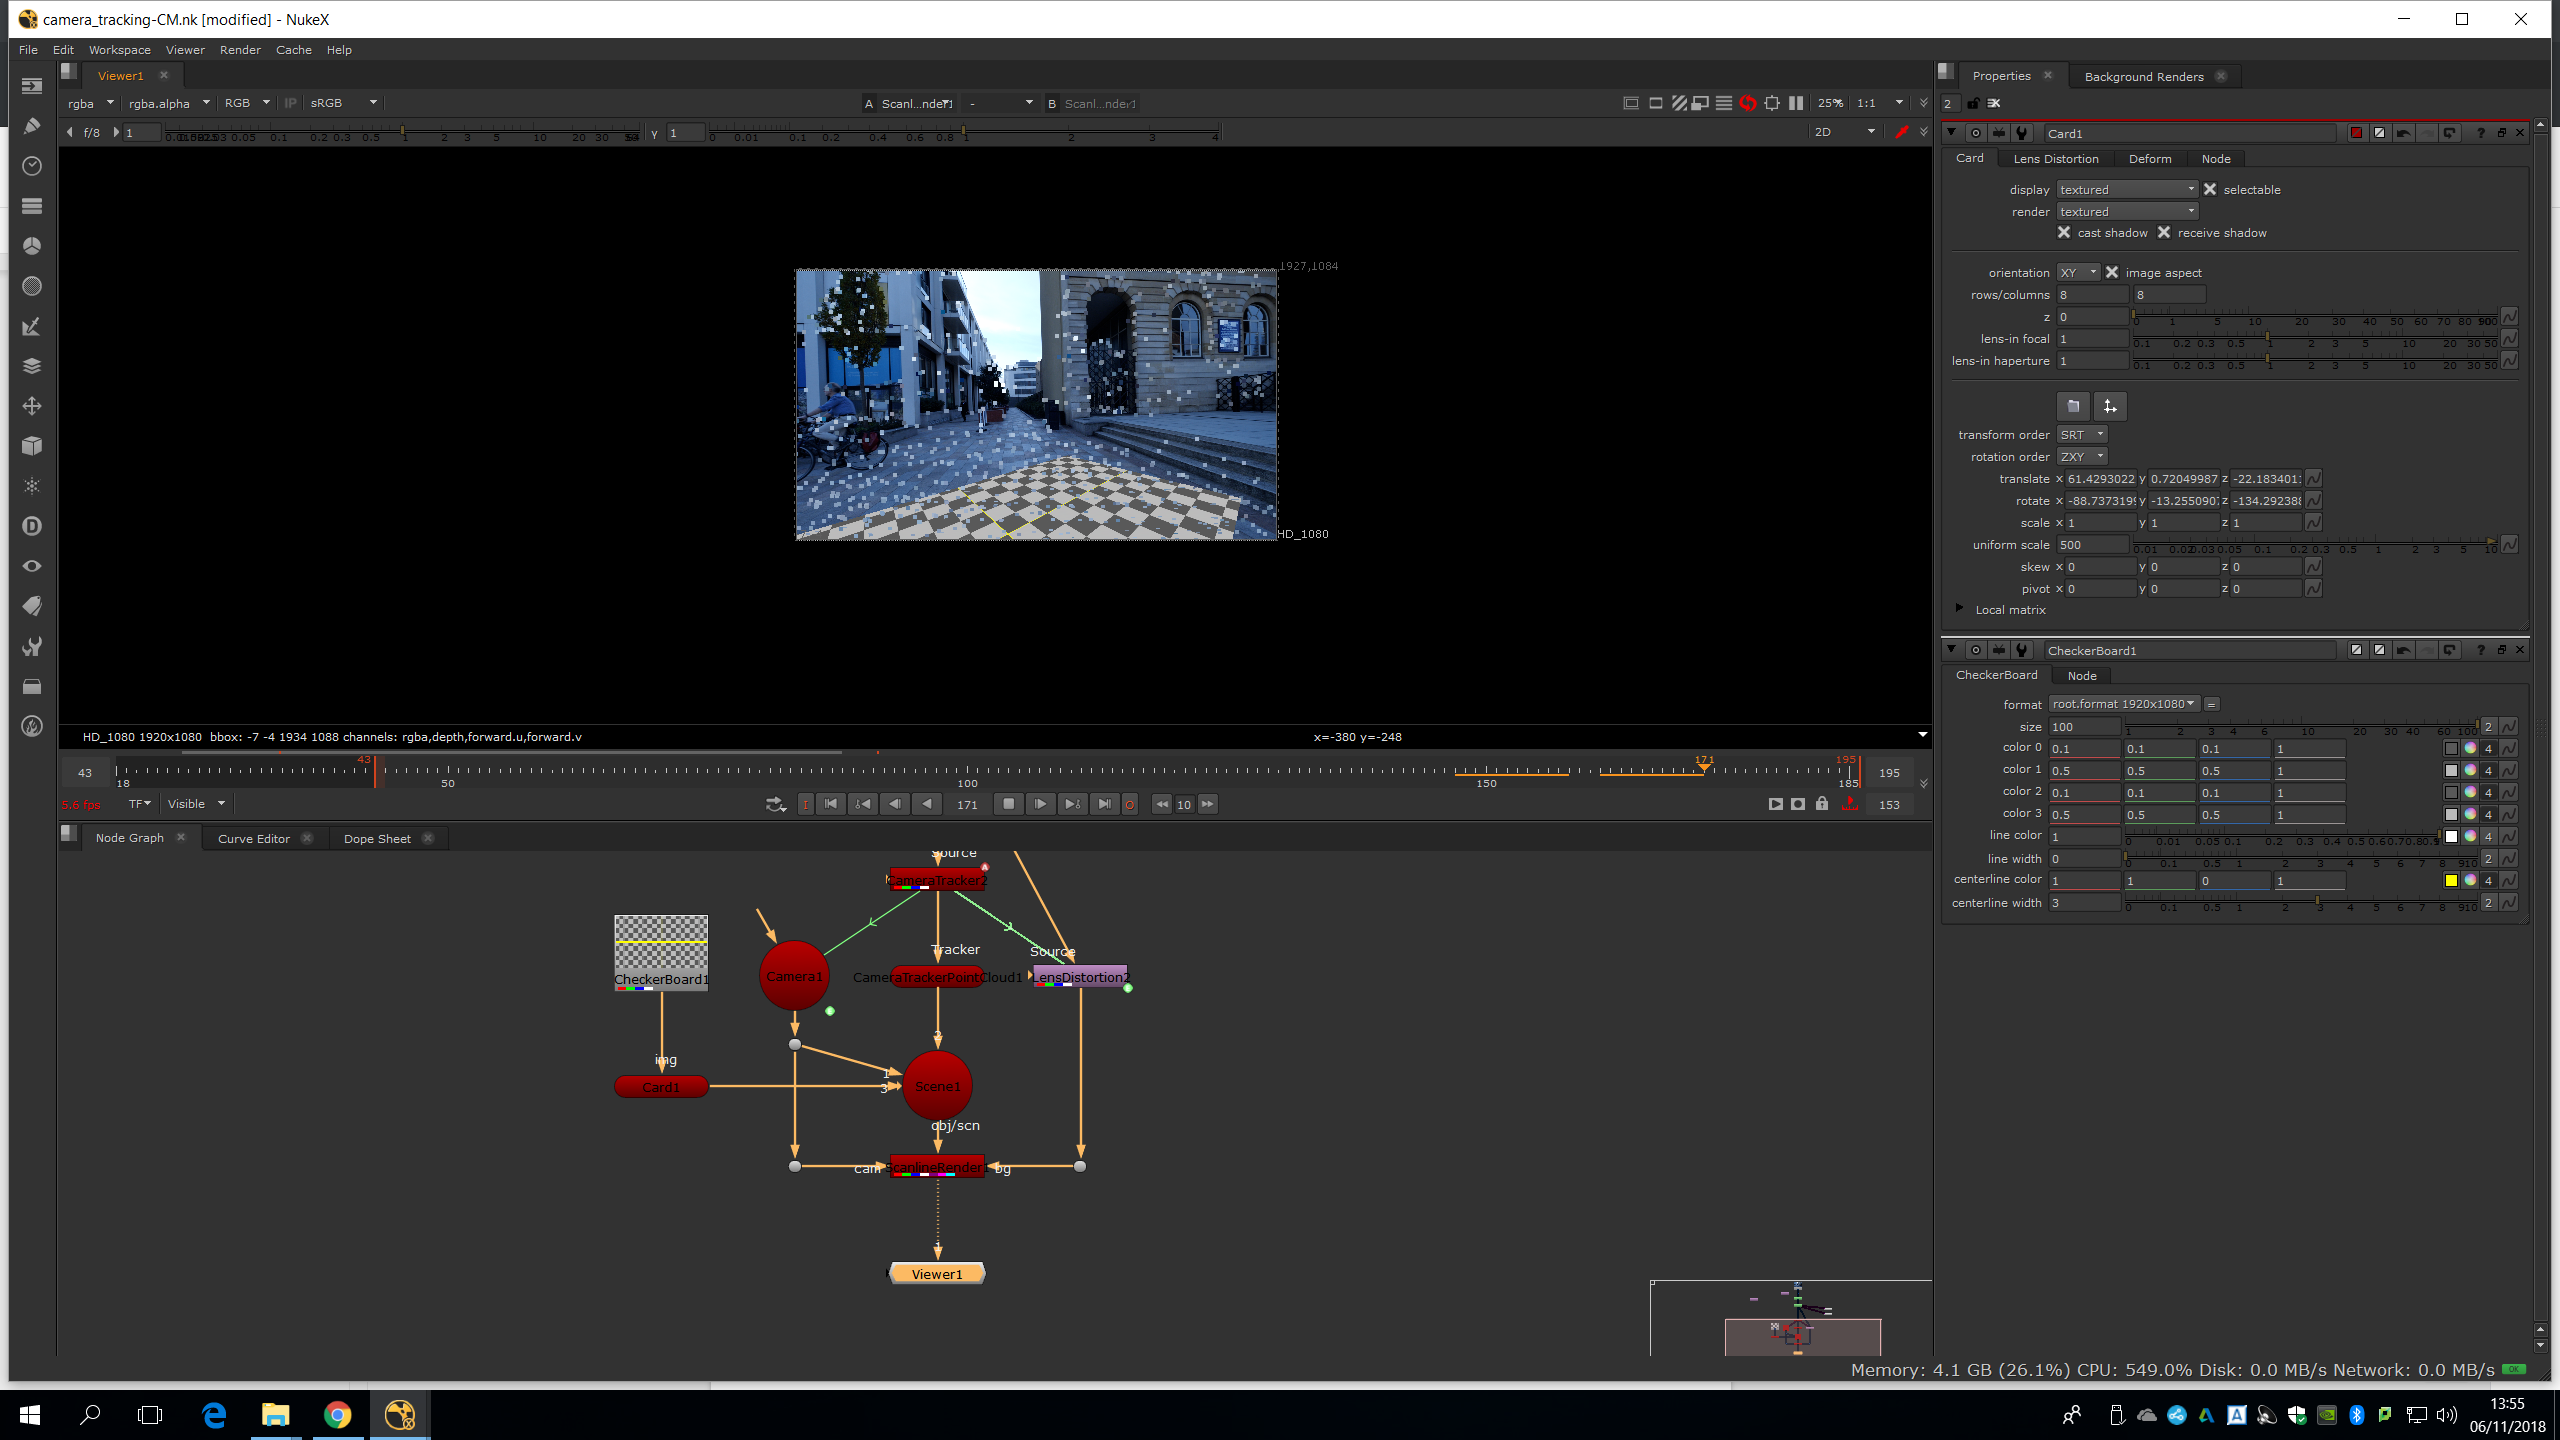
Now we are just going to thrown in a card to see how it reacts.
We are going to crate a card. For that, we choose few points on the same plane in the area in which we want to create the card. With right click we will choose create>card
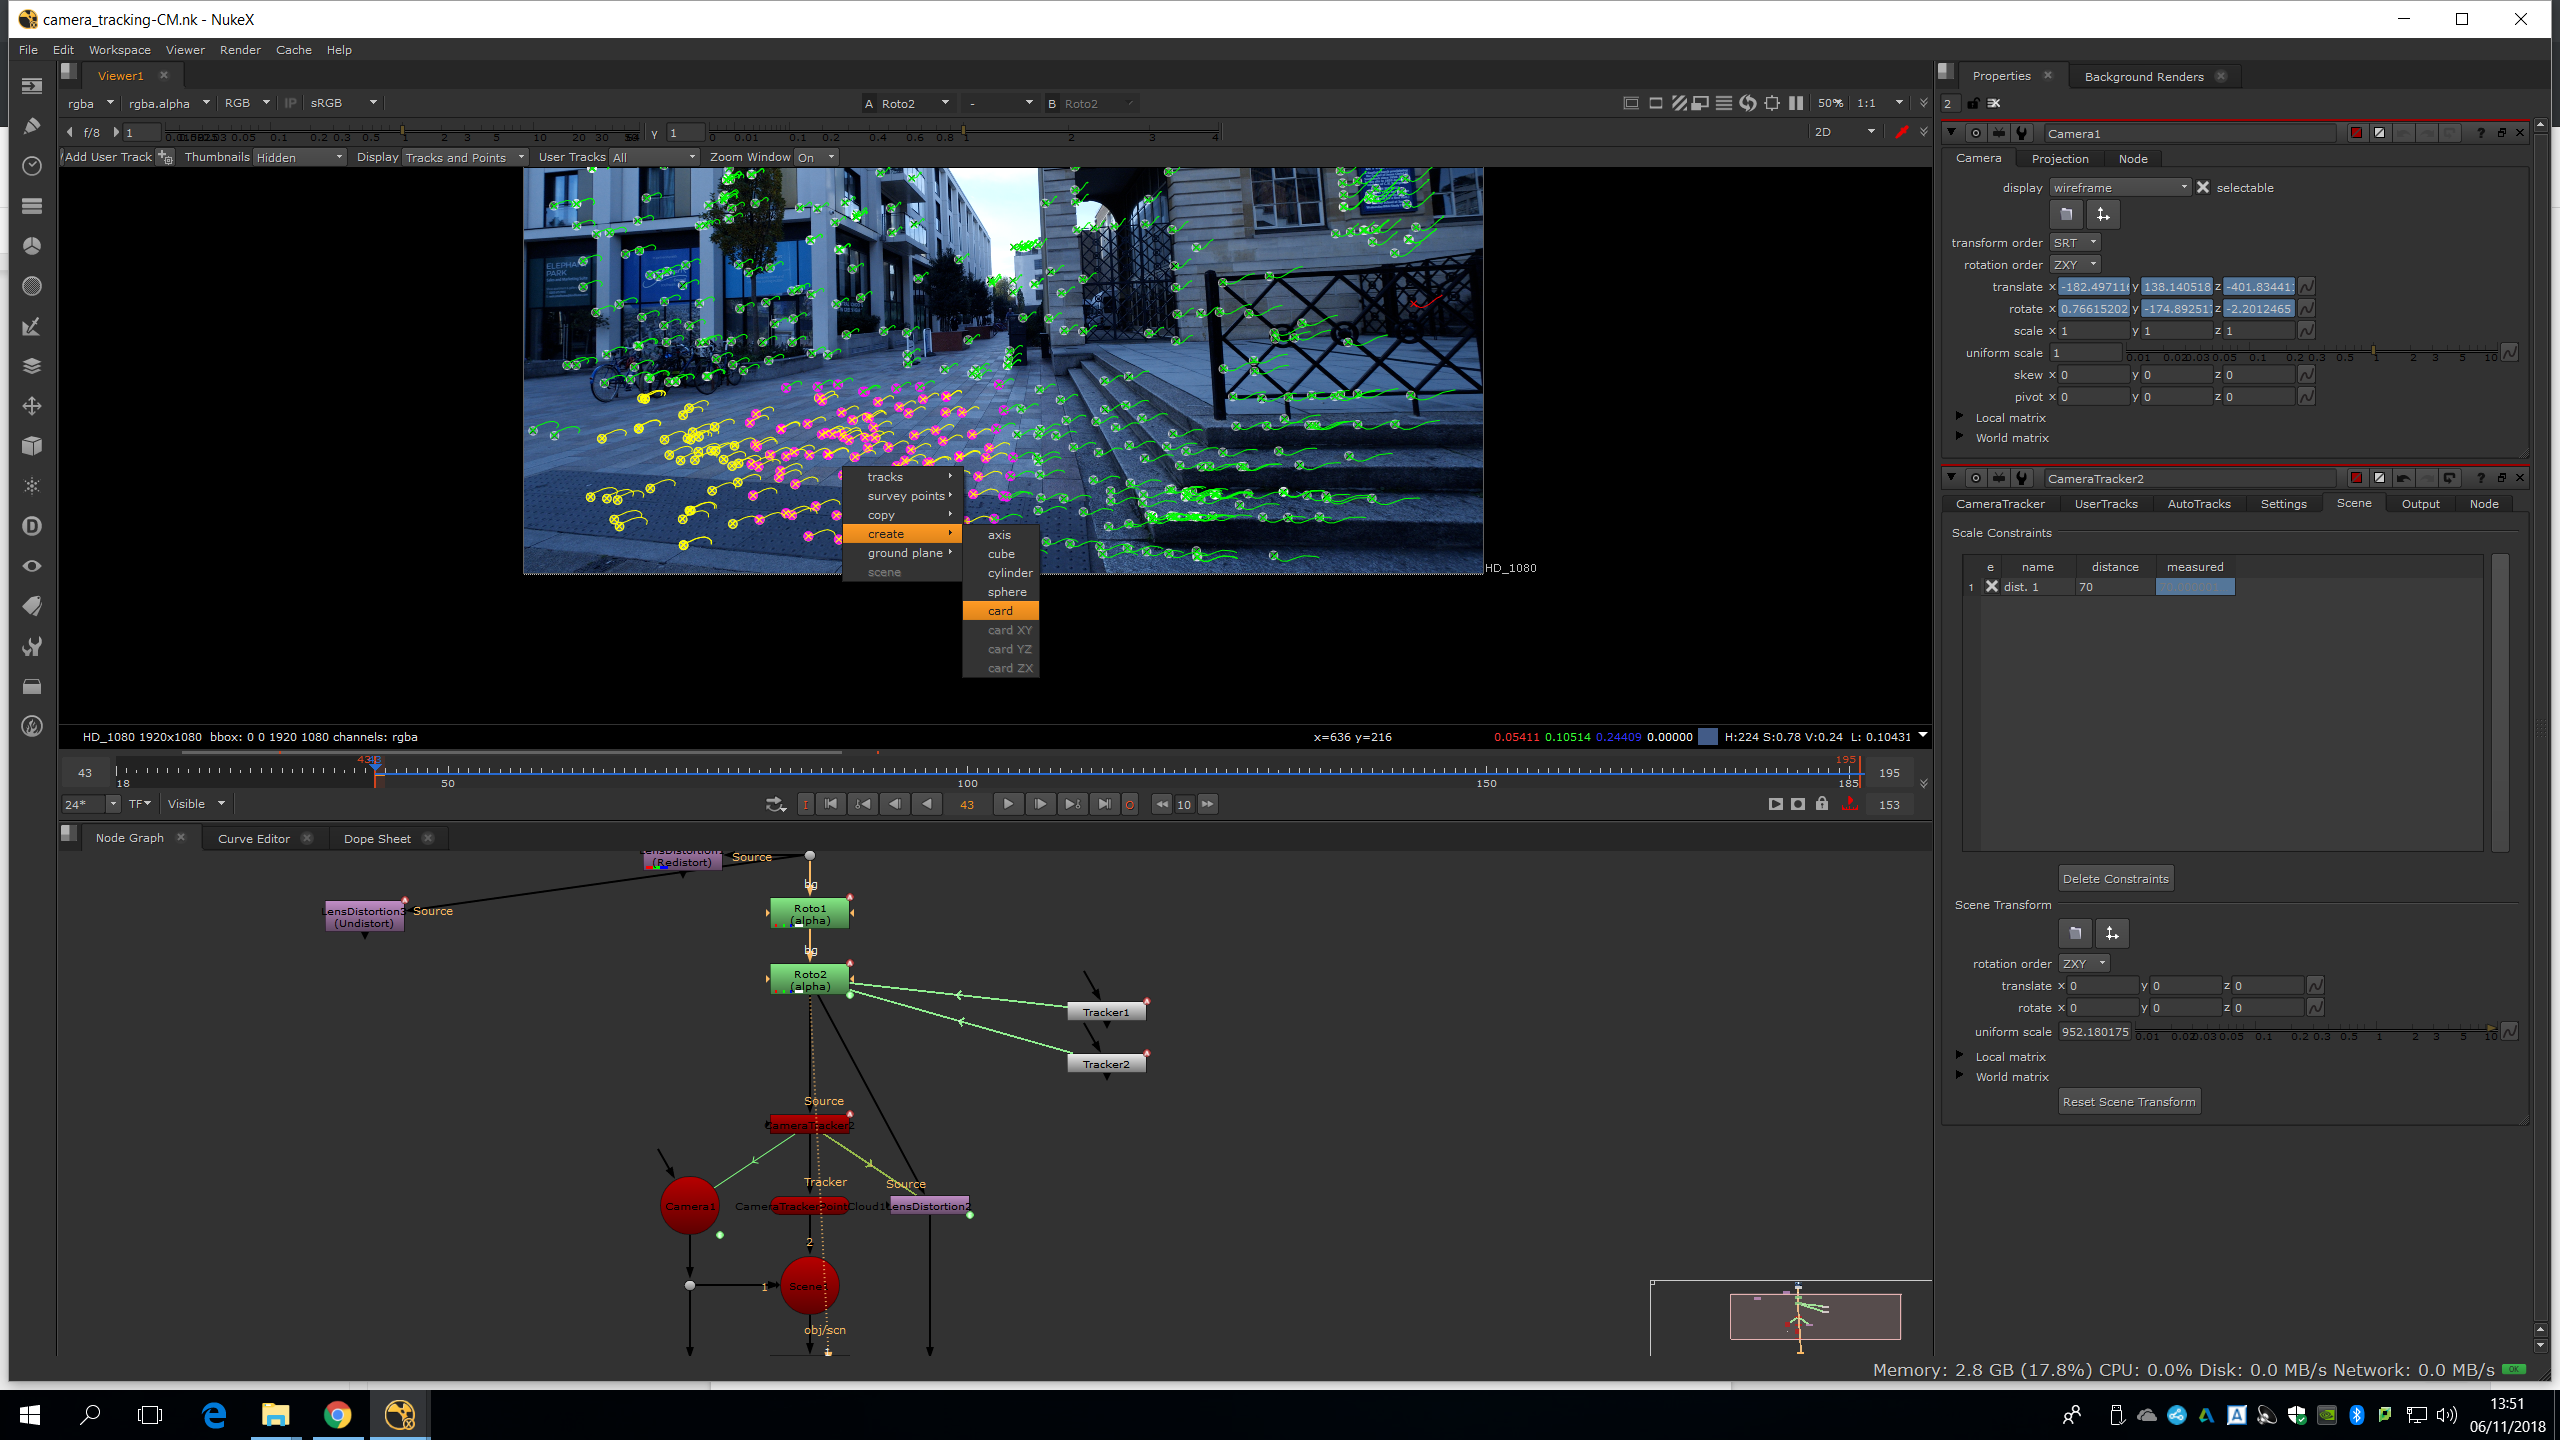
Now, we must create a Checkboard and attach it into the card. By attaching the card to the scene, we are going to be able to see the checkboard in the footage if we put the viewer in the ScanlineRender. 
We put the scale into 500. 
If we play it we can see how the checkboard is integrated in the footage and follows the movement of the camera.