Presentation of the brief and final result
For this first shot, the brief was to remove the “White Building” letters from the building and replace them for “Endeavour Institute”. We were asked to use the font Didot for the new text.
In the following video, we can see the project, including the final version, the original version, the first version, the final version and the VFX breakdown.
Now, I am going to go through he whole script and the corrections, in order to explain how did I get to the final result and explain very step.
Analysis of the script
Prepare the footage
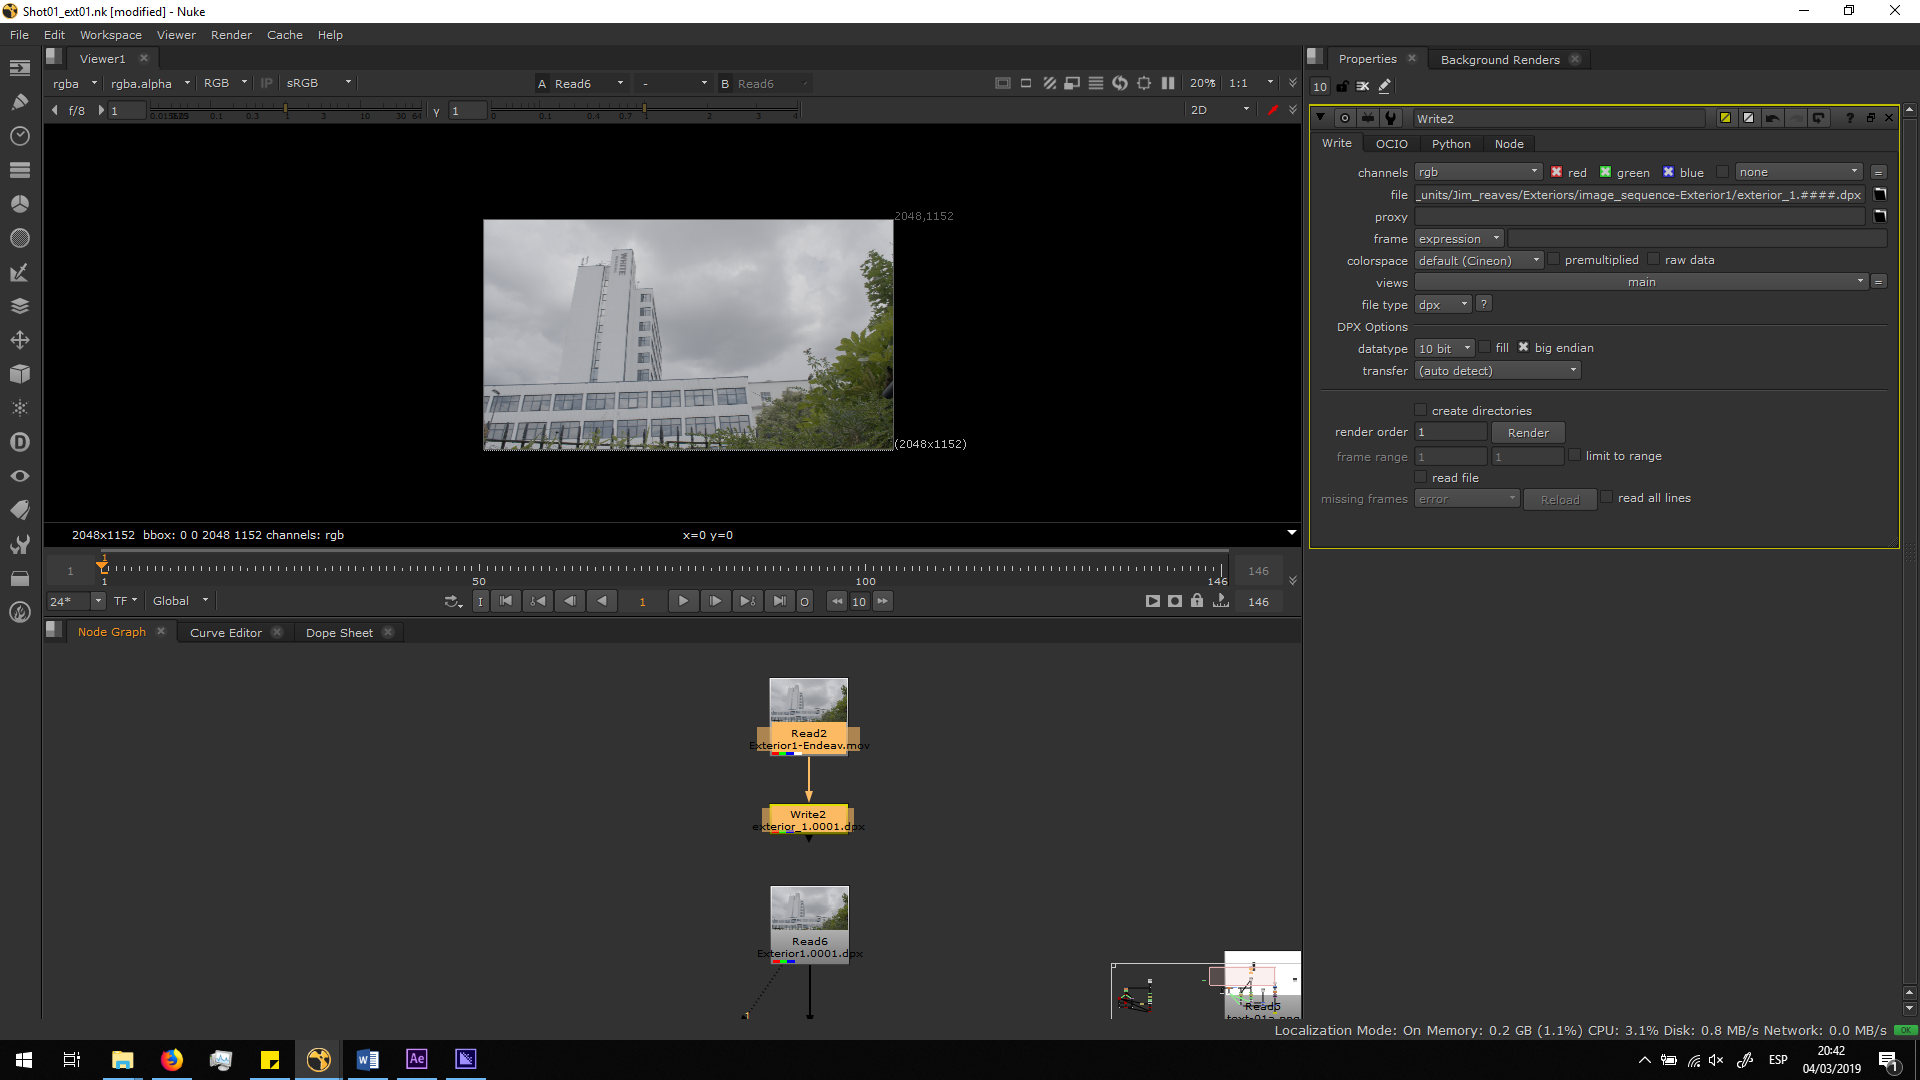
The first thing we need to make while editing a footage is exporting that footage into .dpx format. DPX format exports every frame of the footage as a single image with no compression, this means that is a lossless format, bigger than the original .mov format. Therefore, it needs to be done to preserve the maximum quality of the footage while working with it, in order to have a major quality in the final exportation. Otherwise, while working on a shot, it is unavoidable to lose some quality, but if we work over a .dpx this looseness it would not affect to our final exportation, since we are going to be working with a huge footage.
Roto painting
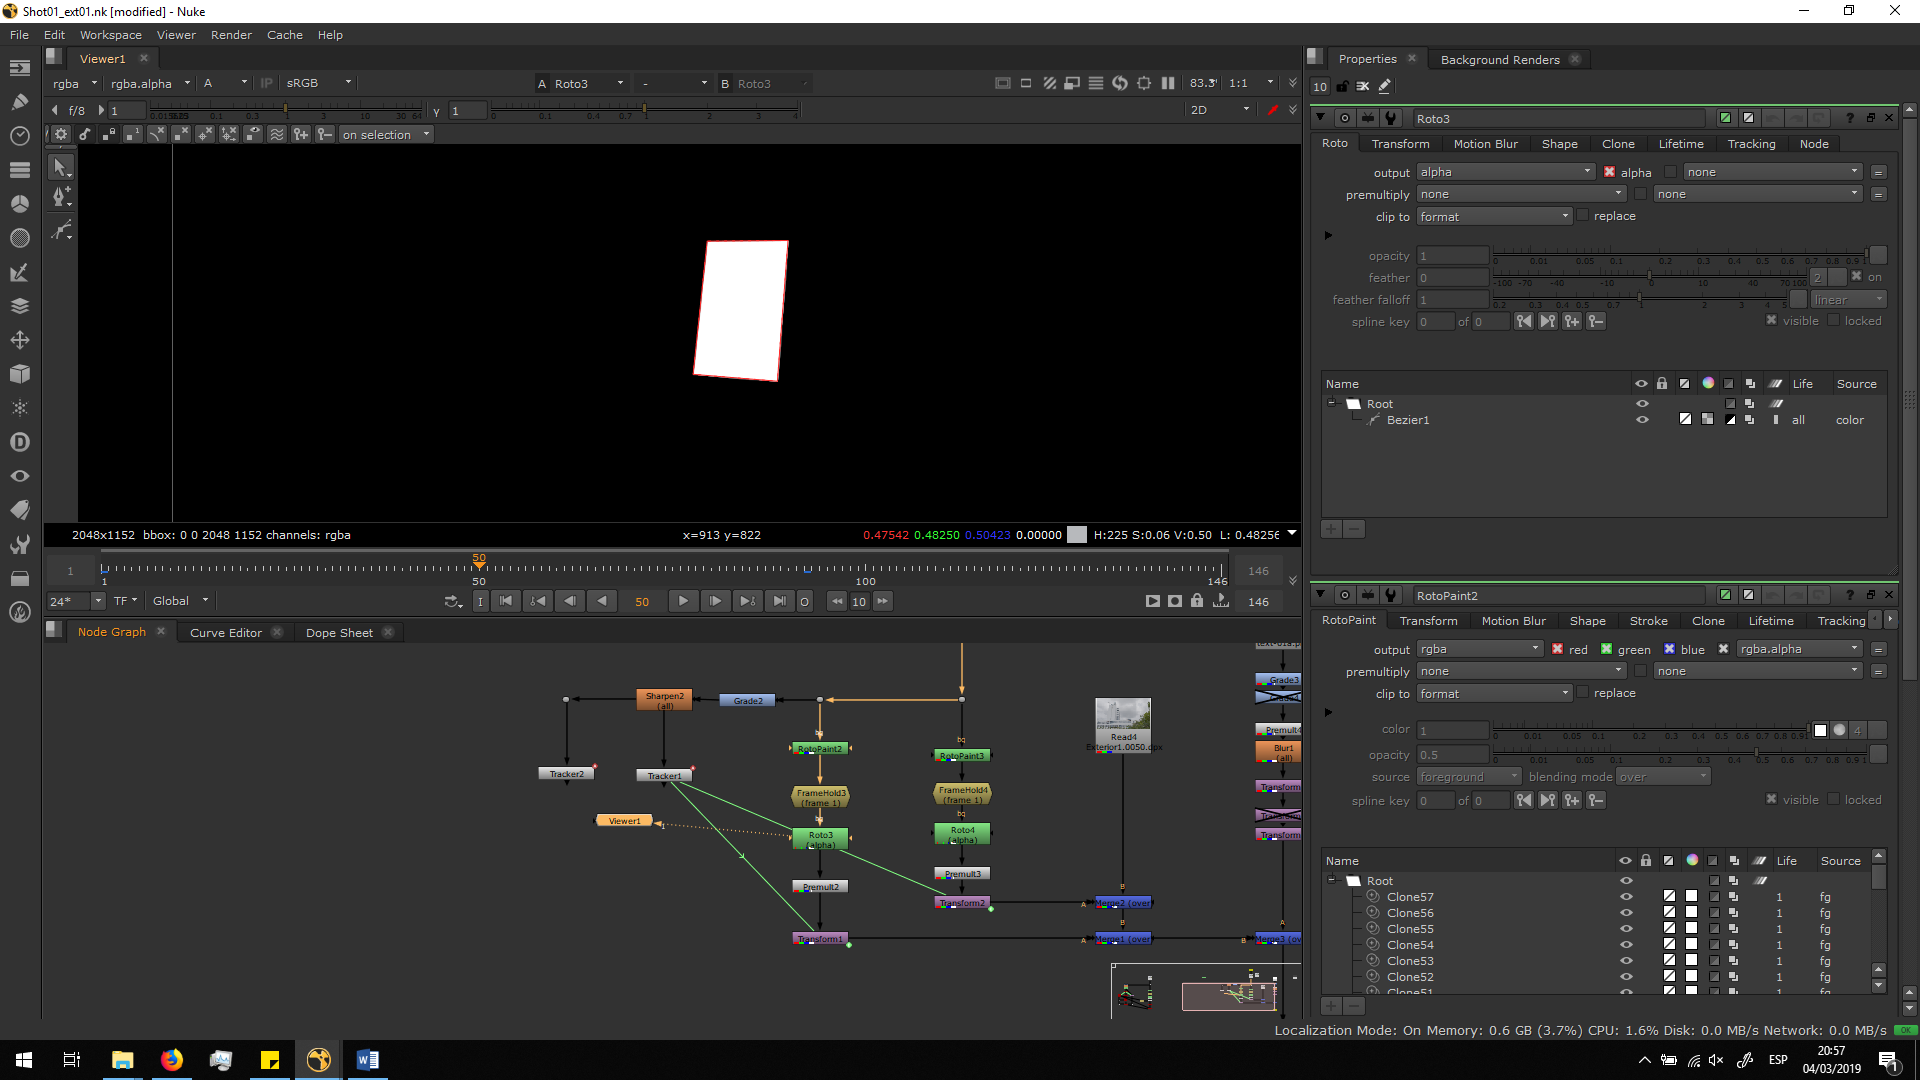
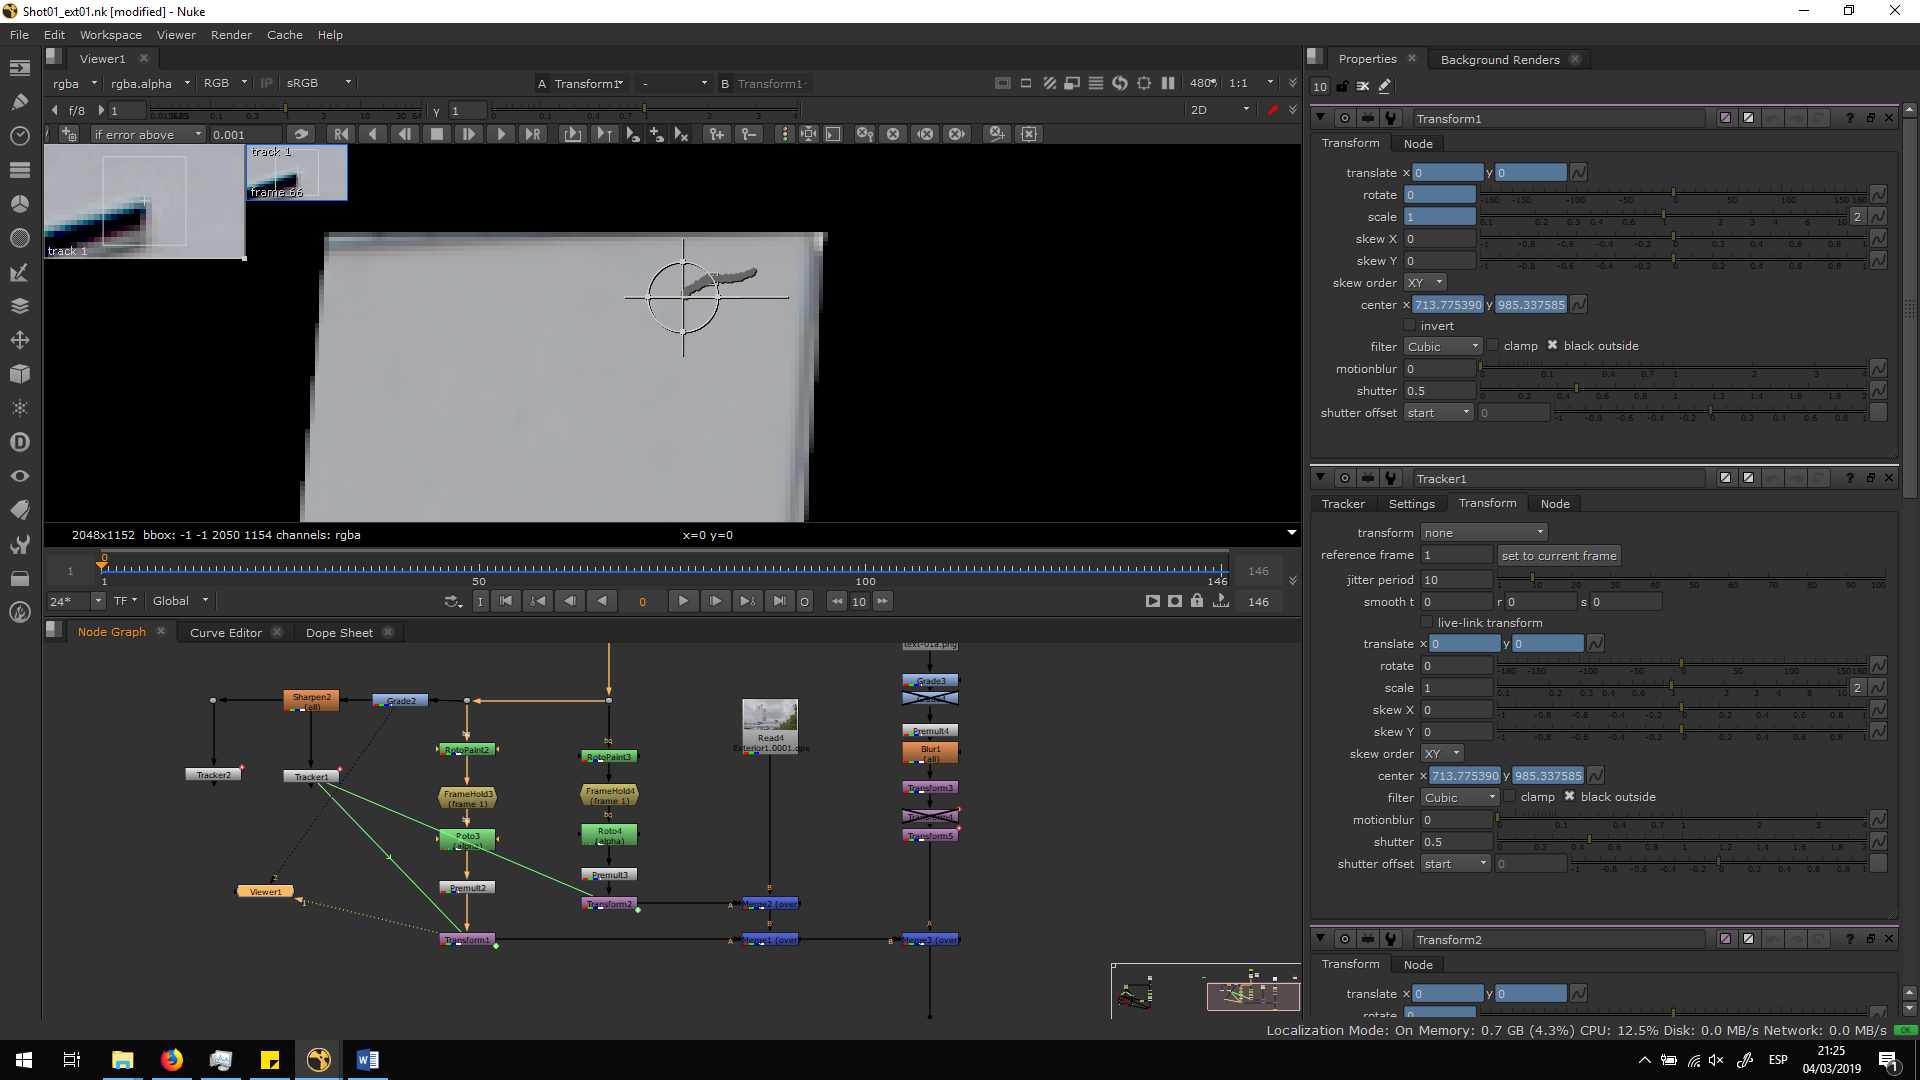
The first thing we are going to make is deleting the current text in the building. For that, we are going to use a Roto painting note. With this note, we can use a brush and paint over the image replacing it with other part of the picture. As we can see in the image, we have two brushes: The white one is the part of the image that is going to be replaced, and the grey one is the pattern it is going to use to replace it. 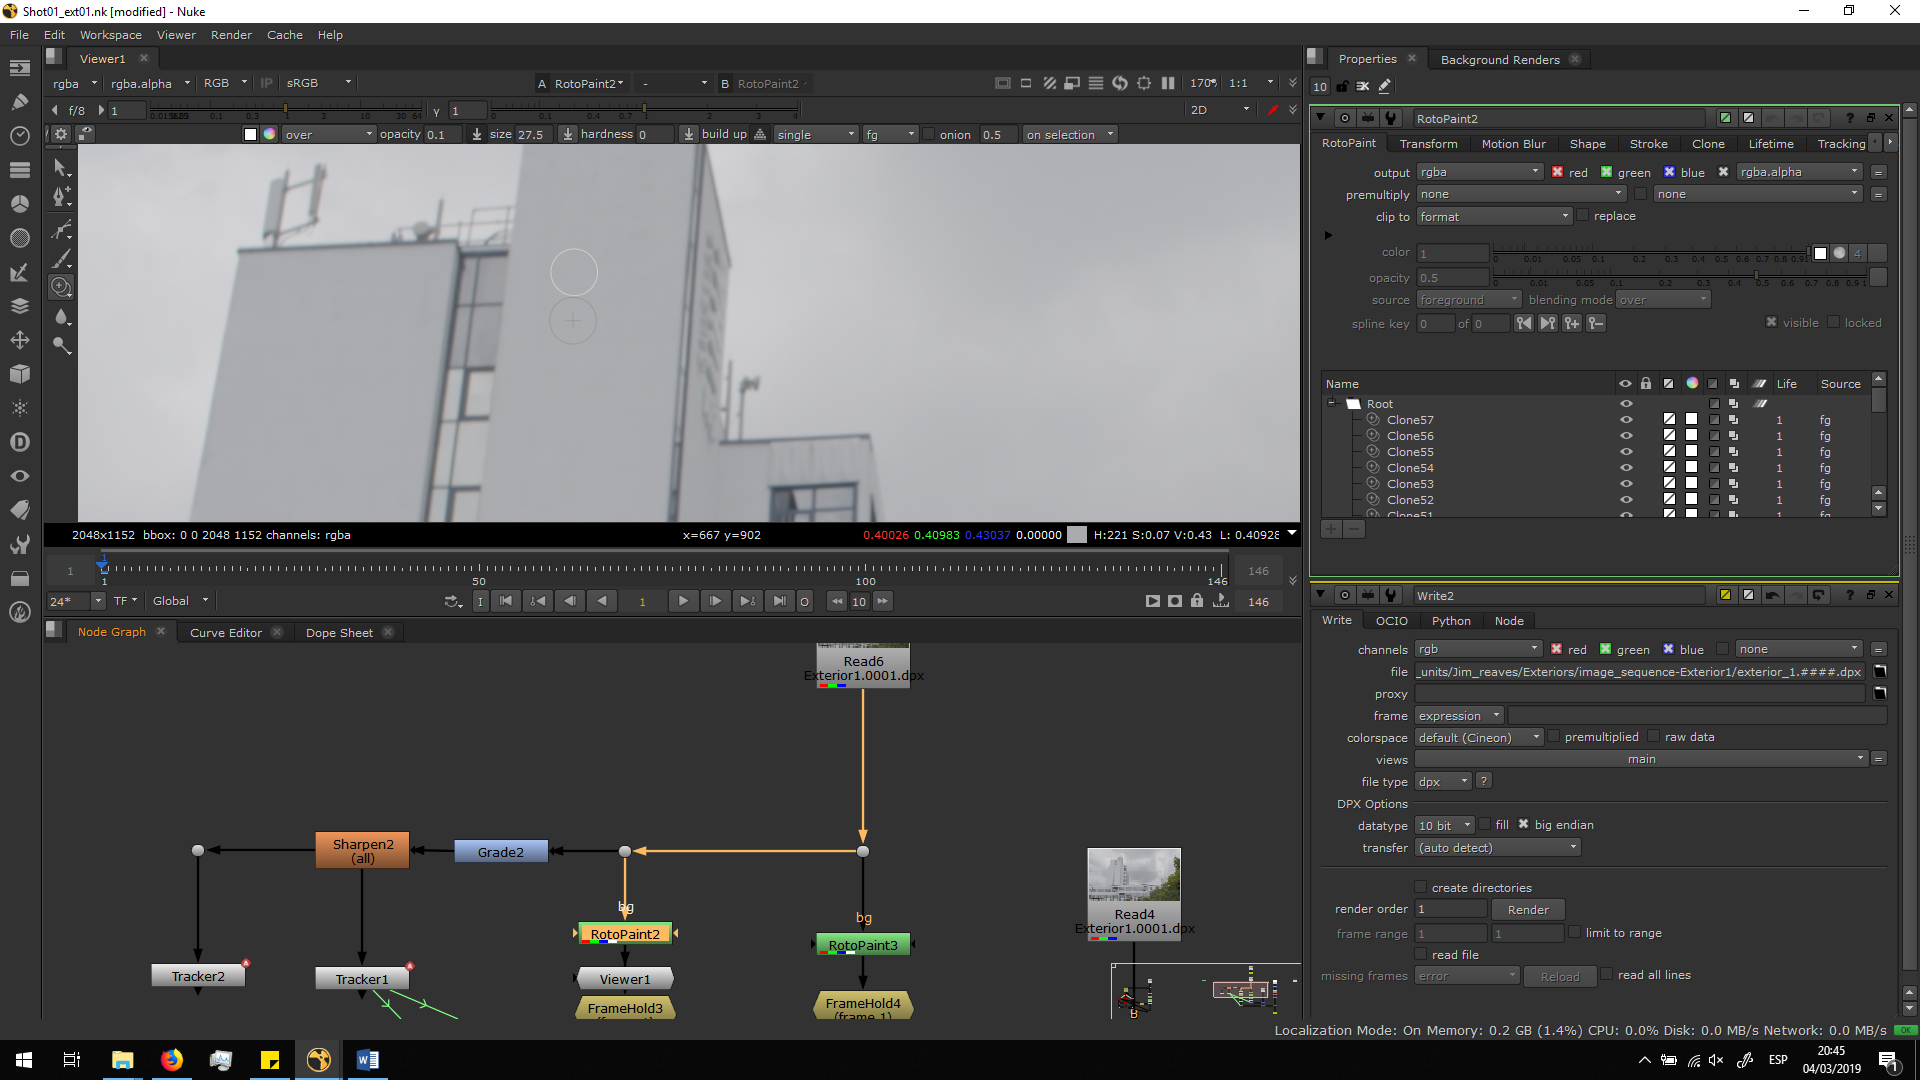
To have a better result and blend better the replaced part with the original image, is better to use a brush with no hardness and soft transparency. Therefore, we are going to make the roto painting in frame one, and then we will add a Framehole in order to stop the video in that frame in which we have the text deleted.
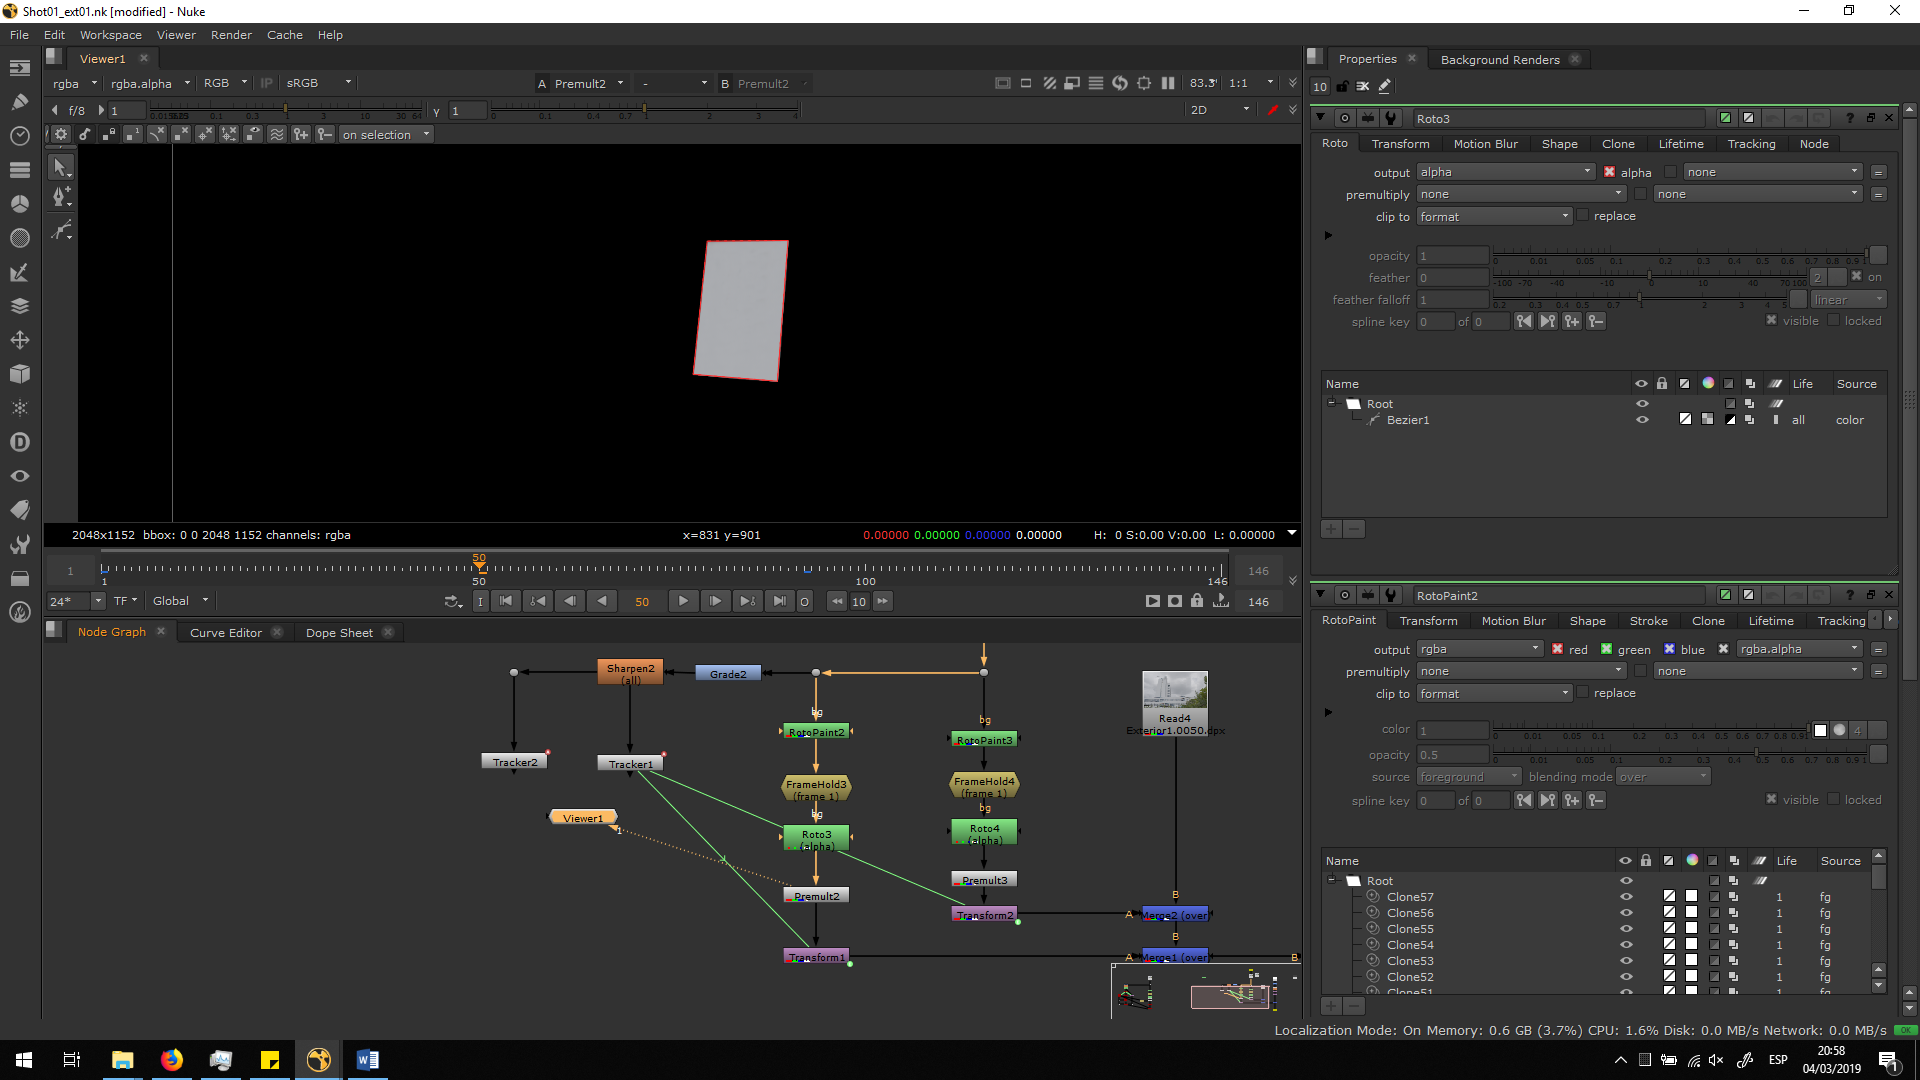
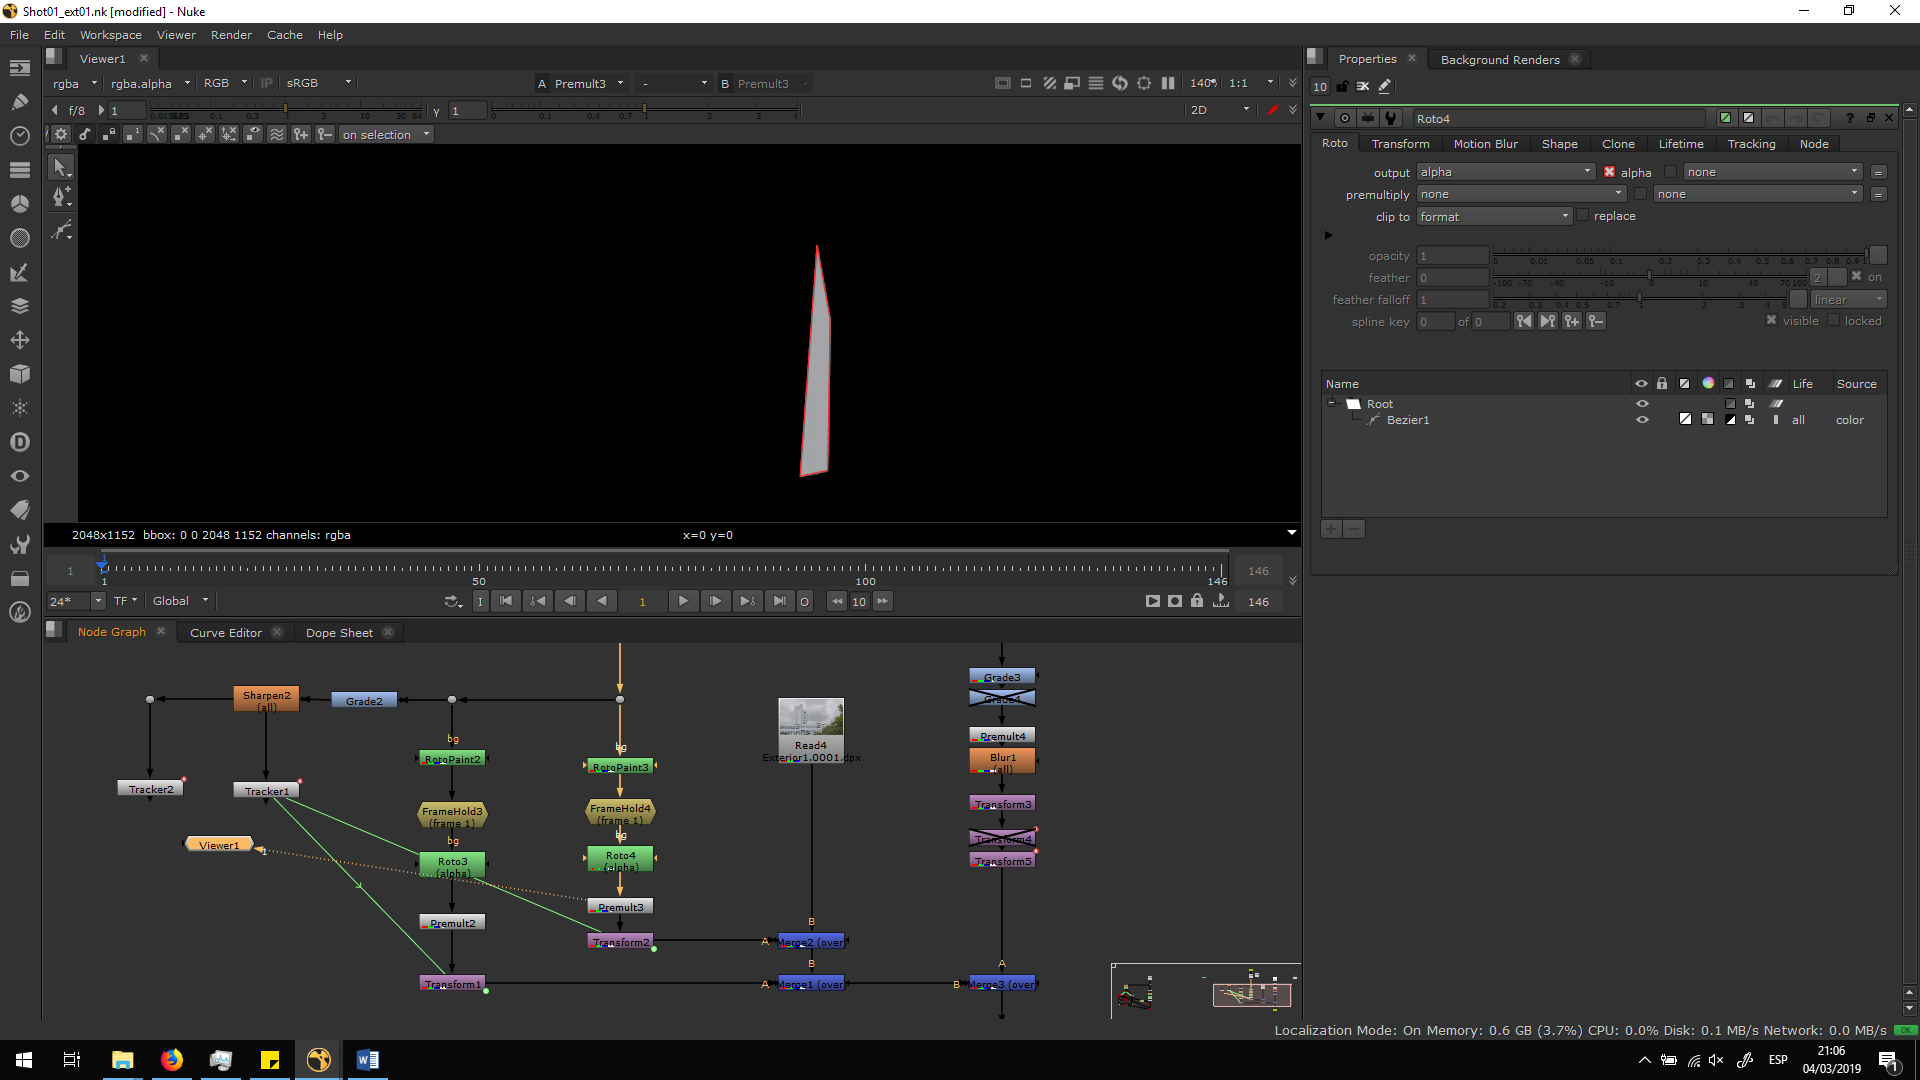
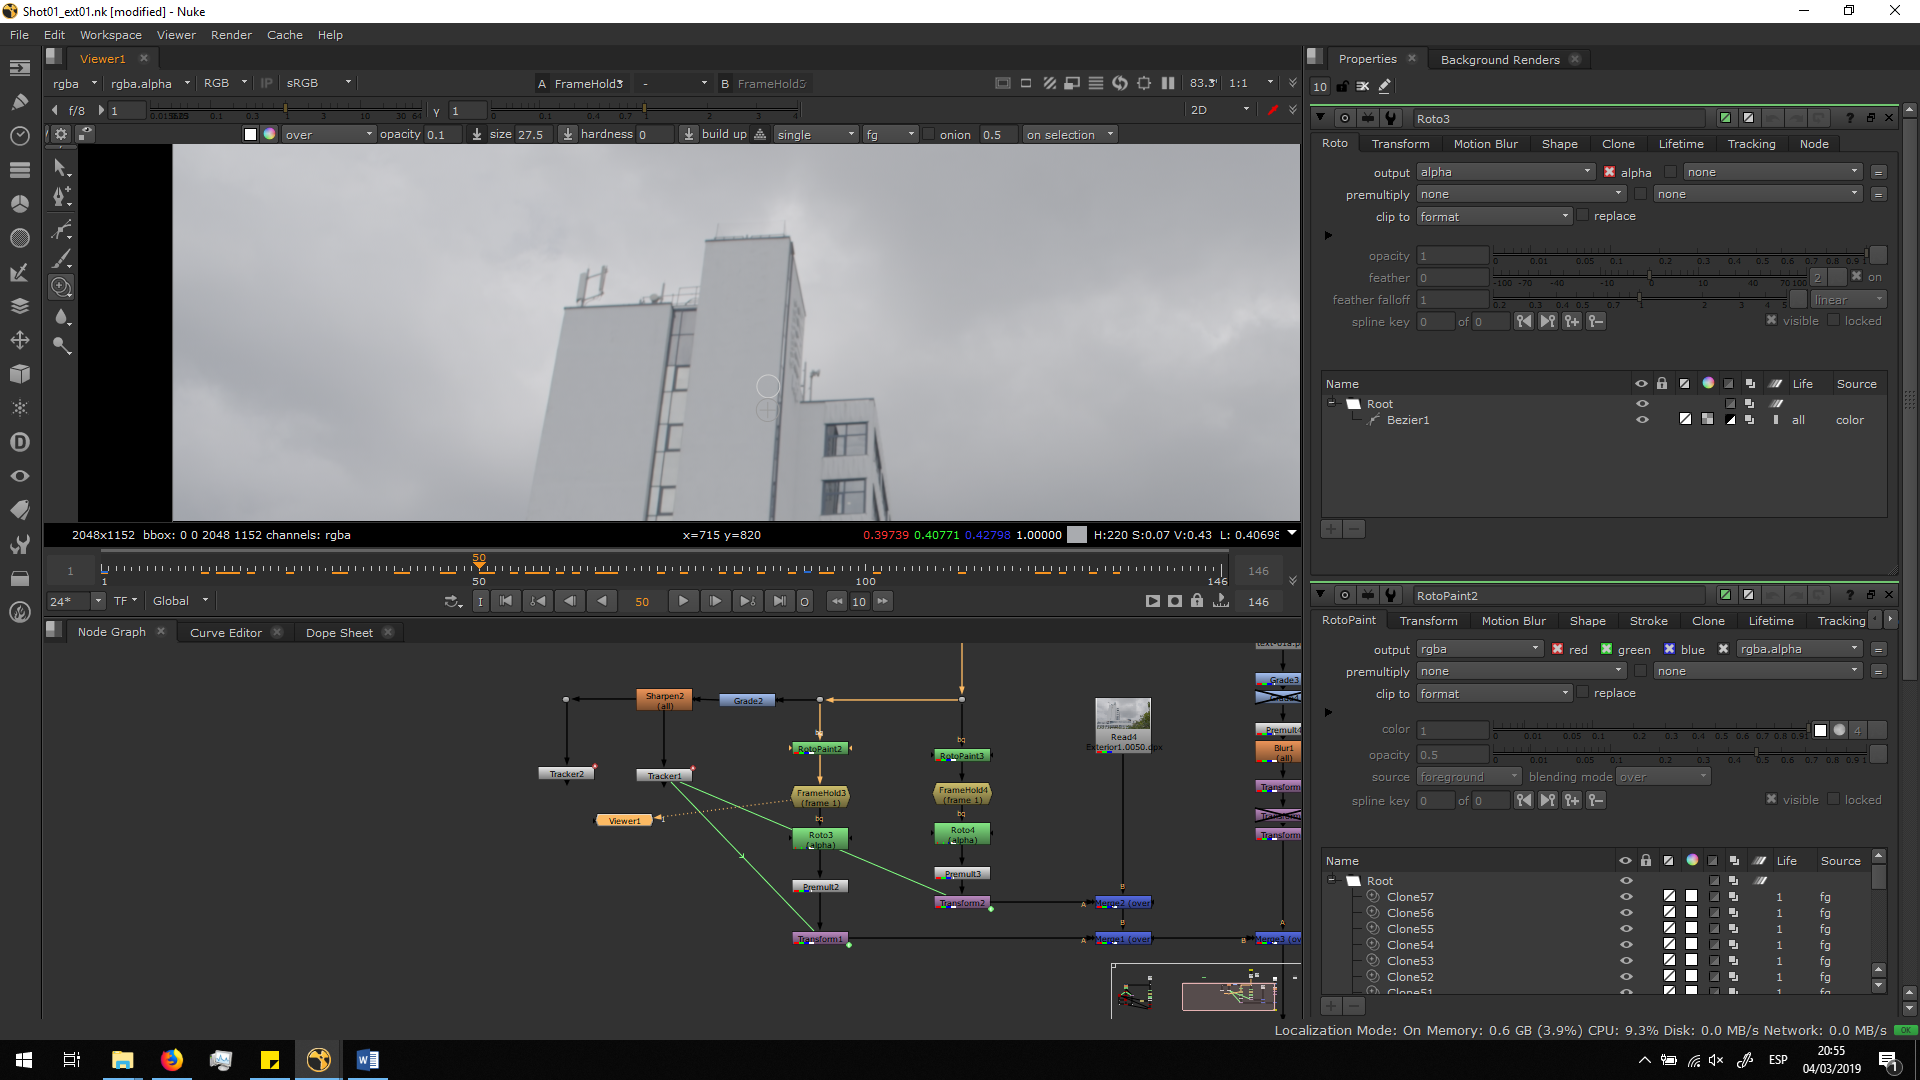 Now, we are going to make a roto isolating only the part of the image in which the text was.
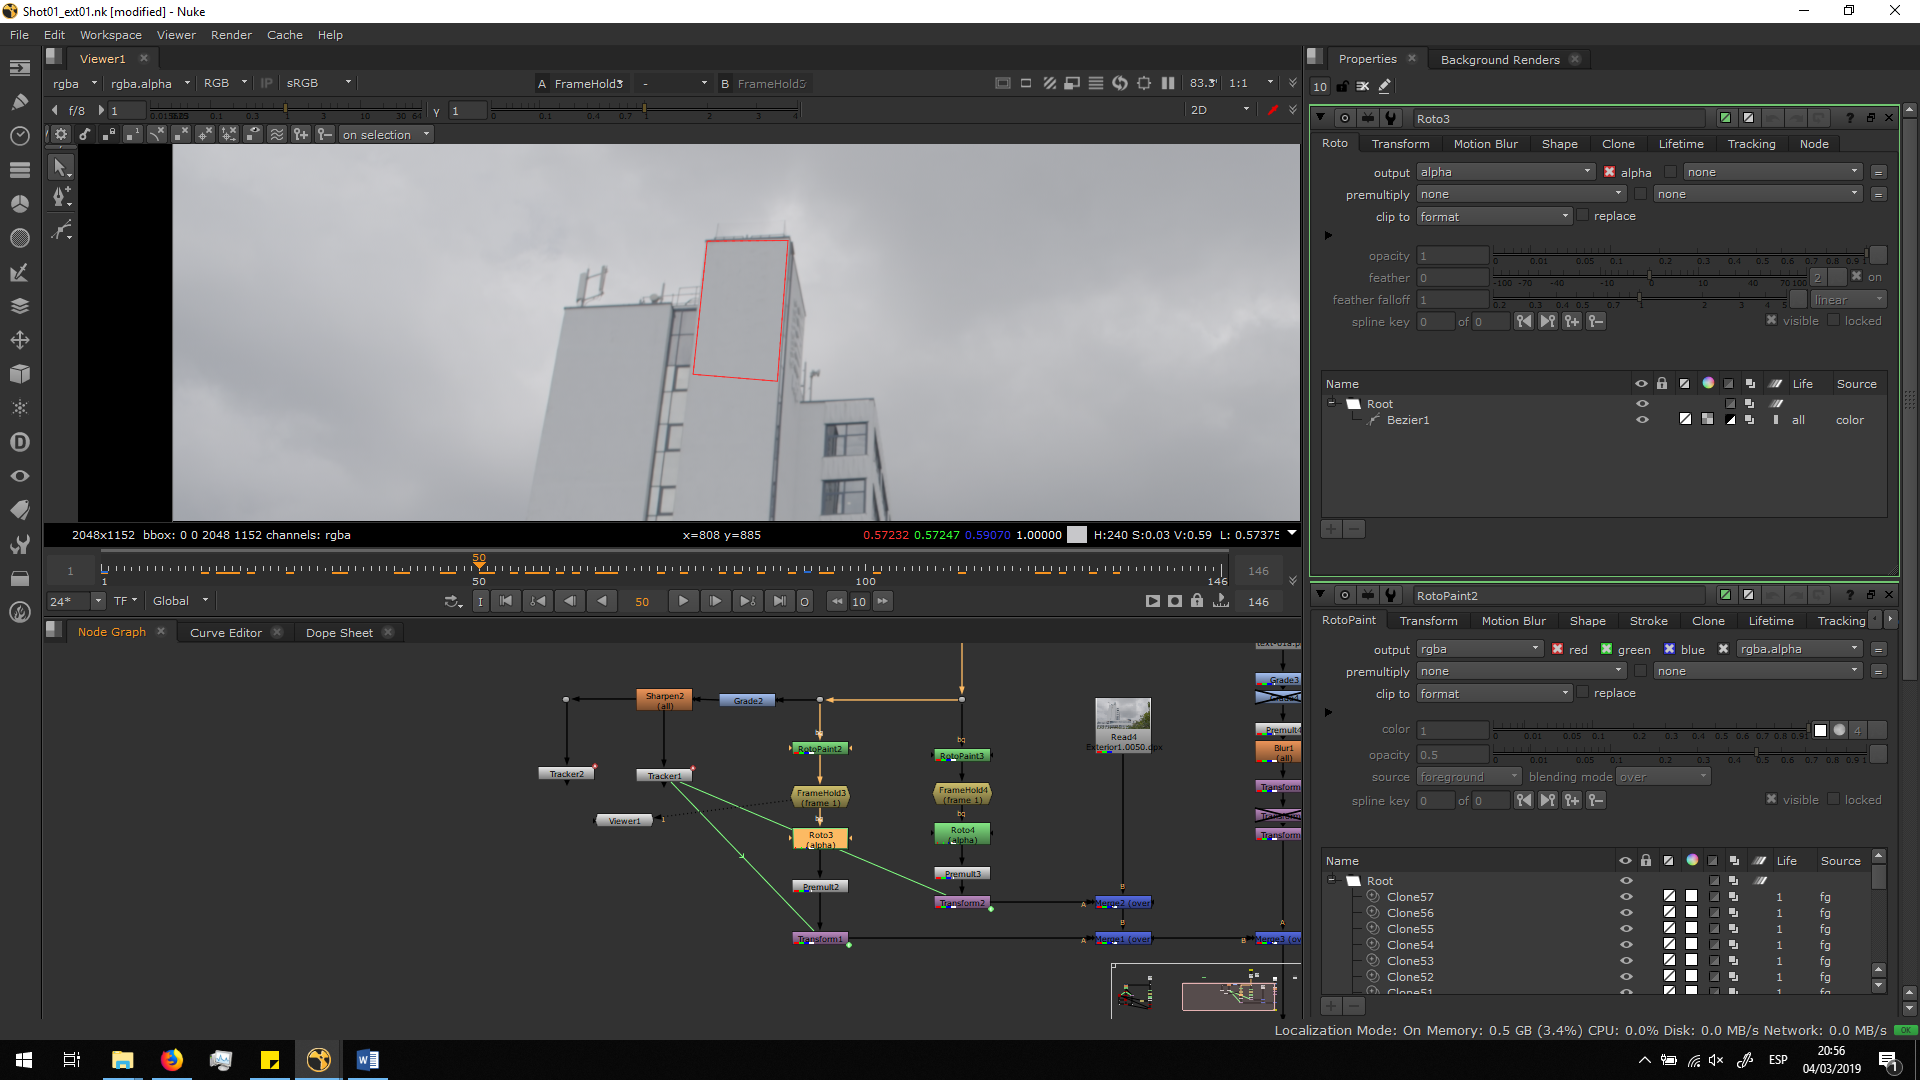
 And we are going to Premultiply it to keep only the alpha channel.
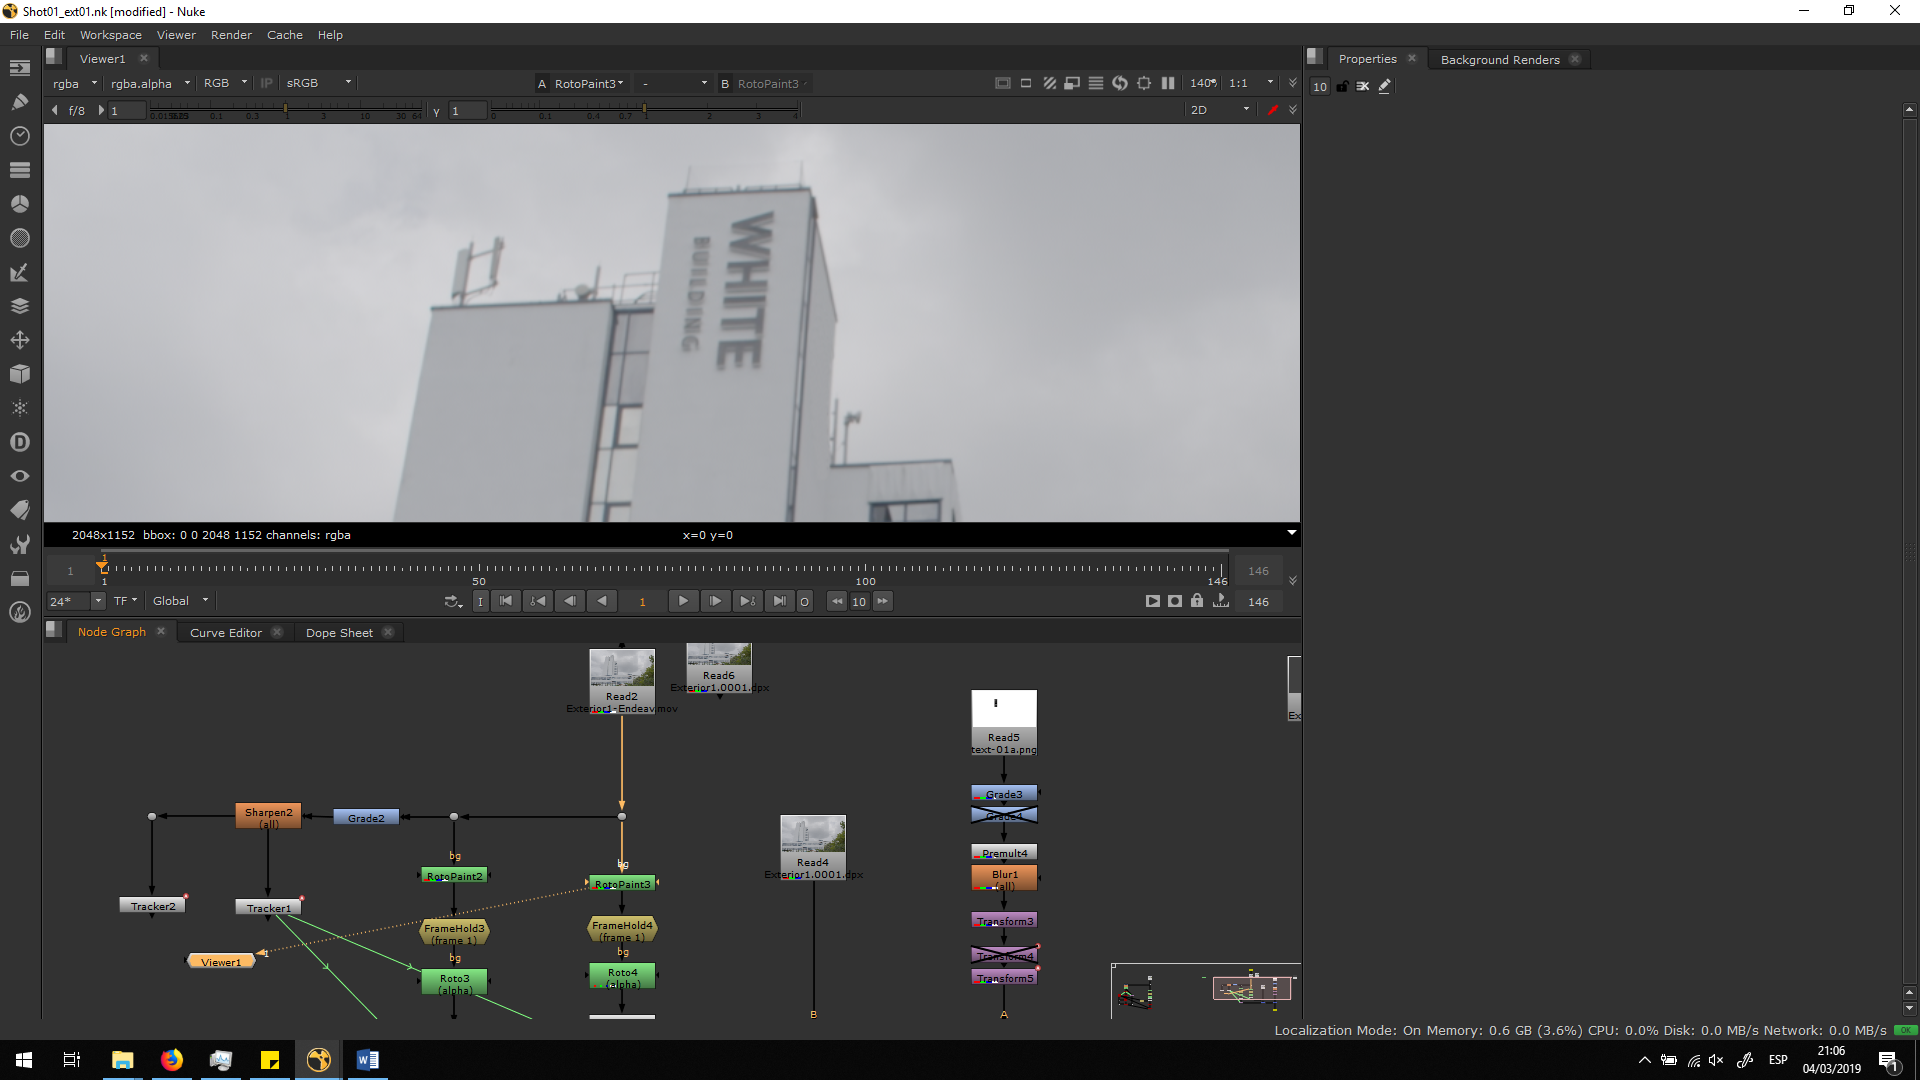
 Now, we have a pattern of this part of the building, that we can merge it over the original footage, and so we will have the roto painting for the whole animation without the need to paint it frame by frame. We did exactly the same process with the lateral part of the building, in which it is also written White Building.
Track the camera movement
As we can see, the original footage has some camera movement. Therefore, we will need to do a tracker in order to track the camera movement, and link the transformation to the premultiplied images.
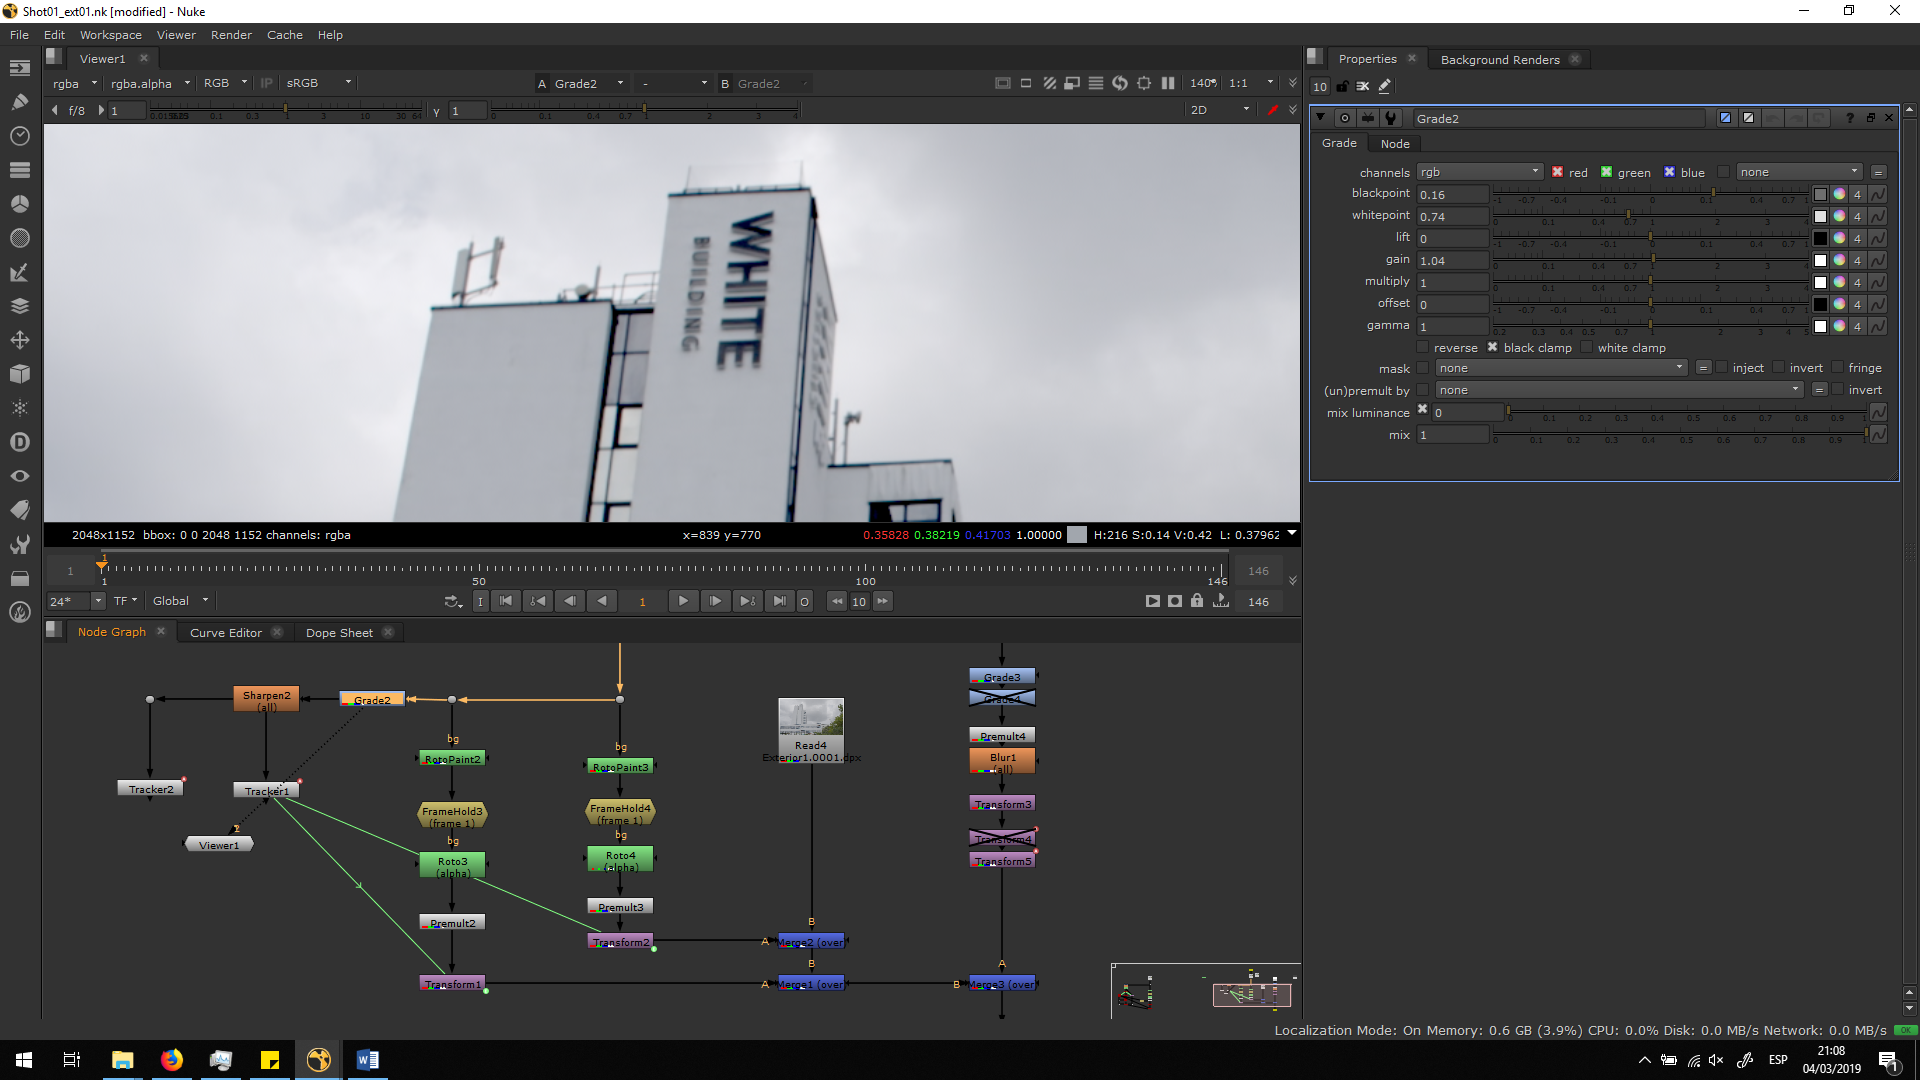
For that, we will adda grade note to the original footage, in order to increase the contrast. For that, we will just need to pull the Whitepoint a bit lower and the Darkpoint a bit higher. This will help us to track easier.
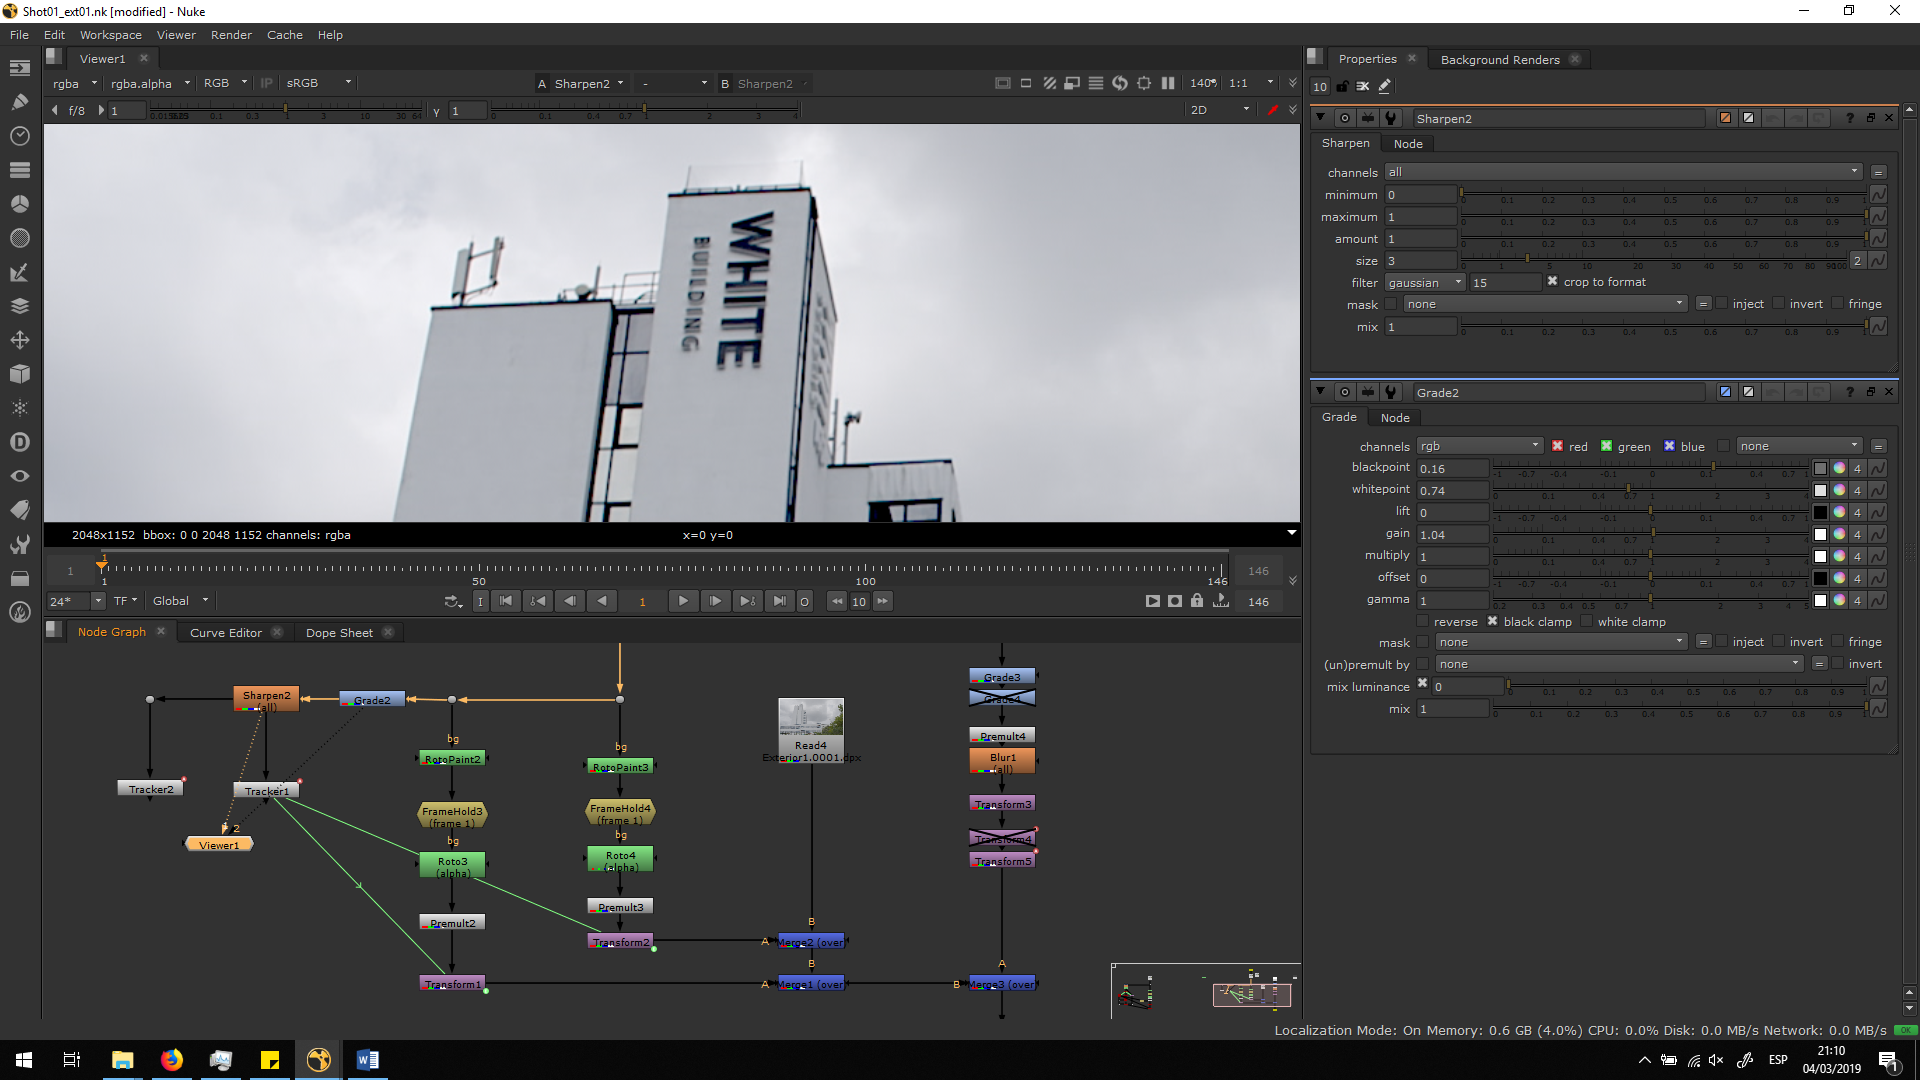
 Then, we will add a Sharpen note in order to refine the edges, which will help us as well to track it easier.
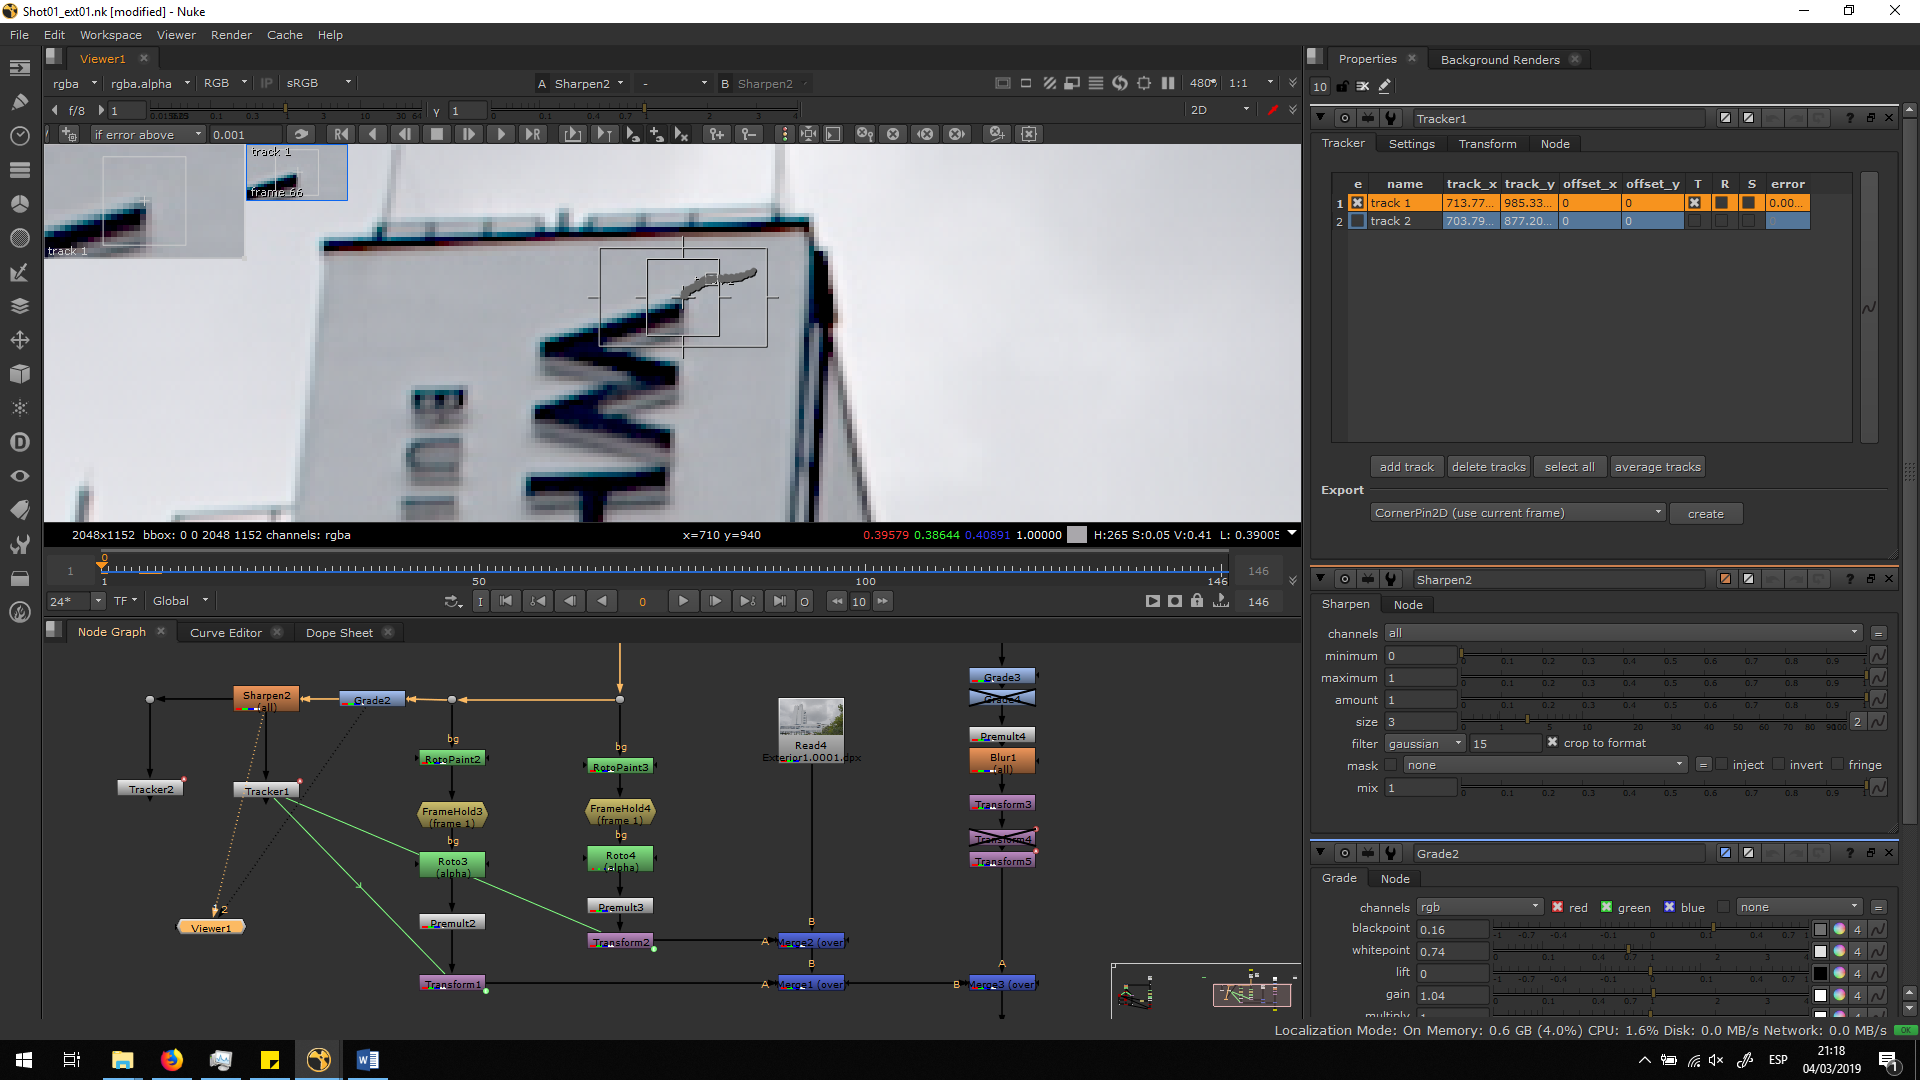
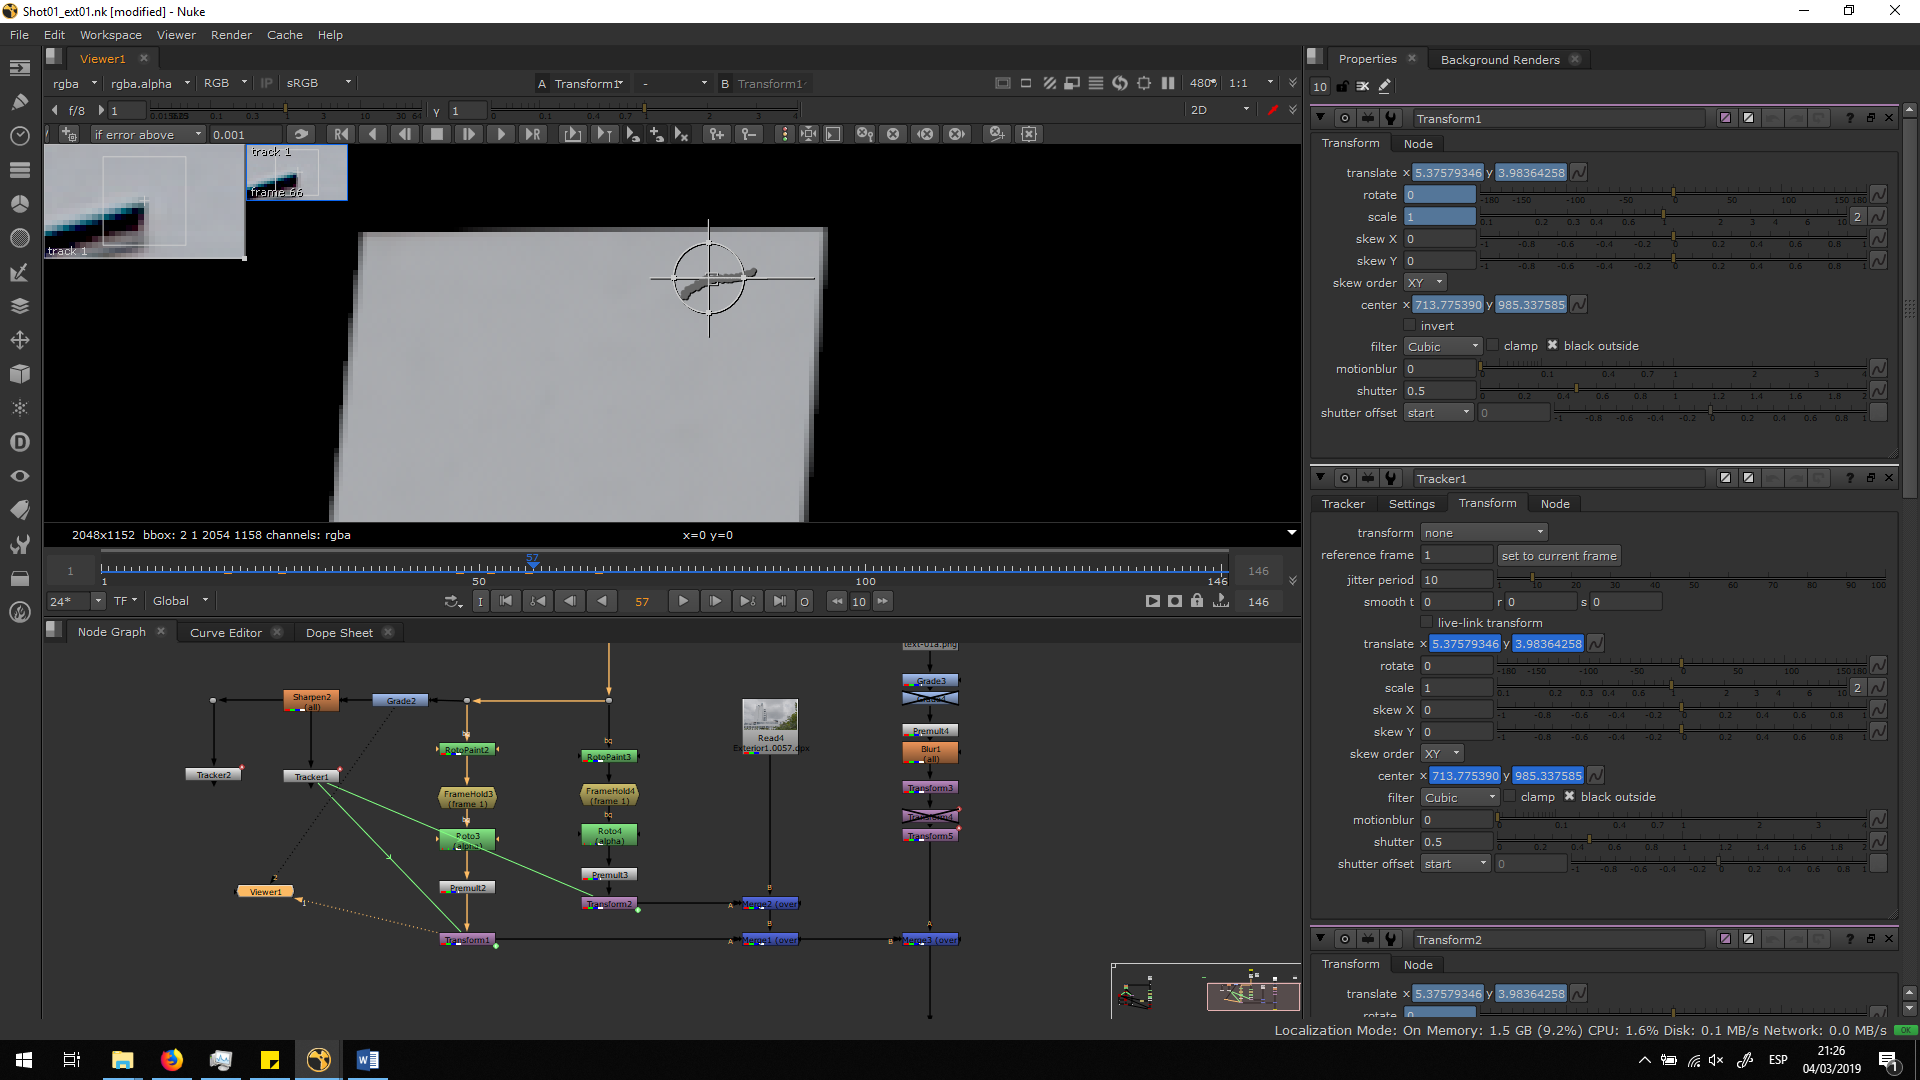
 Now, we are going to add a tracker in order to track the movement of the camera. We will place the tracker in the same text, to have an accurate movement of the text itself. Therefore, we will need to search a high contrasted part of the image, that can be the corner of the W. Finally, we can let the program track by itself.
Now, we will need to copy the transformation of the tracker to both premultiplied roto paintings. For that, we will add a transformation note after the Premultiply notes, and we will Ctrl+drag the animation of the tracking transformation into both Transform notes from frame 1.
As a result, we will have both rotos moving along the timeline following the movement of the camera.
Merge the roto painting over the original footage
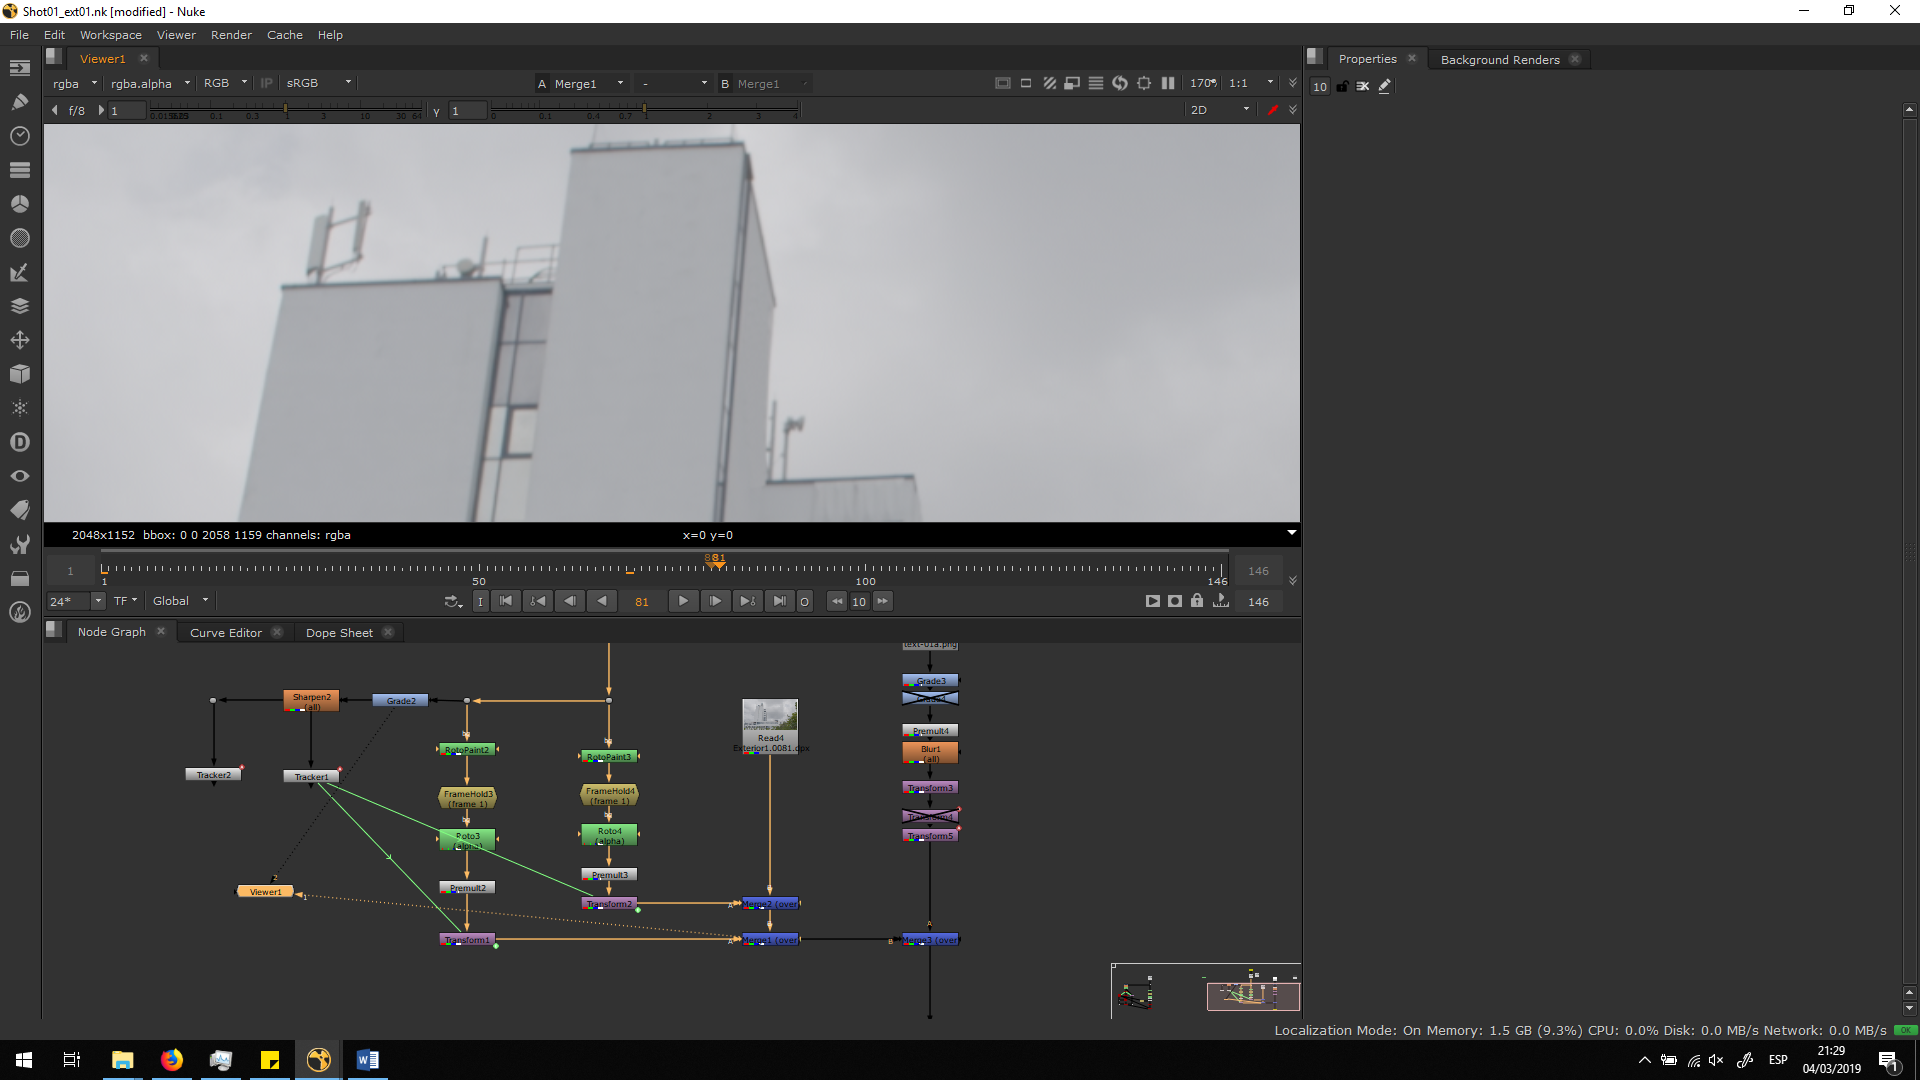
Once we have both roto paintings ready, we can merge them over the footage by a merge over note. We will merge one first, and then we wil merge the other one over.
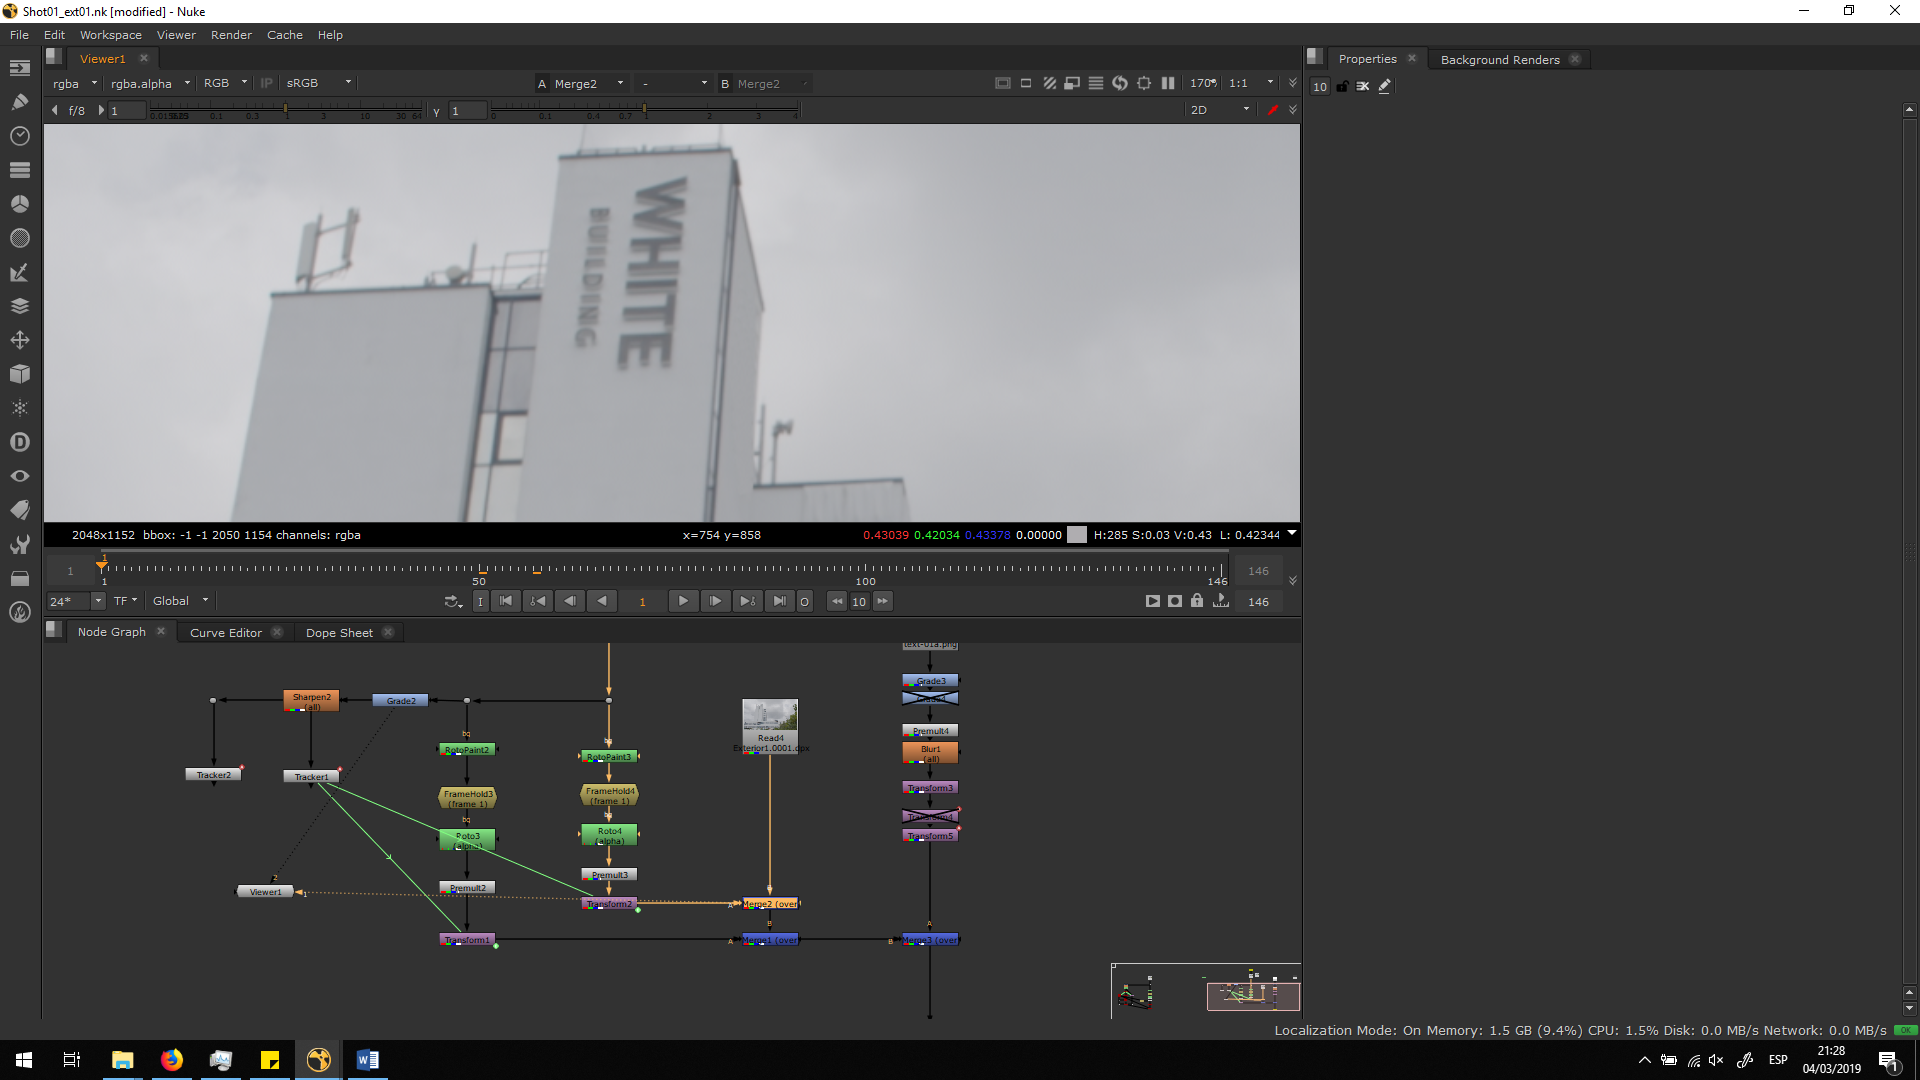
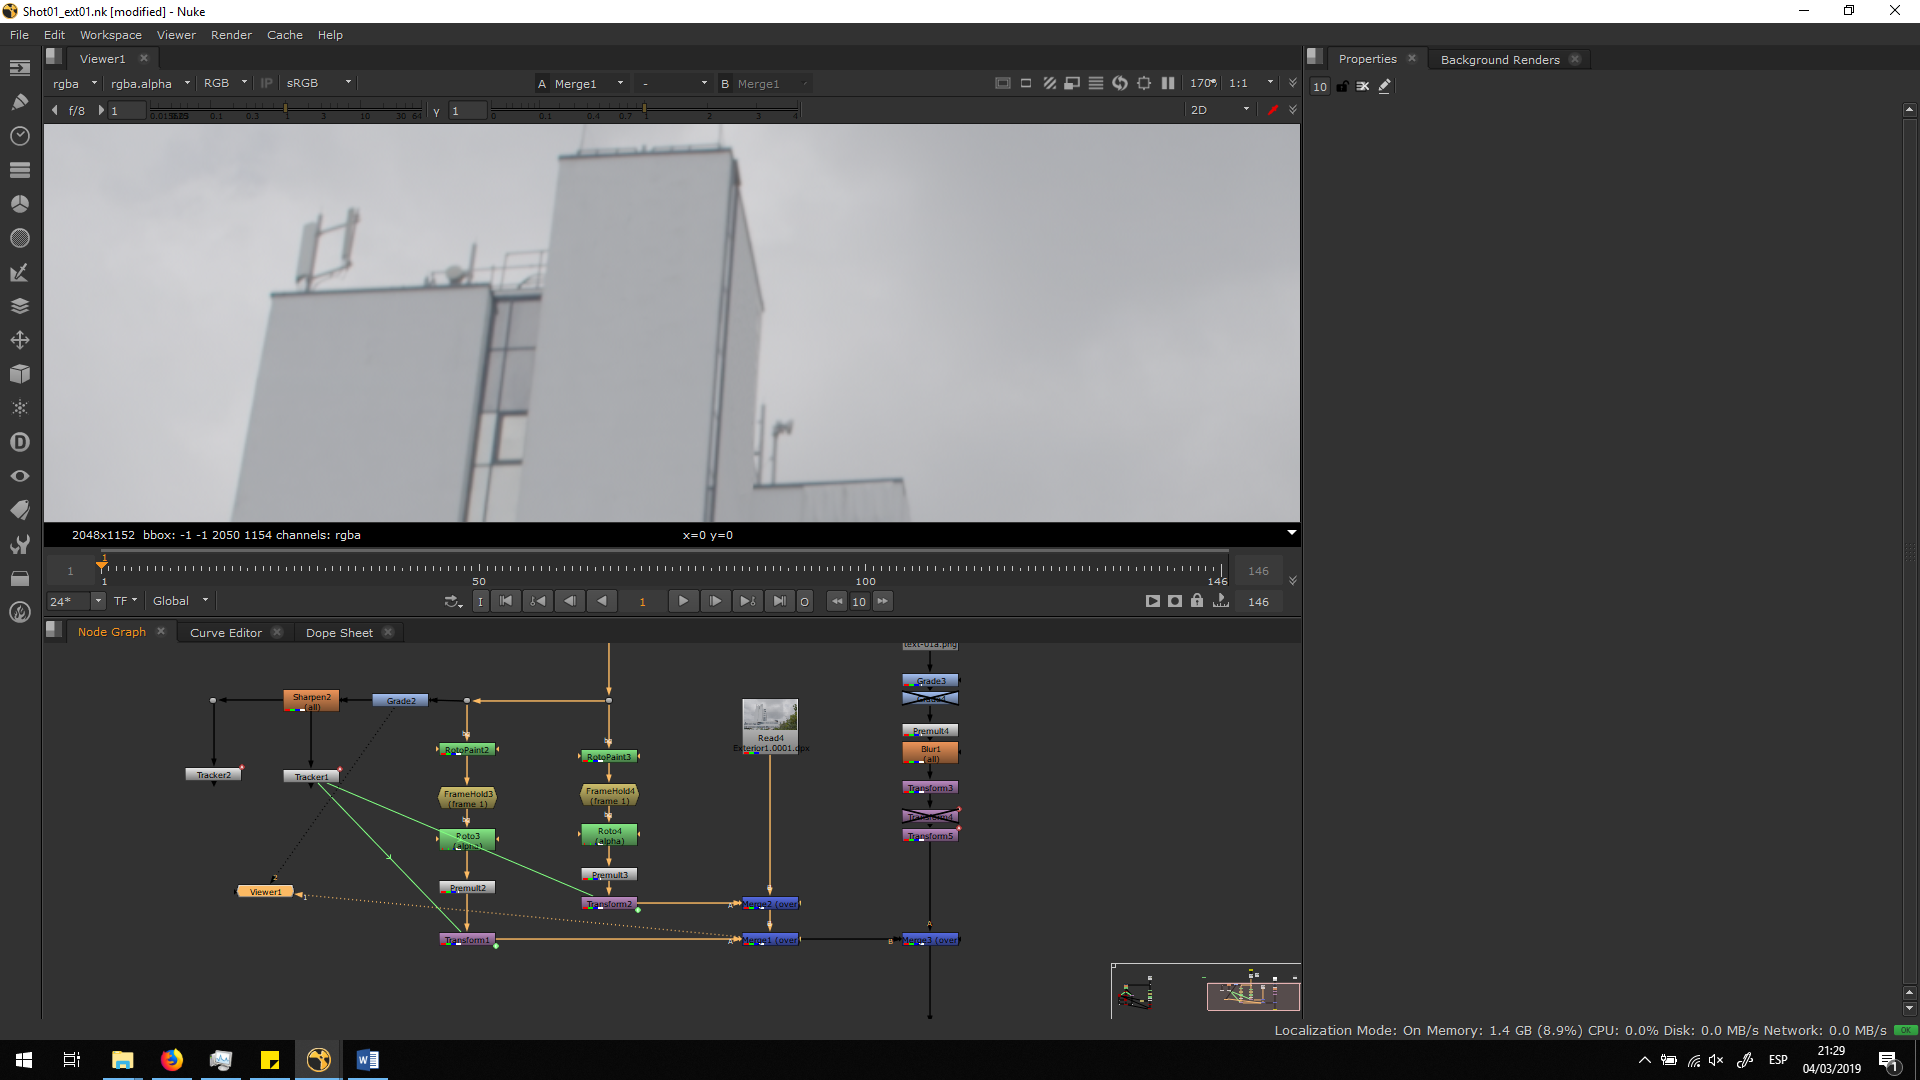
Now, we can check along the timeline to make sure it is working correctly.
 Since it is looking good, we can now focus on create the other text in order to replace it.
Create the text
We are going to create the text in Photoshop. For that, we will import a screenshot of the first frame, and we will write the text in the Font given. Then, we will transform it as we consinder, adding also the perspective of the building. Finally, we are going to export it in PNG in order to blend it over the footage.
As we can see, we can add more effects in order to make it more attractive. In this case, we extruded the text a little bit in order to give a tridimensional illusion, and we also added some shine from above, because as we can see in the original text, the illumination is not uniform.
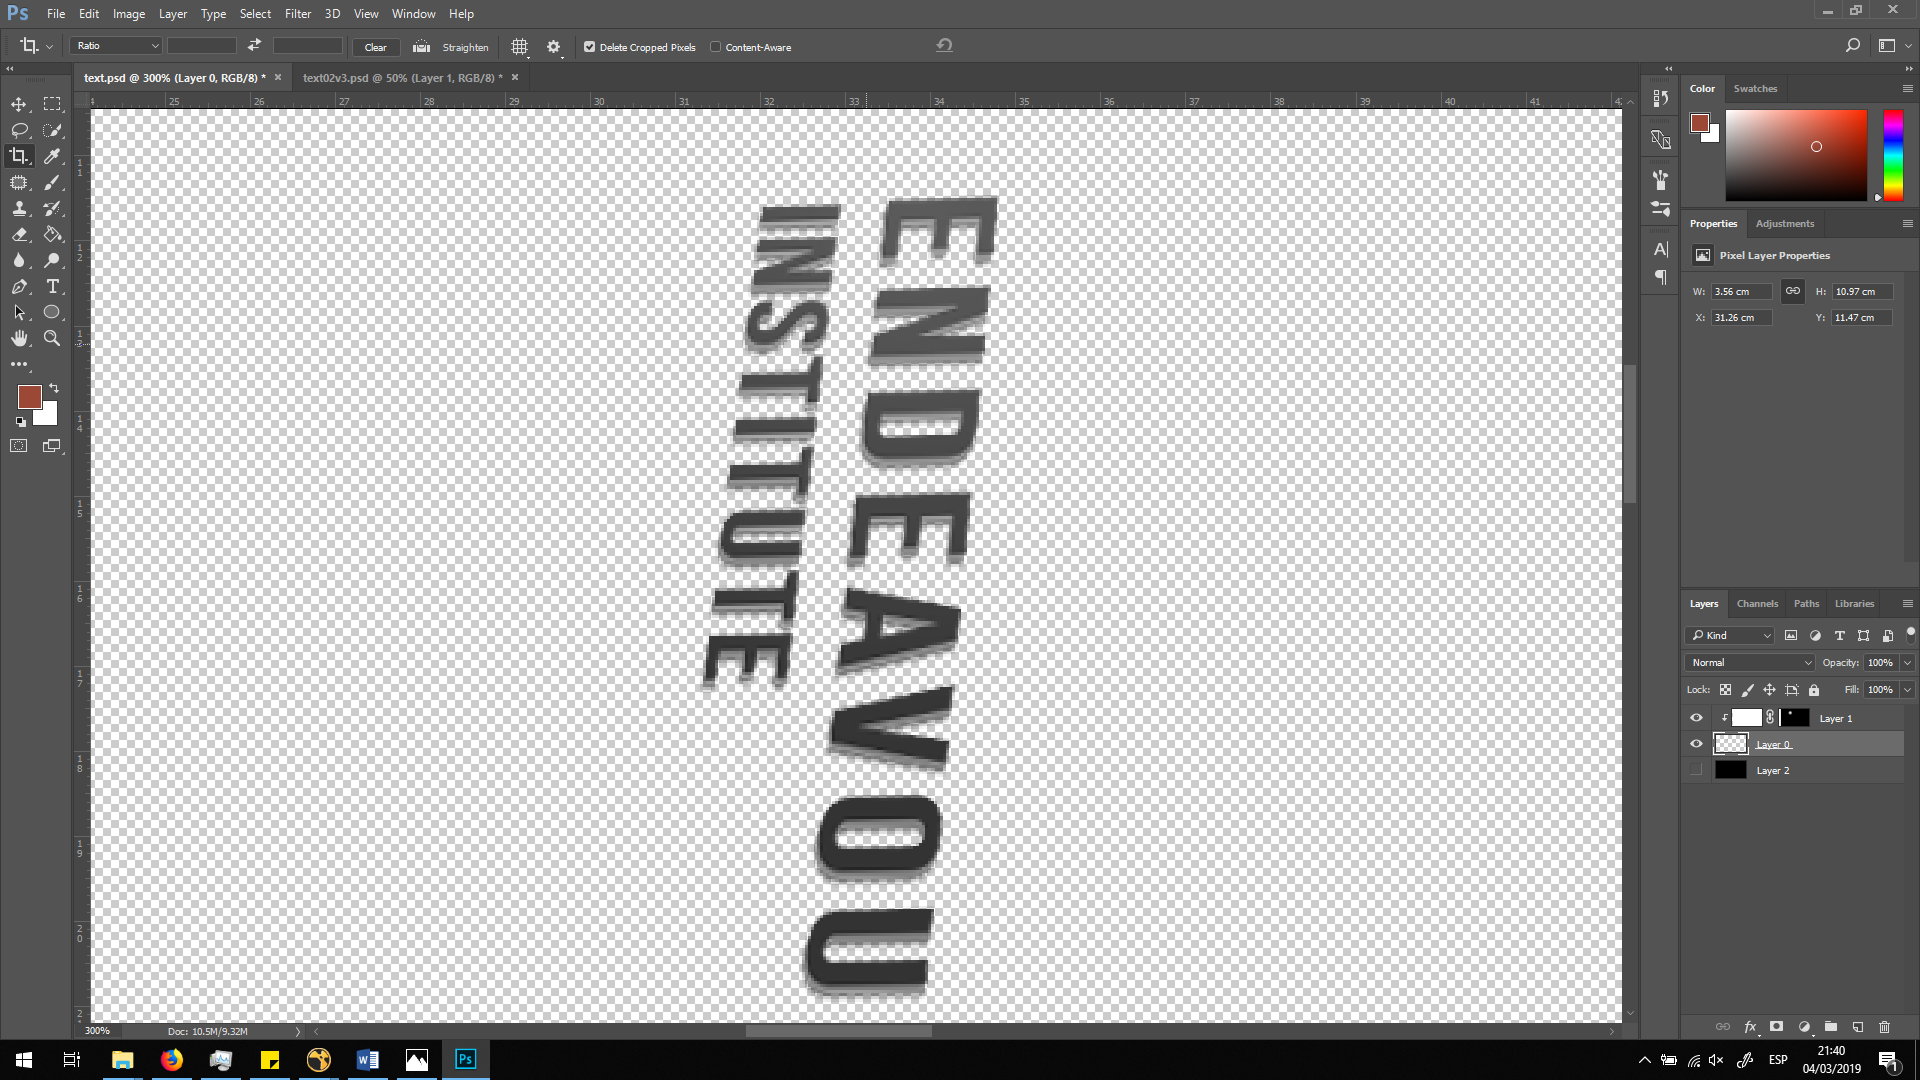
We will save it as a PNG to save the transparency.
Merge the text
Now, we are going to import the ext into our script, place it and merge it over the image.
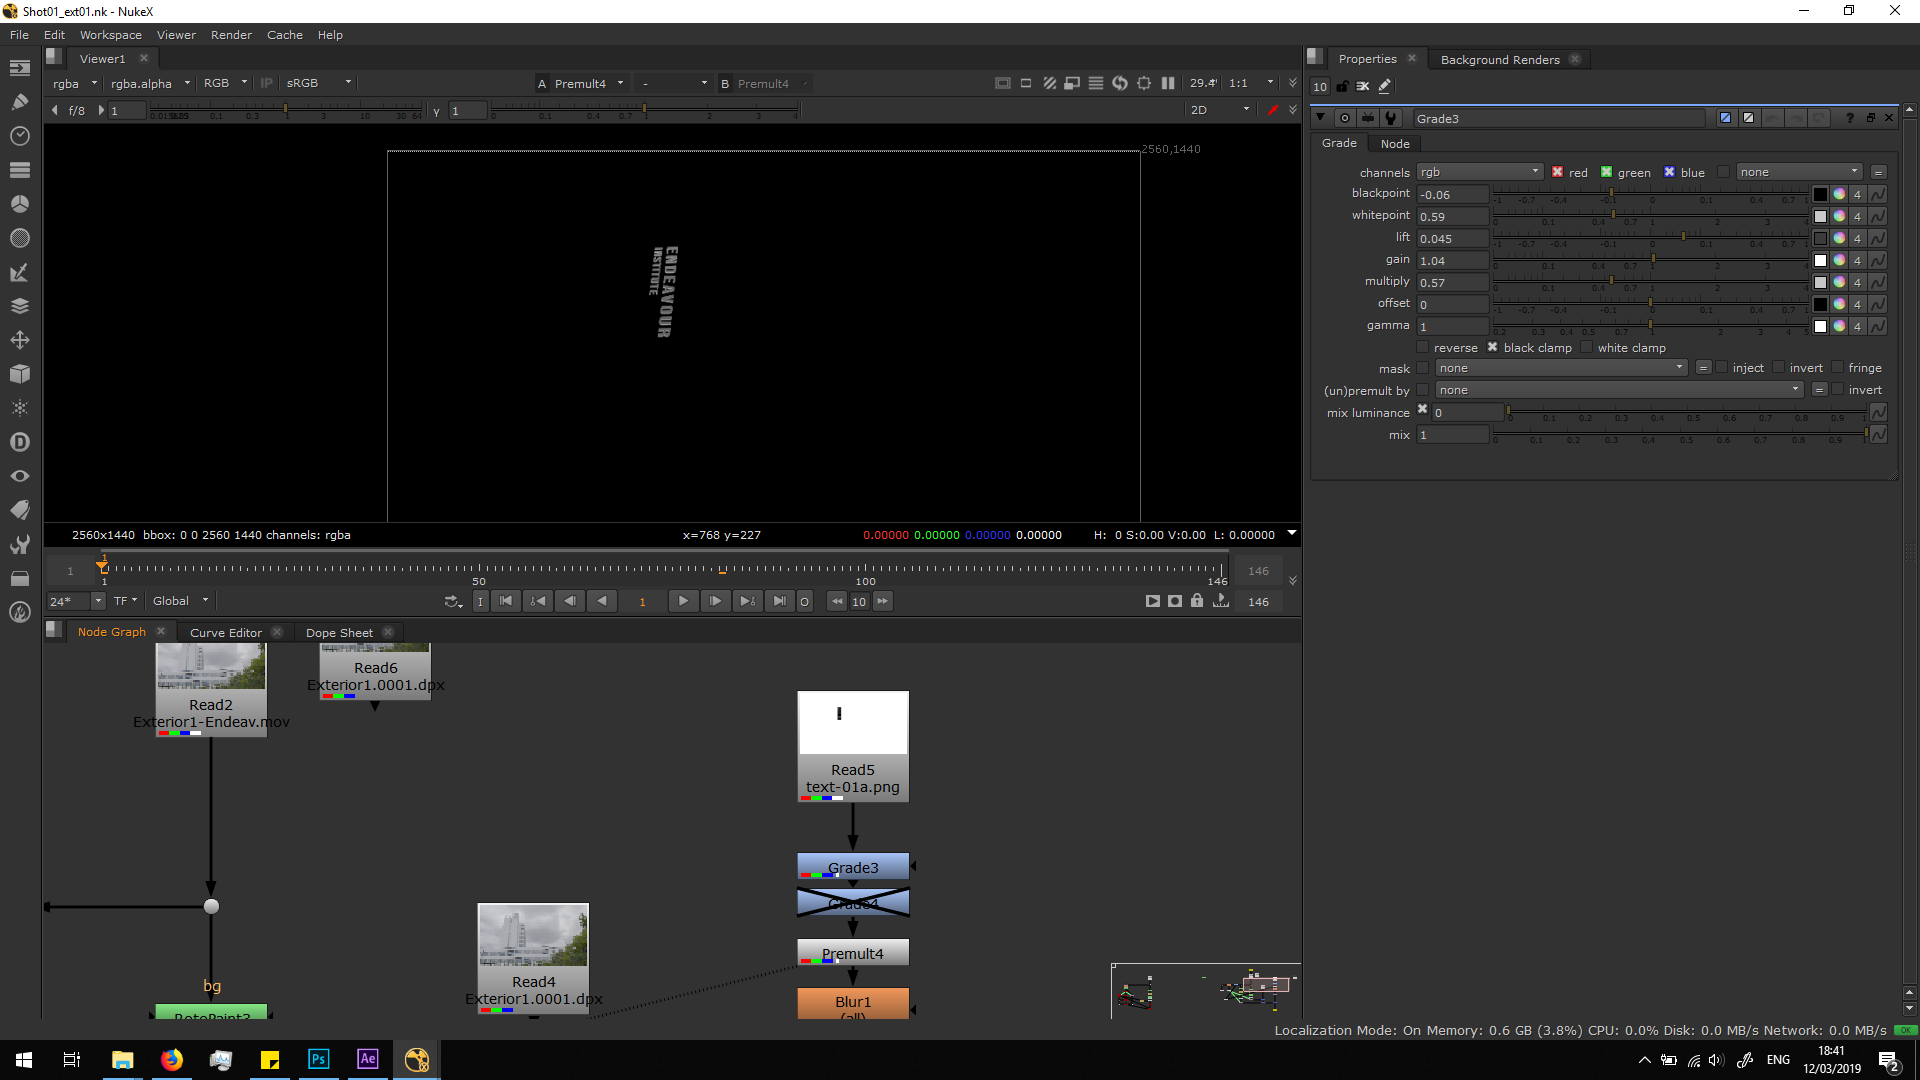
First of all, we will read the footage into the script. In order to delete the alpha channel, we will need to Premult the footage. Now, we will merge it over the image to see how it looks, and know better which changes do we need to do to blend it correctly.
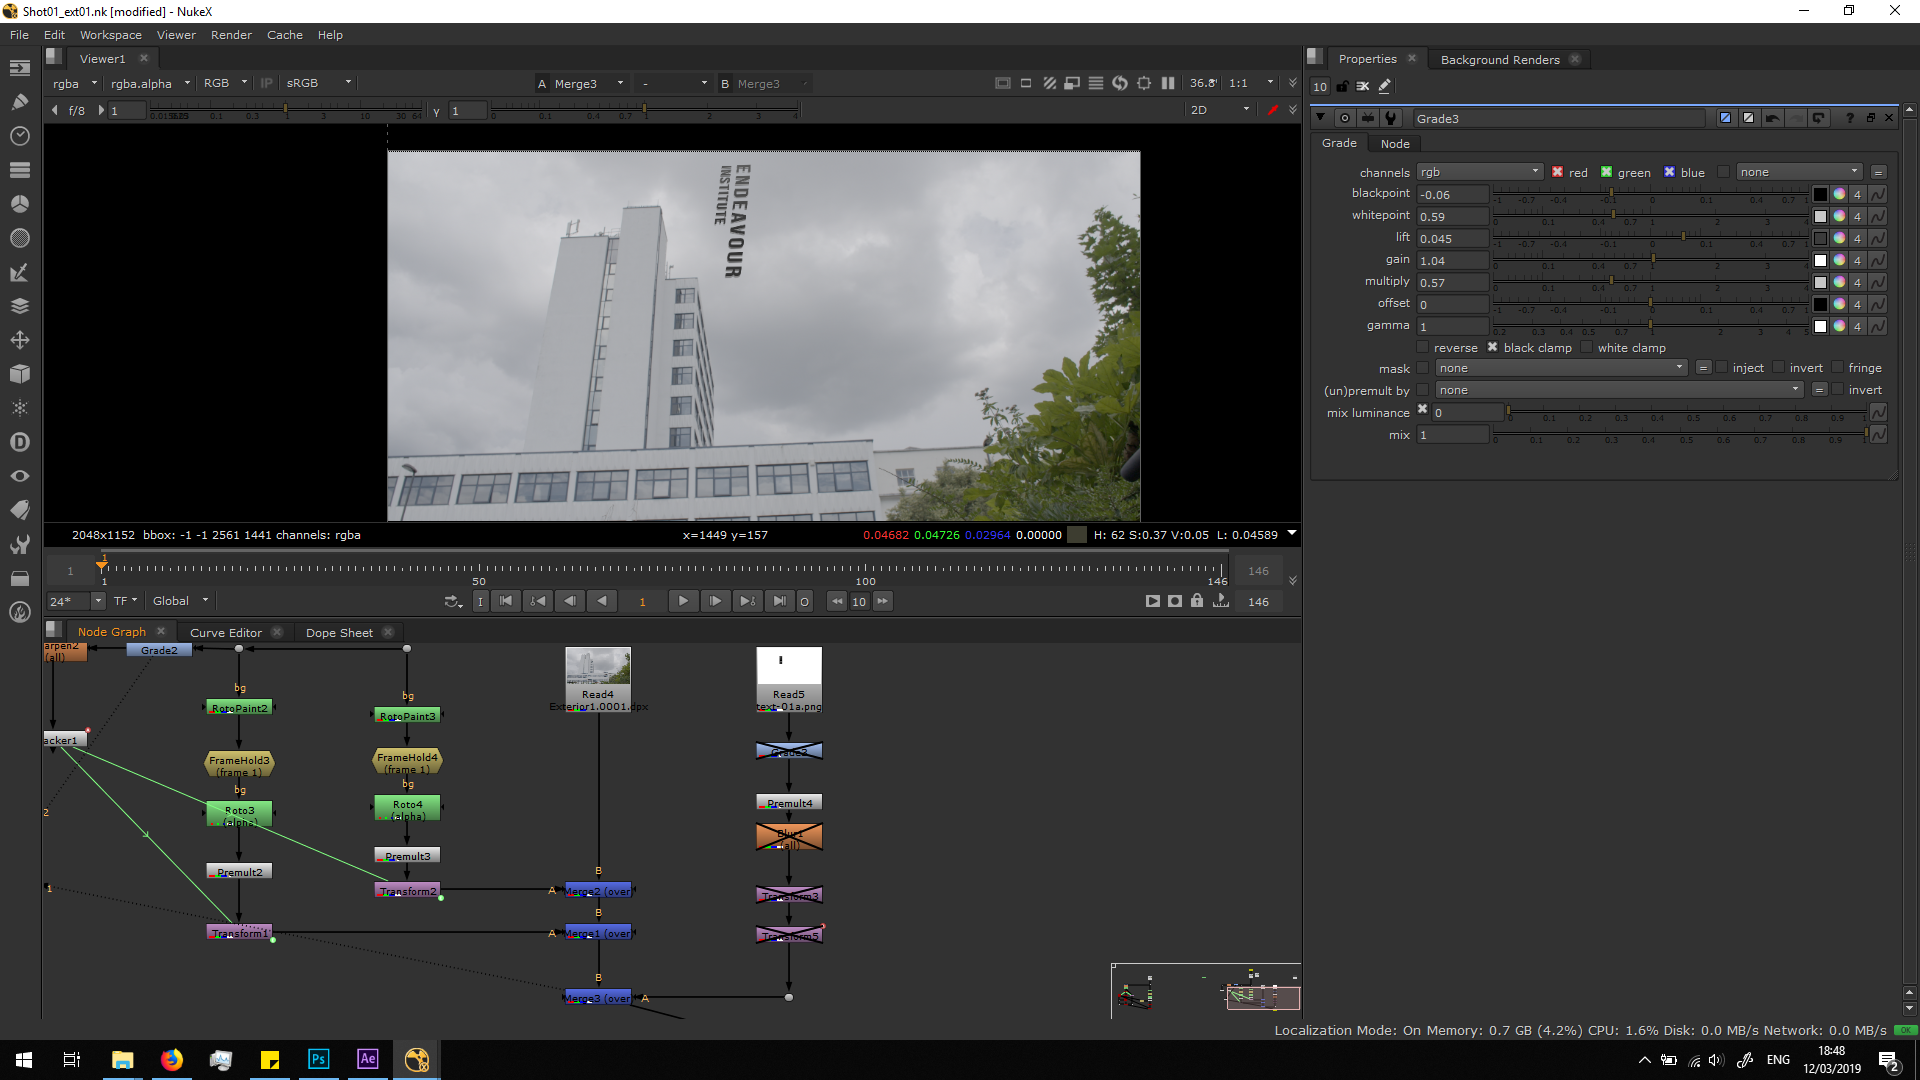
The first obvious thing we need to change is the position. We will add a first transform note to place the footage in the correct position over the frame 1.
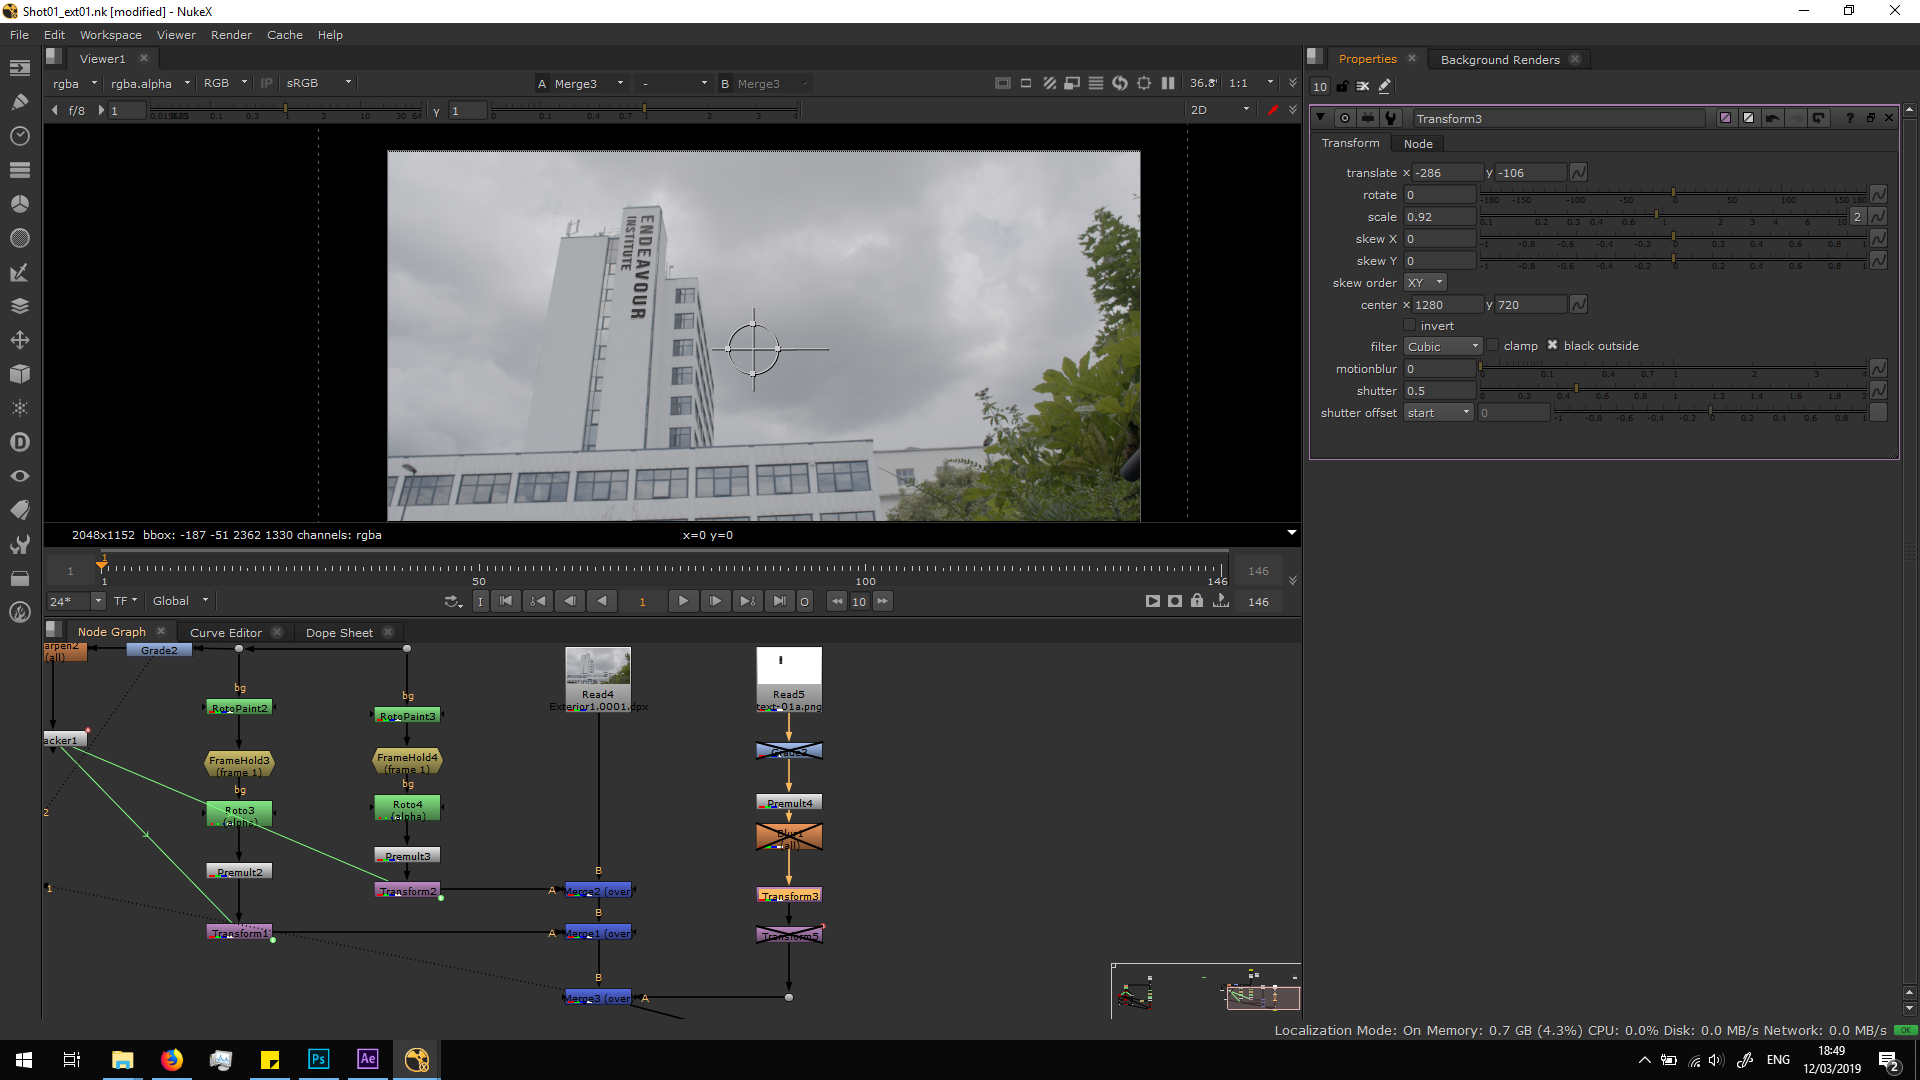
Then, in order to make the text move along with the camera movement, we will add a second transform note in which we are going to copy the transformation of the tracker.

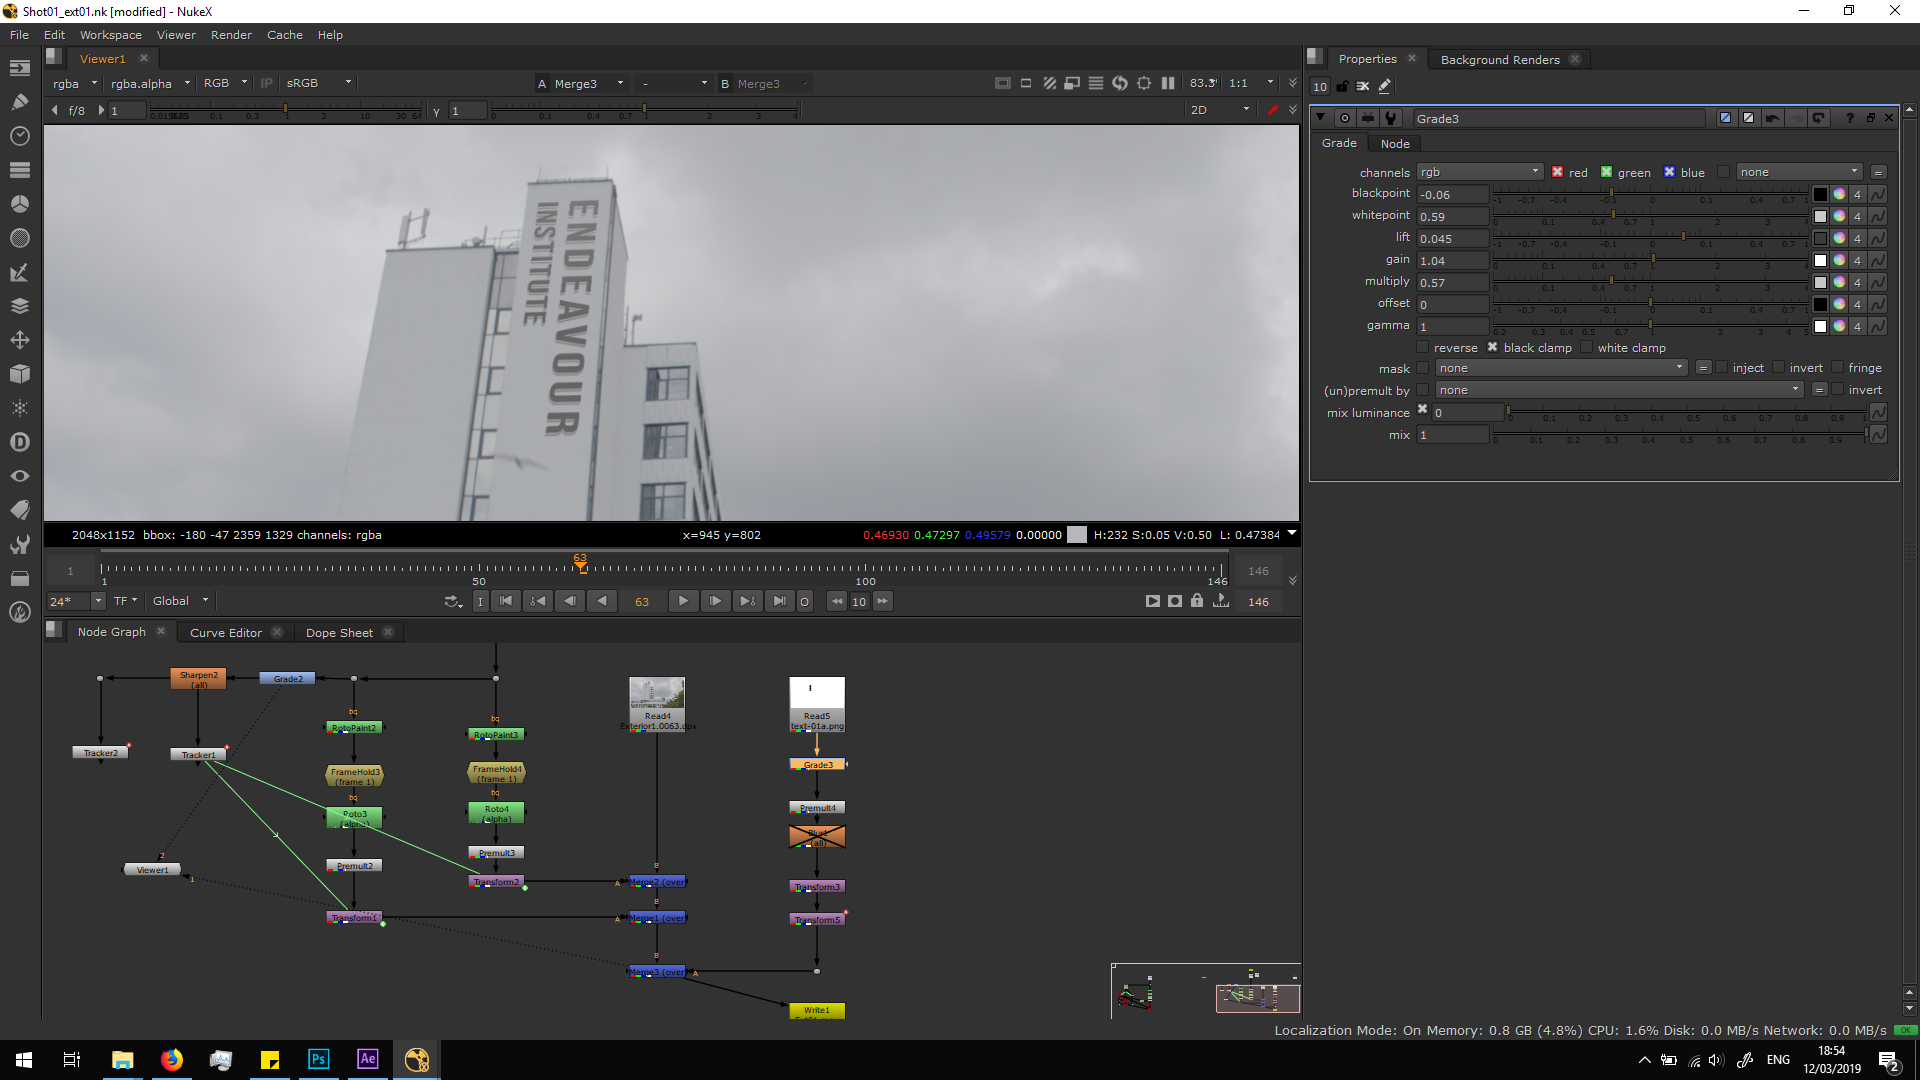
Once we have the text in the correct position, we will make it look nicer by adding a grade note. In the note, we can play with the parameters in order to blend the text better with the picture. In this case, we made it brighter by increasing the lift and decreasing the multiply.
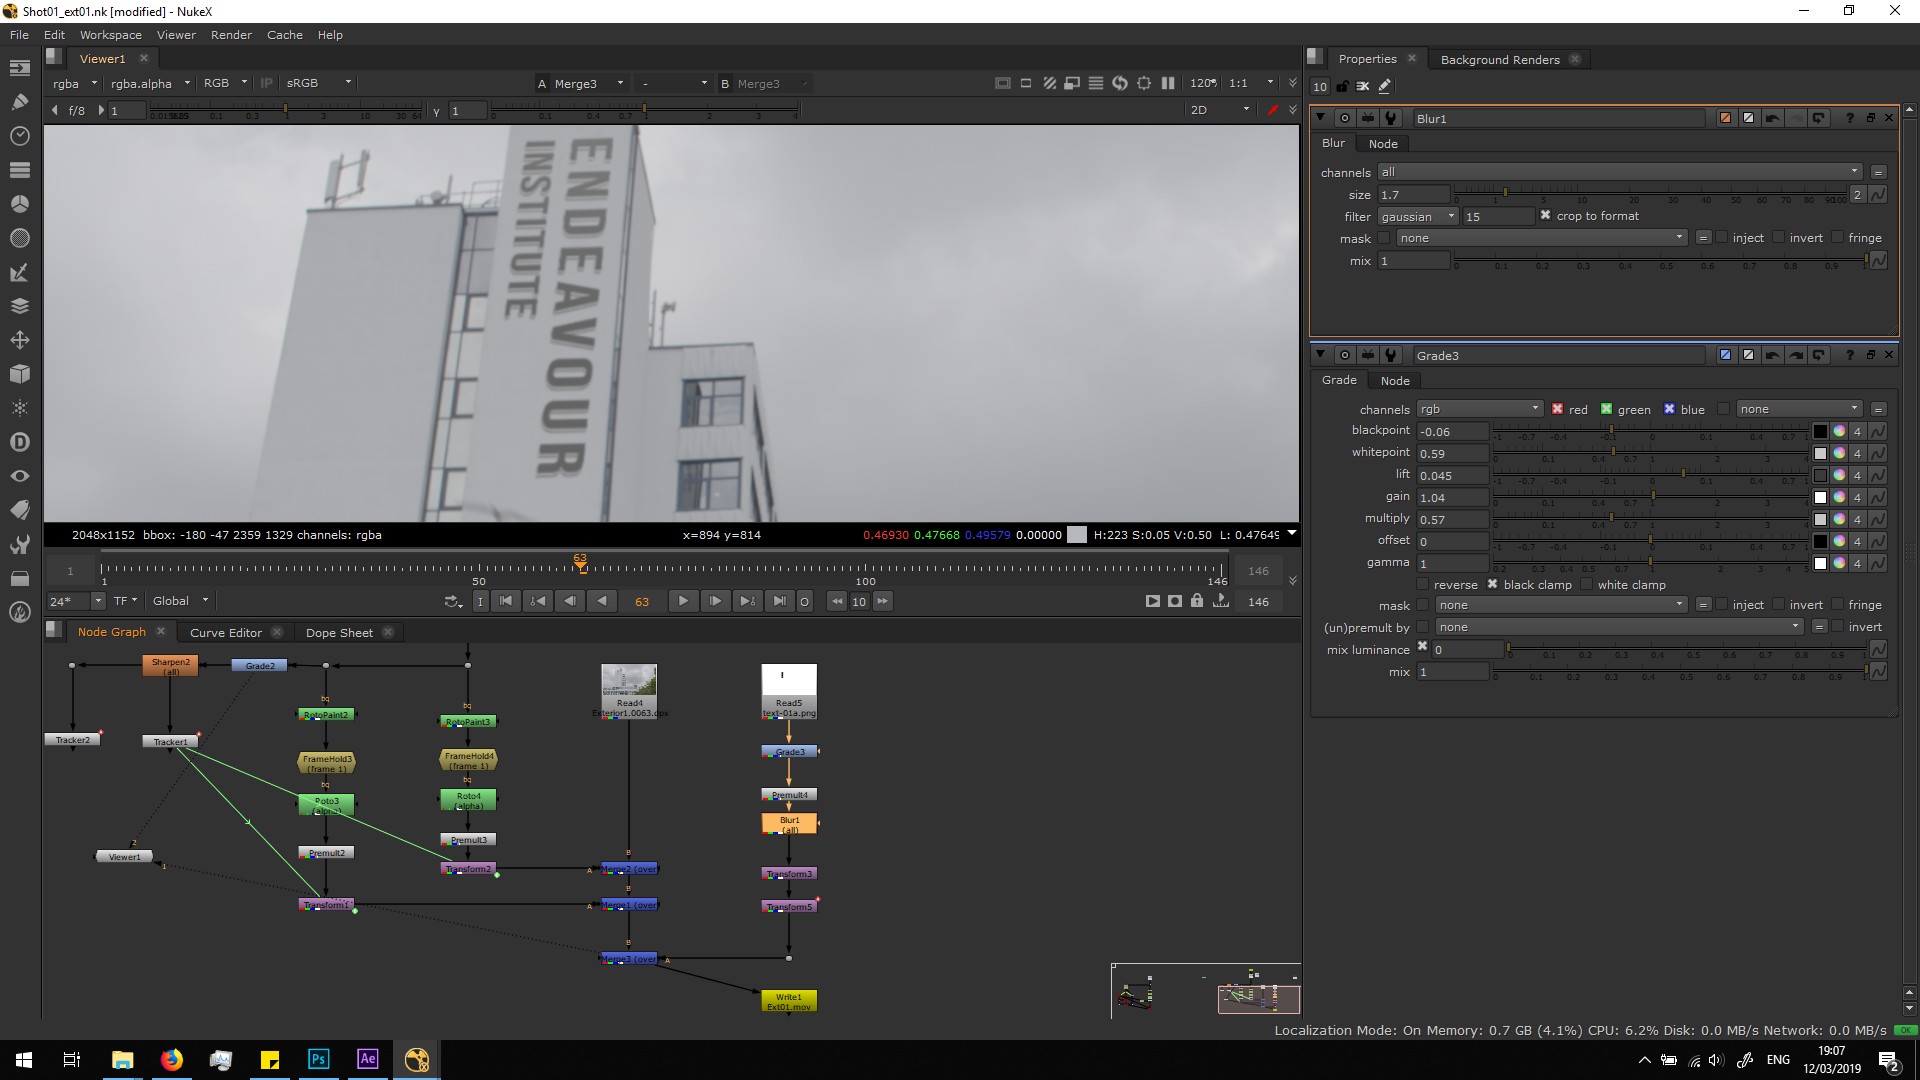
Finally, we will add a blur note to soften the text edges and blend it better with the building, which is also not completely sharp.
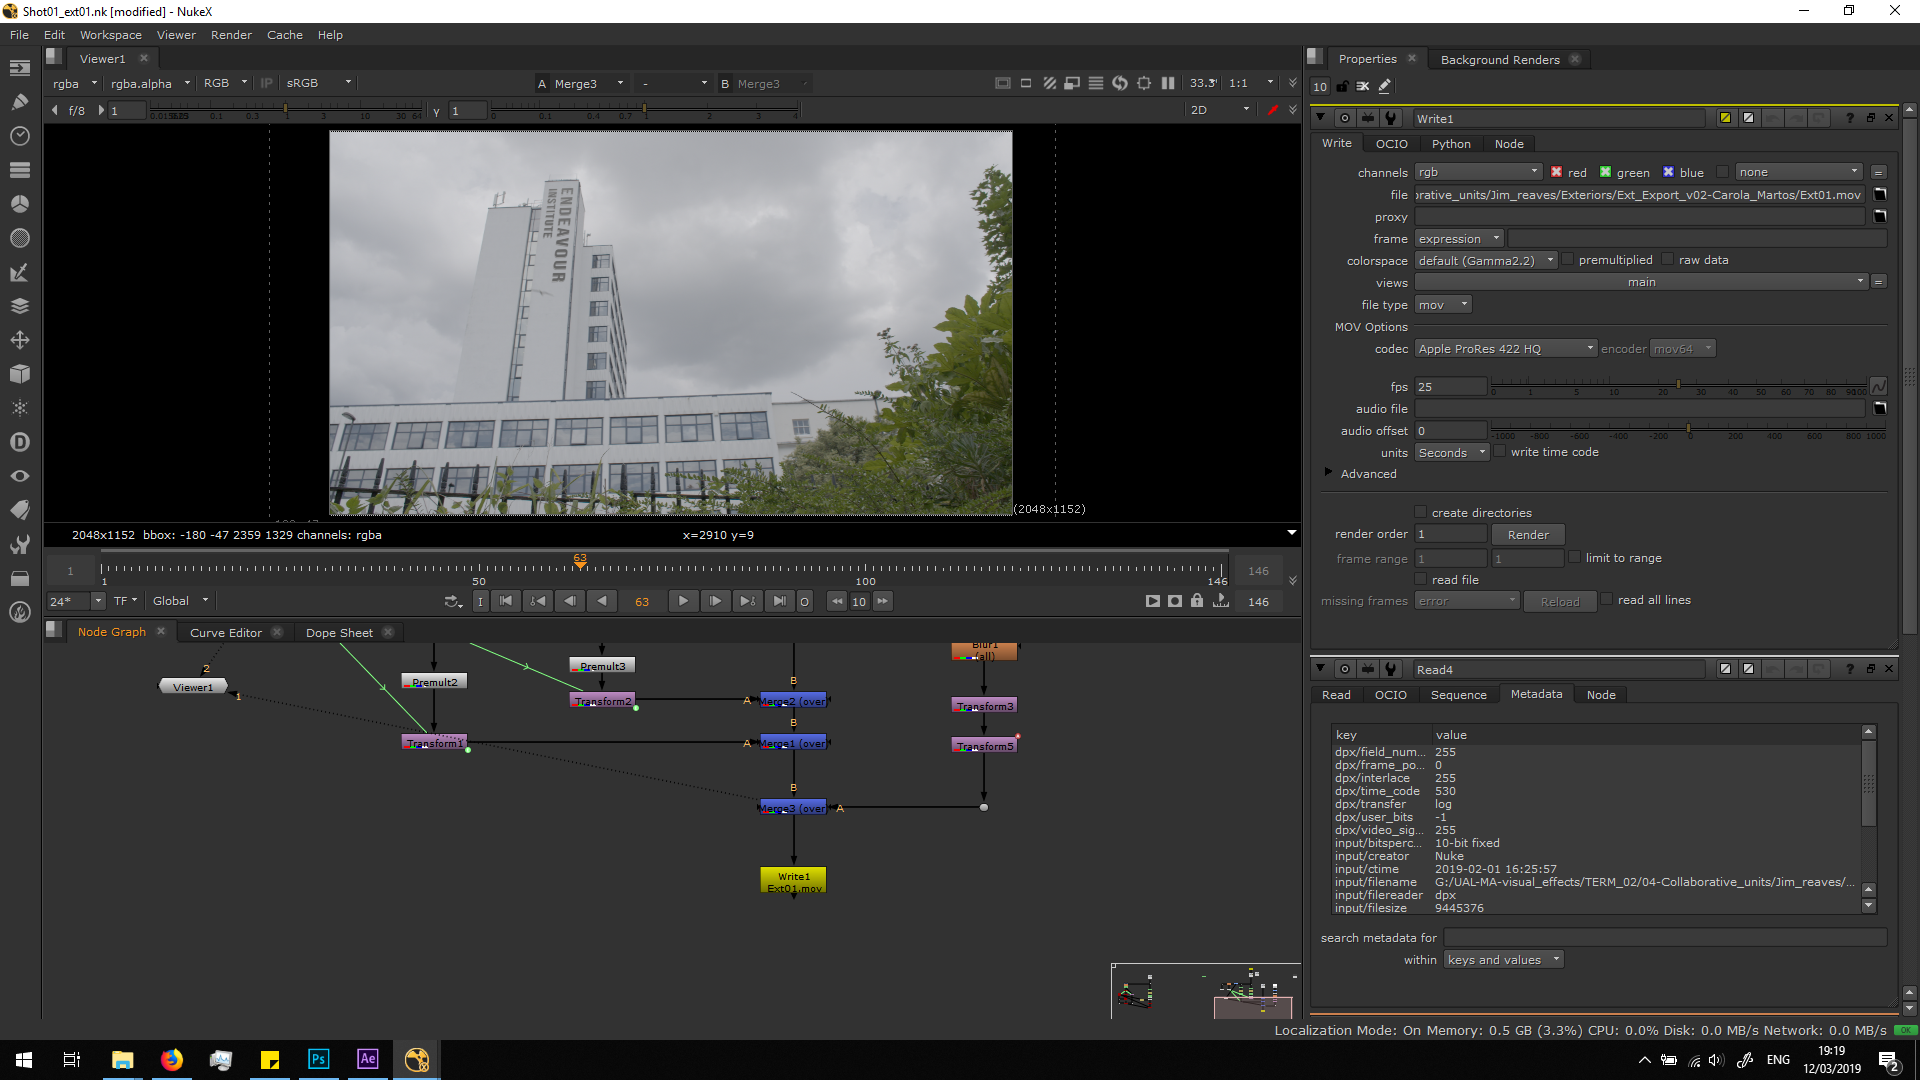
Export
Finally, we will export the sequence in the format we were asked, which in this case will be Apple ProRes 422HQ. Watch this blog entry to know more about Apple ProRes. We should take care about having the correct FPS and color space, matching the original video.
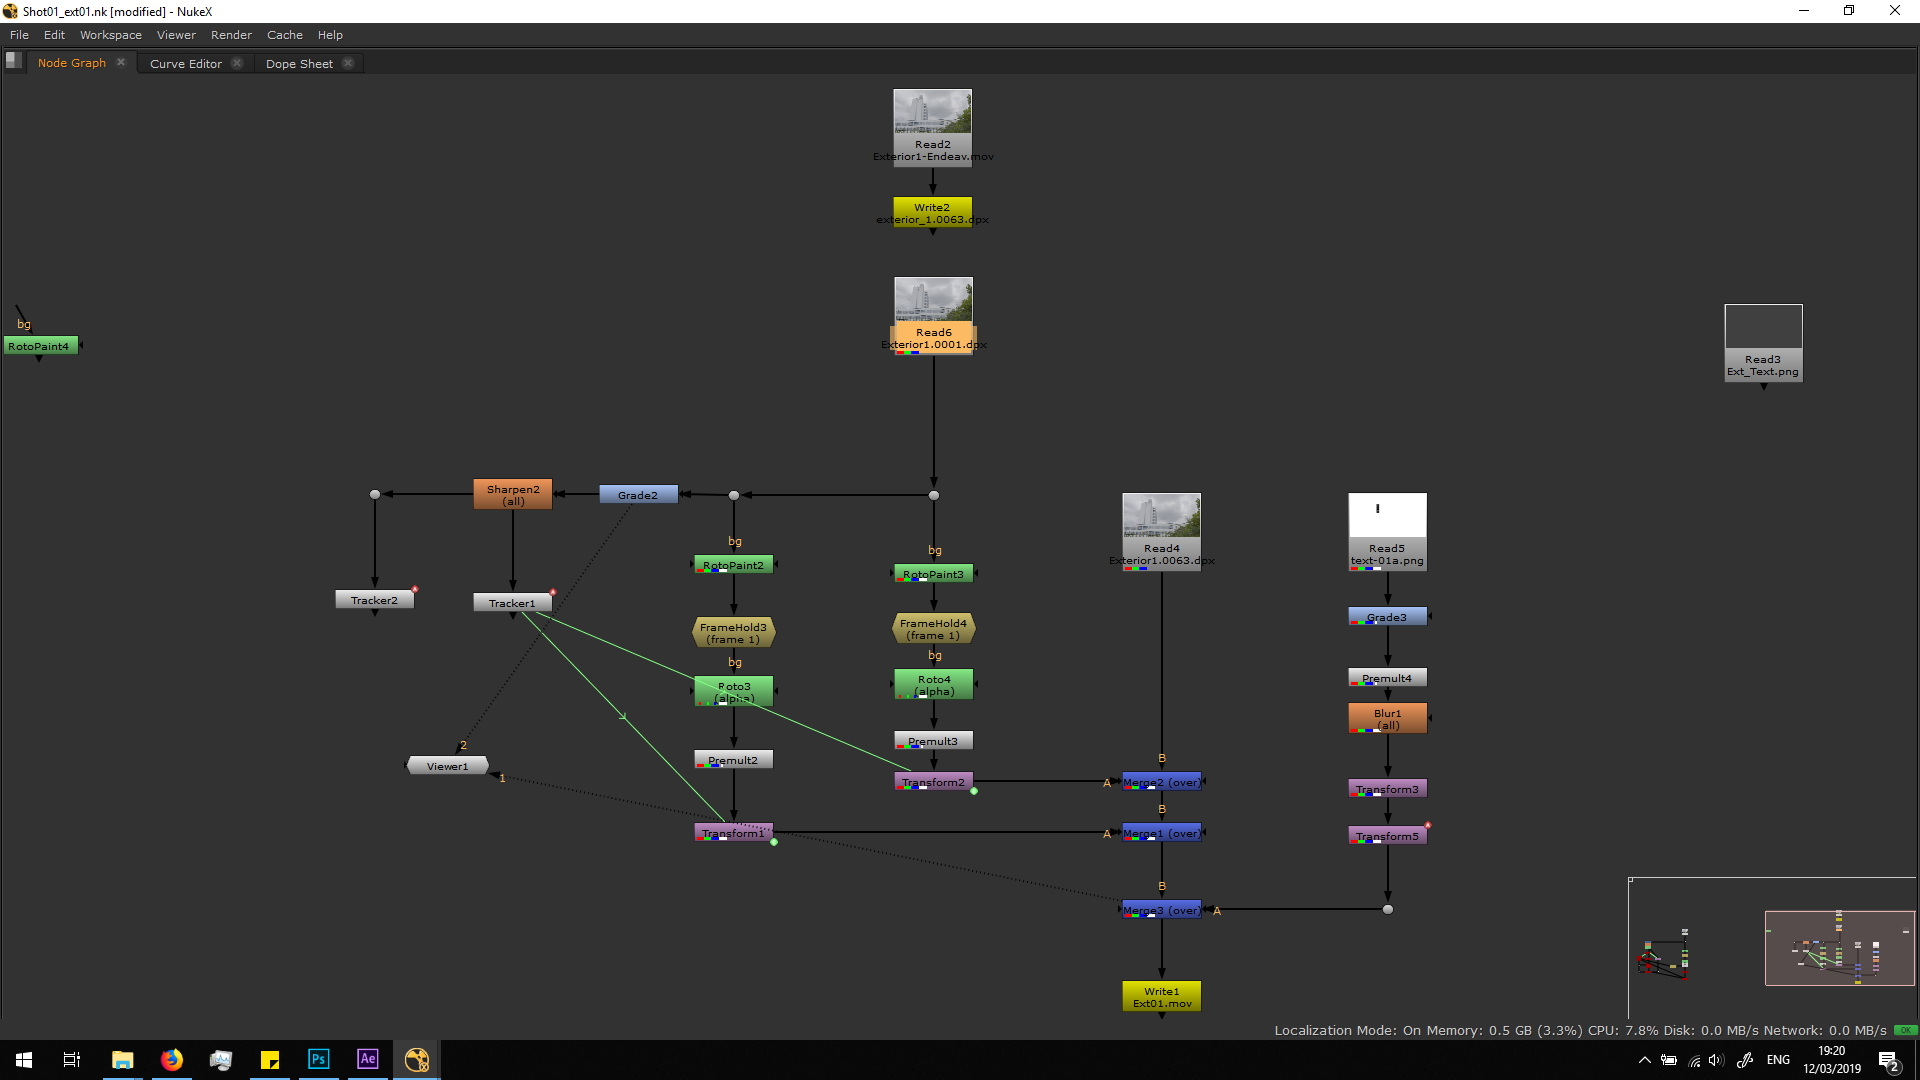
Script overview
Corrections
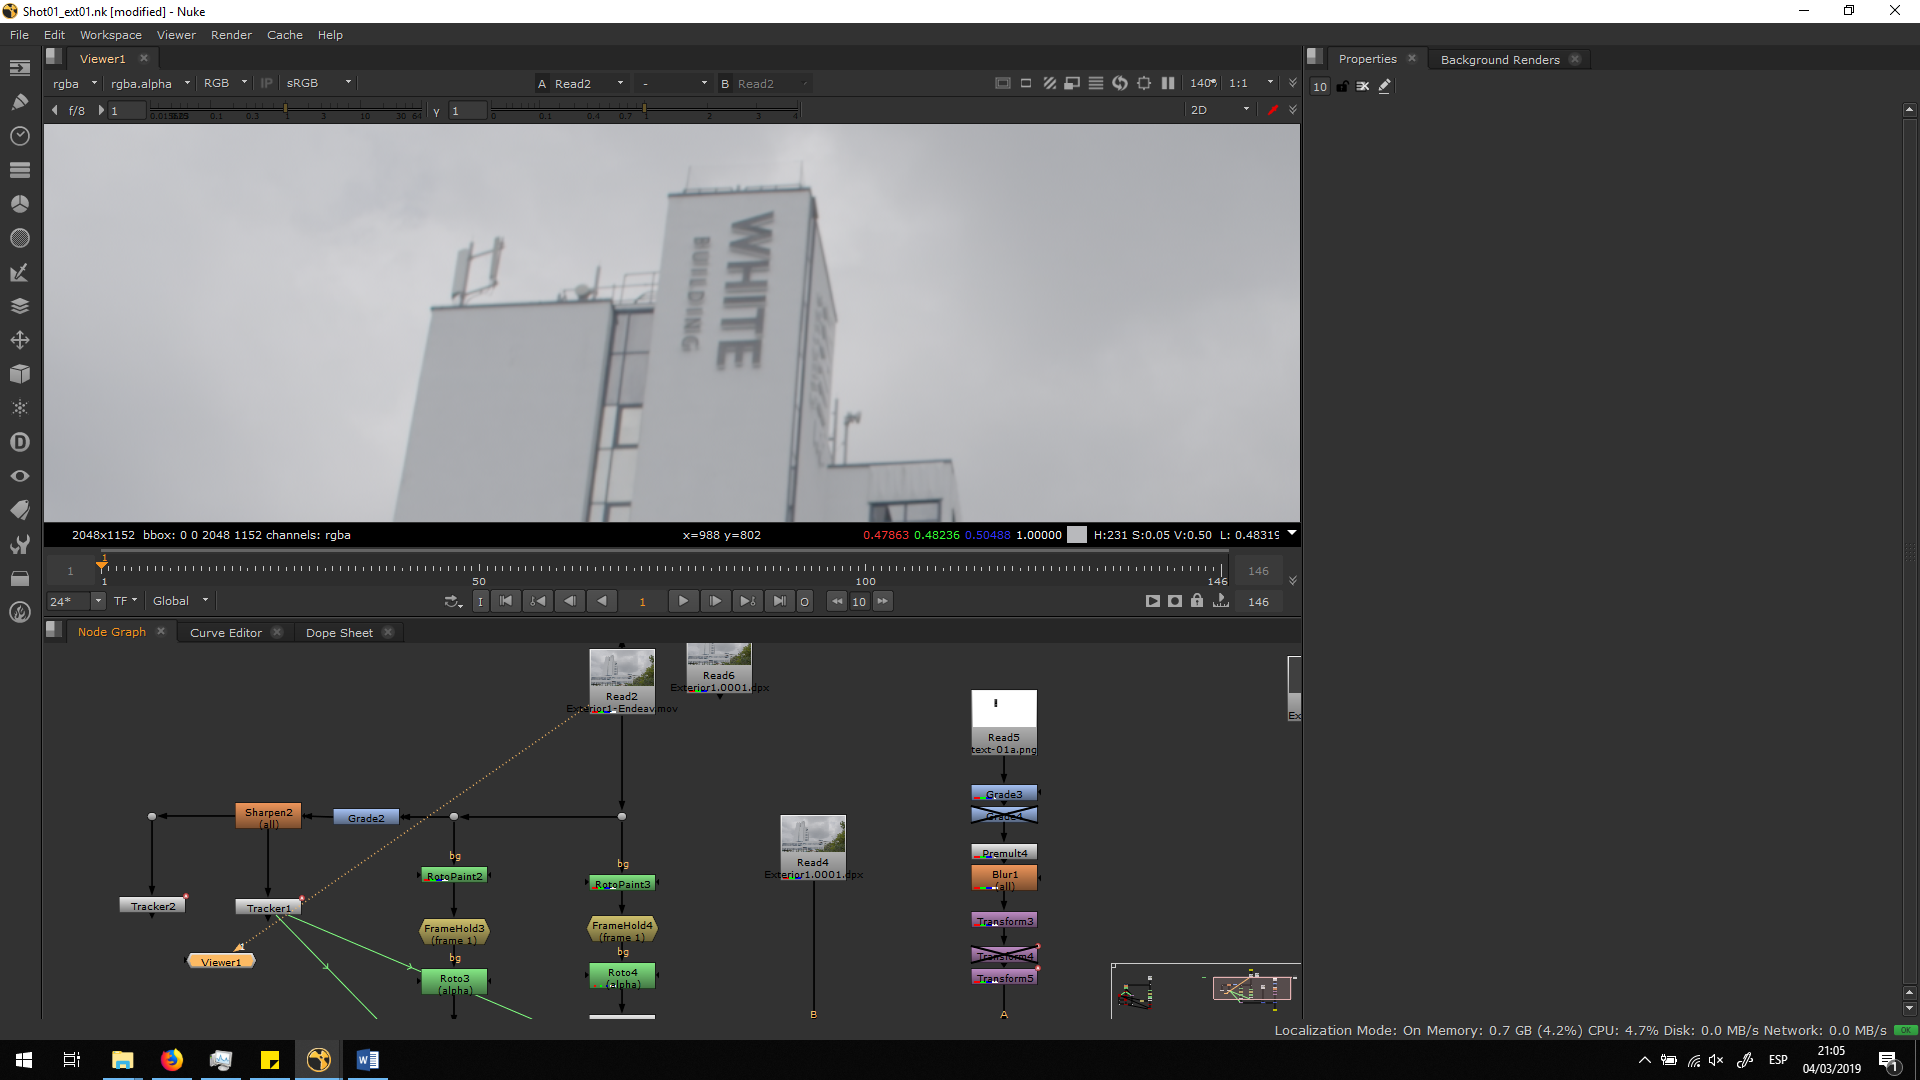
This is the first version of the footage:
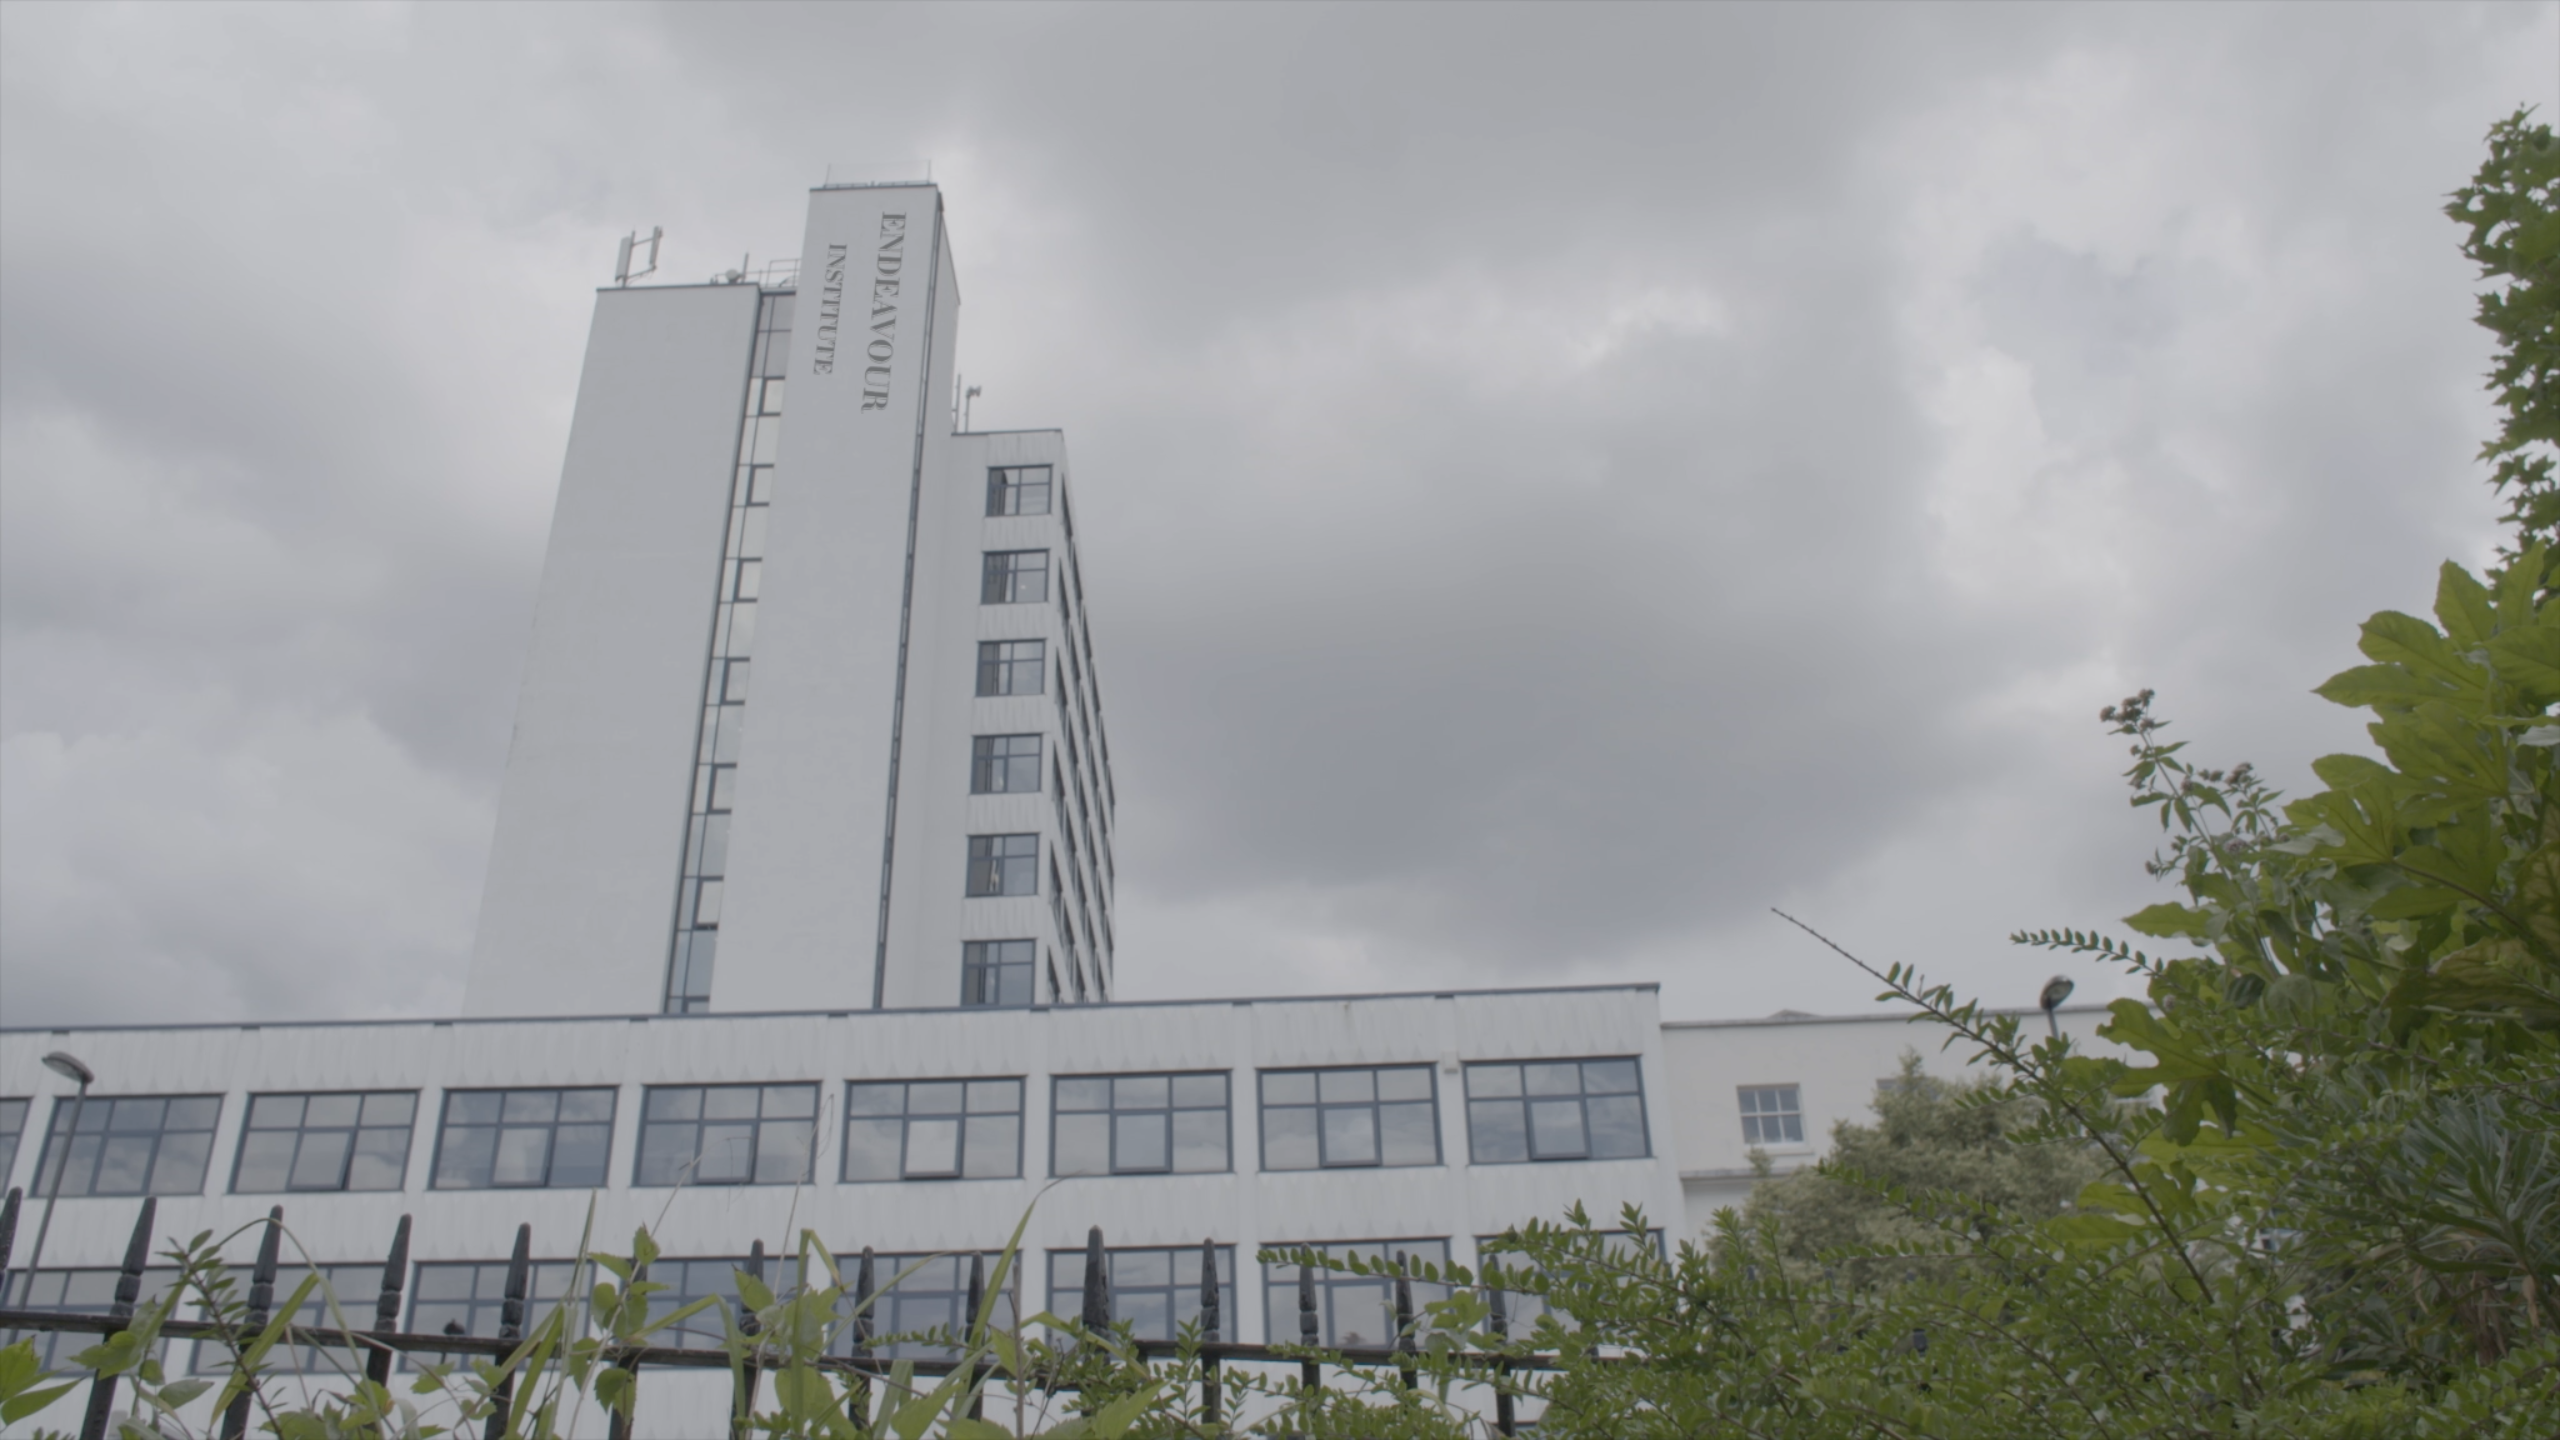
After submitting this versions, I had two corrections in the feedback.
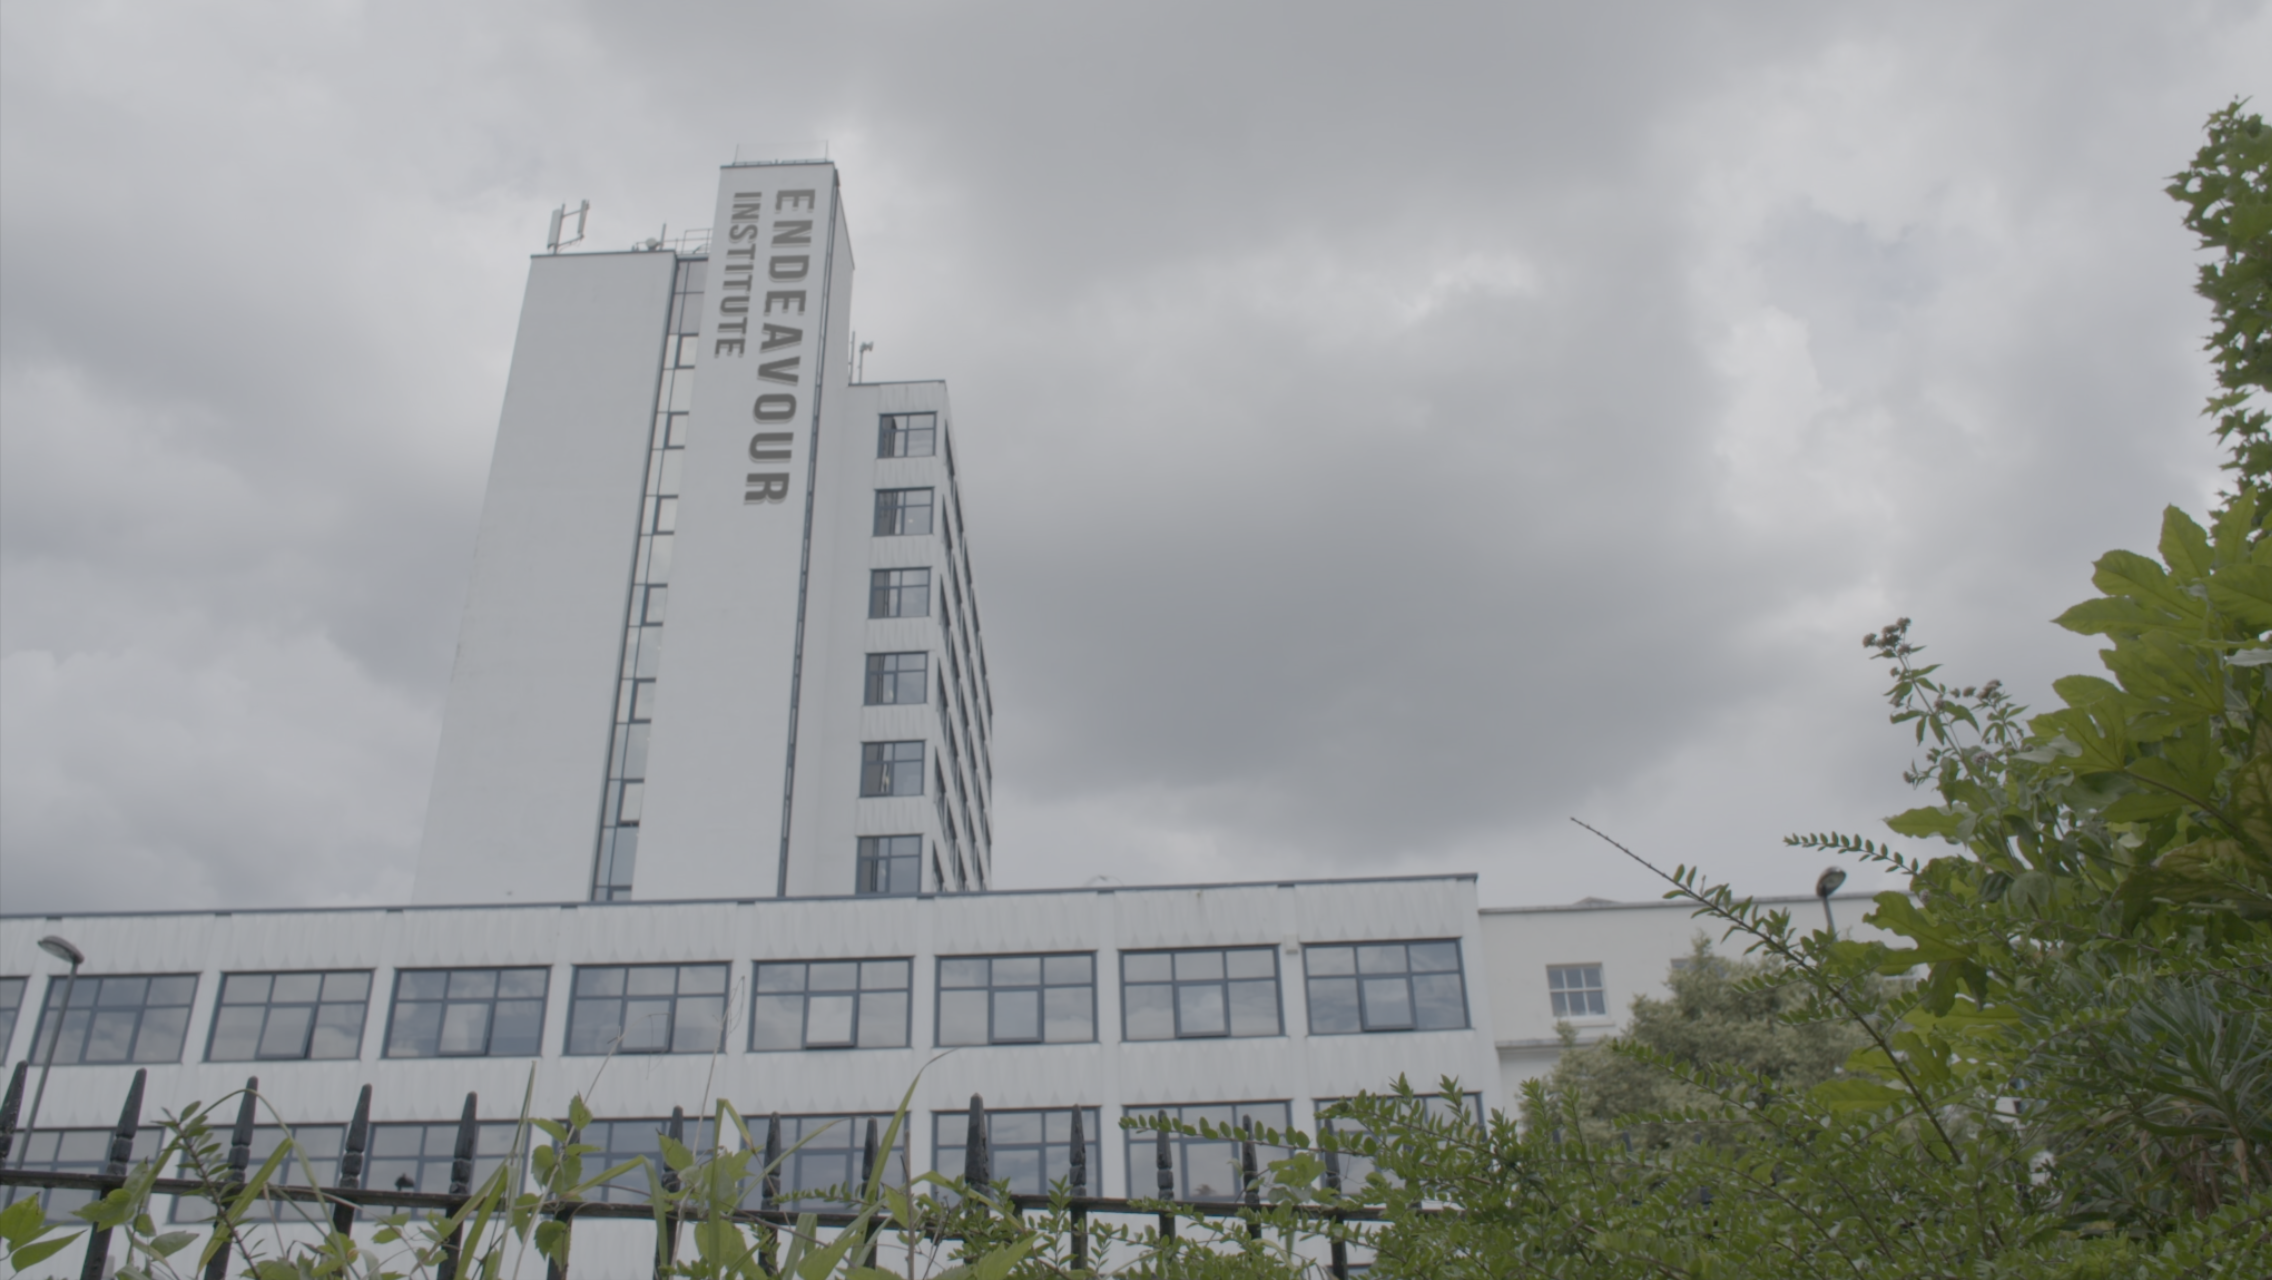
First of all, the text would need to be bigger, as it is really important that is obviously seen and easily readable.
On the other side, even though we were ask to use Didot font in the brief, it came up not looking so good in the shot. It is a Serif font with huge thickness differences, so it is difficult to read if it is small. As a solution, we recommended a Sans Serif Bold font, as Bebas Neue.
Therefore, I did again the letters with the new font, substitute the read file in the script and readjust the transformation to make it bigger, having this final result.
Difficulties
At first, in order to merge the text over the image, I thought to attach the text with no distortion through a scene, tracking the movement of the camera through a Camera tracker. But the movement of the camera was no prominent enough, and it did not have enough parallax. Therefore, it was impossible to have an accurate 3D environment with the camera correctly placed. Therefore, I could not merge the text using a 3D space, that is why I decided to add the distortion in Photoshop and merge it as a 2D image.
