Merge
In this section we are going to explain how to create an alpha channel and merge two pictures.
First of all, we will open out background footage. If we wish to change the dimensions of it, we can press s so view project settings. We can change, for example, the dimension of the picture, the color or the pixel ratio. We should make sure that both pictures we want to merge have similar features.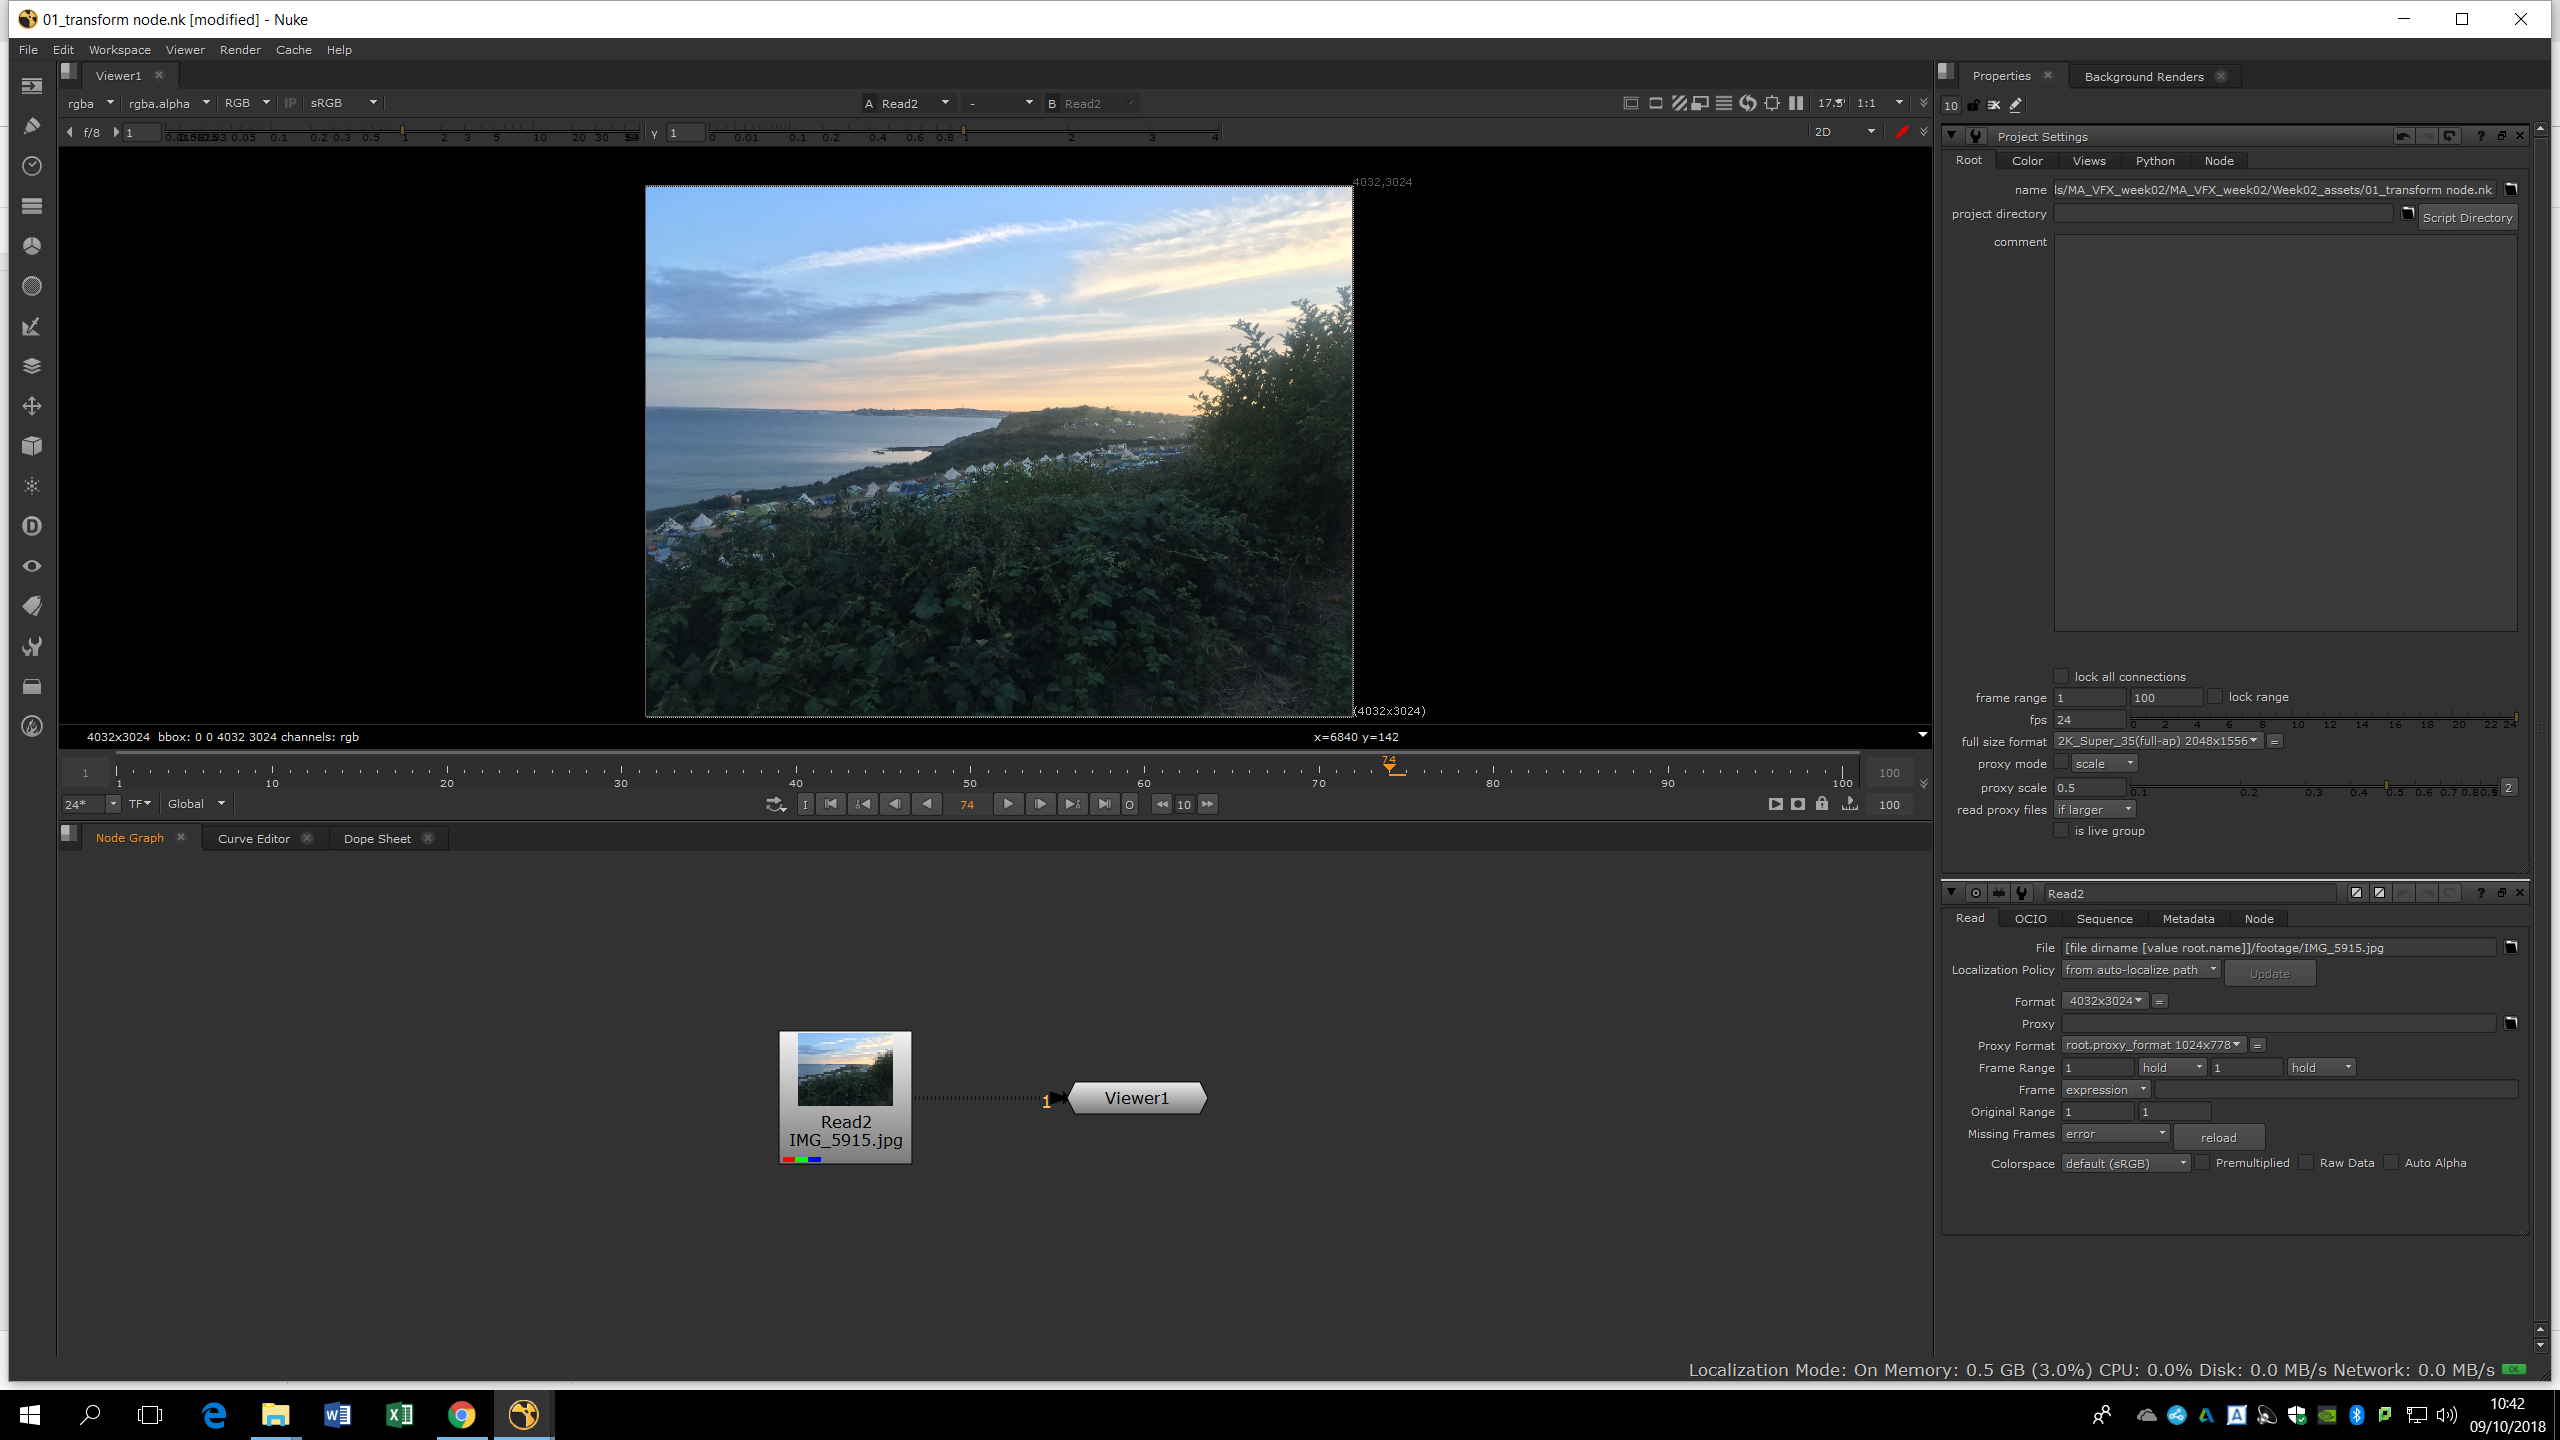
To import a second picture, we can either press tab a do a read note, either drag the file into the note area. Then, it will appear as a note. The picture we imported in order to put it over the background doesn’t have any alpha channel. Therefore, we would need to find the way to separate the element (bird) from the white background.
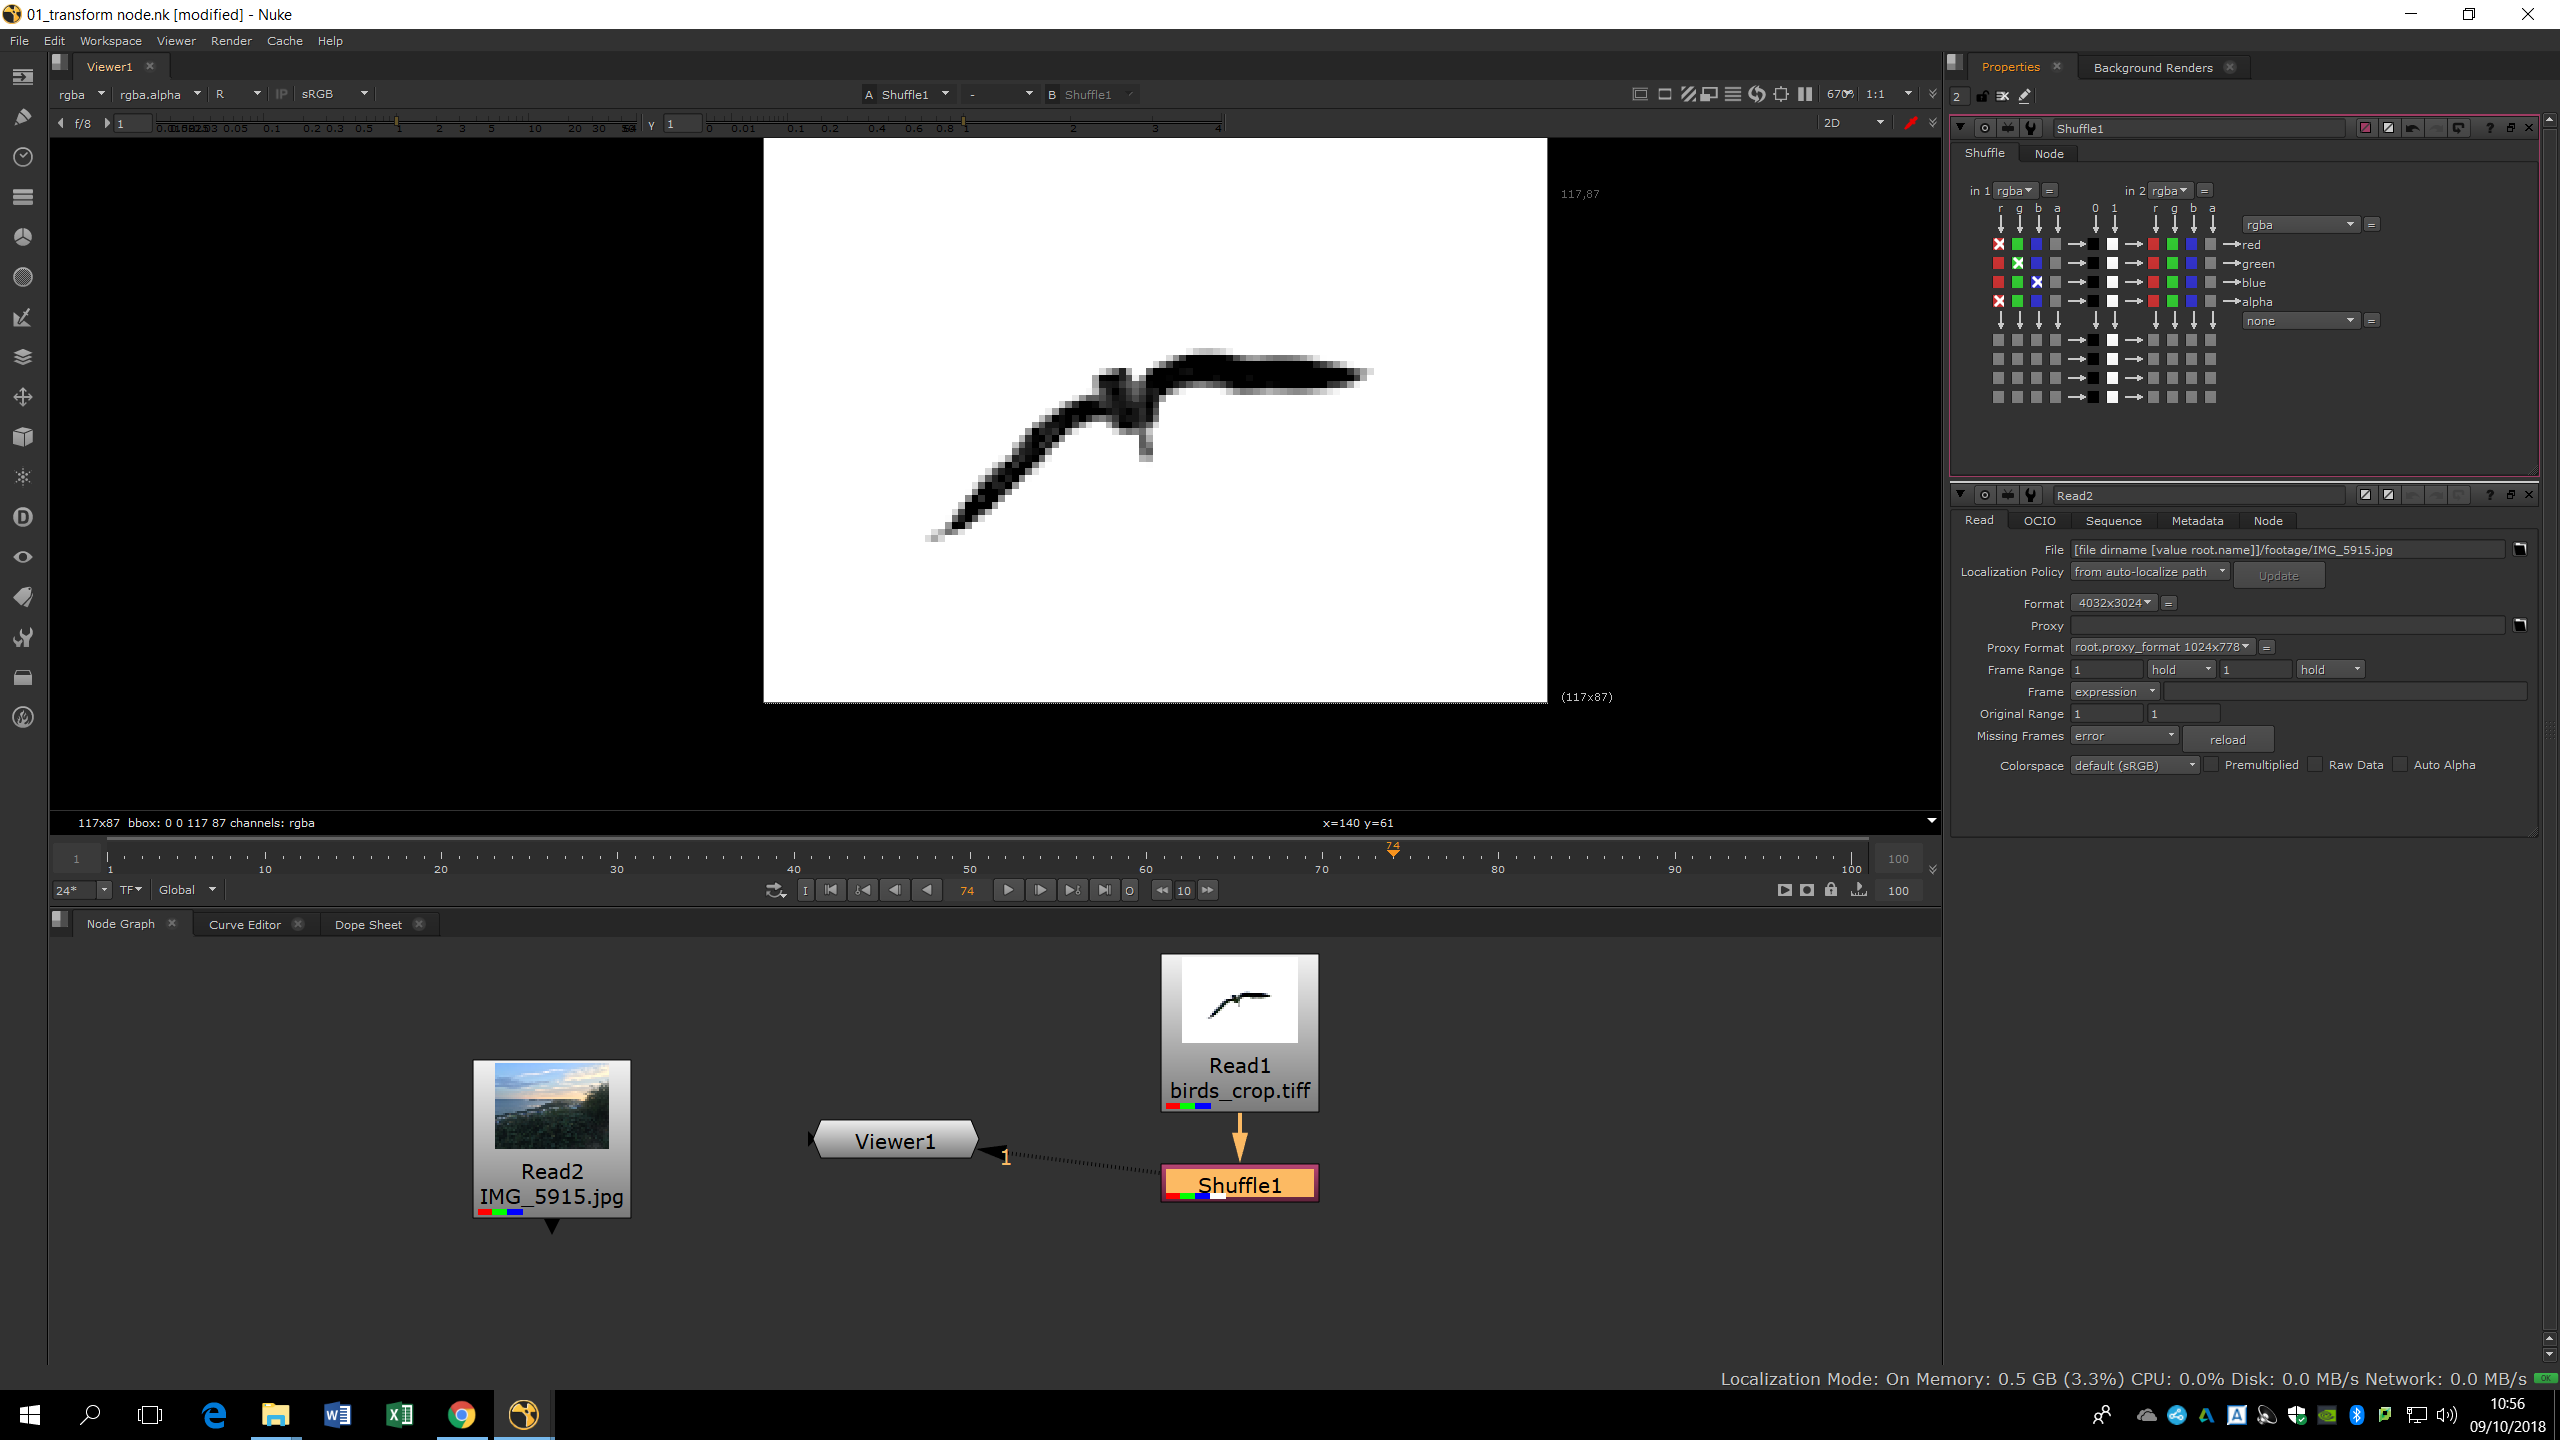
In order to do that, we will add a Shuffle note. In that note, we can see the different channels of the bird. If we press R, G or B we can preview each channels in the viewer.
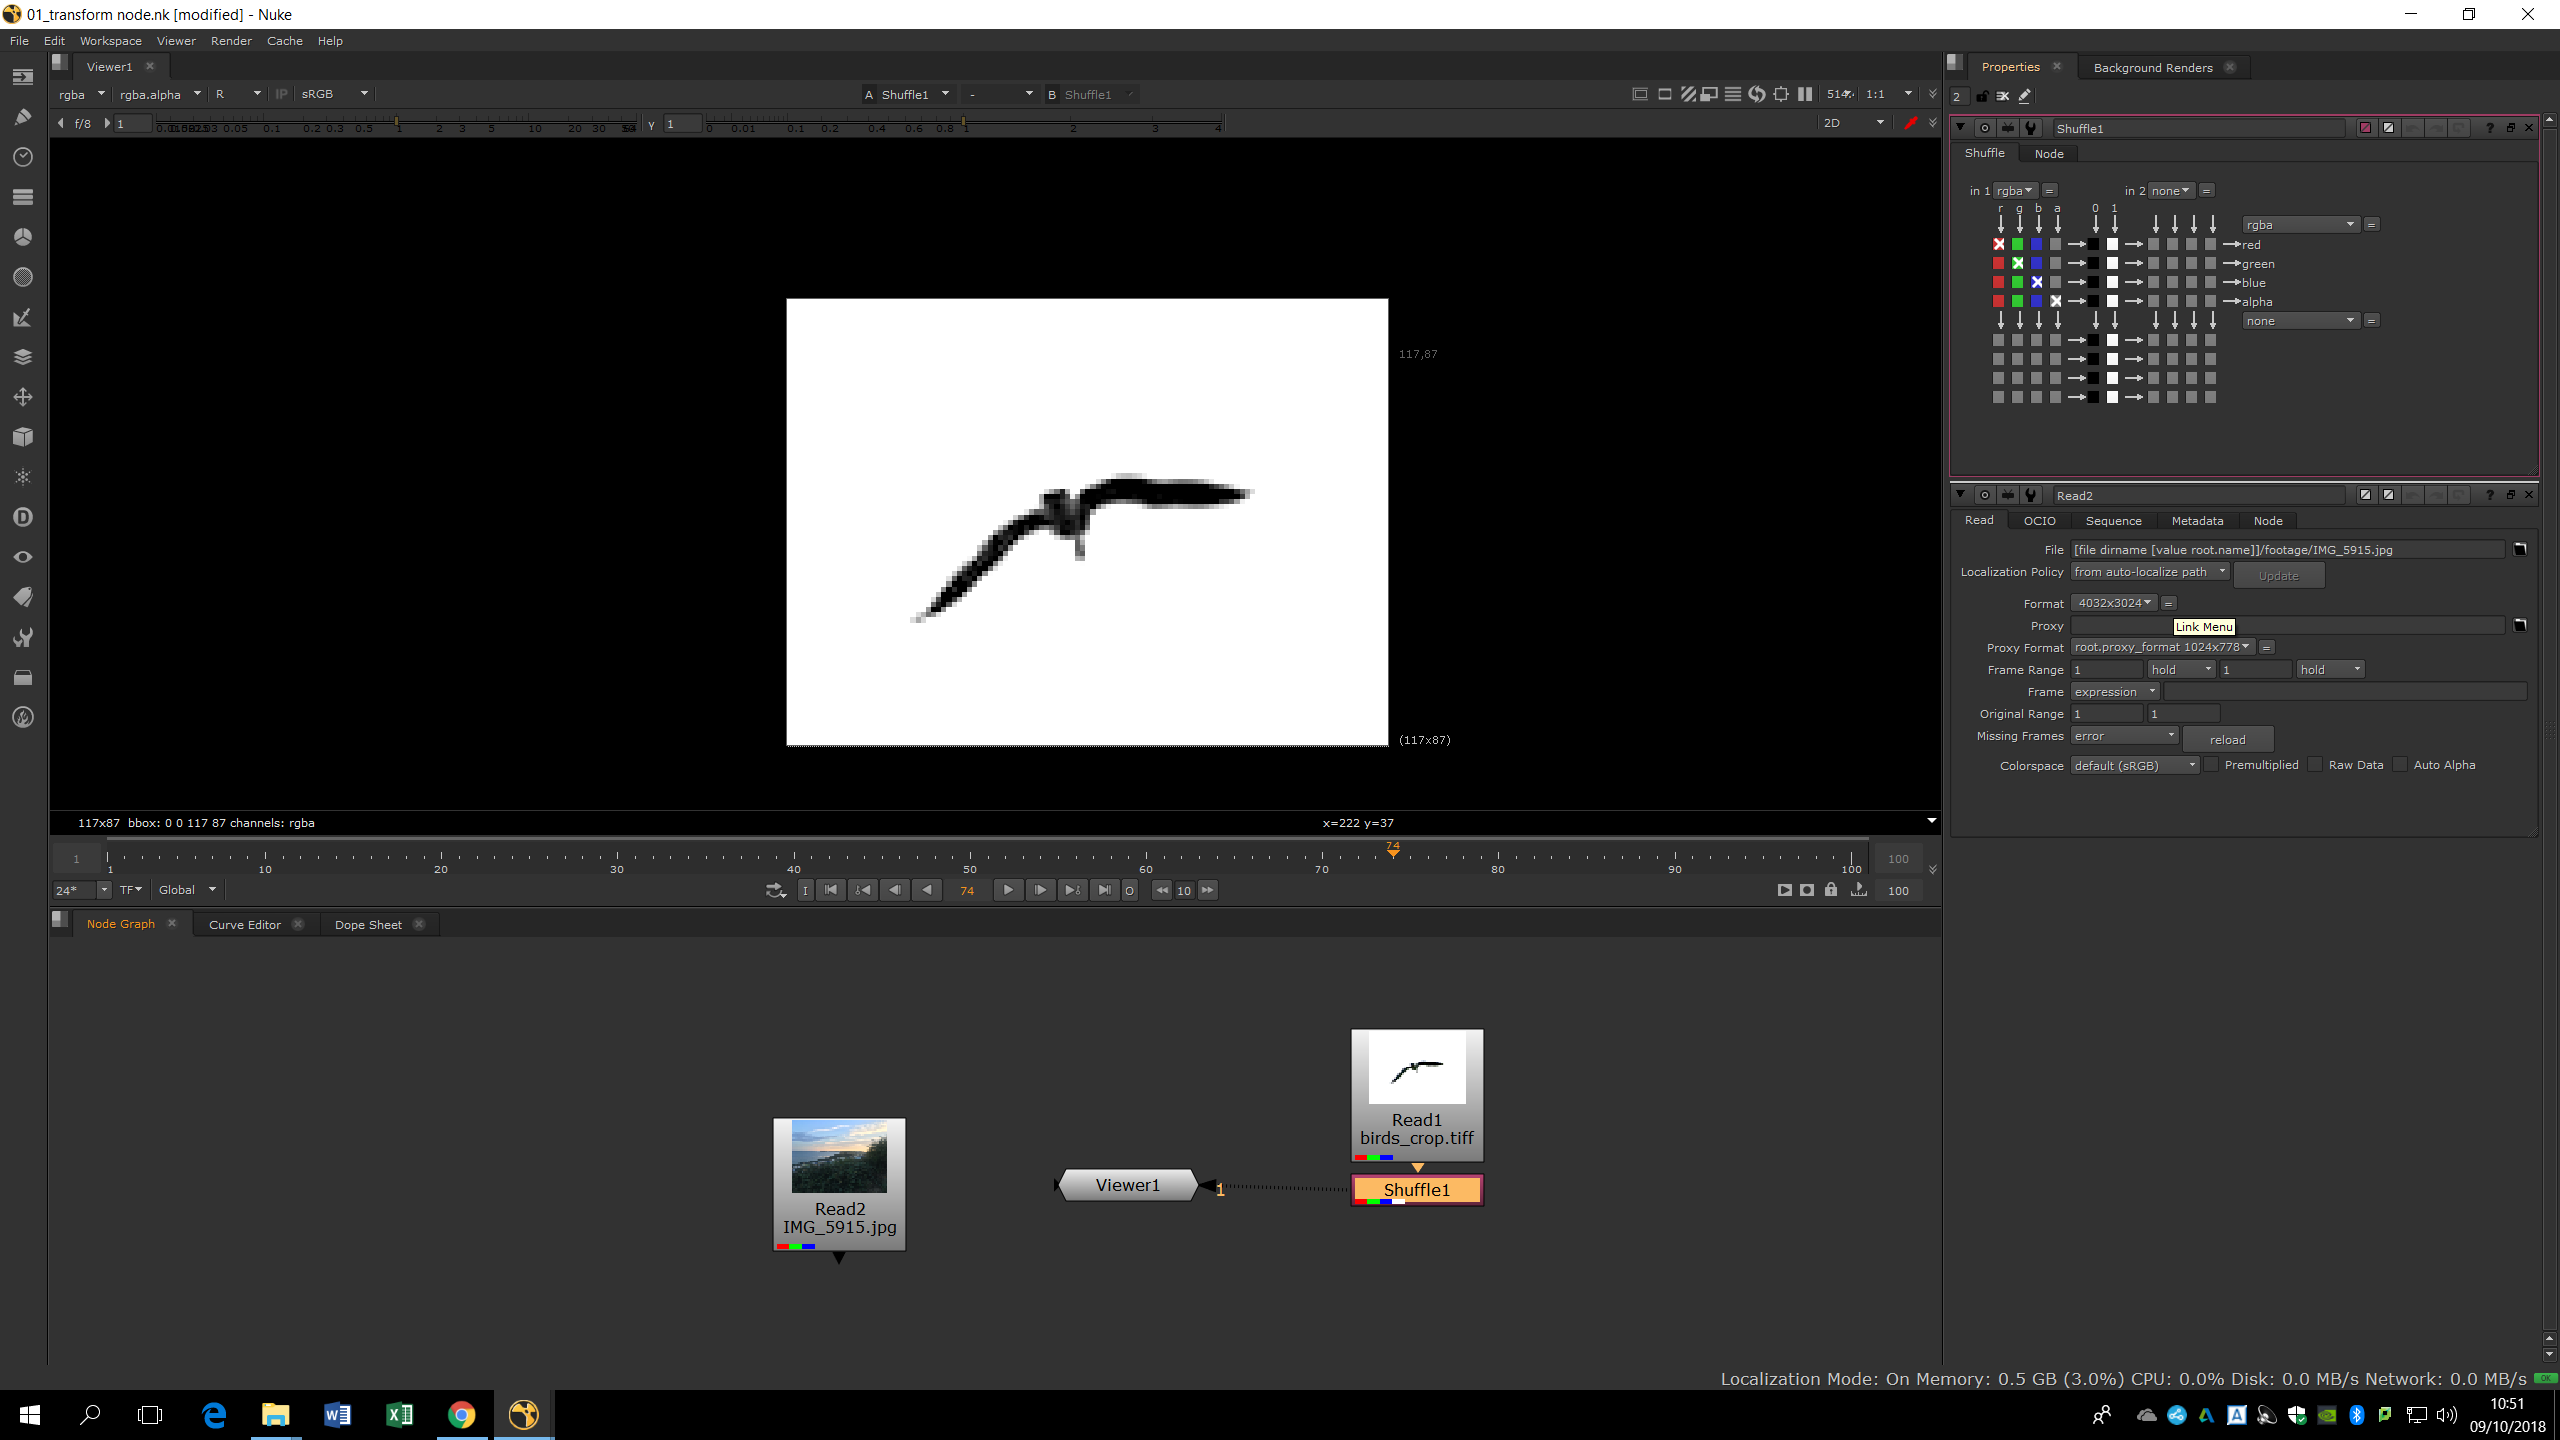
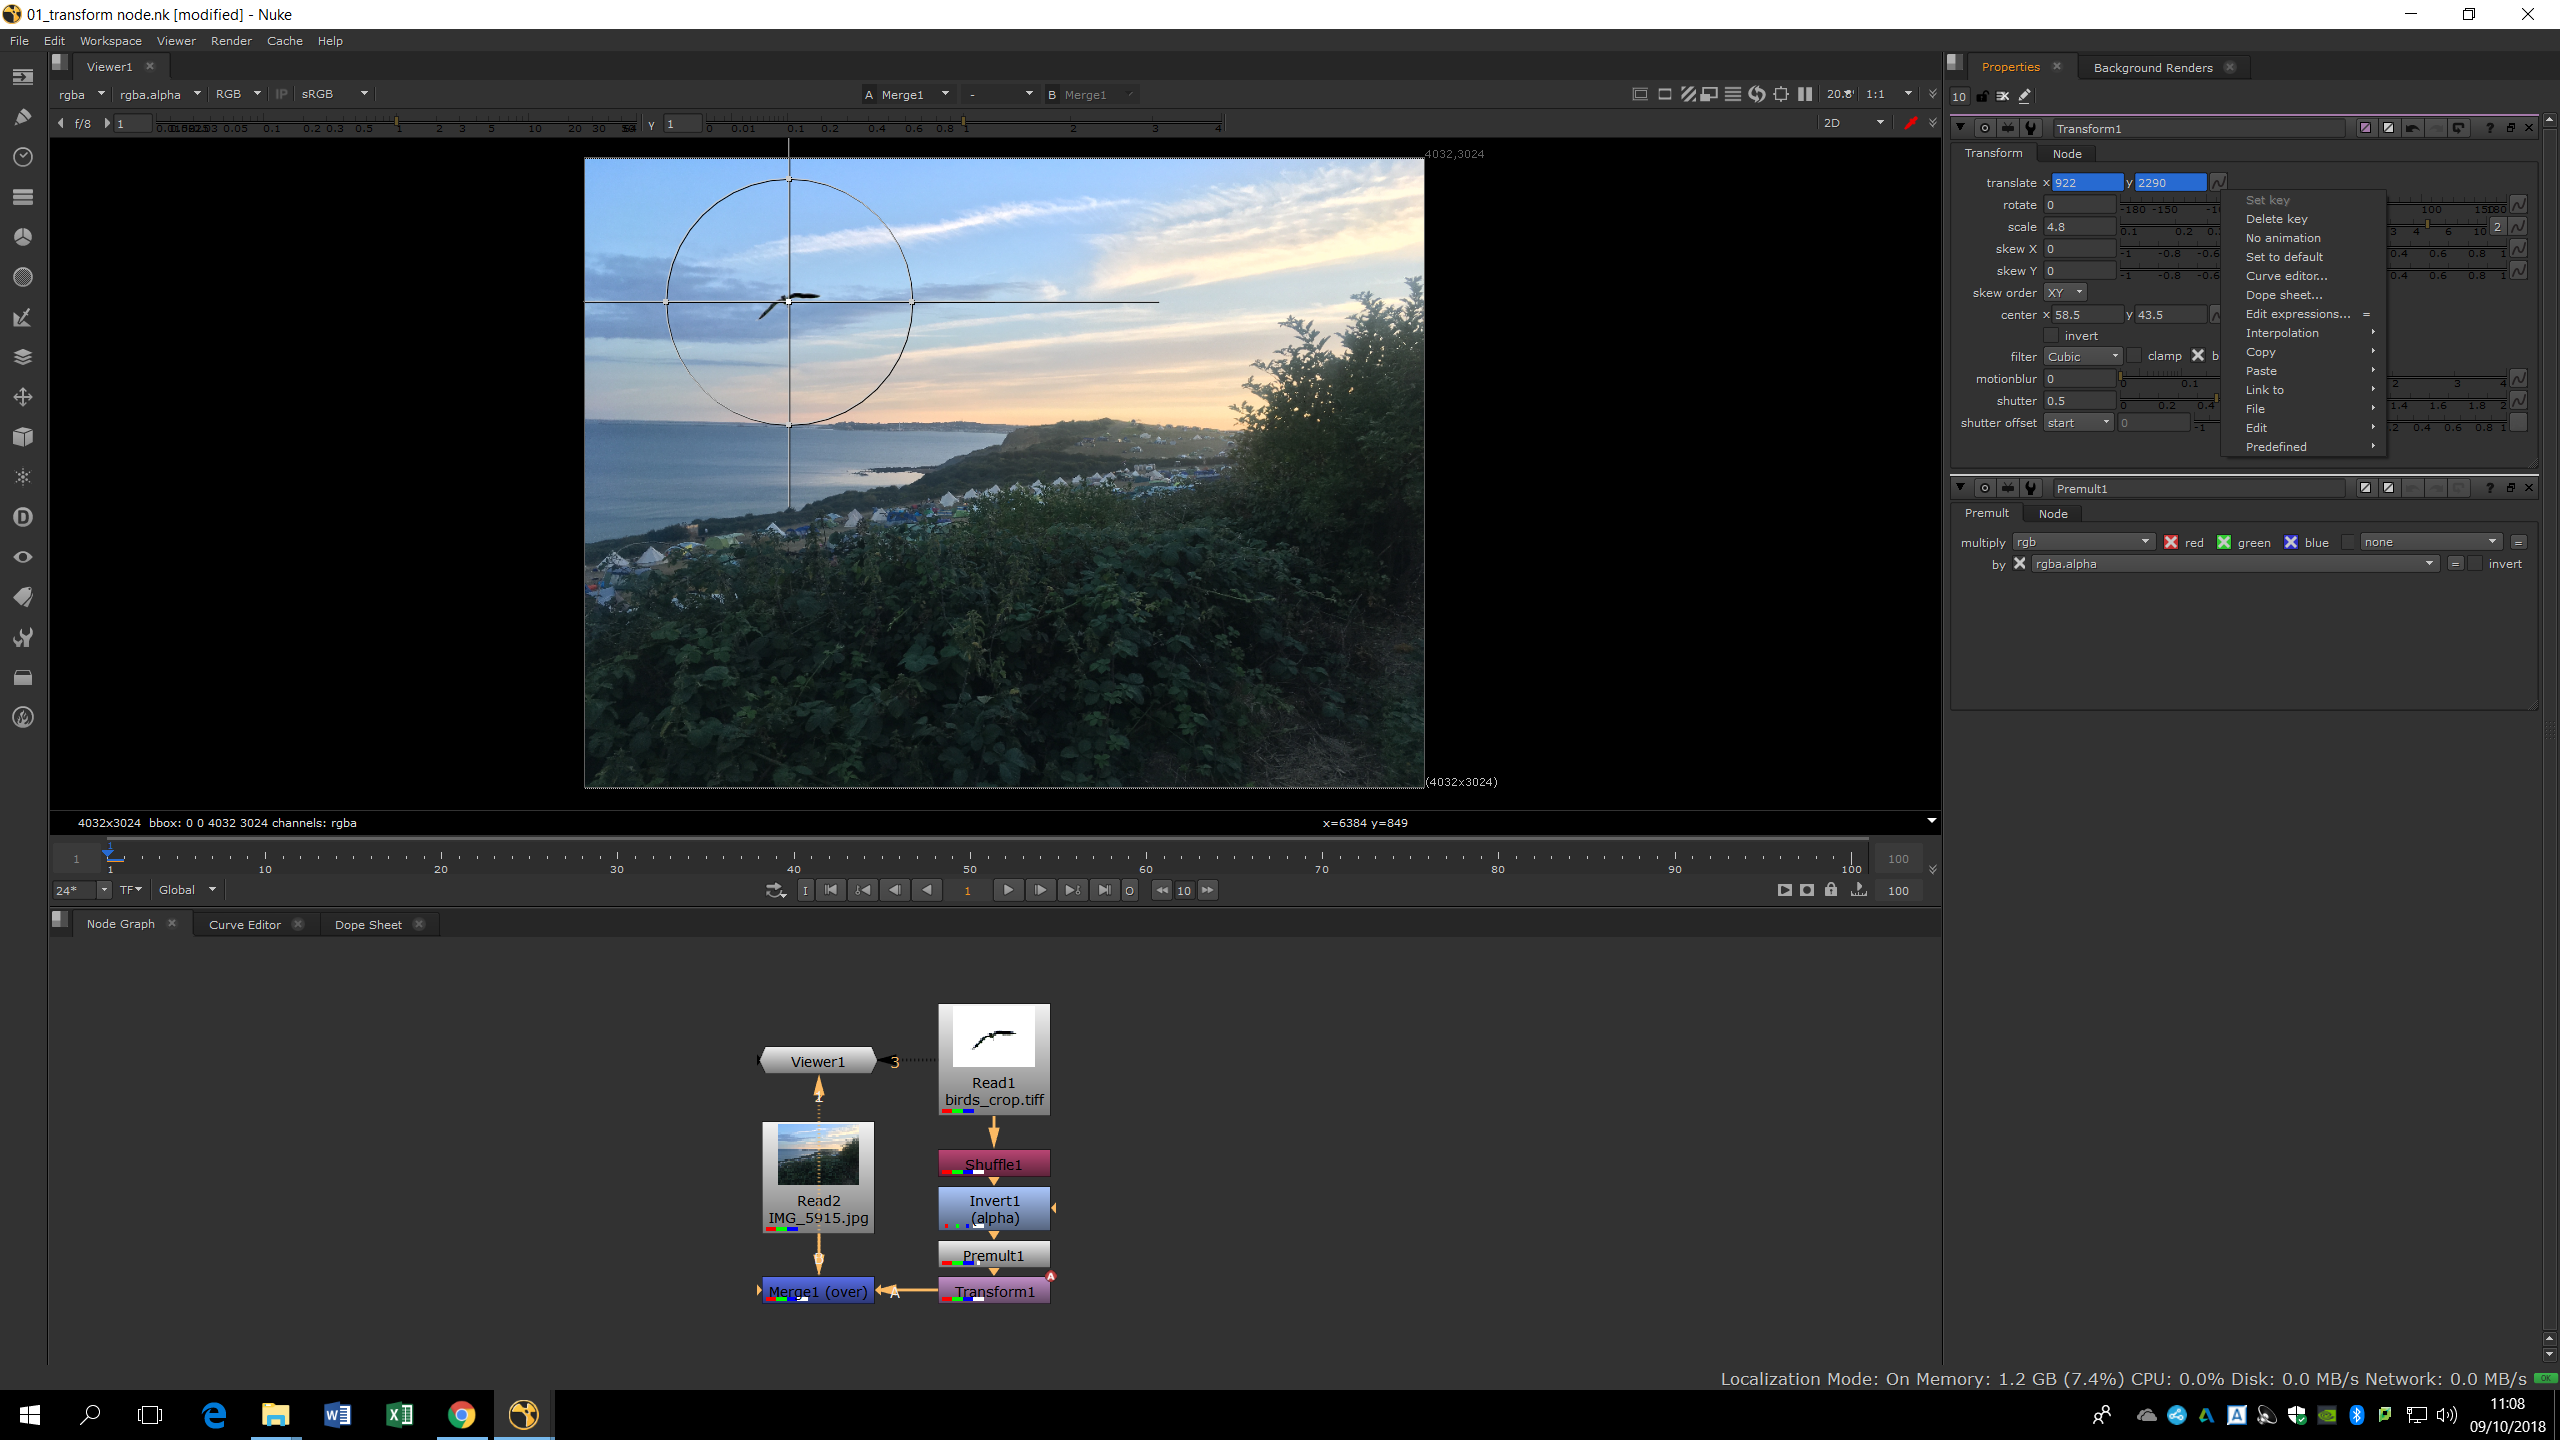
We need to find the channel in which the color of the bird is closer to the black, and in this case we realized it is the red one.Therefore, it is the red channel the one we are going to turn into an alpha channel. To accomplish that, we would just need to change the alpha input on the shuttle scheme menu from alpha to red, as it is shown in the following picture. Now, if we preview the alpha channel we can see how the bird shape is marked as alpha.
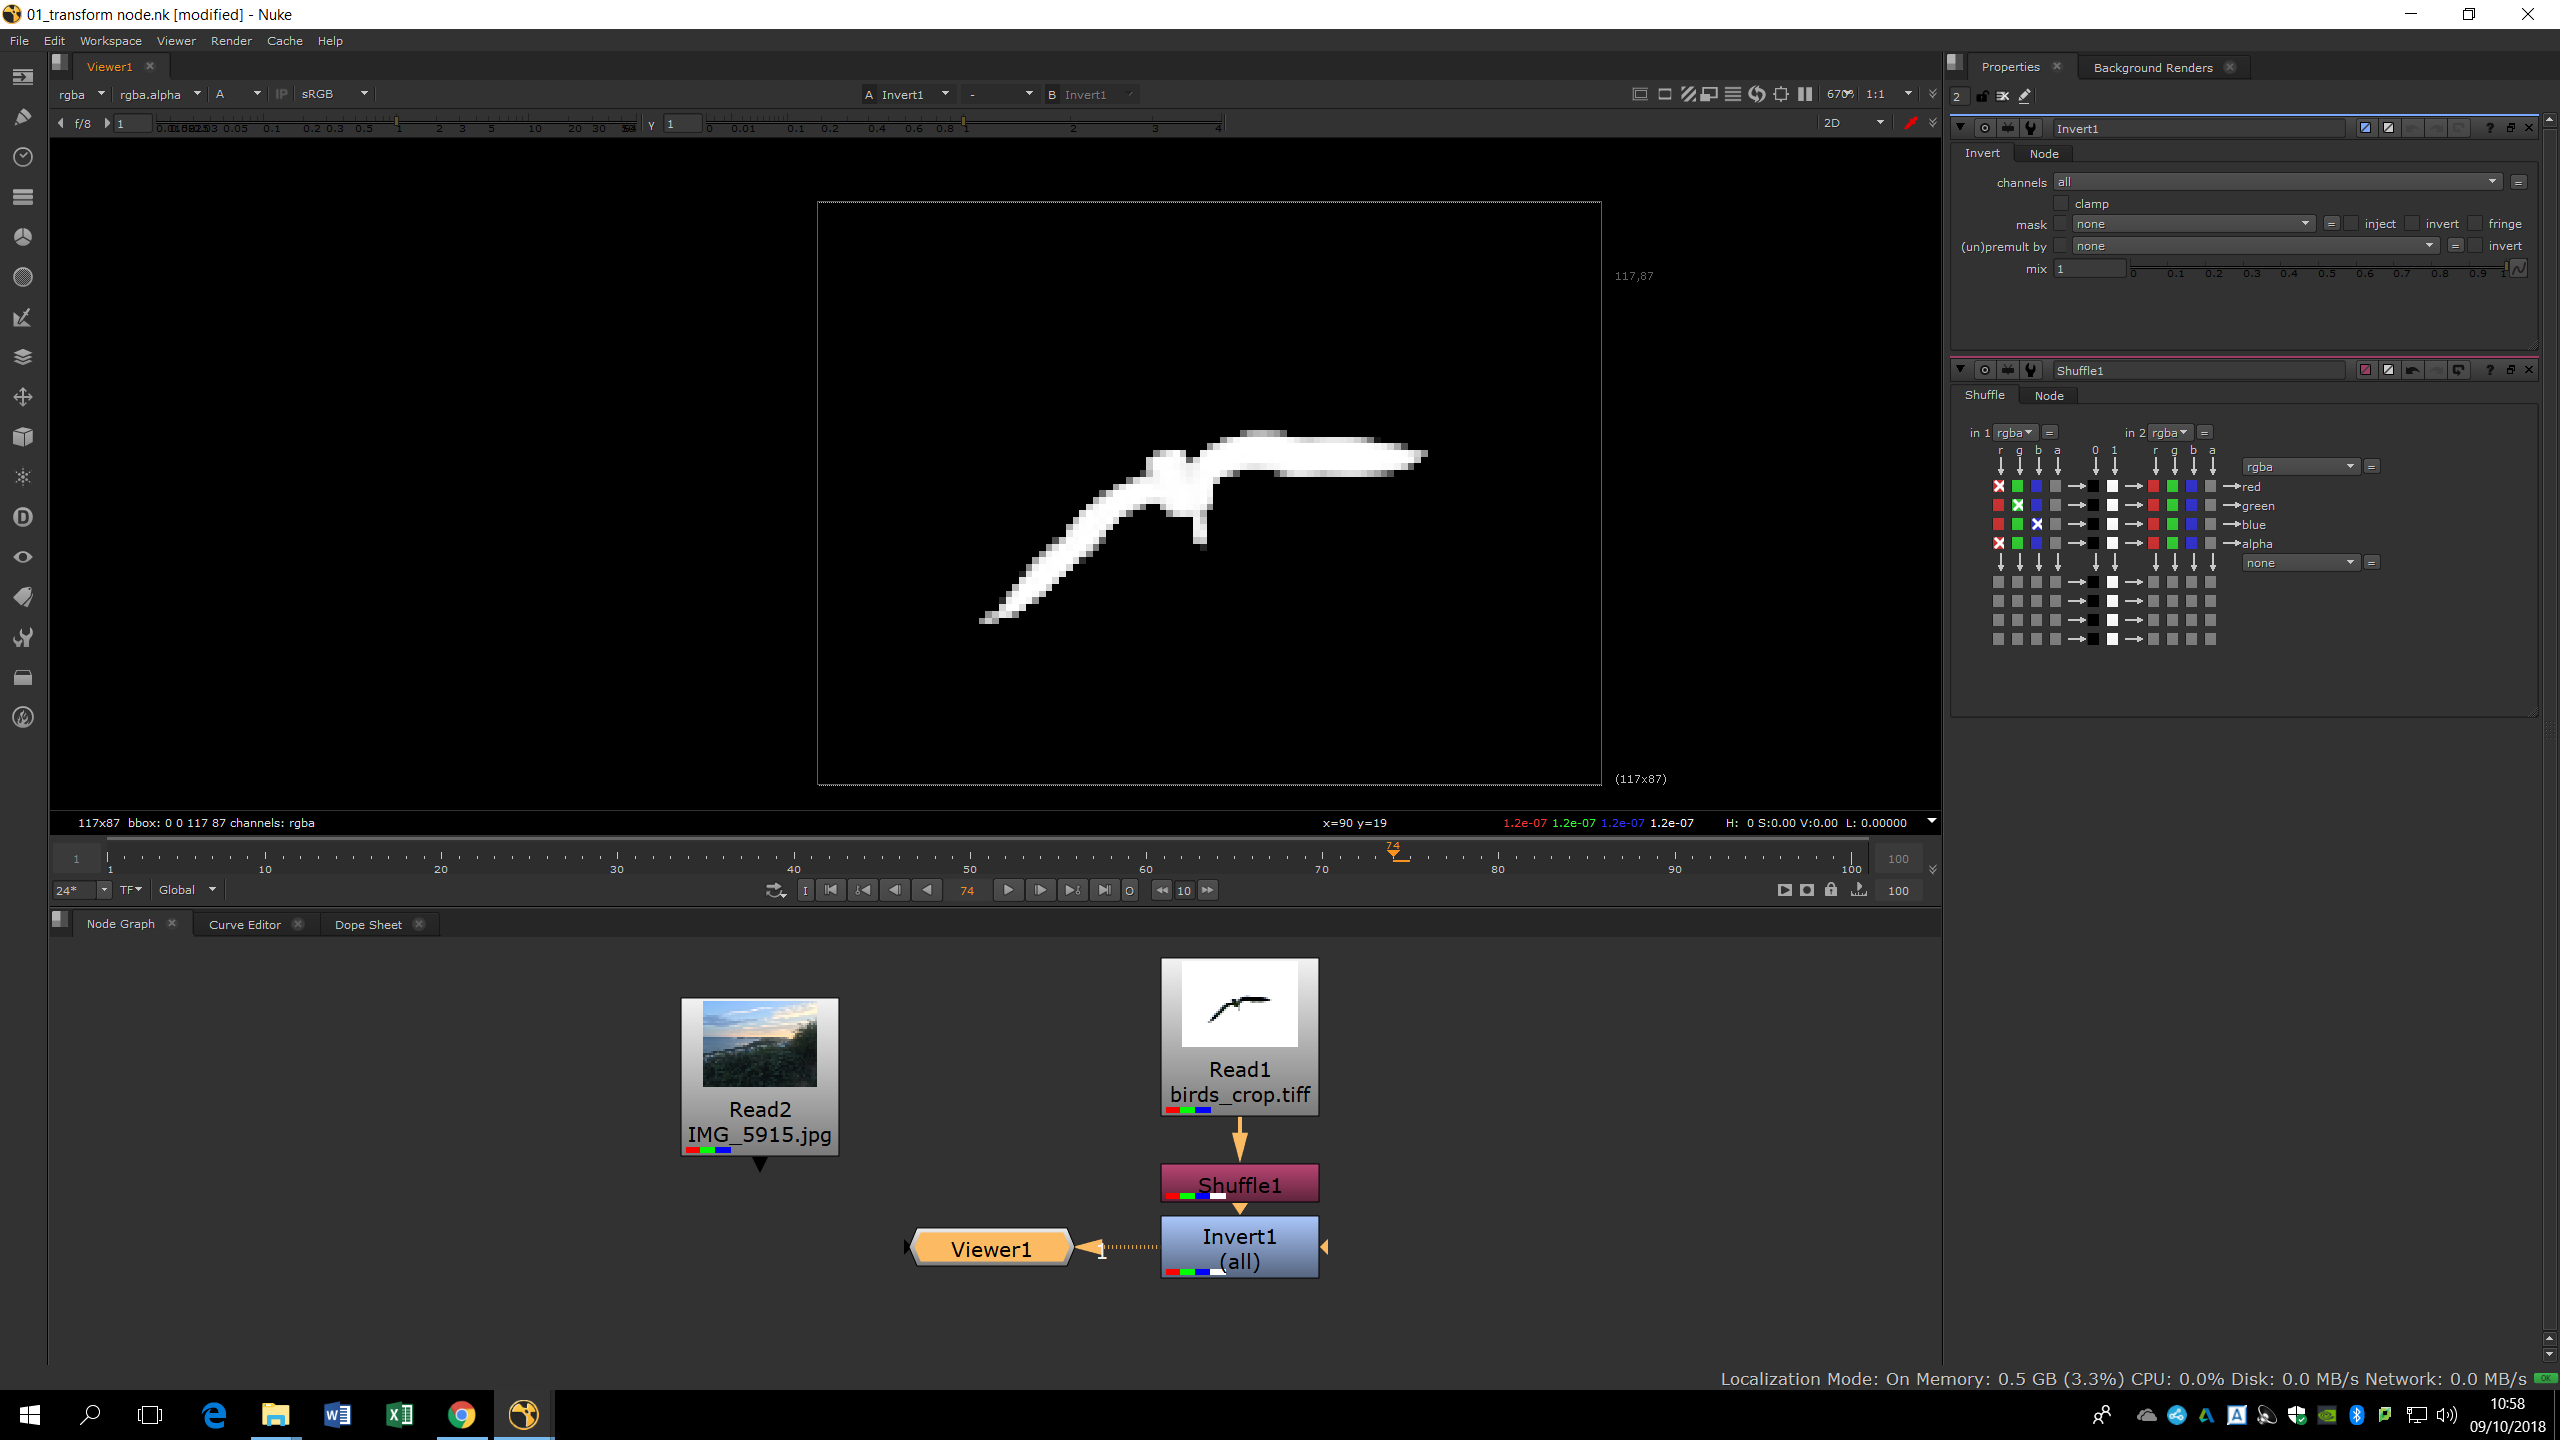
But we want the white background to be transparent, not the bird. Therefore, we should add an invert note after the shuffle. This note will also invert the RGB channels; to avoid that, we would mark in the invert settings Channels -> Alpha. Now, we can see how the bird shape is opaque and the white background became an alpha channel.
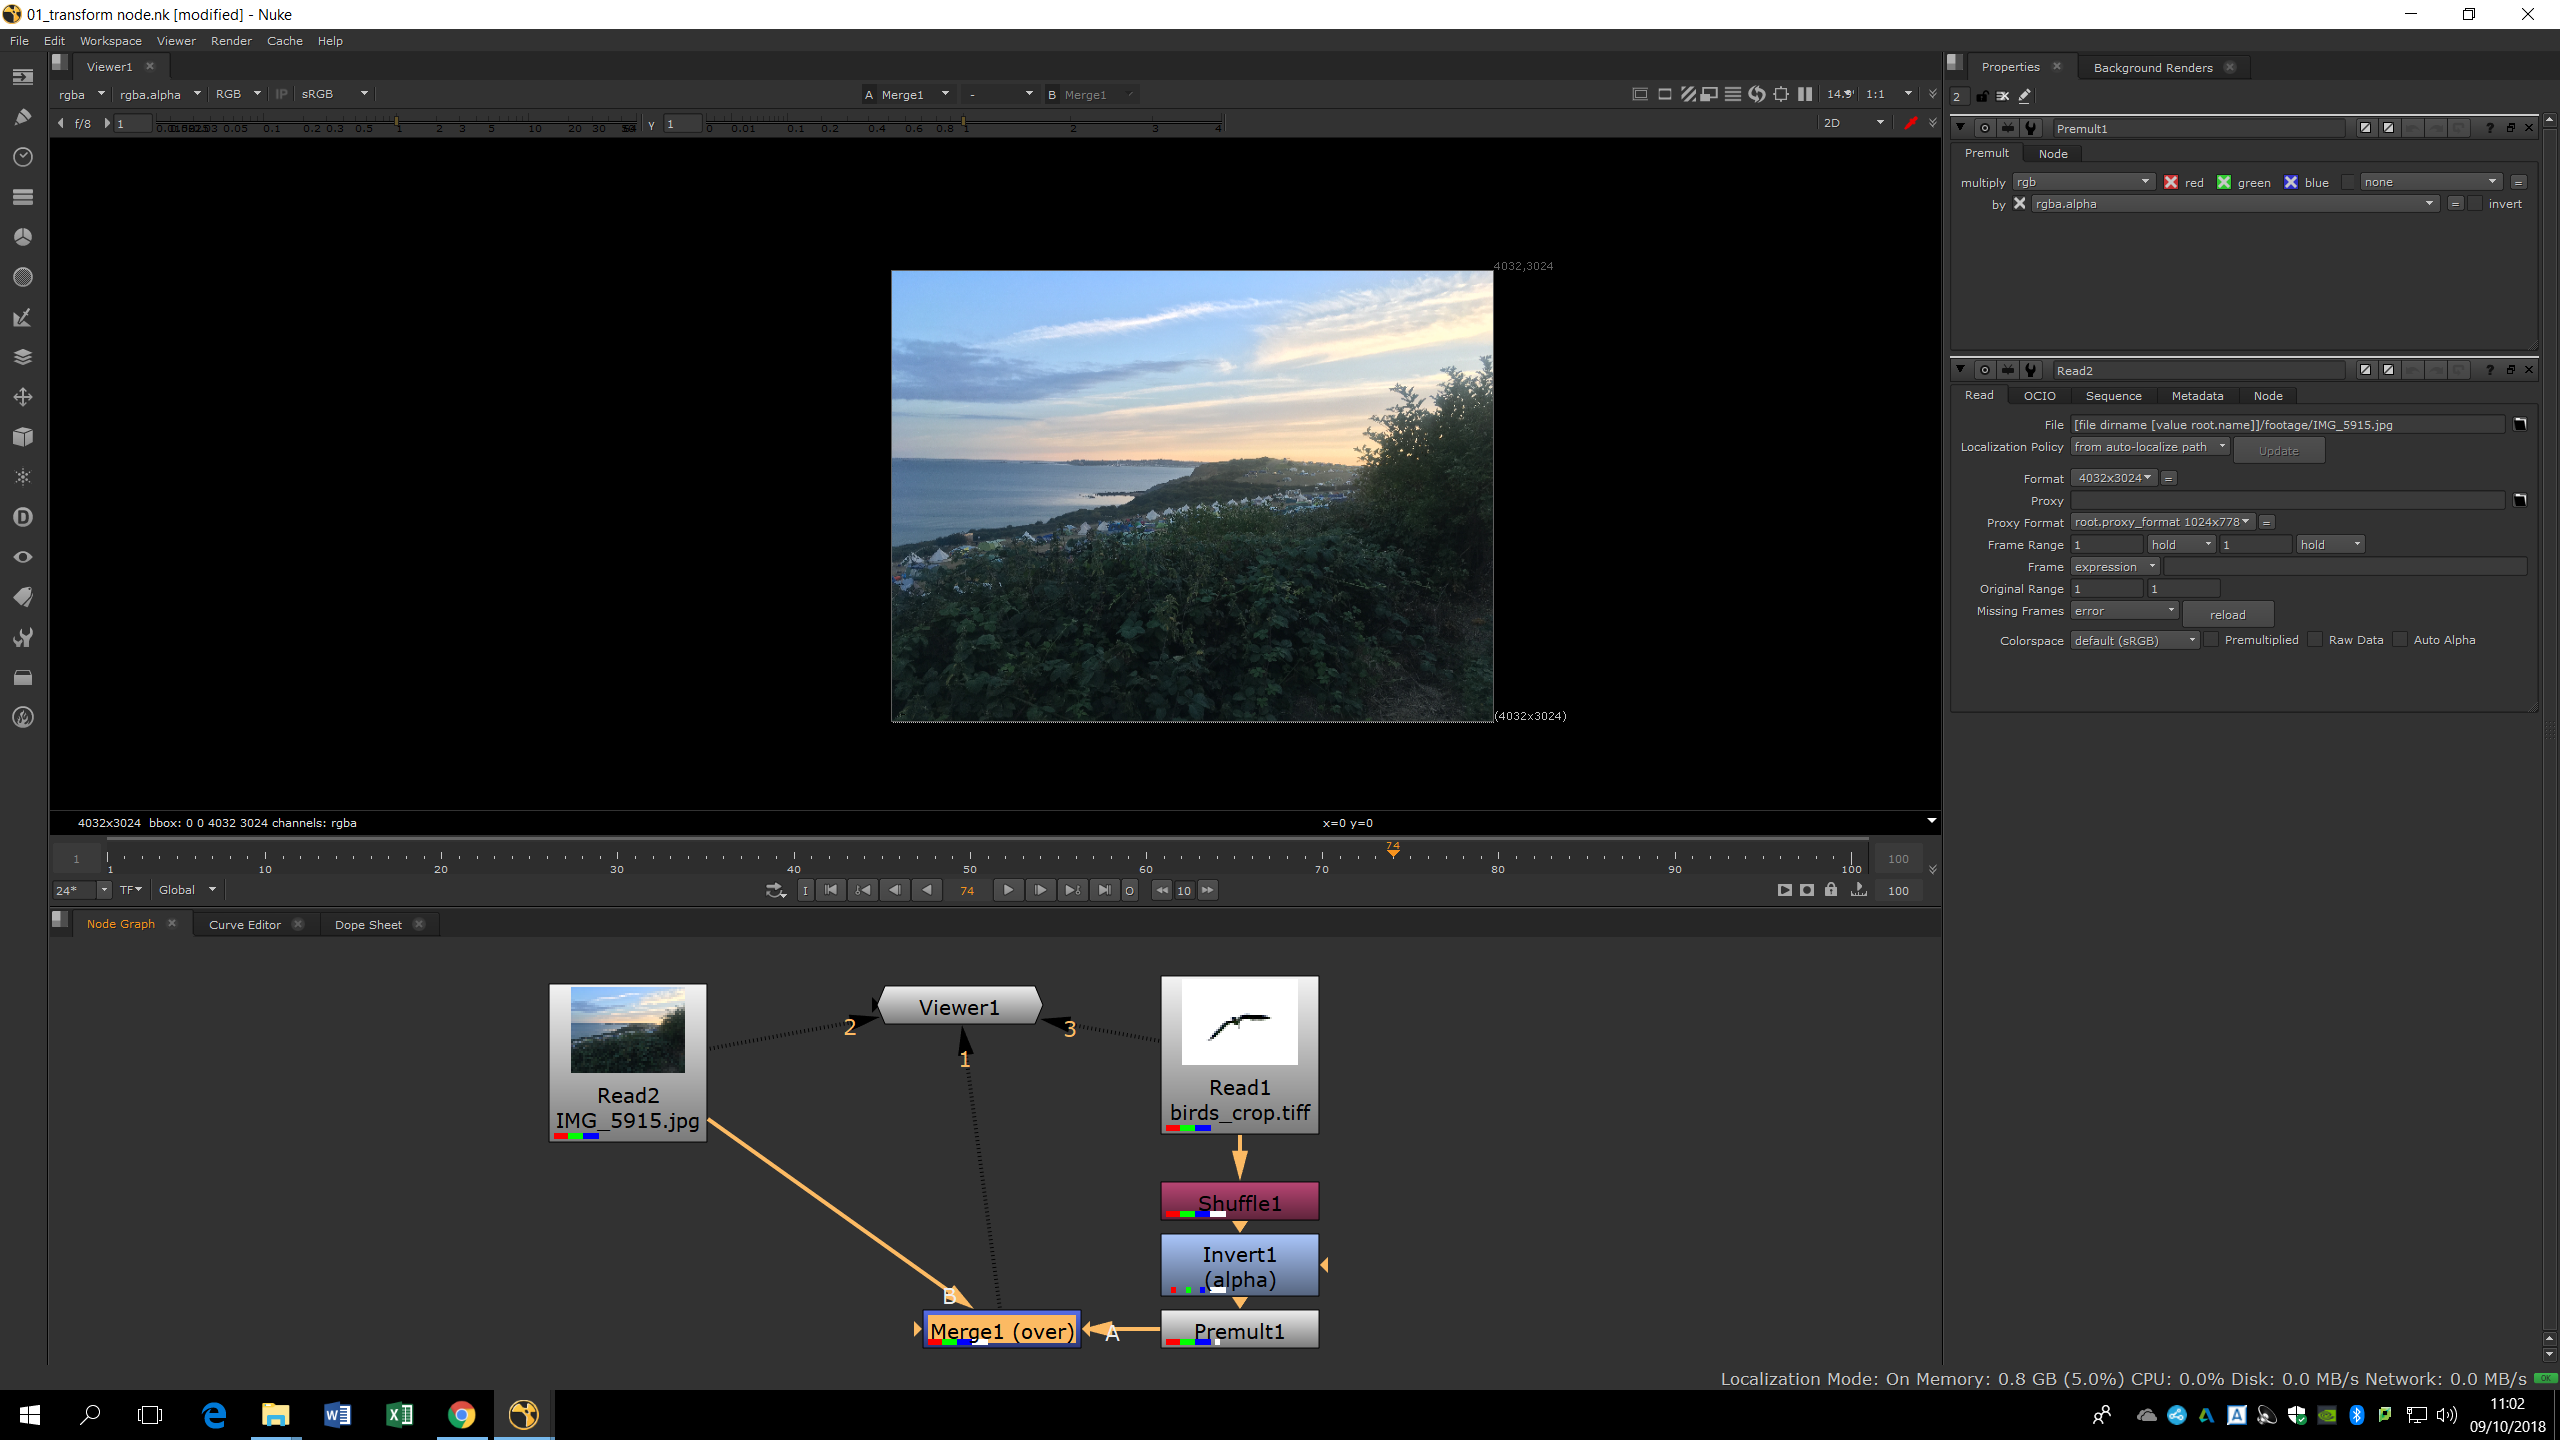
Now, both pictures are ready to be merged. To make the bird picture available to be seen after merge, we need to premultiply it. For that, we just need to add a Premult note after the invert one. Then, we can add a Merge (over) note to merge both pictures. We will link the background with the merge note using the arrow in which is written bg, and we will use the other arrow to link the bird.
The background is much bigger than the bird, therefore we can not see it properly. To solve this problem, we just need to click in Premult note and press T in order to add a transform note and transform the bird. Now, we can scale it and place it anywhere in the background.
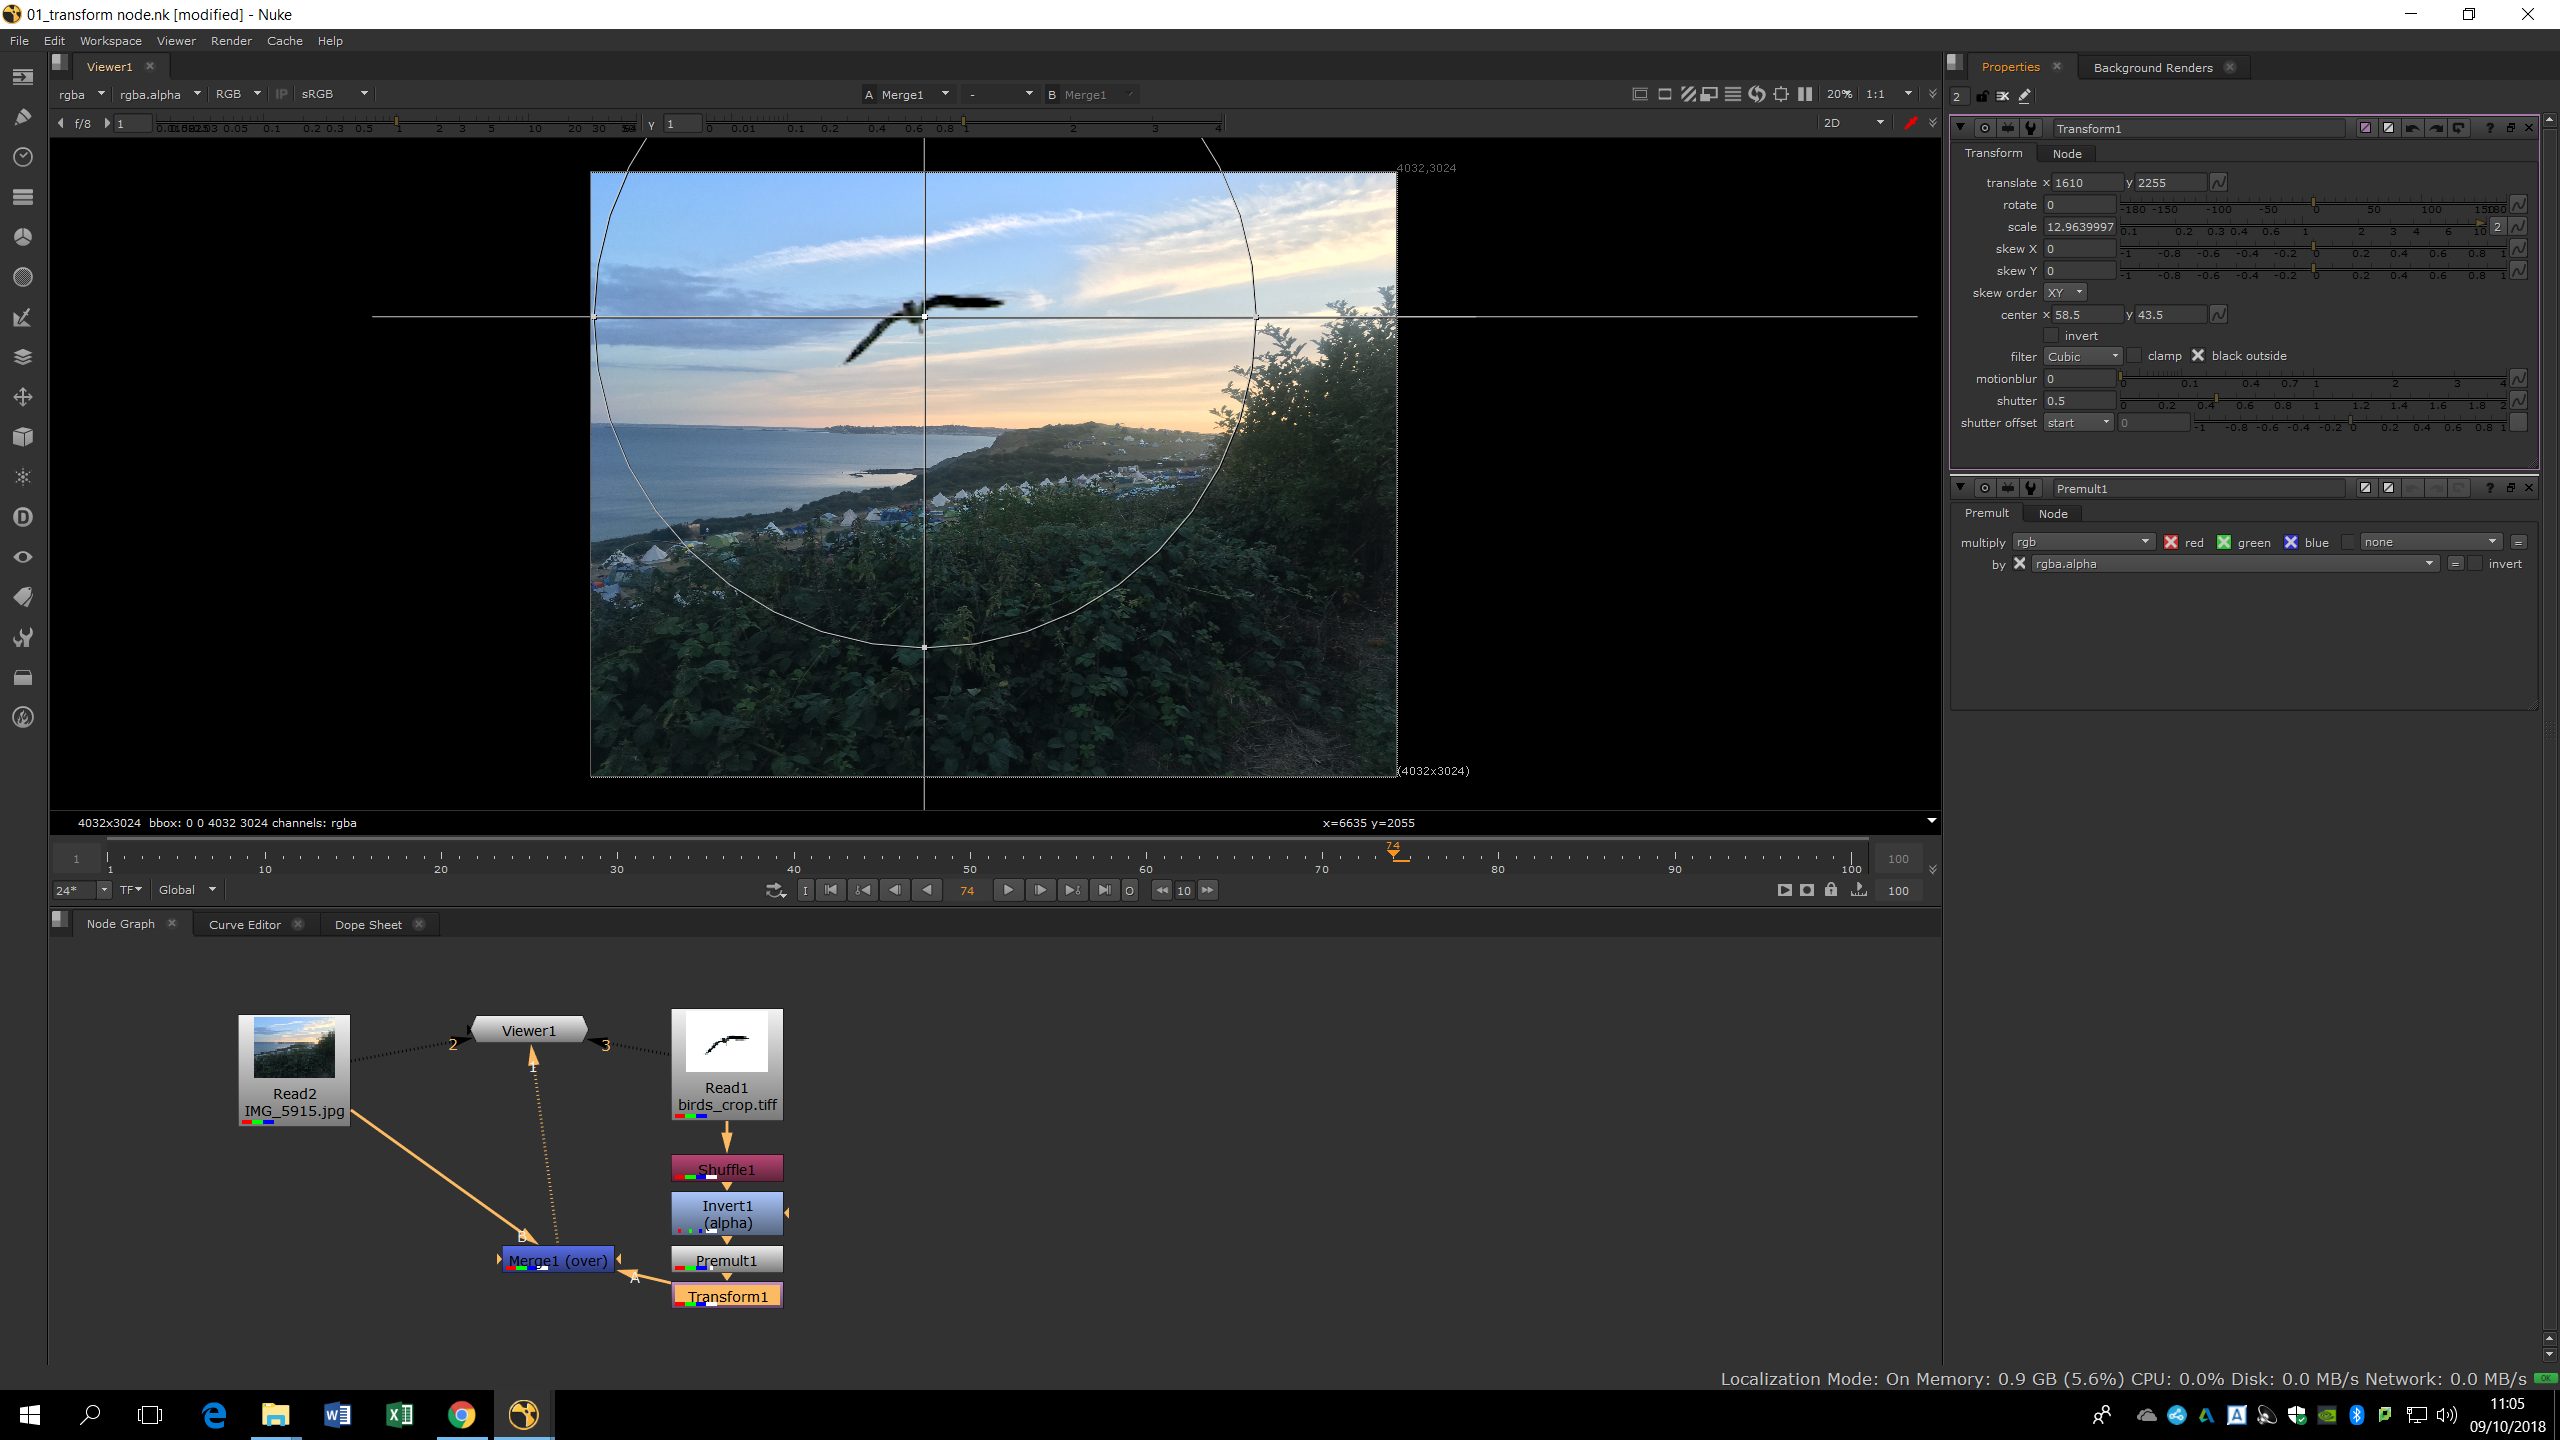
We can also animate those values. To do that, we can put a key frame along the timeline, and set there a specific values of translation, rotation, scale, and screw. Then, we can go to another point of the timeline and add another key frame with different values. Nuke will automatically make an animation on time changing gradually the values we mark. When we see the values in dark blue it means we there is a key frame in that frame for those values; if we see them in light blue it means there is not a key frame in that frame but there is an animation.
We can also change the amount of motion blur and the shutter (which can also be animated) to make the movement more realistic.
Concatenation
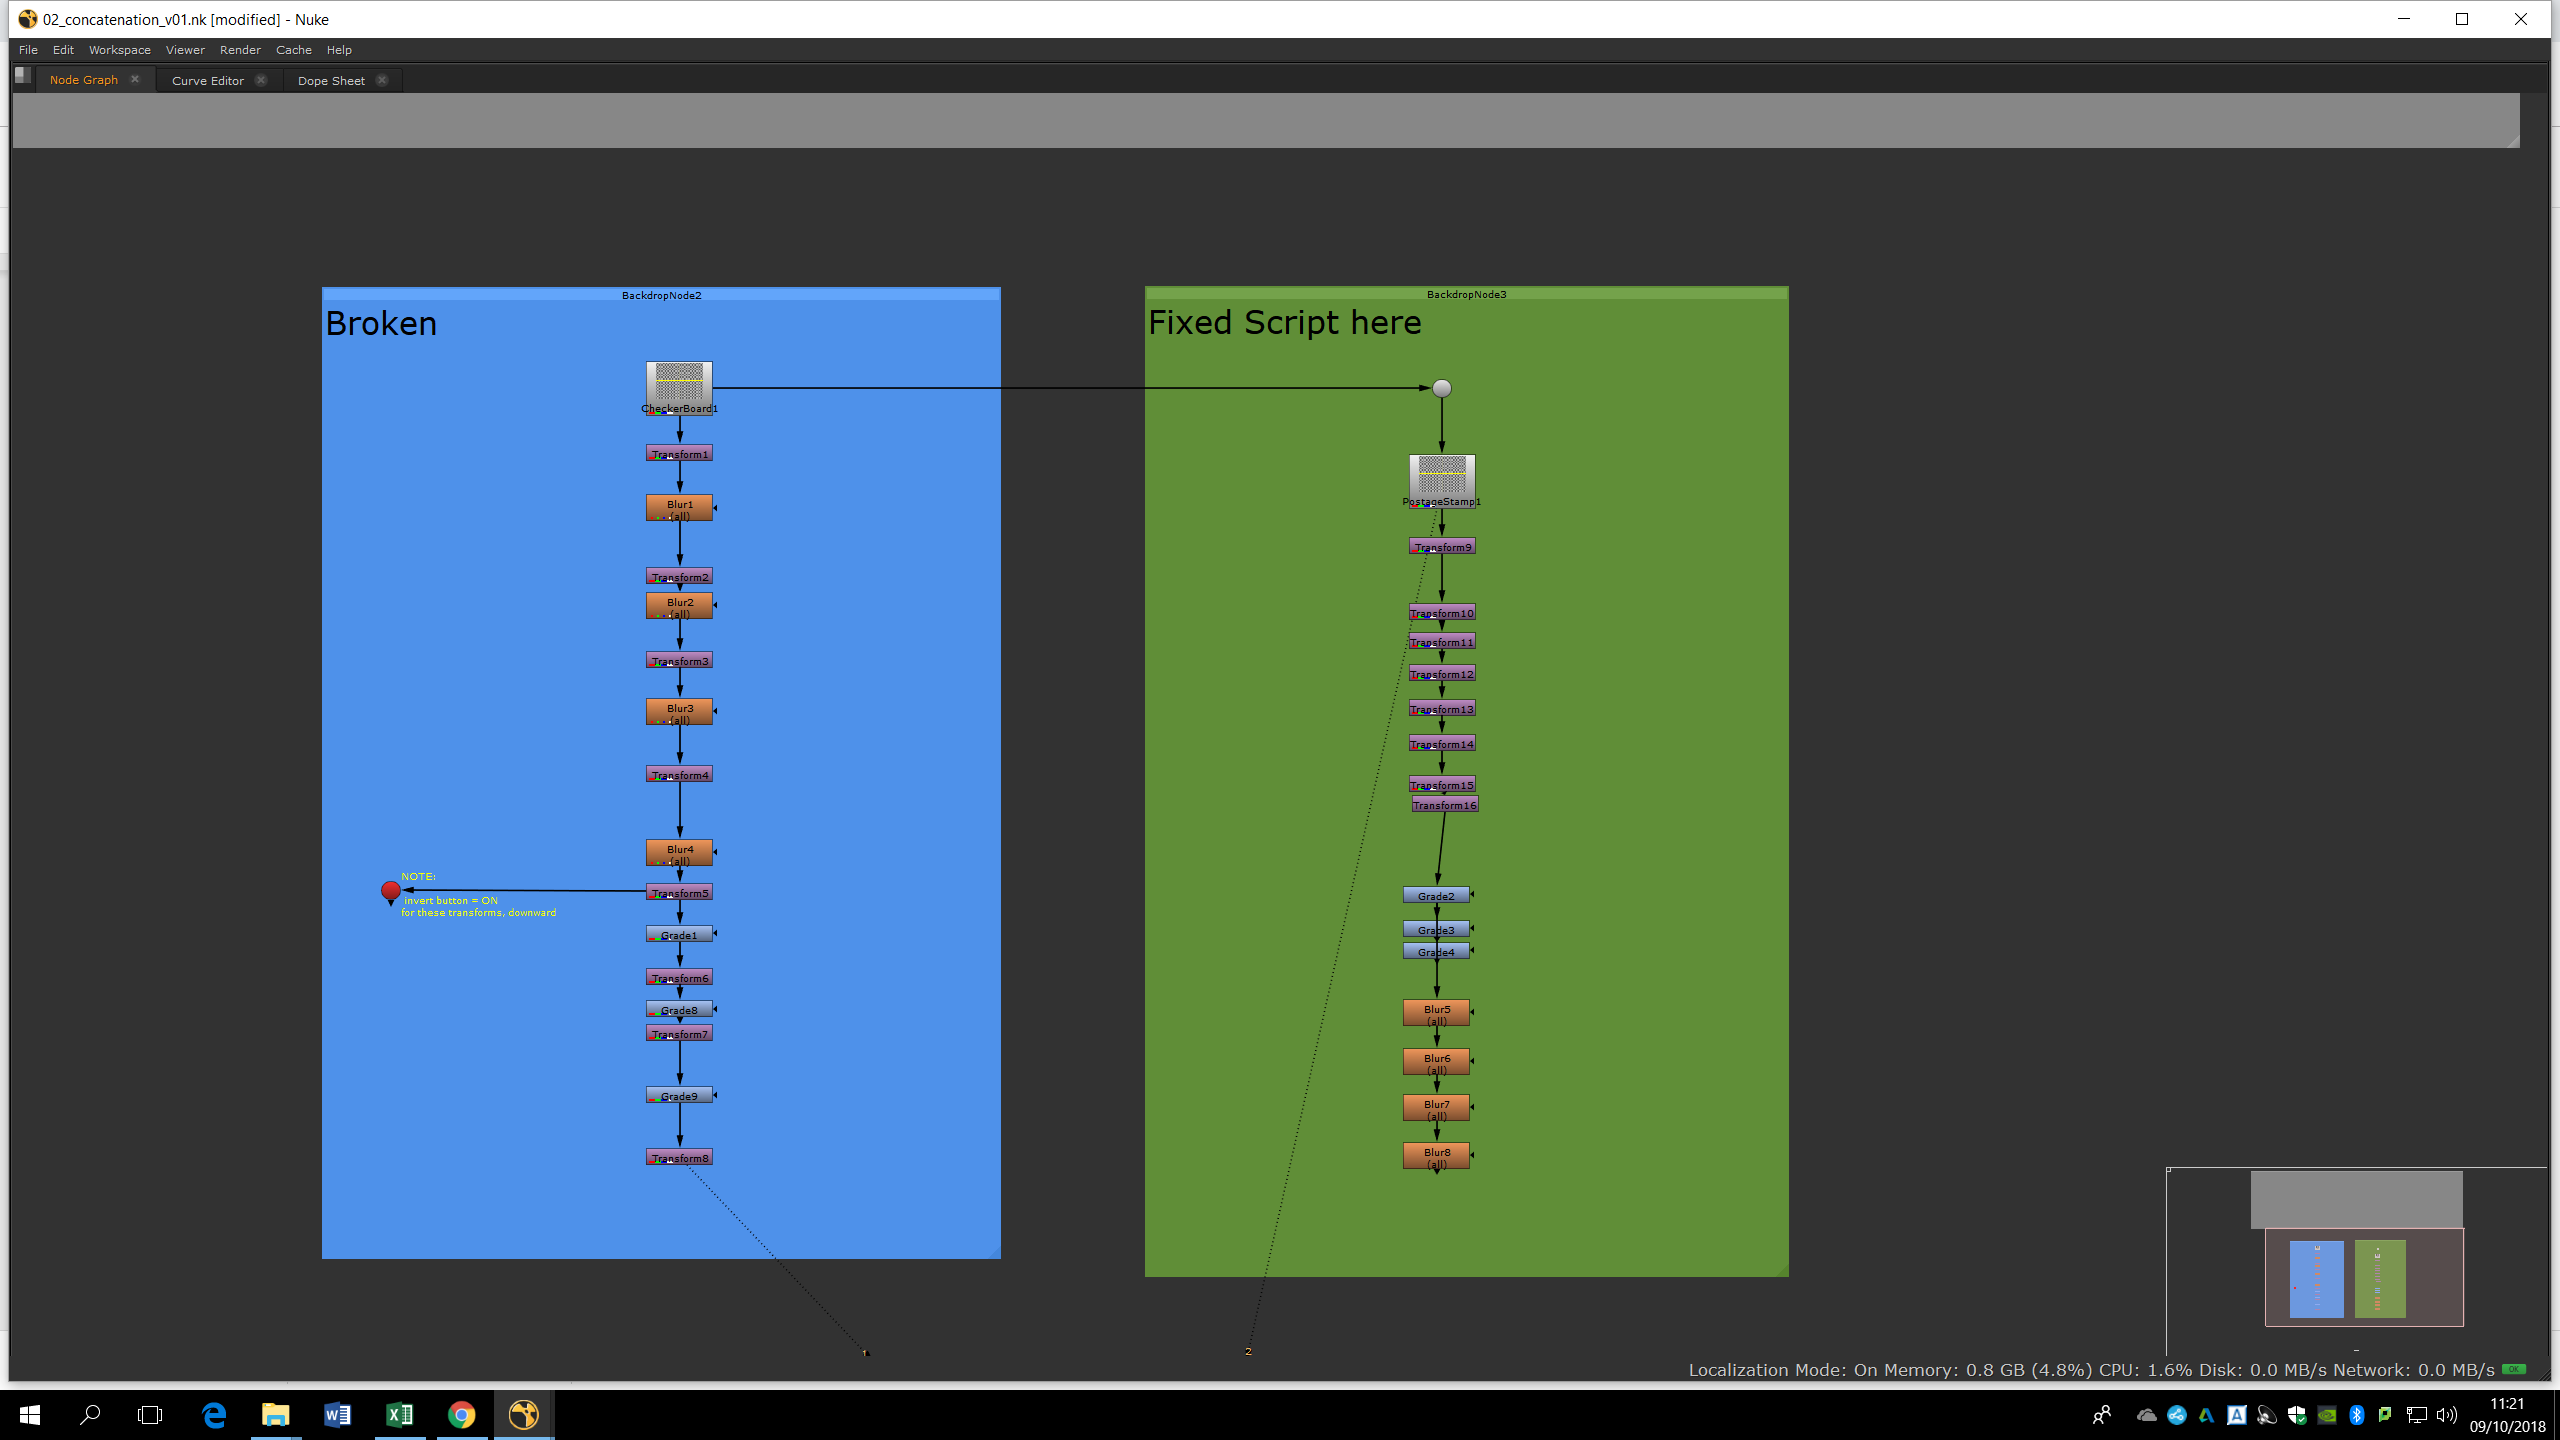
The random concatenation of the notes in Nuke can mean a loss of quality and resolution in the footage we are working with. If we have several notes with the same function, is much better to connect them together rather than mix them and connect them randomly. We can see a huge difference in the quality on the resulting footage after applying the notes as is shown in the picture. The footage keeps almost all it’s quality when the notes are arranged as the scheme of the left.
Tracking
The tracker tool locks itself into areas of contrast. Therefore, it can be used to draw the movement of certain objects in out composition. The tracker works with luminance, so if we want to track the movement of a shape, it would be much easier to put our tracking point in the edges and corners since they’re easier to recognize.
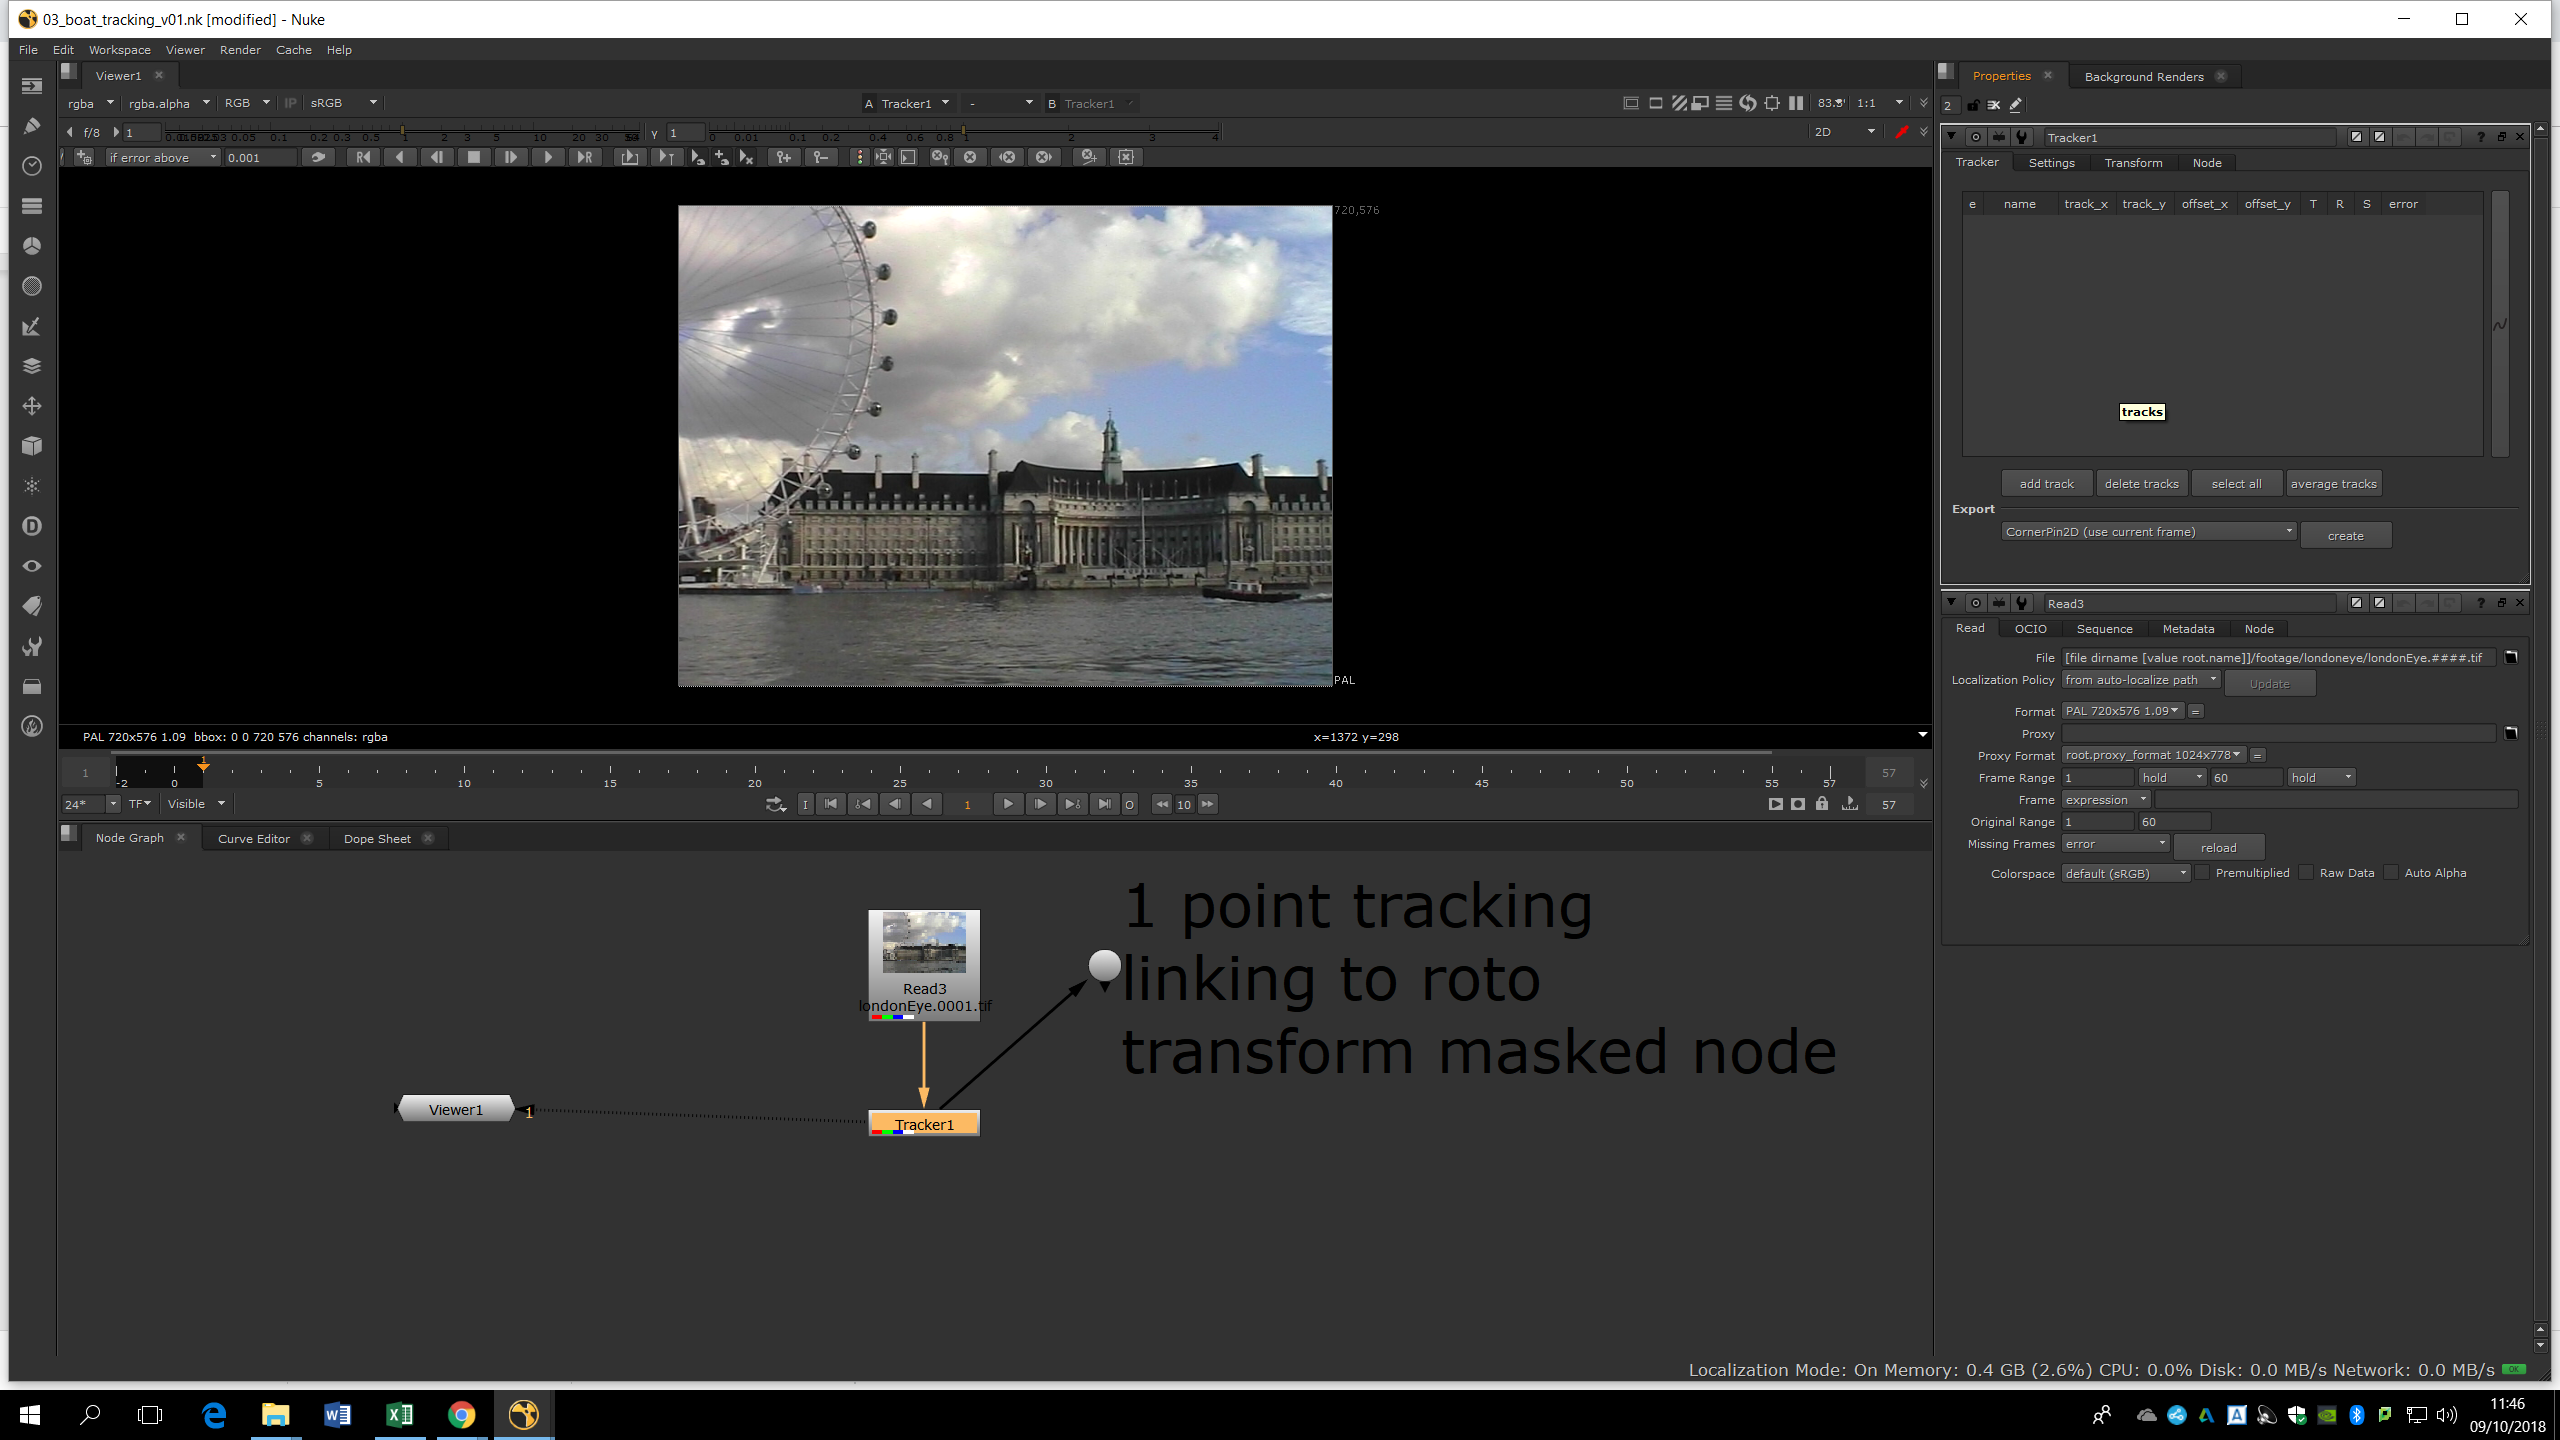
In this example, we are going to put the tracking marker in the corner of the boat, even if the background changes a bit, it doesn’t change massively.
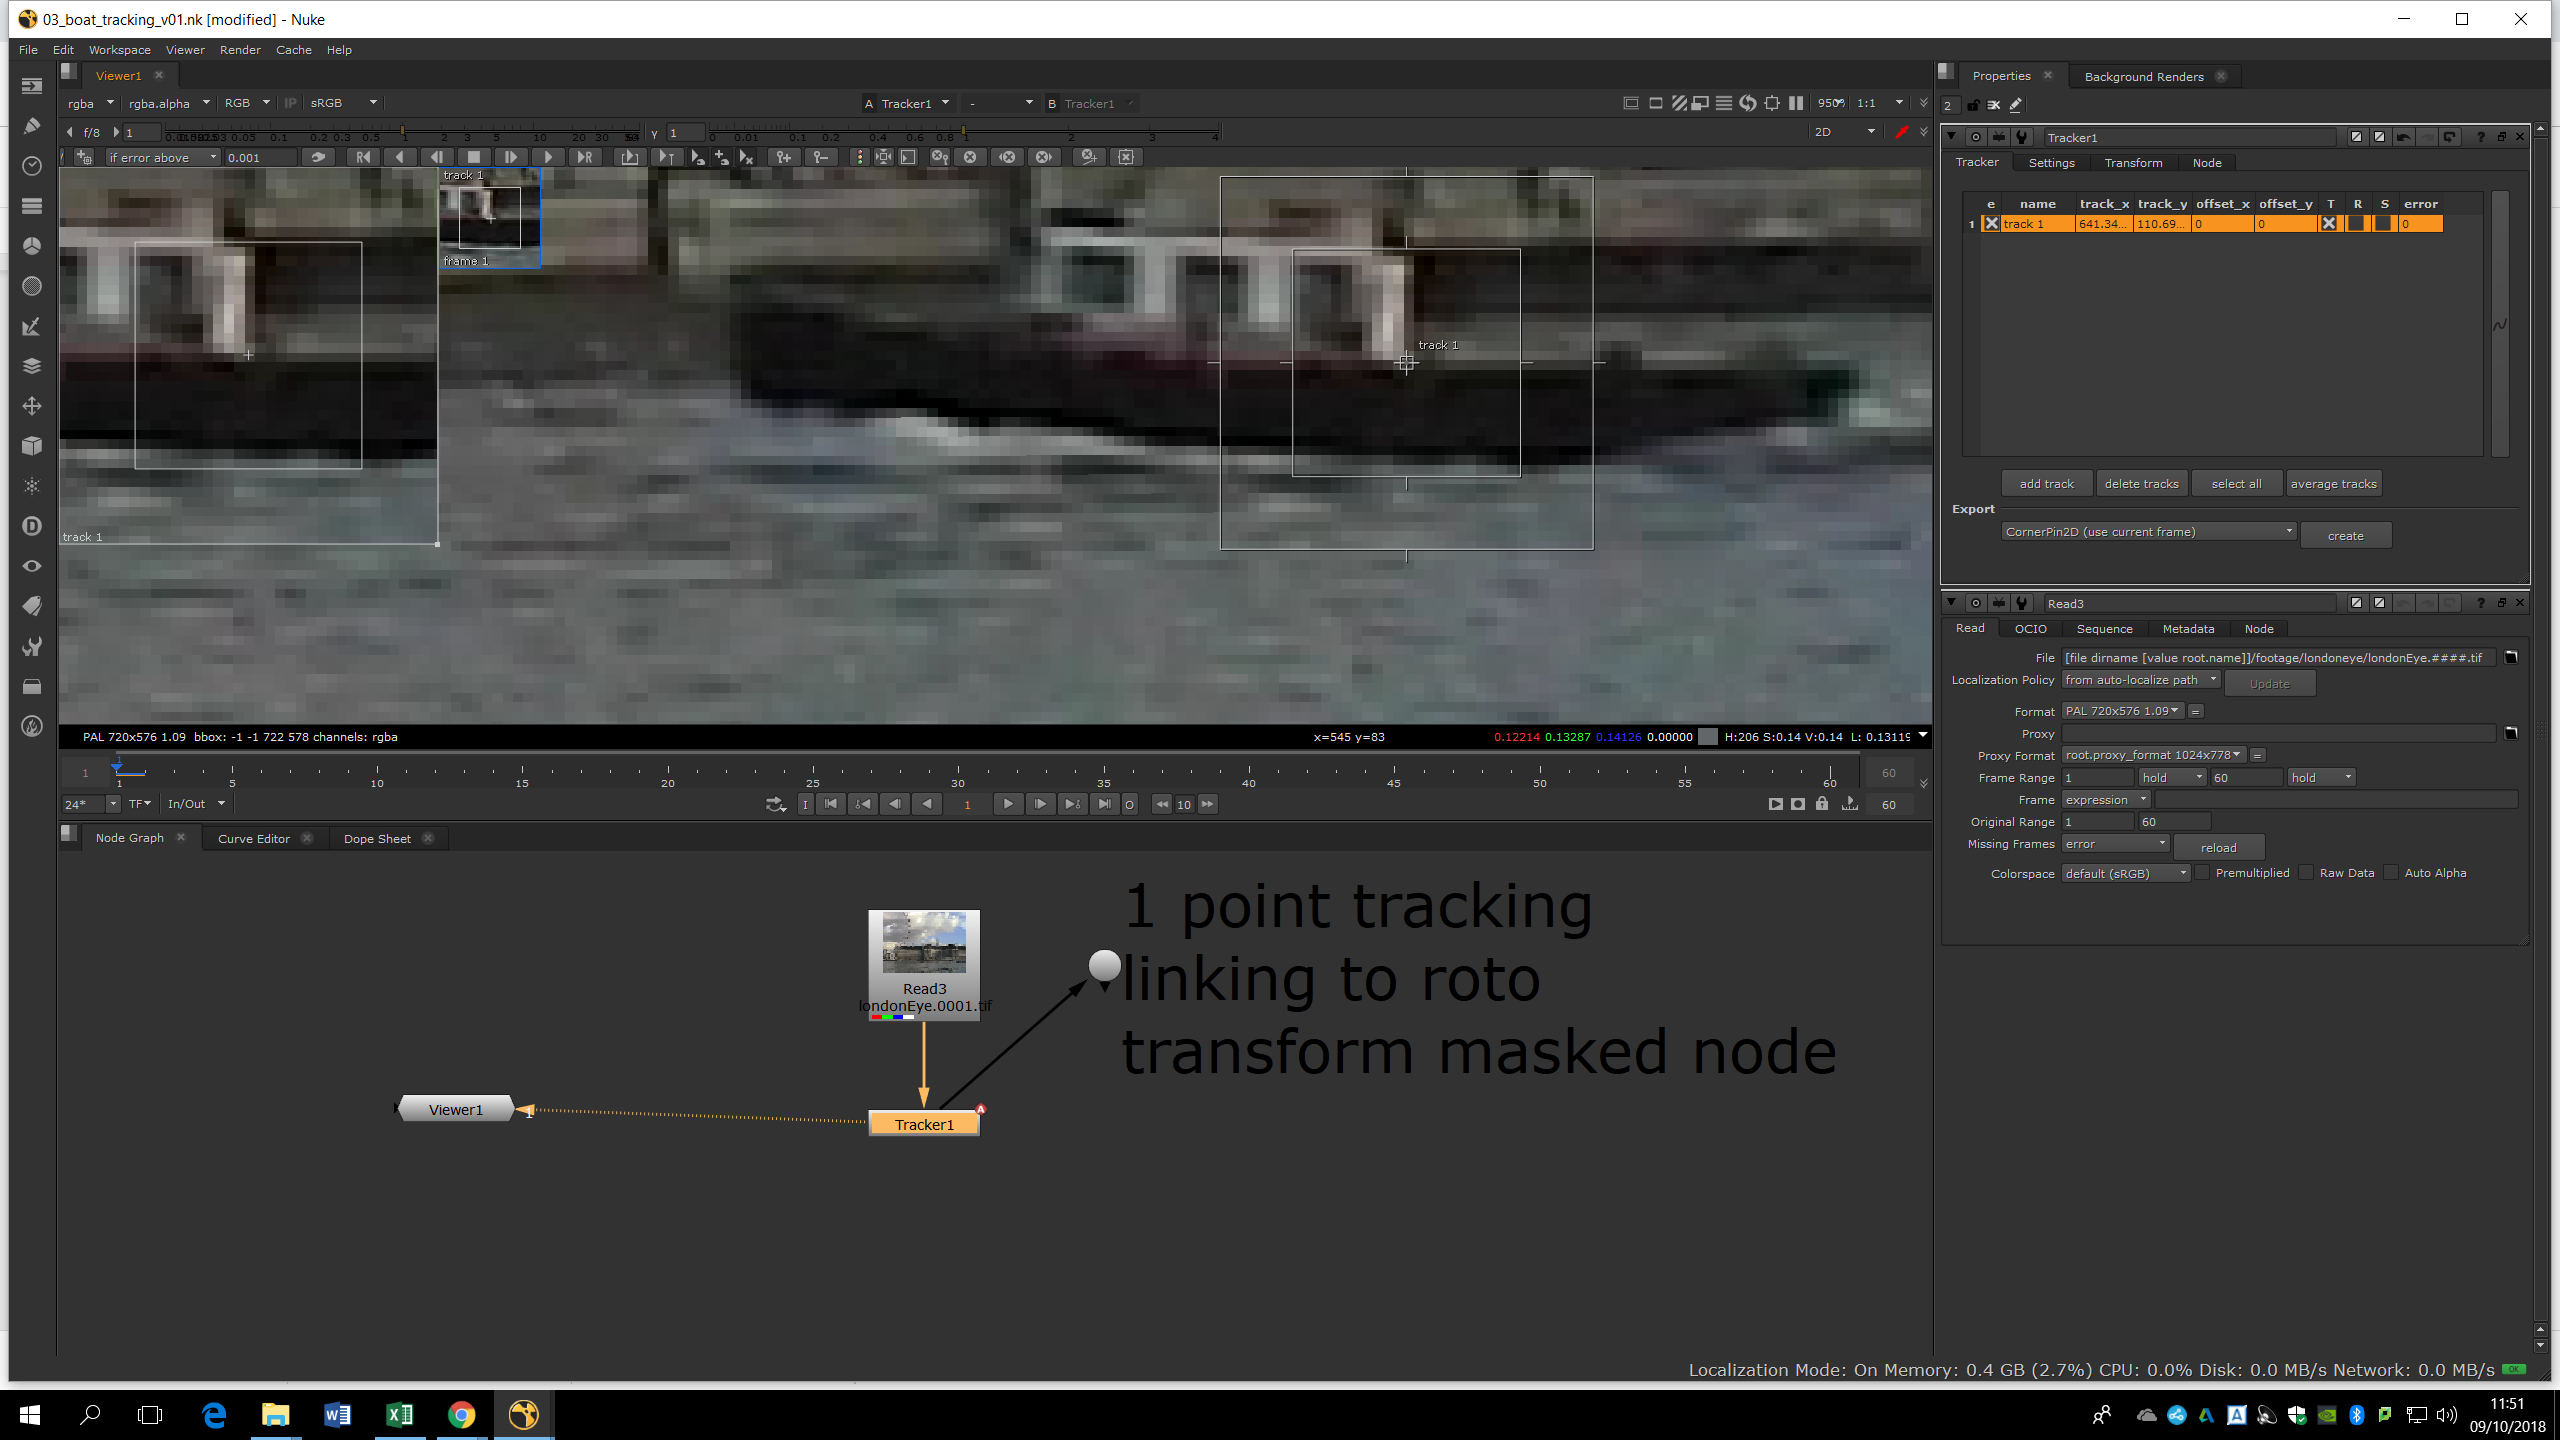
The easier way to add a track is with Ctrl+Alt+Click. The Tracking controls are located in the bar menu over the image. If we press the button Clear track forwards we delete the tracking from the point forwards. When we put a tracking point we can see two boxes, the smallest one is the pattern that the tracker will look for, and the outer box is the area within the tracker will look for the pattern. If the element we are tracking is moving fast, we will need to use a bigger area. If the tracking point drifts, we can stop the tracking and add one more key frame in the track, that will guide the tracker better and track correctly between the key frames by selecting Retrack. We can create a track by pressing Ctrl and click. 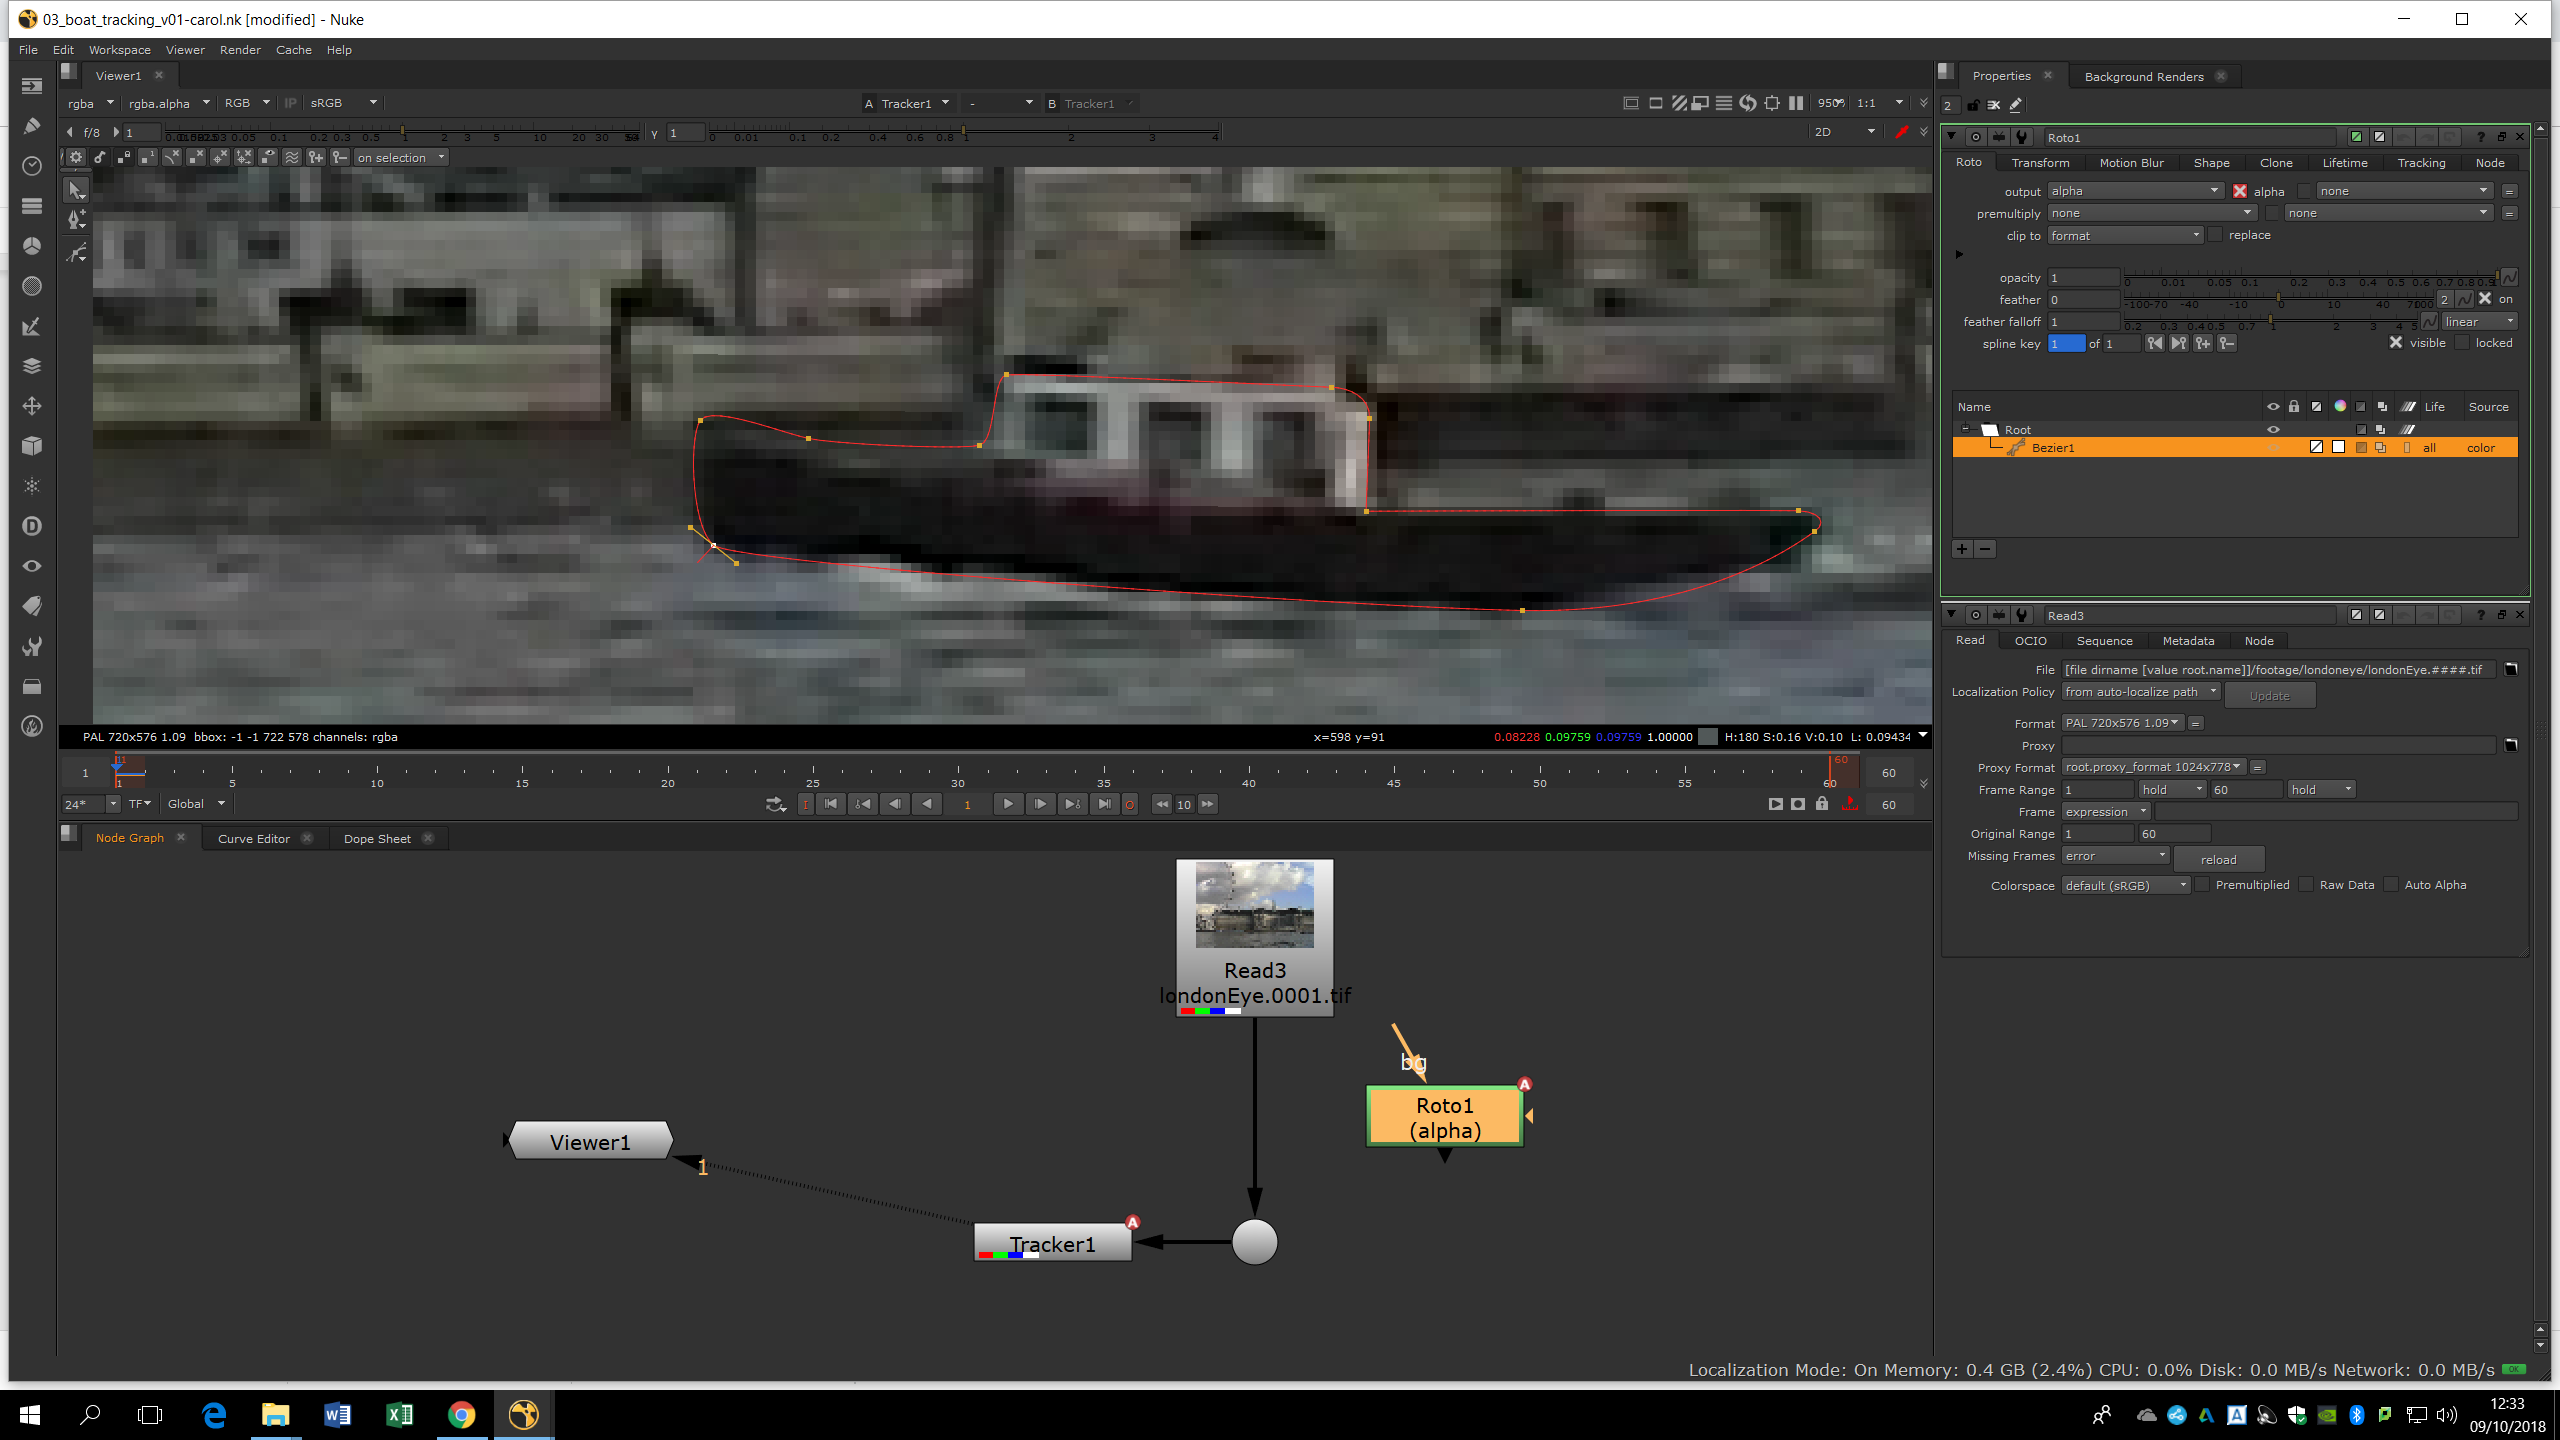
Now, we will do a Roto in the first frame by adding a Roto note or pressing O. In the roto, we can draw the shape of the boat. If we go to the tracker settings, we can see the transform tab. We can see the same transform in the roto we made. Therefore, we can link the transform values of the tracker with the ones of the roto, by clicking Ctrl and dragging them from the tracking to the roto, making sure both are starting at the same frame. Now, the mask is going to transform following the tracker movement.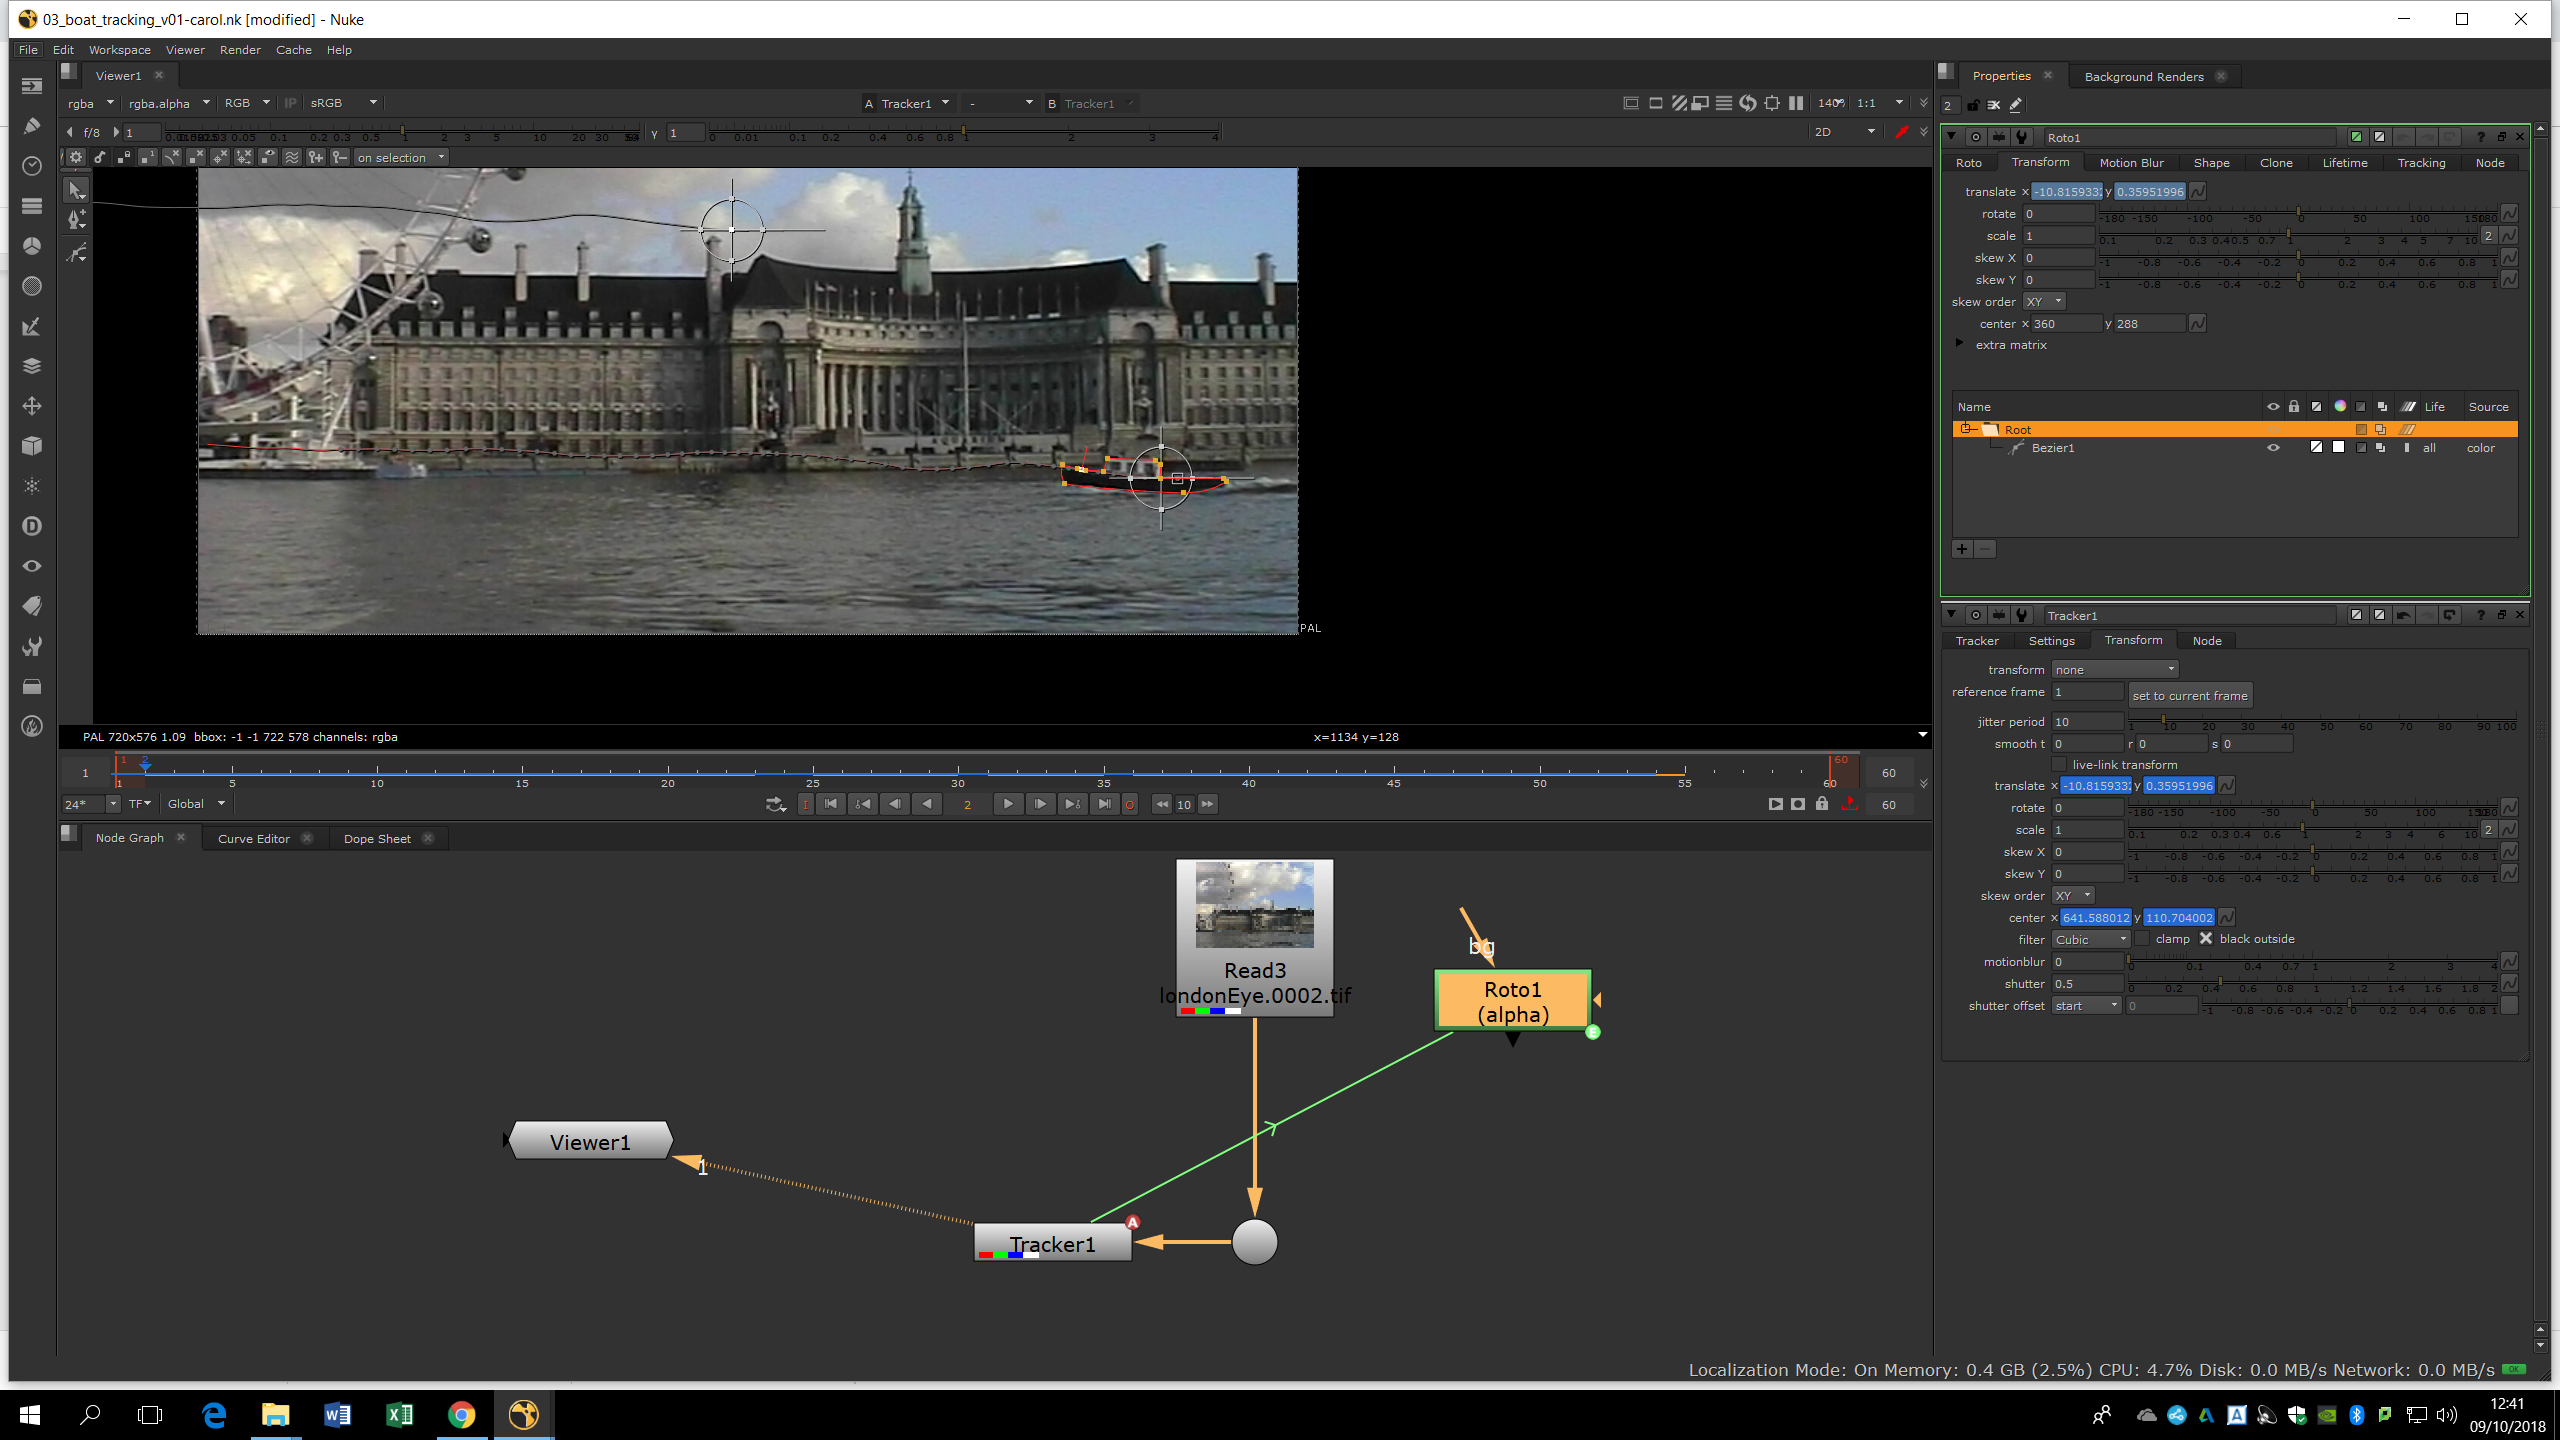
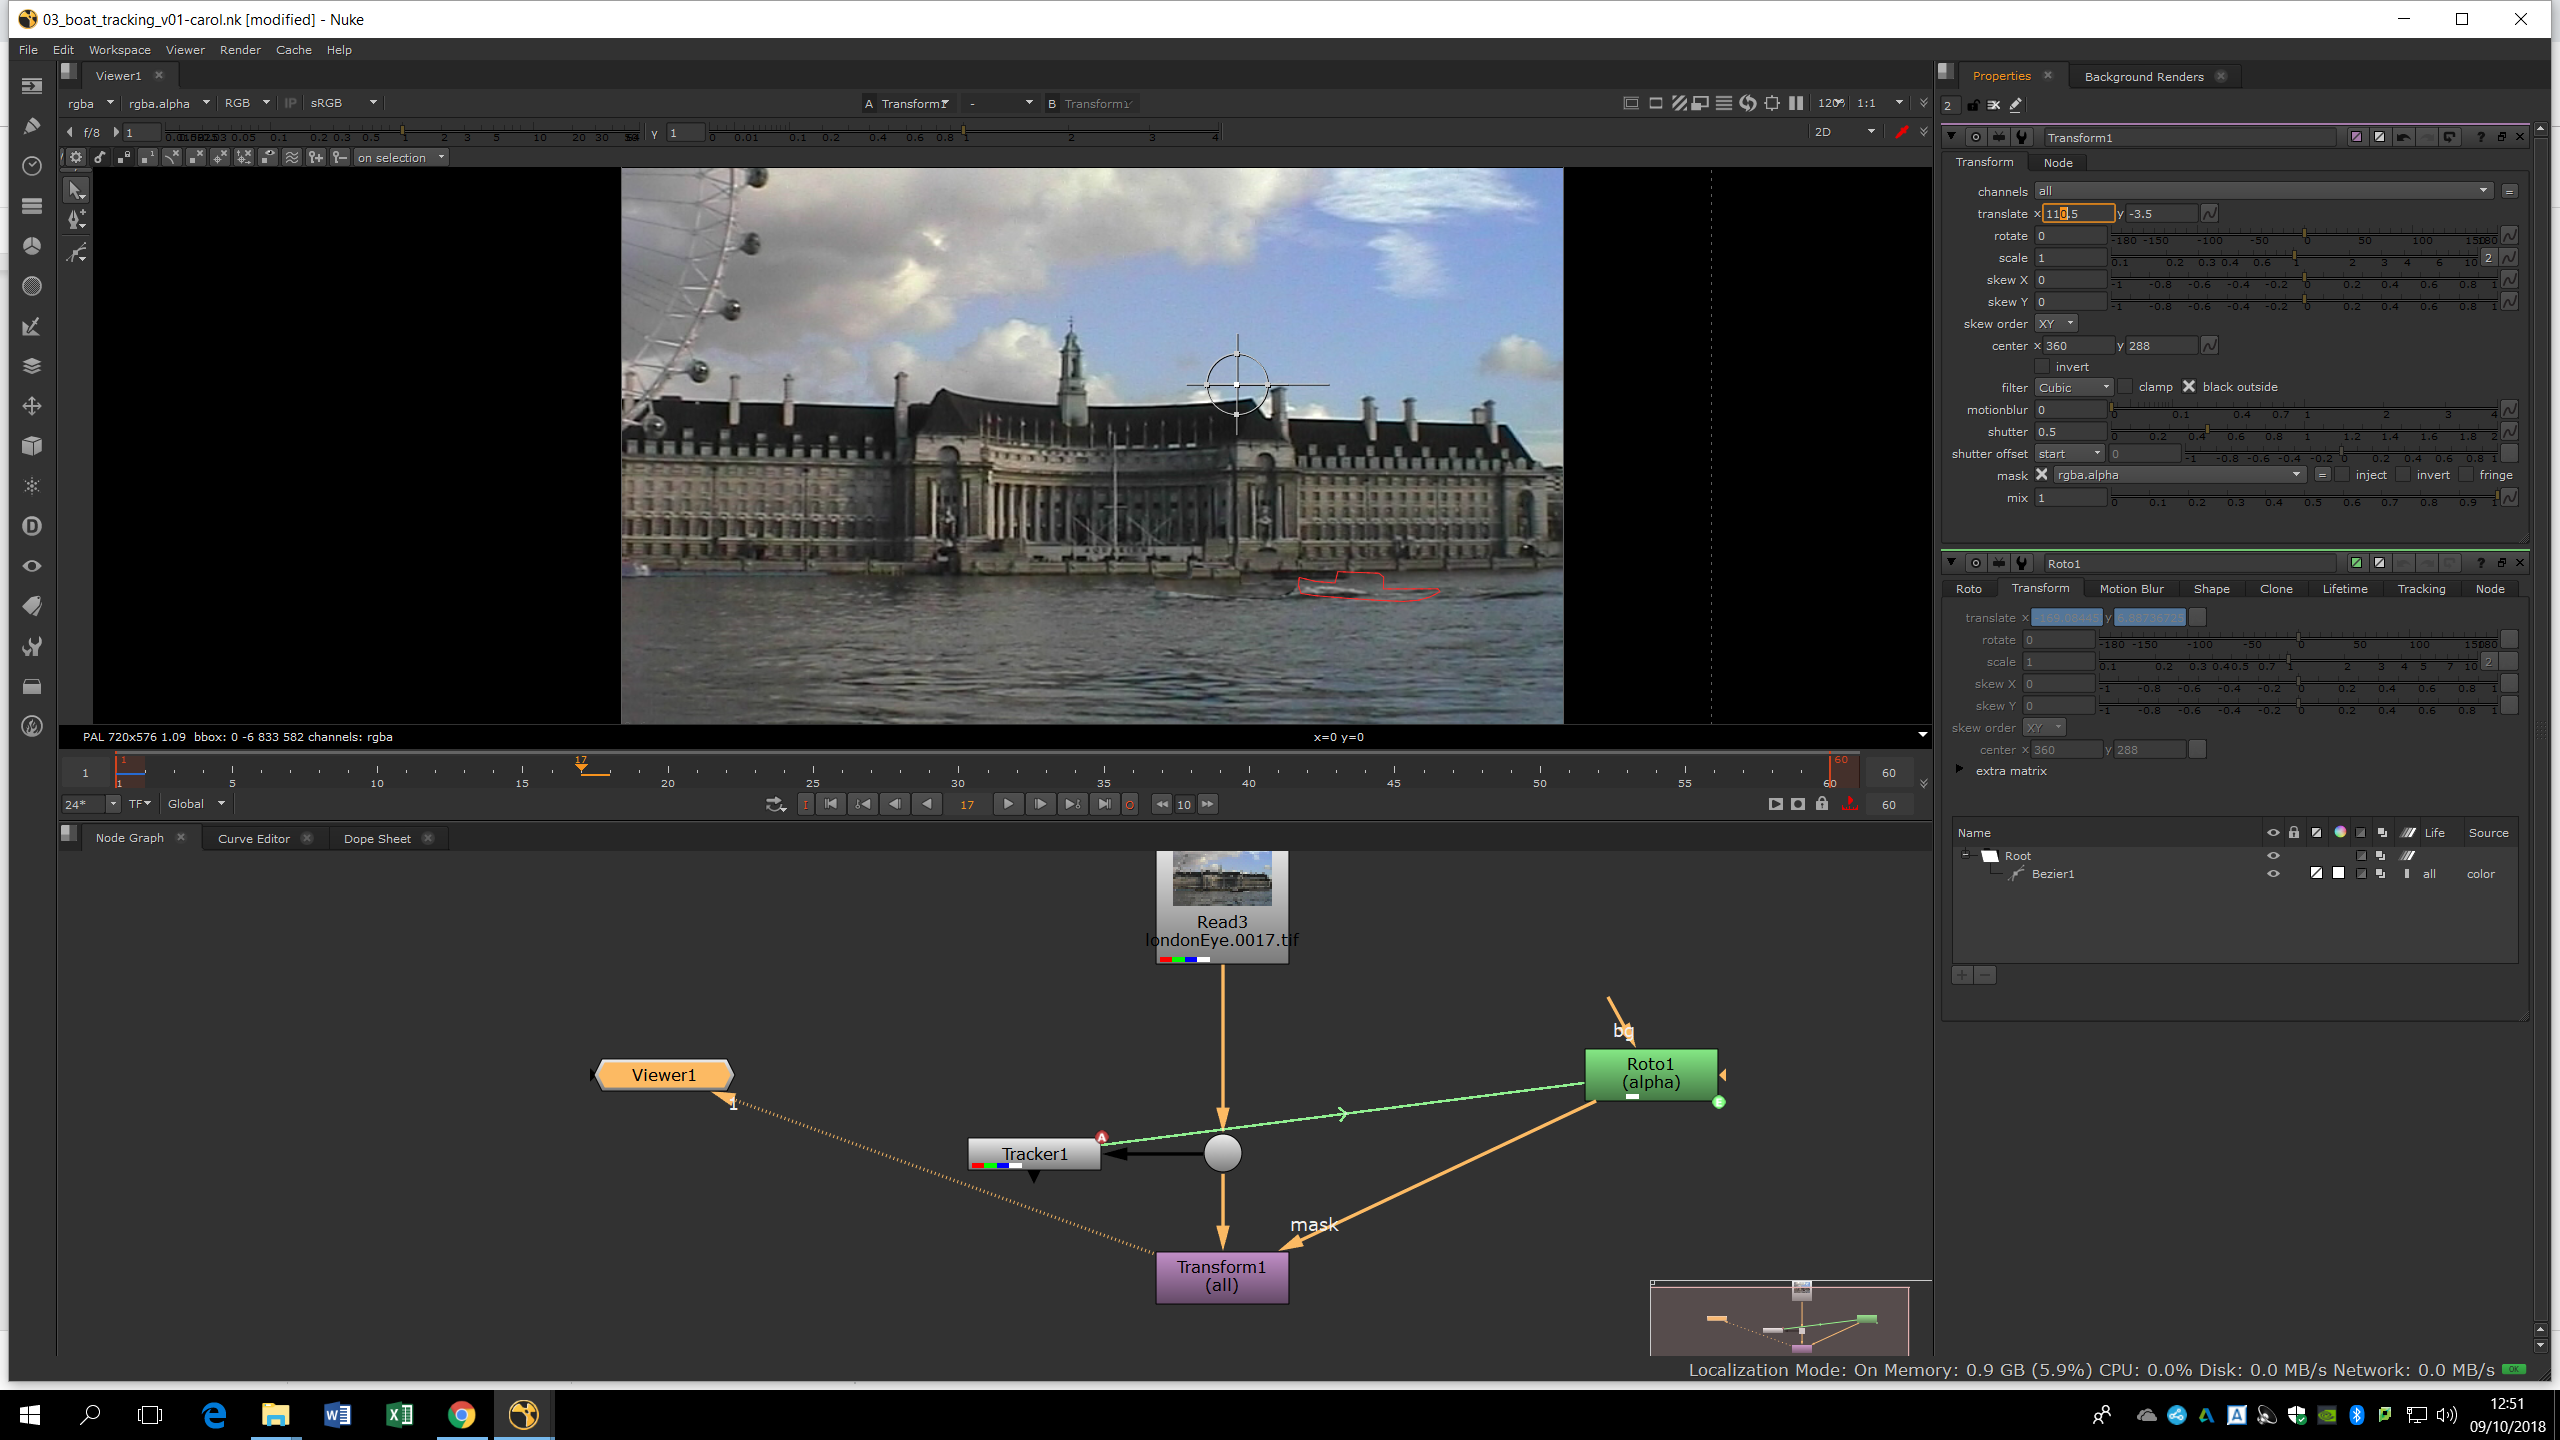
Linking tracks to rotos can make us save huge amounts of time. Now, we can add a Transform note to the footage and a mask connected to the roto. If we move the translate property of the Transform note, we can remove the boat.
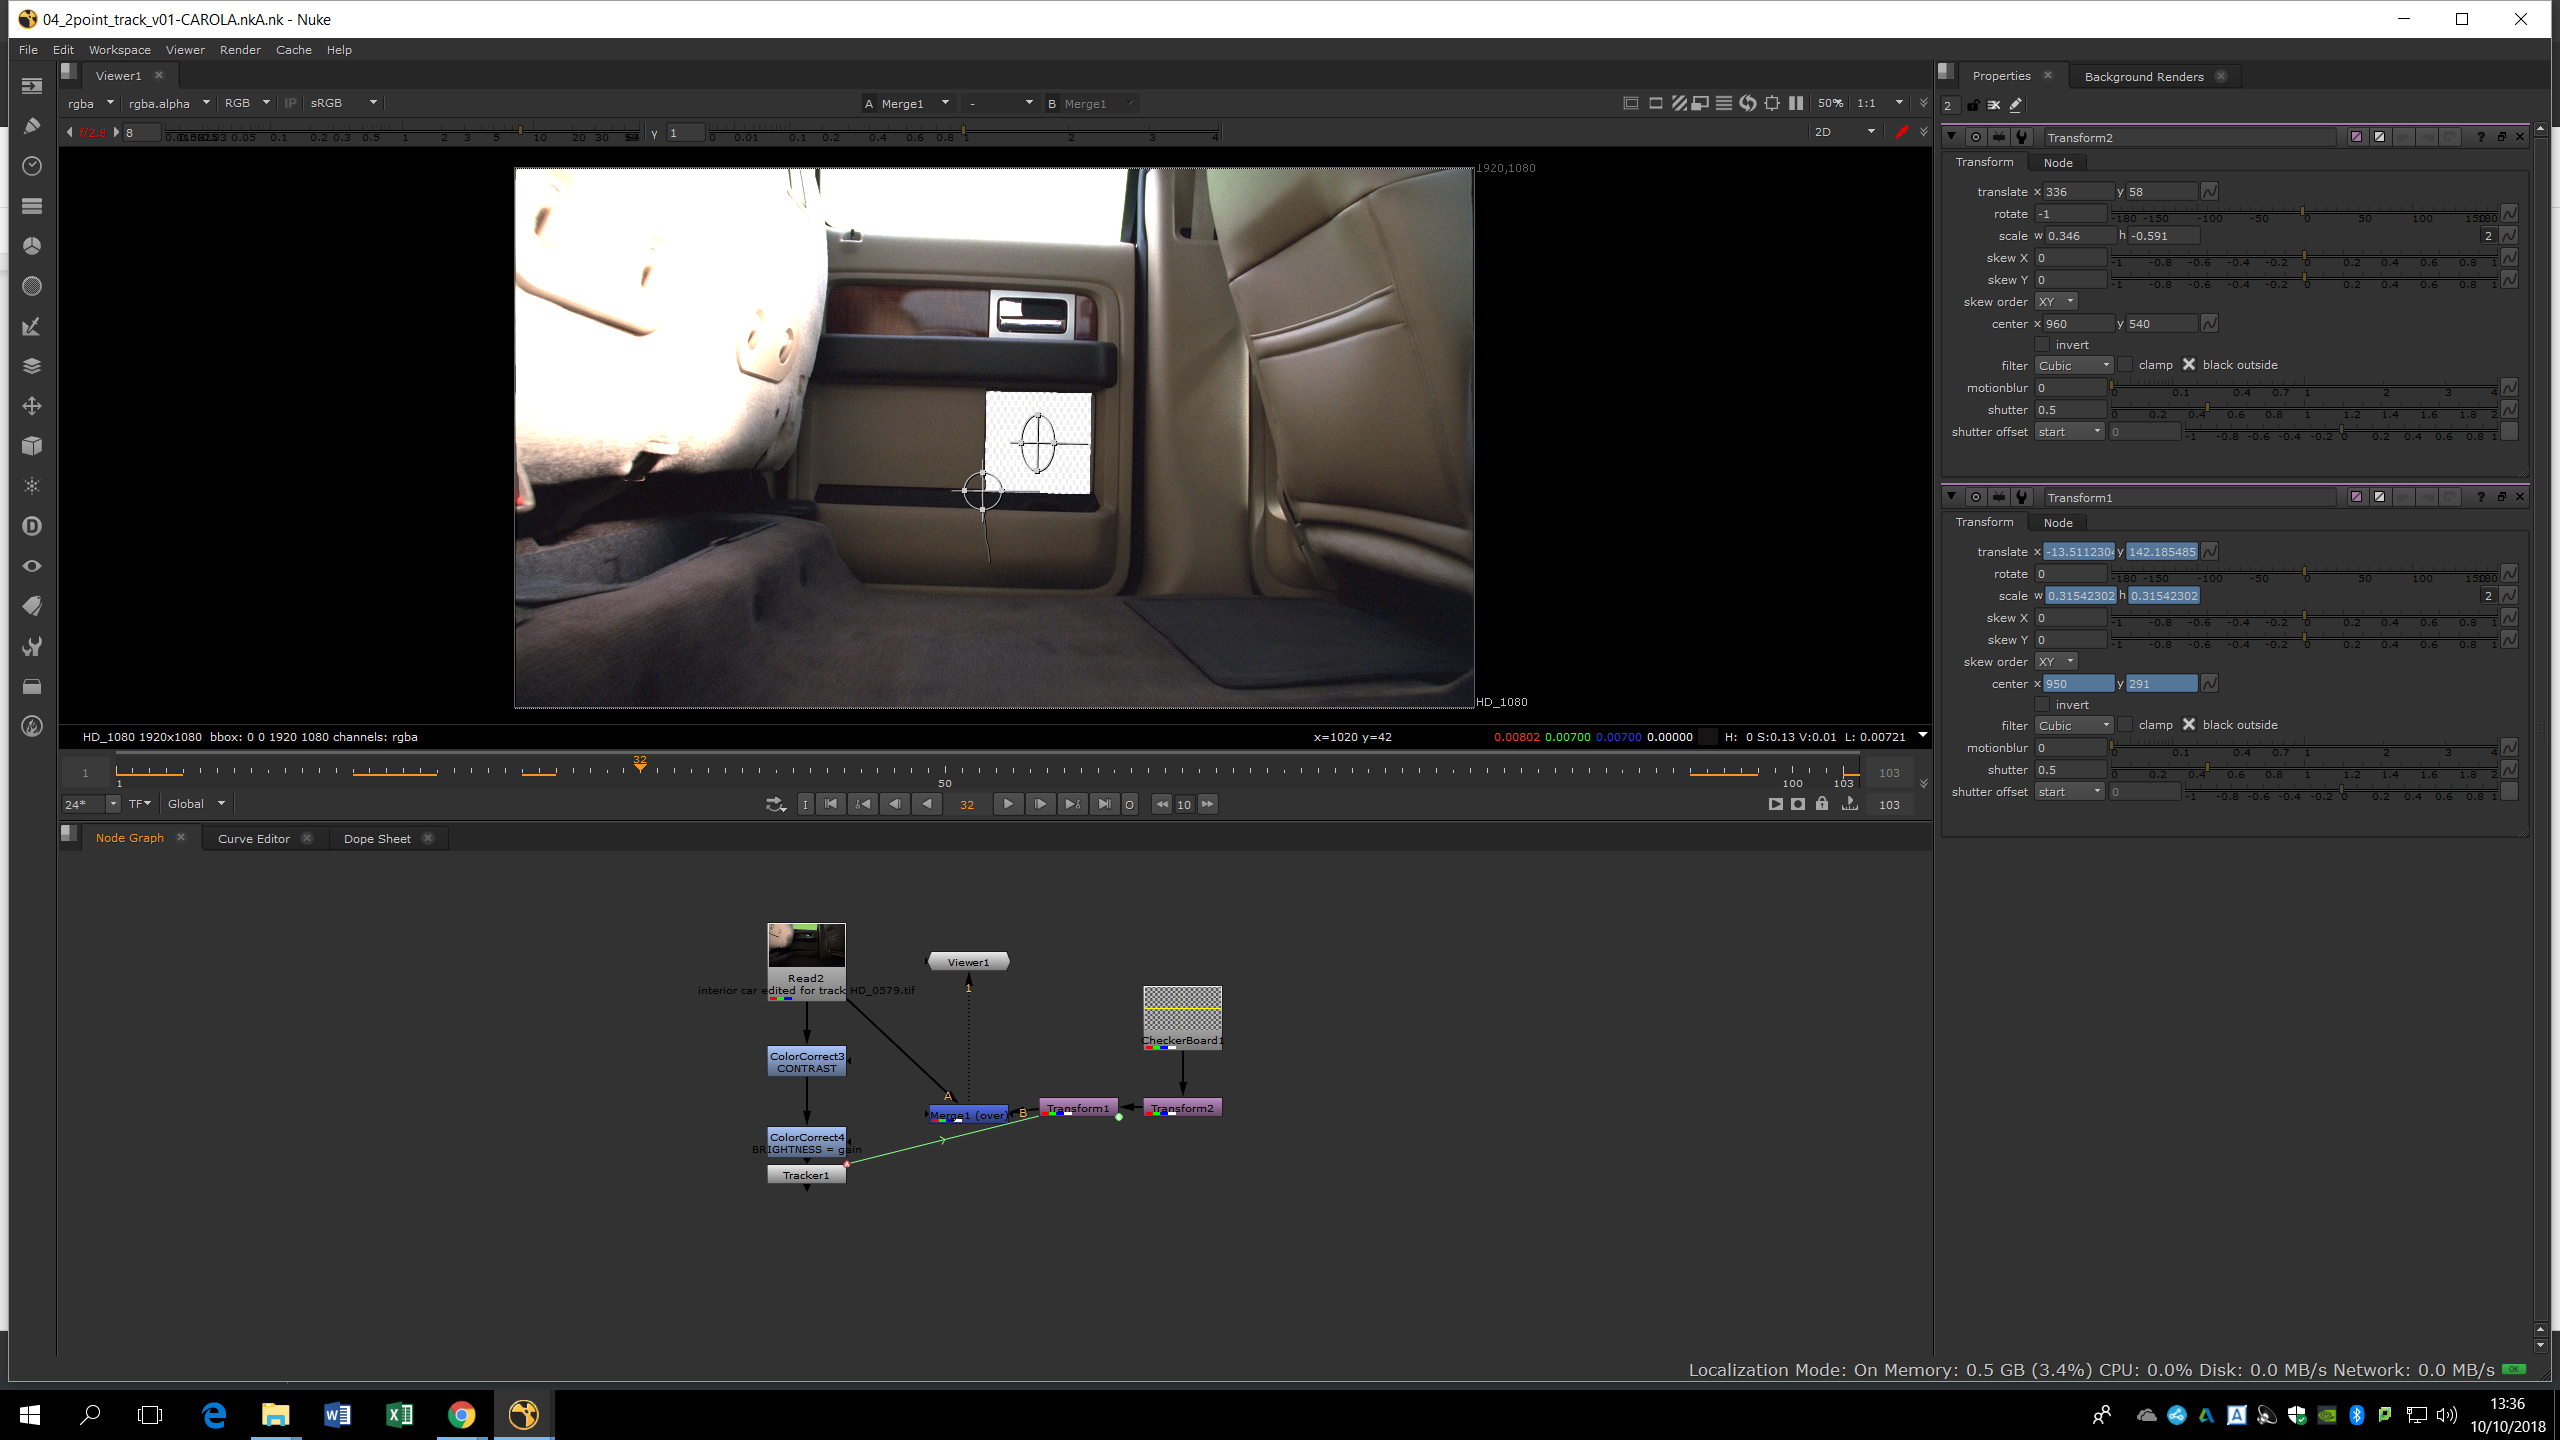
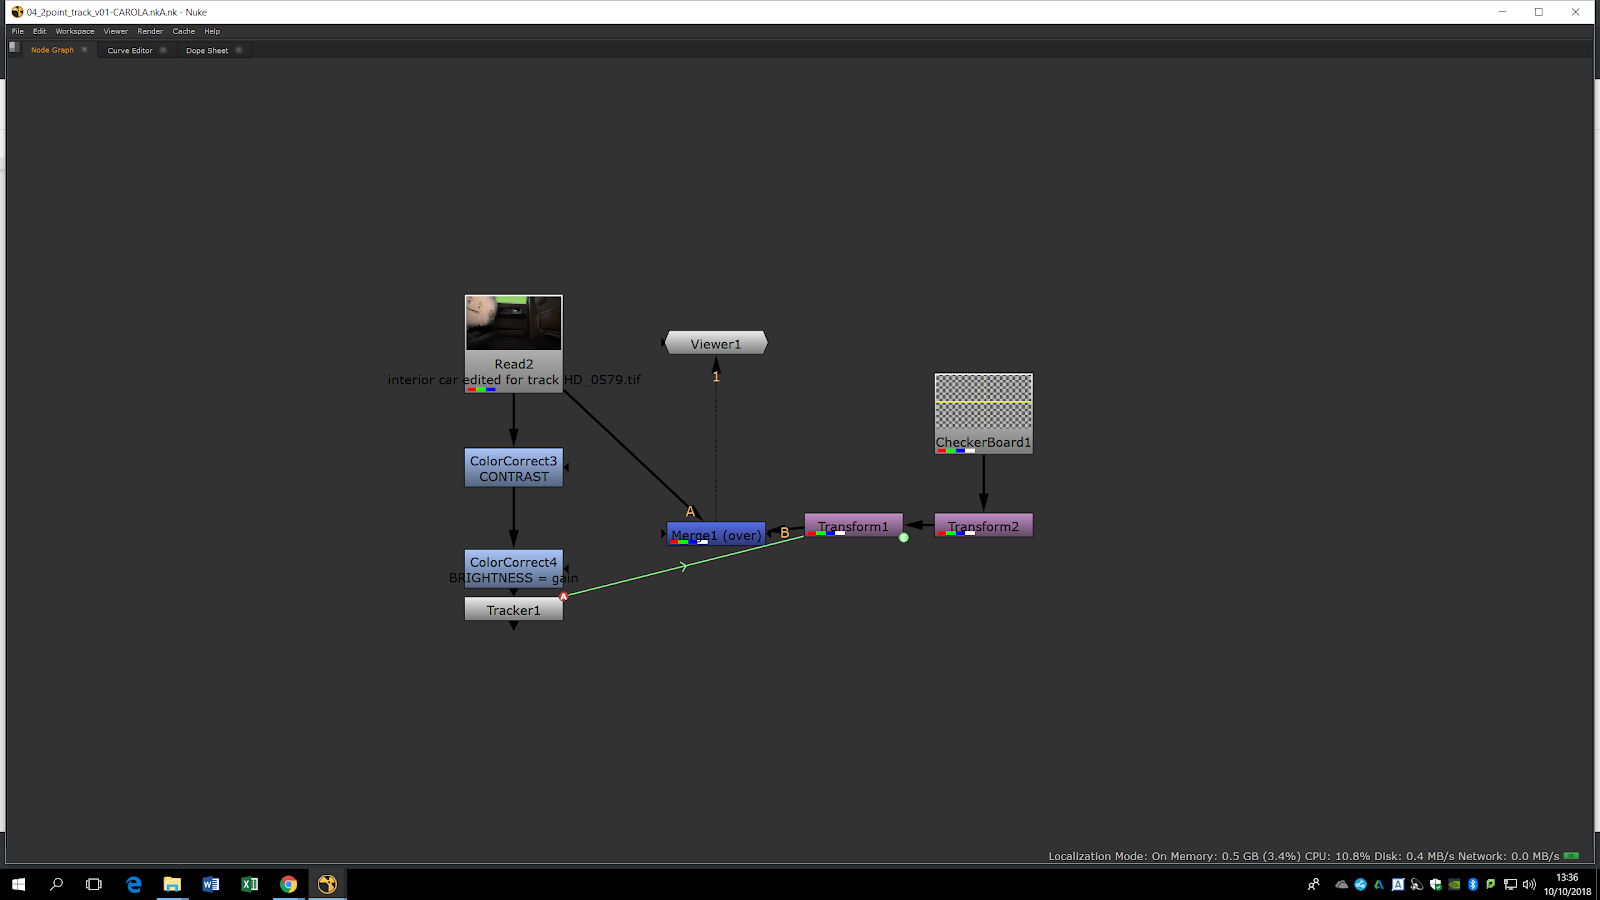
Two points track
By adding two trackers we are going to be able to set the movement with one of the trackers, and the scale and rotation with the other. Anyway, to do that we will need to track something that is in the same plane, by clicking Alt+G.

We mark in one tracker the property of Translation and in the other the property of scale. 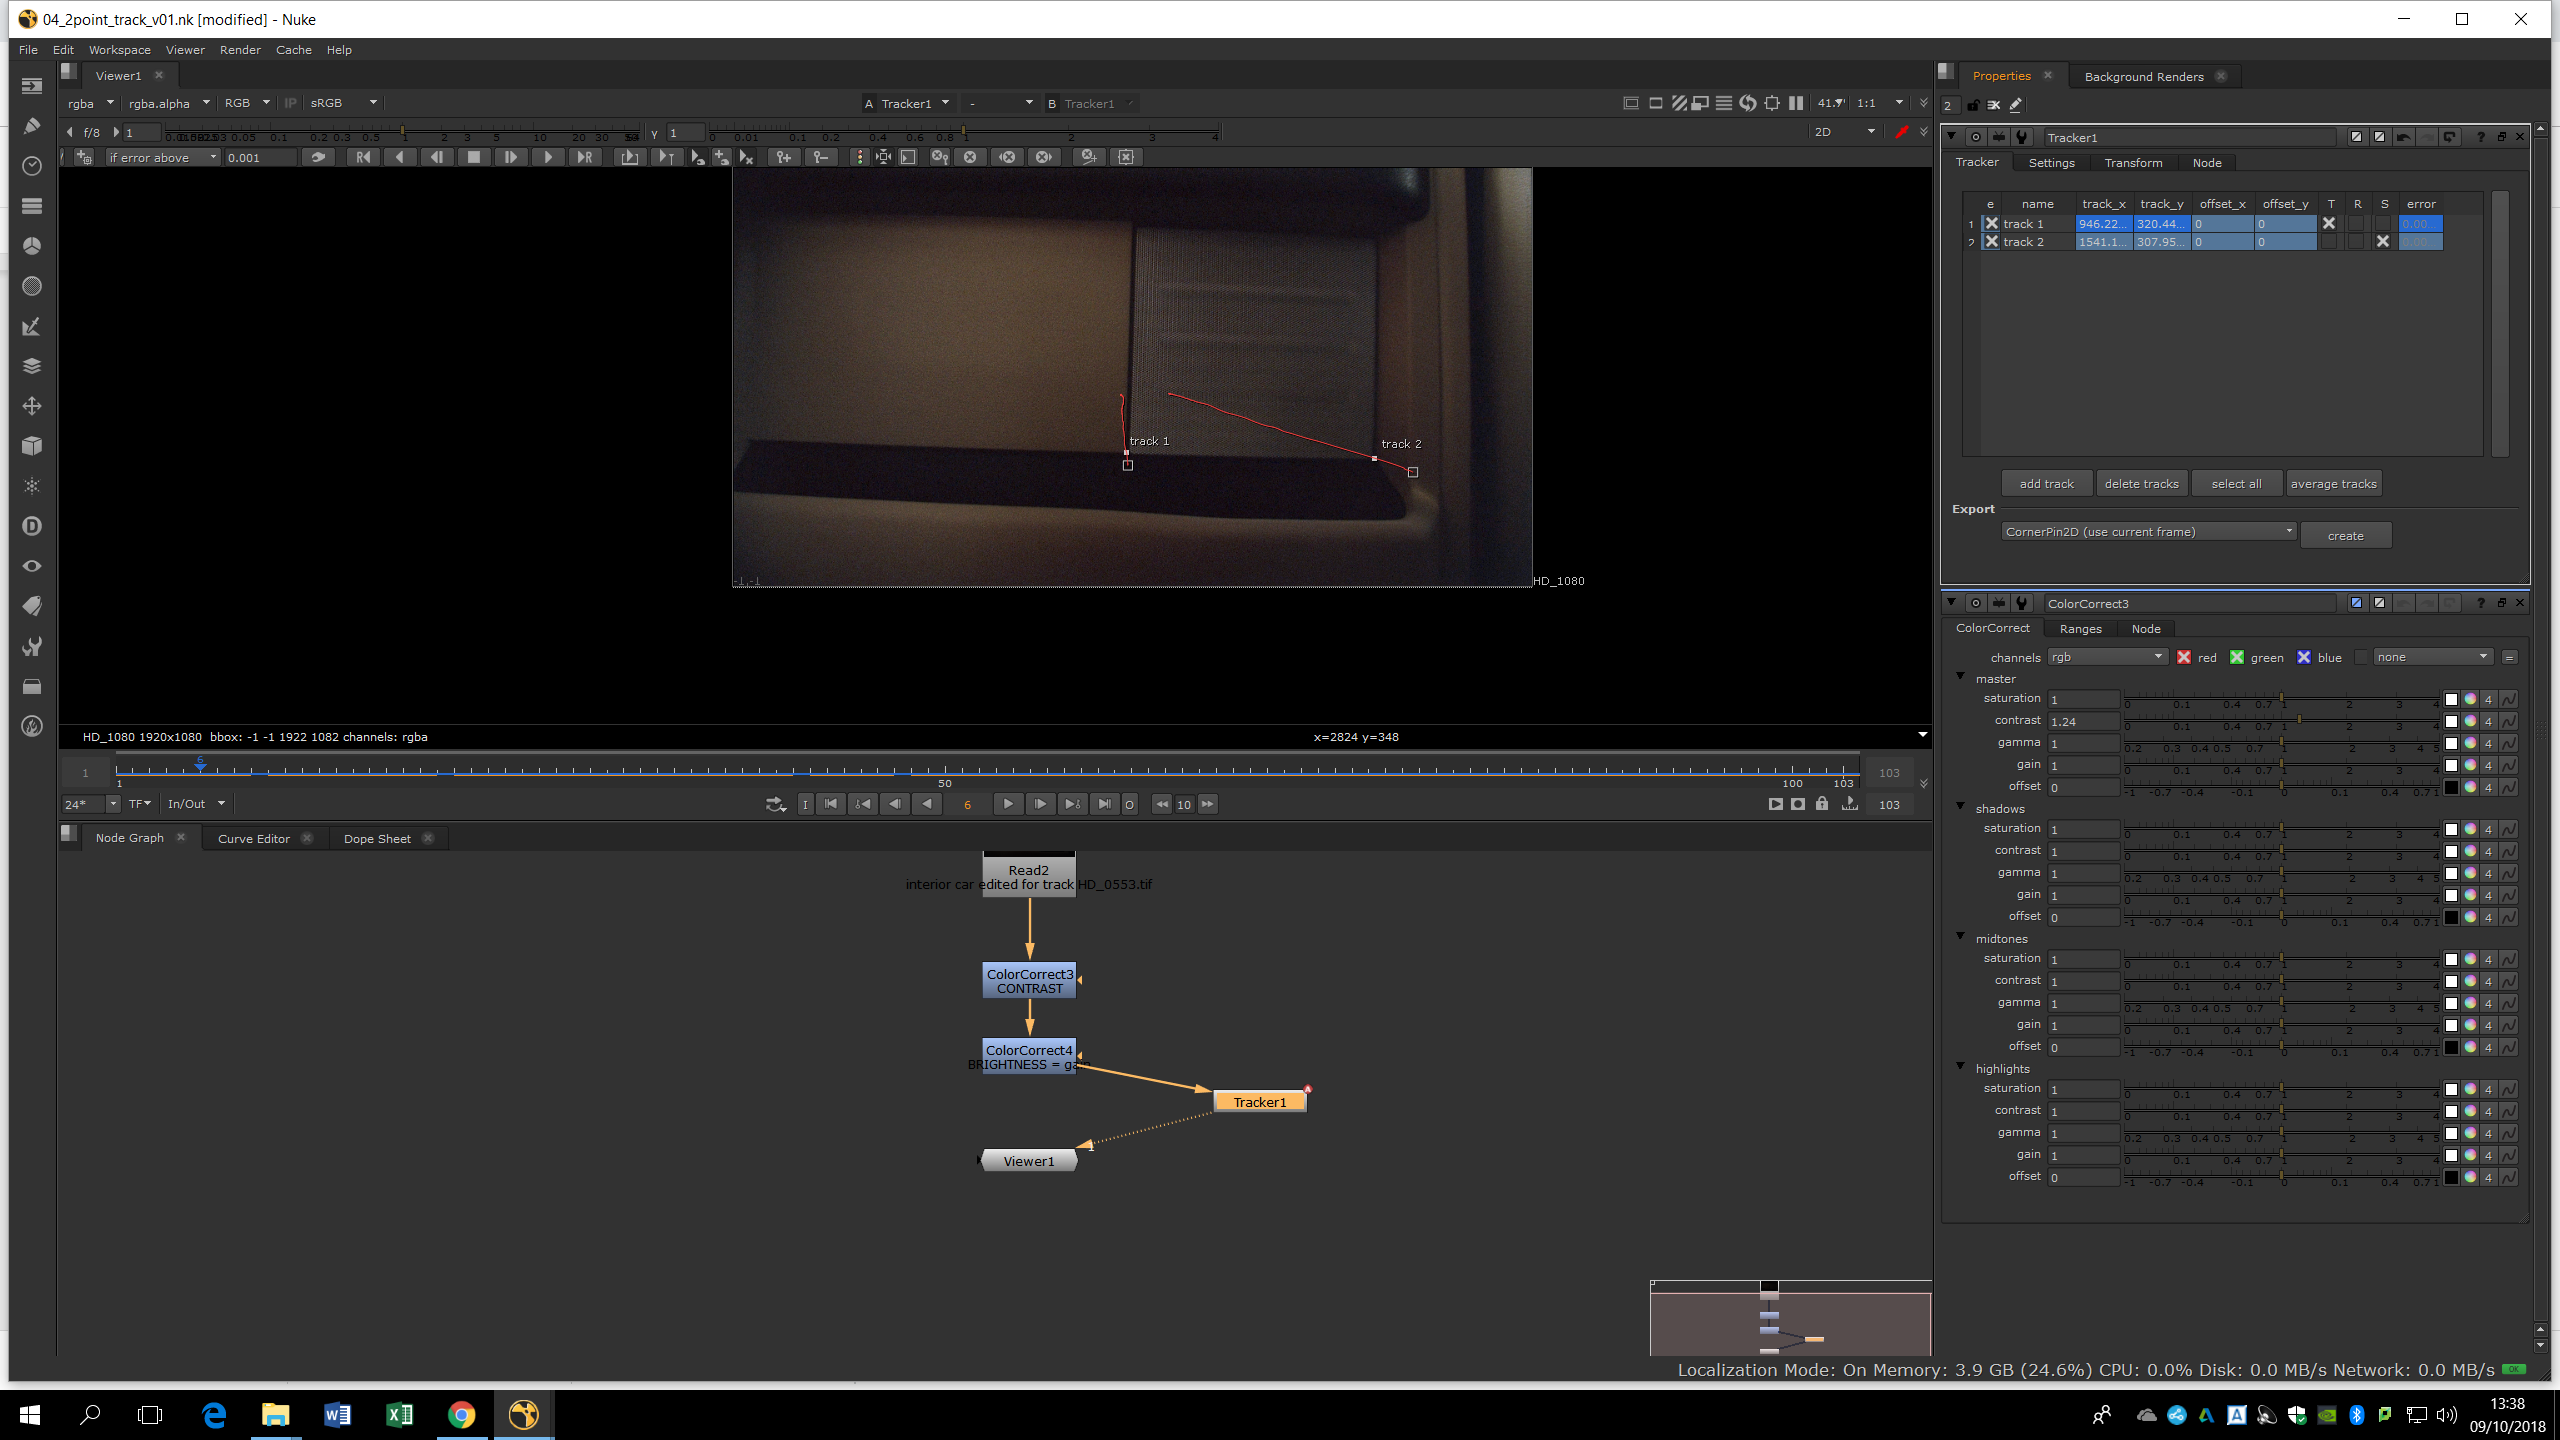
To match a better chance to have an accurate tracking we can add a checkboard. We can merge the checkboard with the footage to view it.

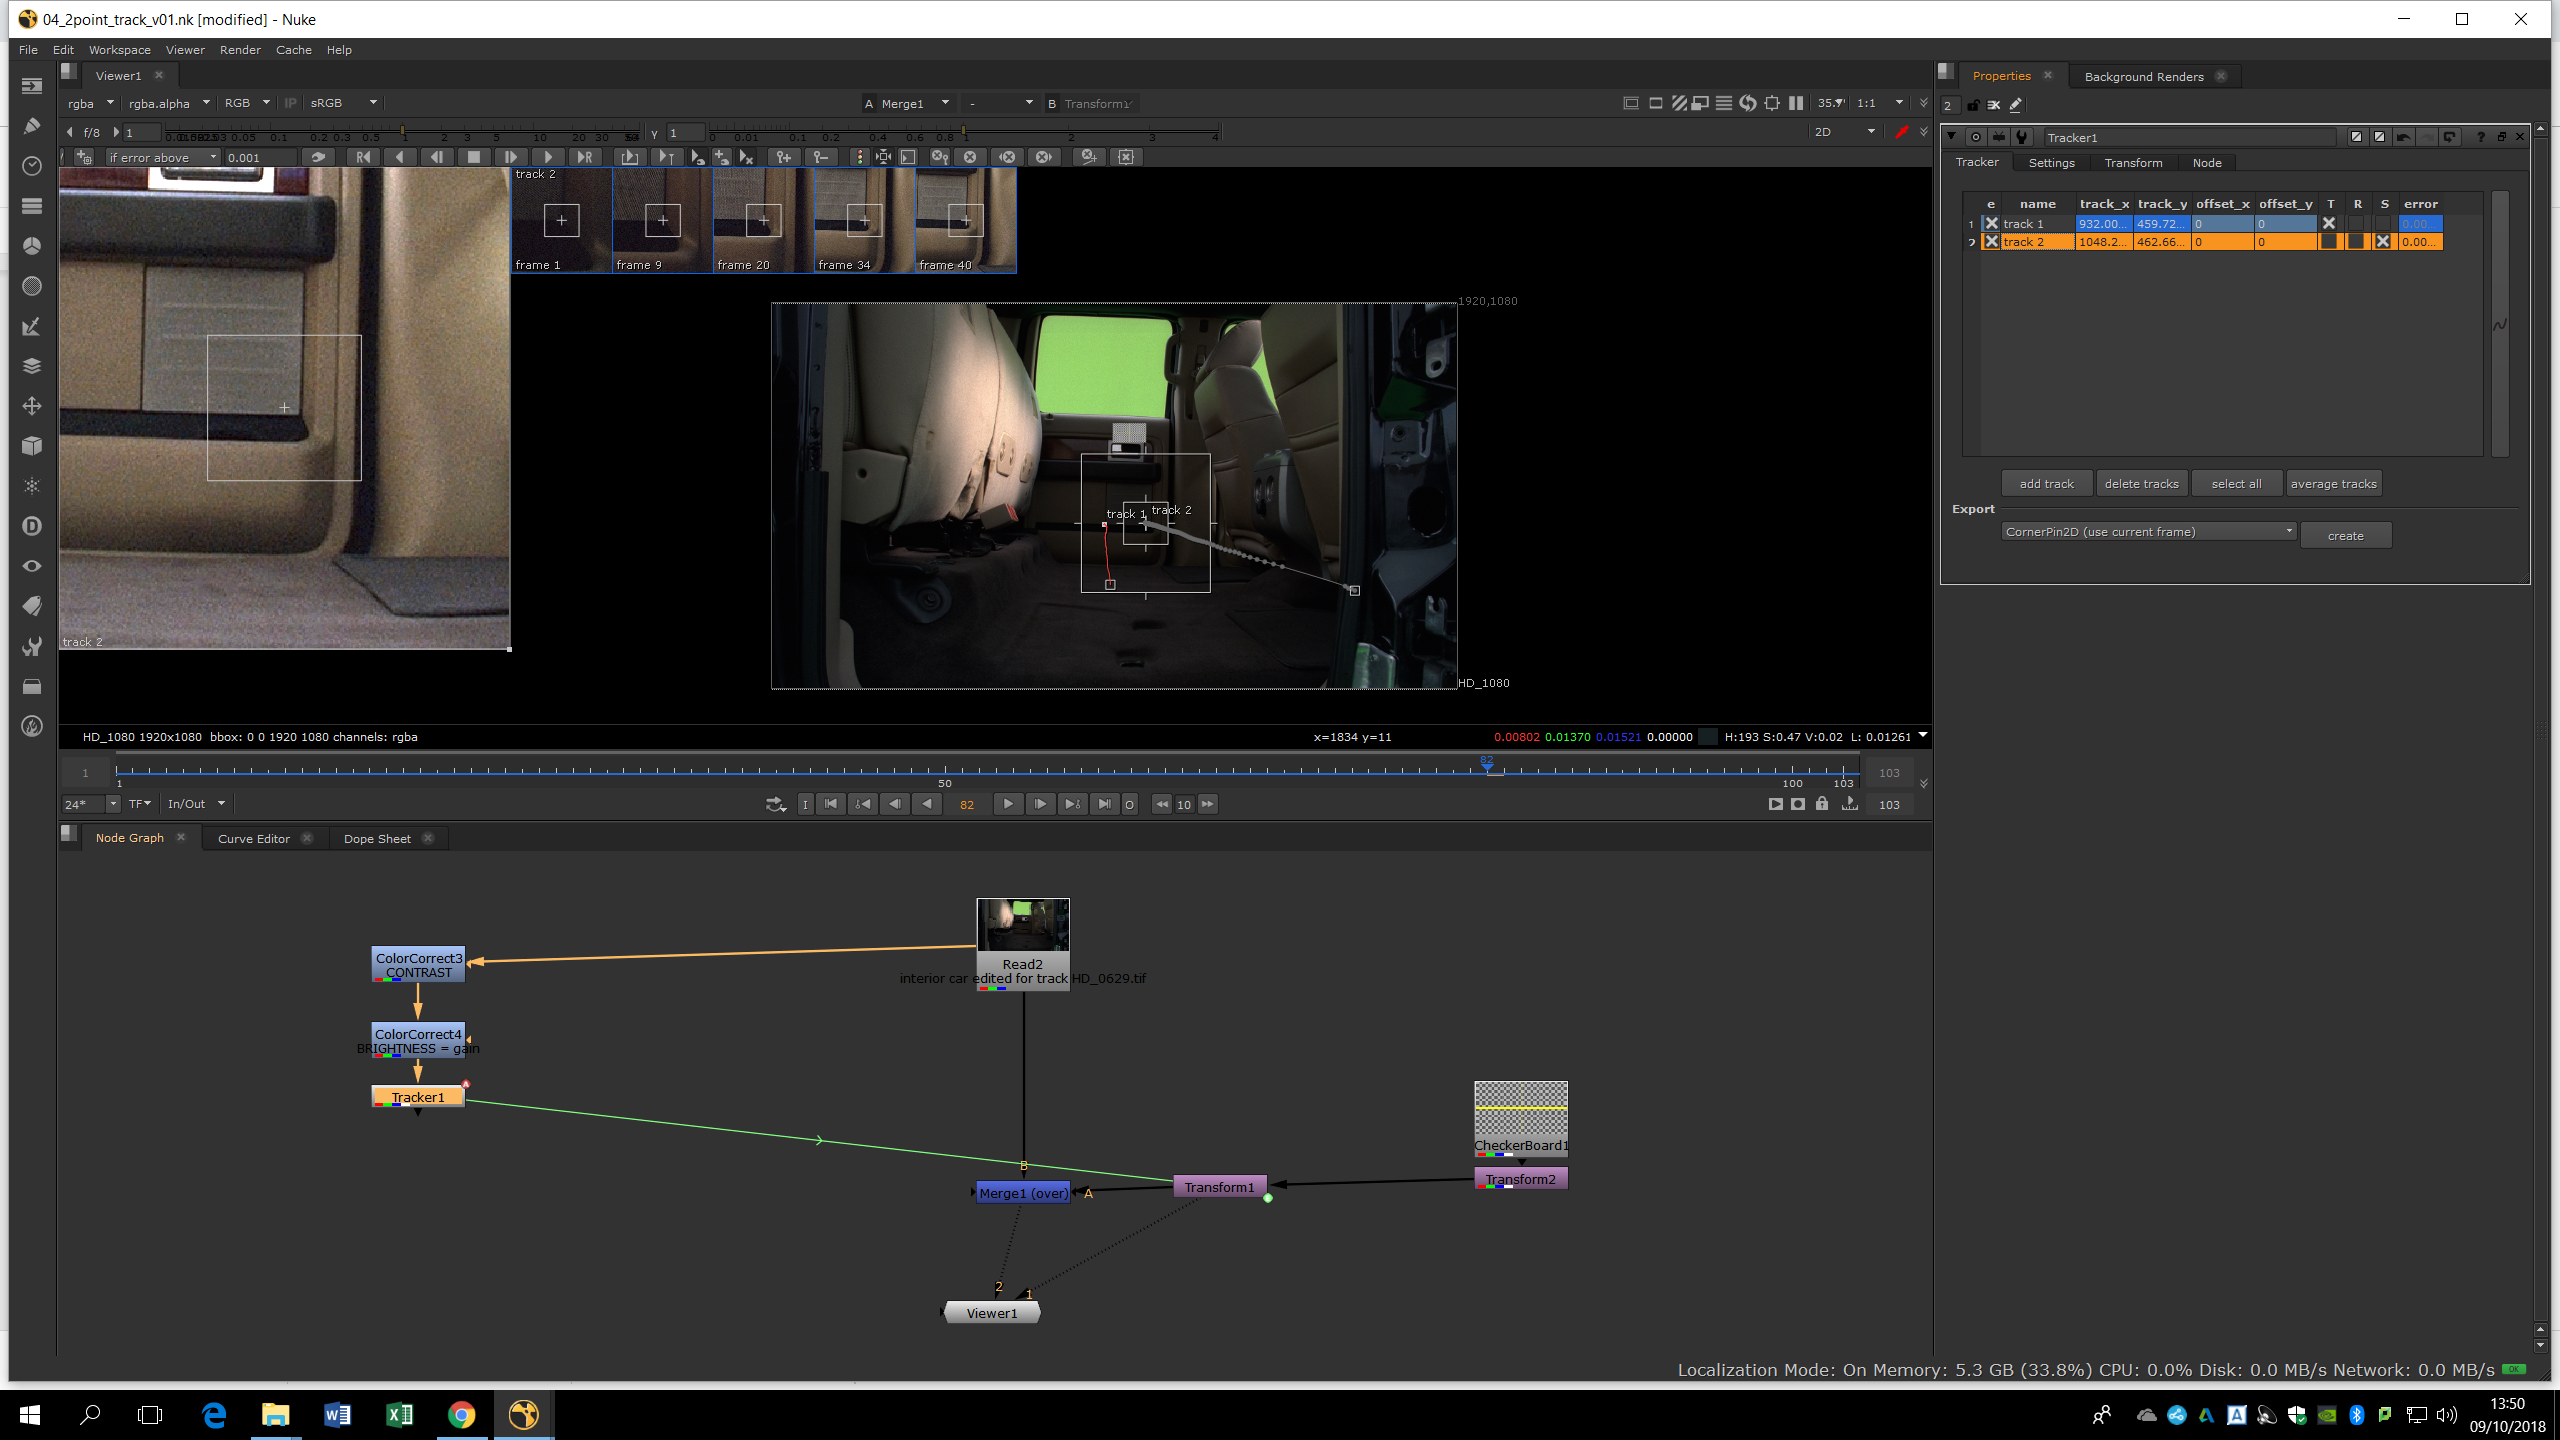
Now, we will add a Transform to the clackboard and we fit it into the square of the doot we want to track. Now, we add another transform and we link there the Translation ans Scale parameters of the tracker. If we view the merge tab, we will be able to see the clackboard moving and following the tracker transformation.