Presentation of the brief and final result
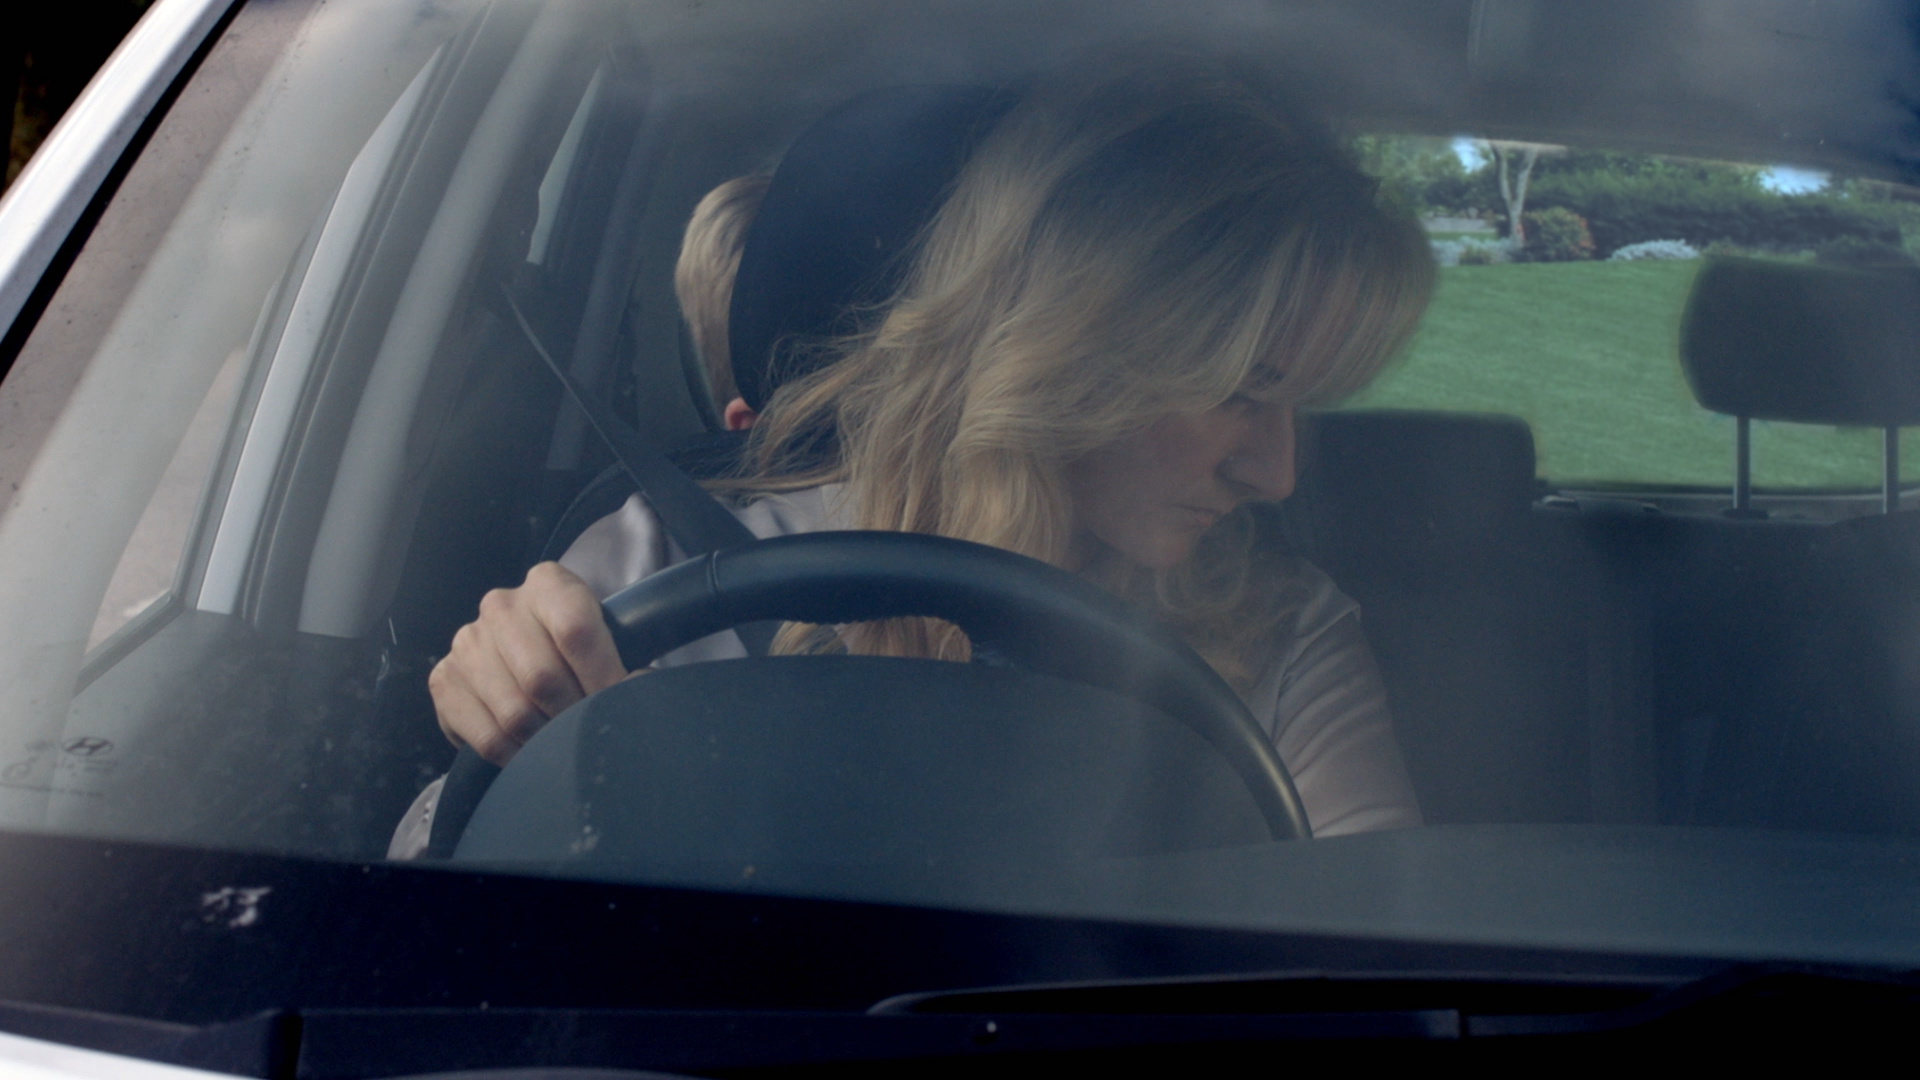
In this shot the character has a car crash and his son dies. The brief was to add some smashing glasses or any element to give the feeling of the car hitting. Also, the director noticed that the horizon moves with the car, and he asked if we could fix that too.
In the following video, we can see the project, including the final version, the original version, all the previous versions, and the VFX breakdown.
Now, I am going to go through he whole script and the corrections, in order to explain how did I get to the final result and explain very step.
Analysis of the script
Prepare the footage
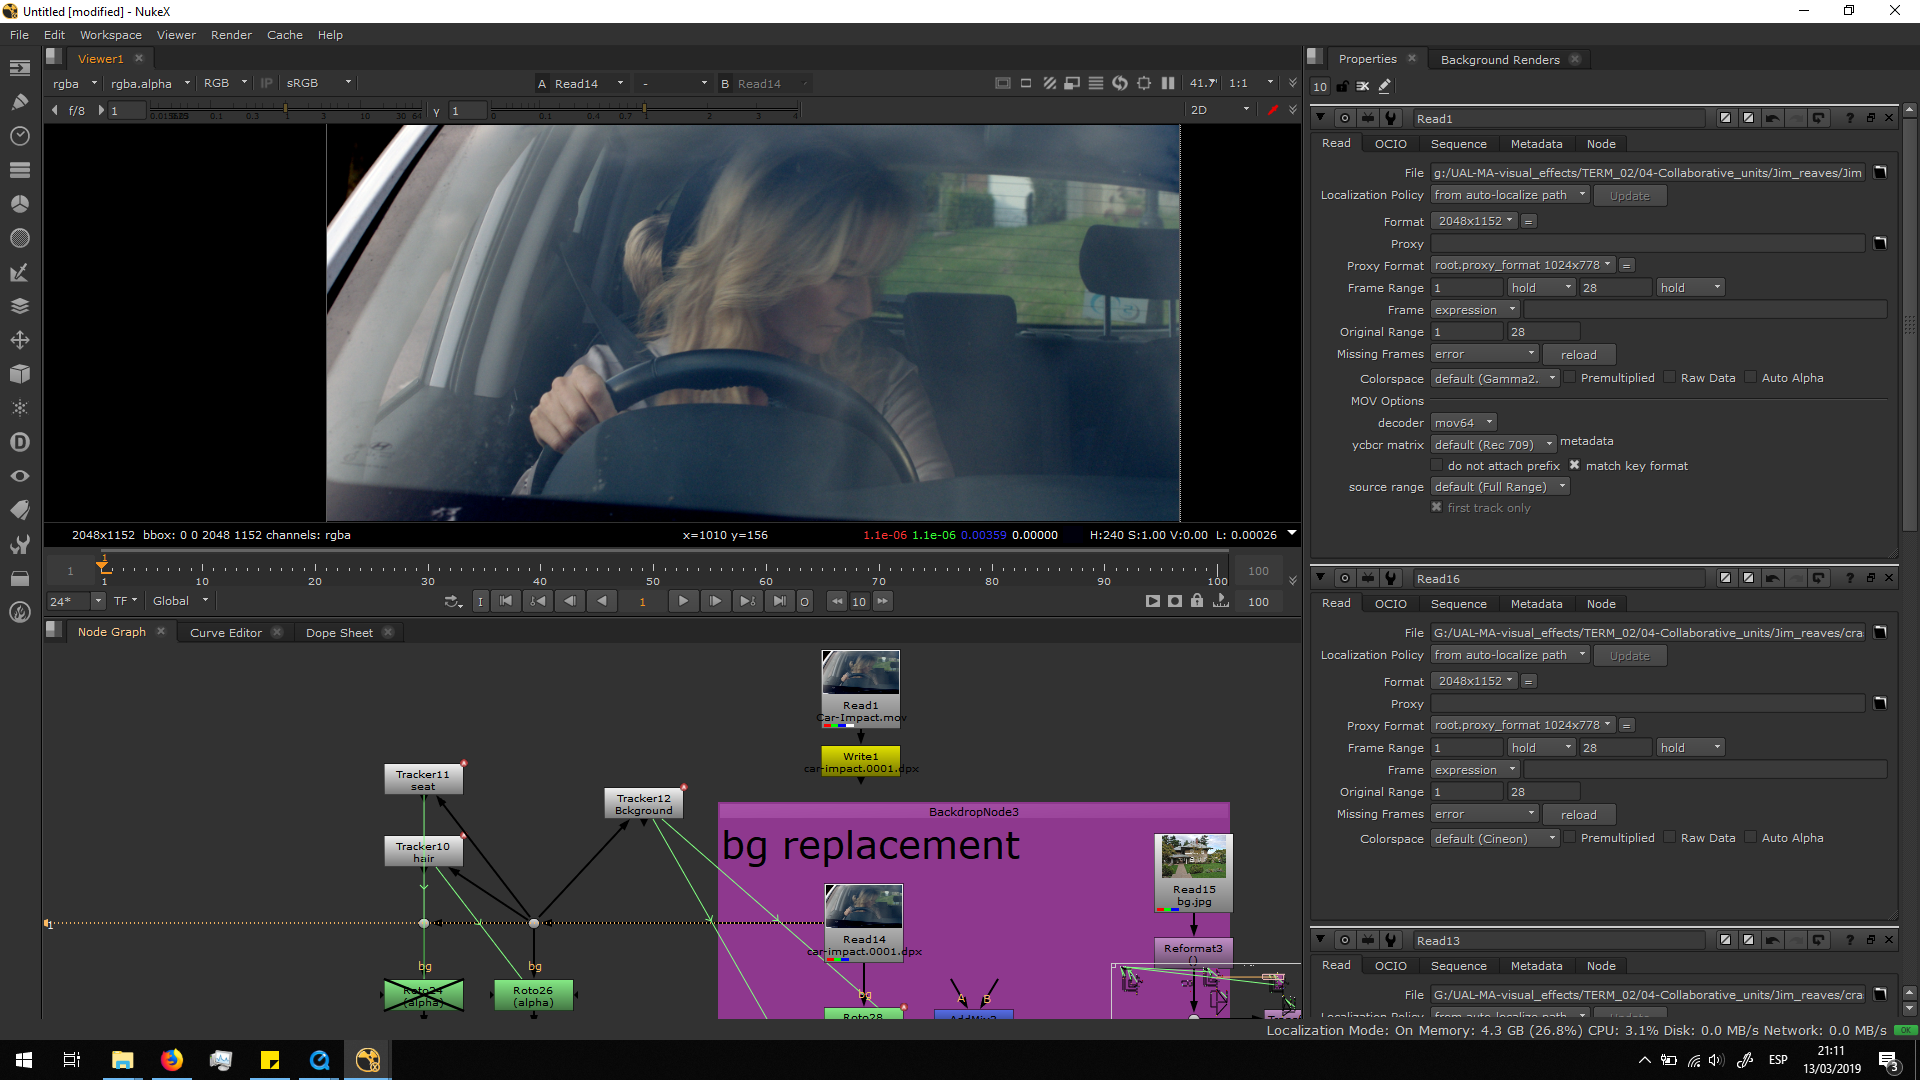
The first thing we need to make while editing a footage is exporting that footage into .dpx format. DPX format exports every frame of the footage as a single image with no compression, this means that is a lossless format, bigger than the original .mov format. Therefore, it needs to be done to preserve the maximum quality of the footage while working with it, in order to have a major quality in the final exportation. Otherwise, while working on a shot, it is unavoidable to lose some quality, but if we work over a .dpx this looseness it would not affect to our final exportation, since we are going to be working with a huge footage.
Delete the current background
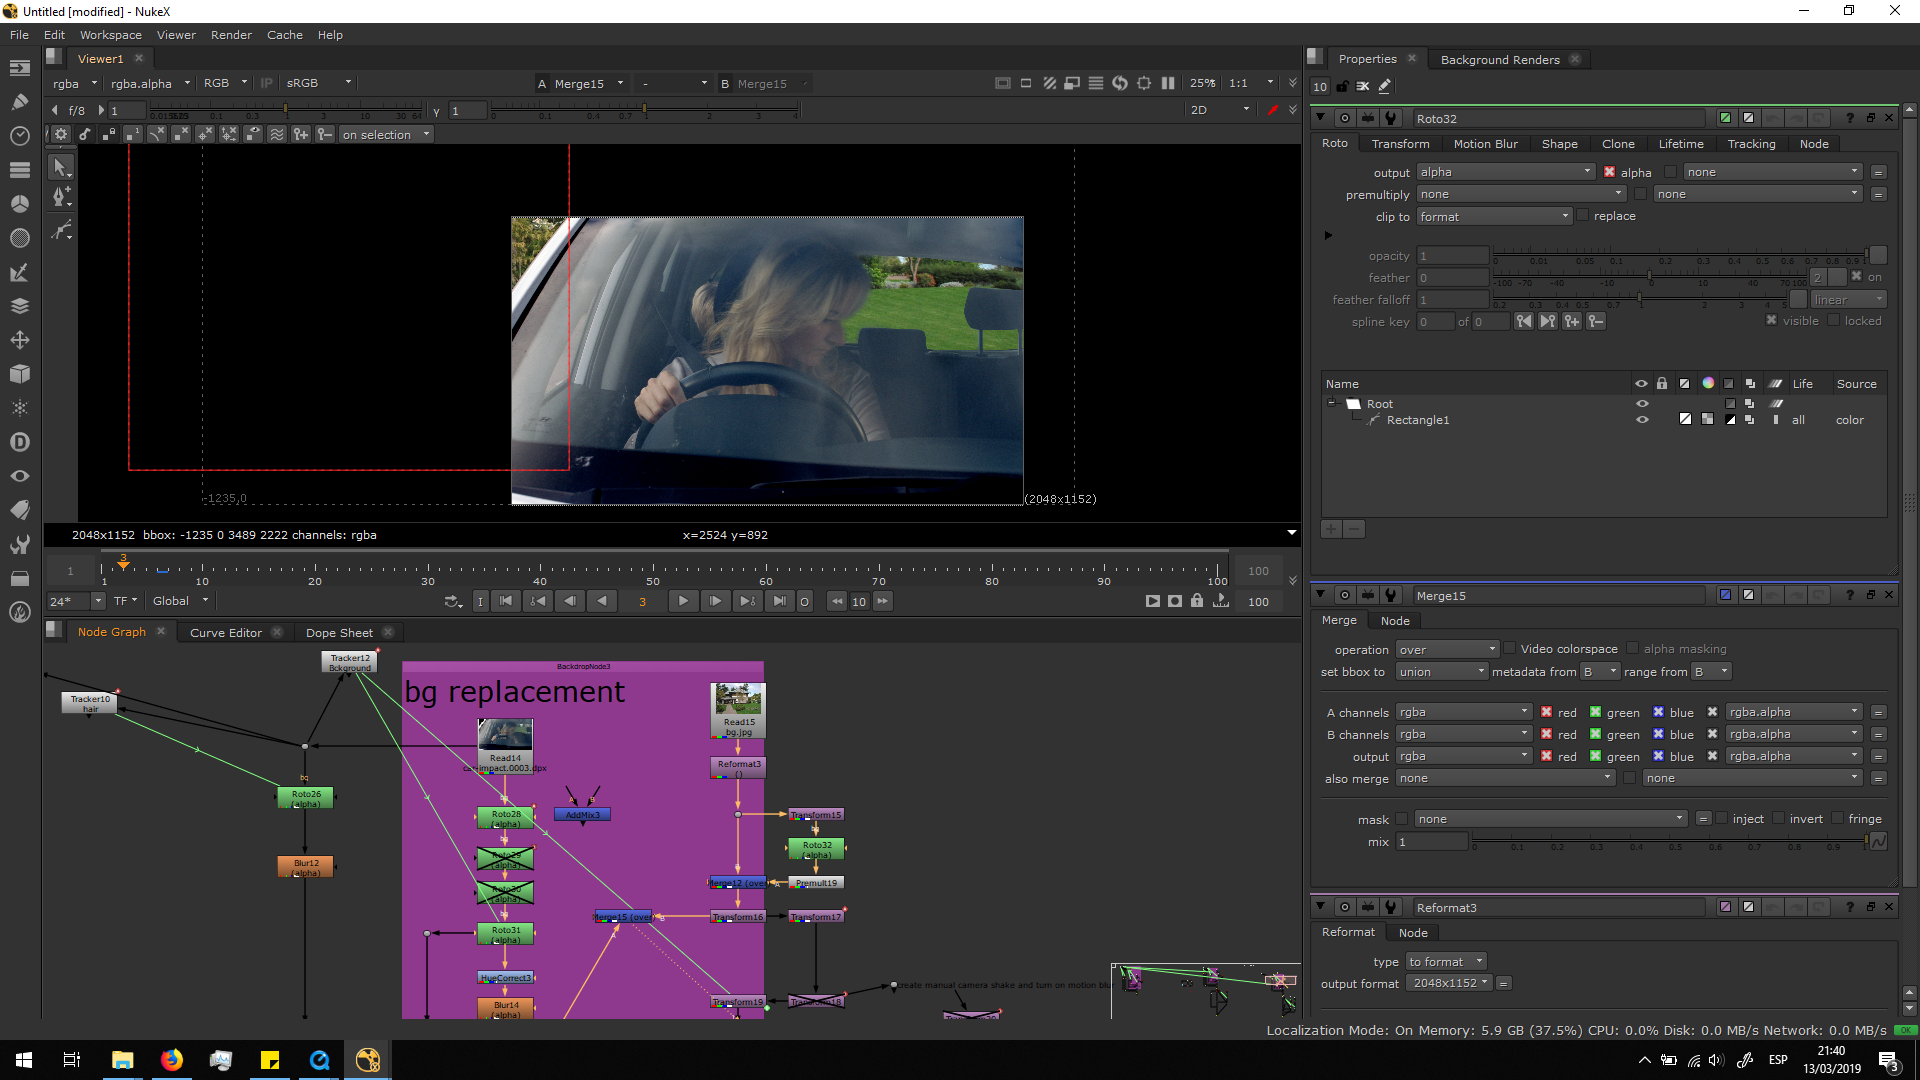
The first thing we are going to do is to replace the background.
For that, first I did roto to take out the background, animating it frame by frame.
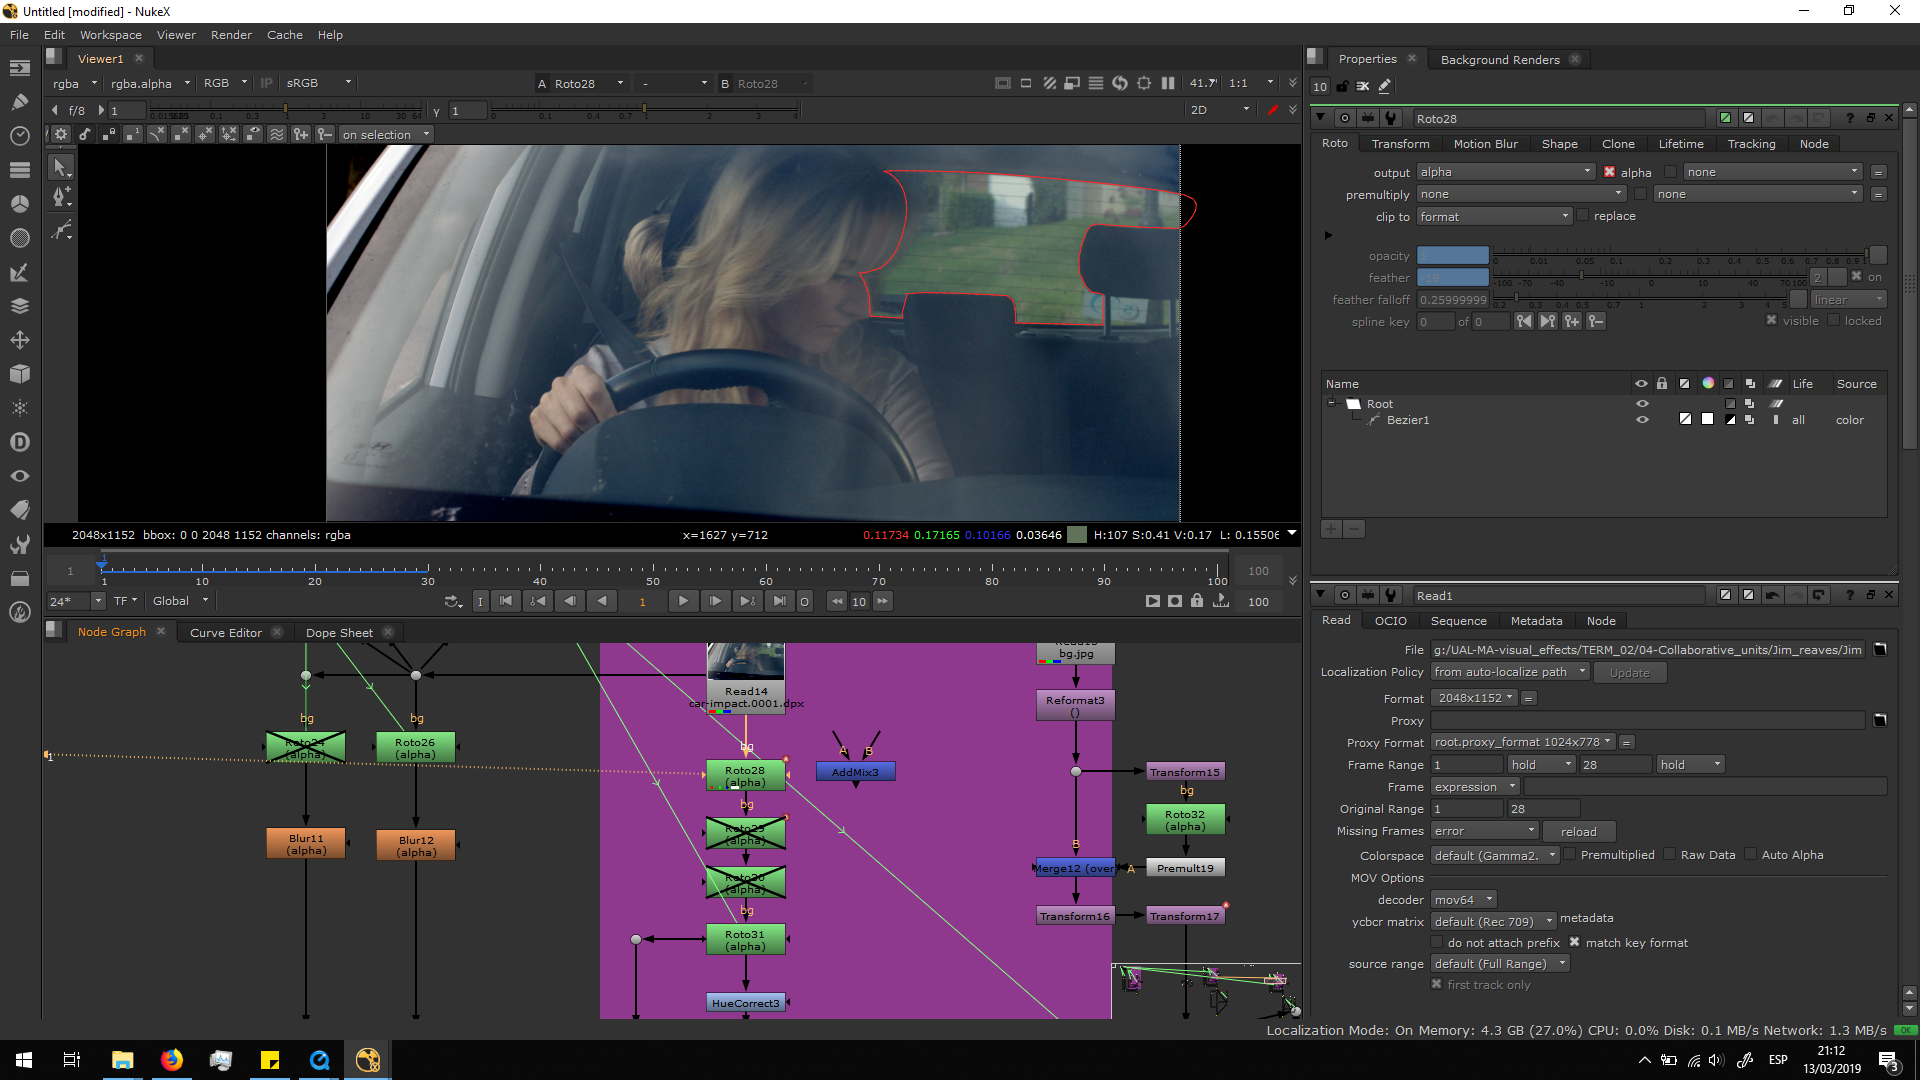
I did a roto also for the left corner of the car.
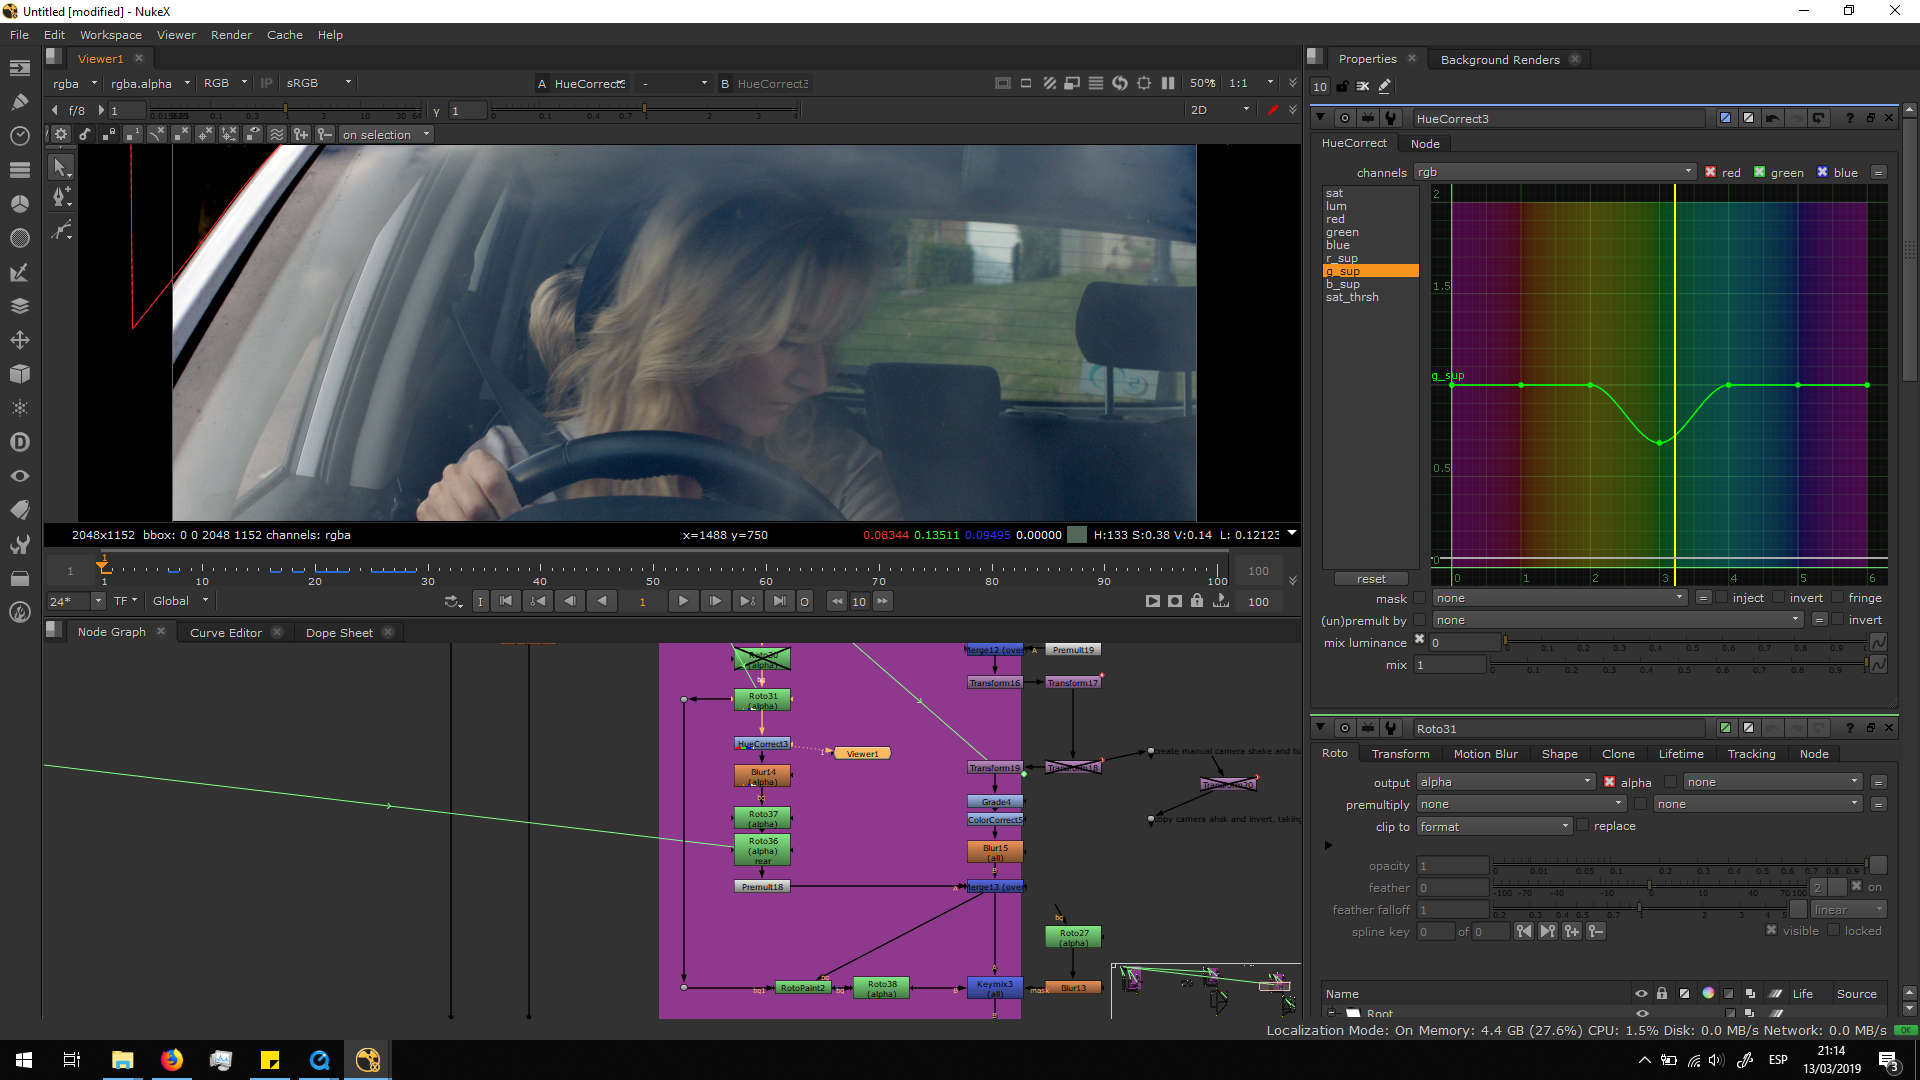
I did a hue correct in order to reduce the green in contact with the car and the hair of the woman.
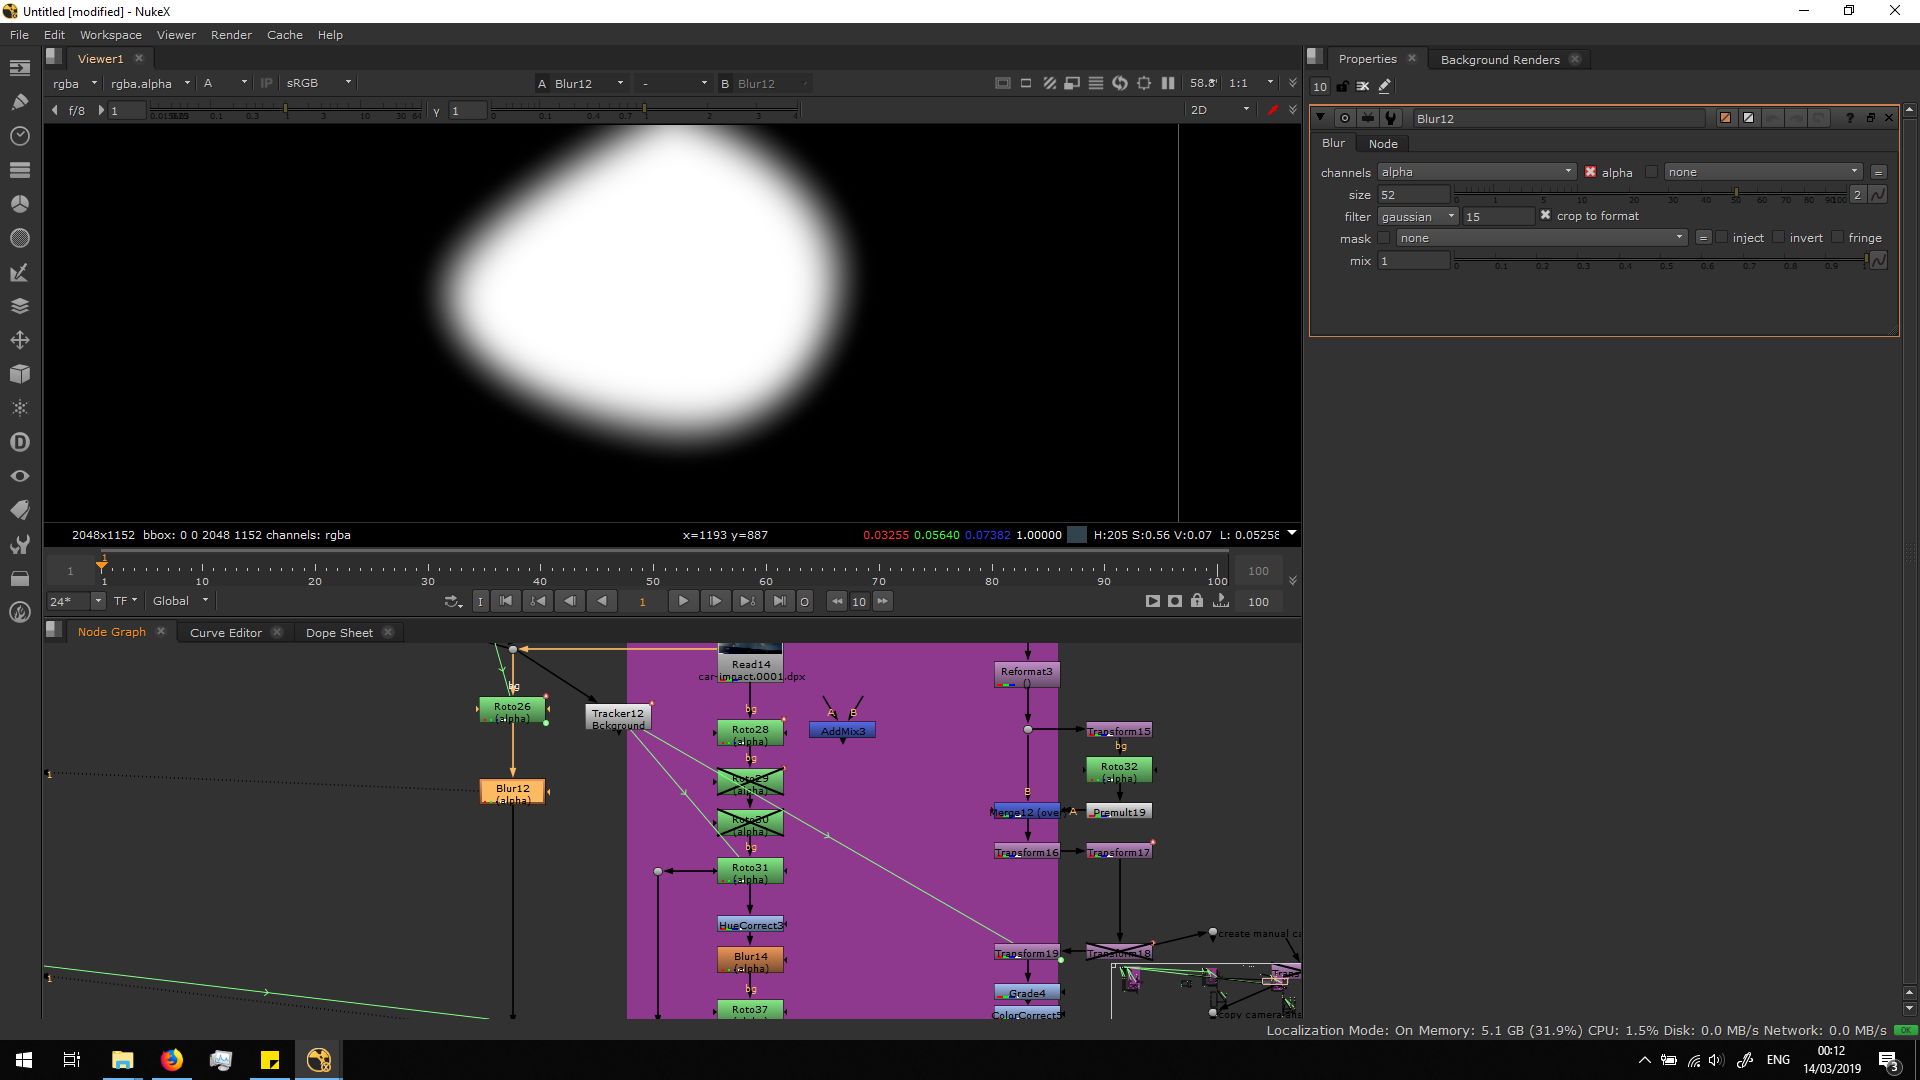
Then, I added a blur note in the alpha channel in order to soften the edges of the roto.
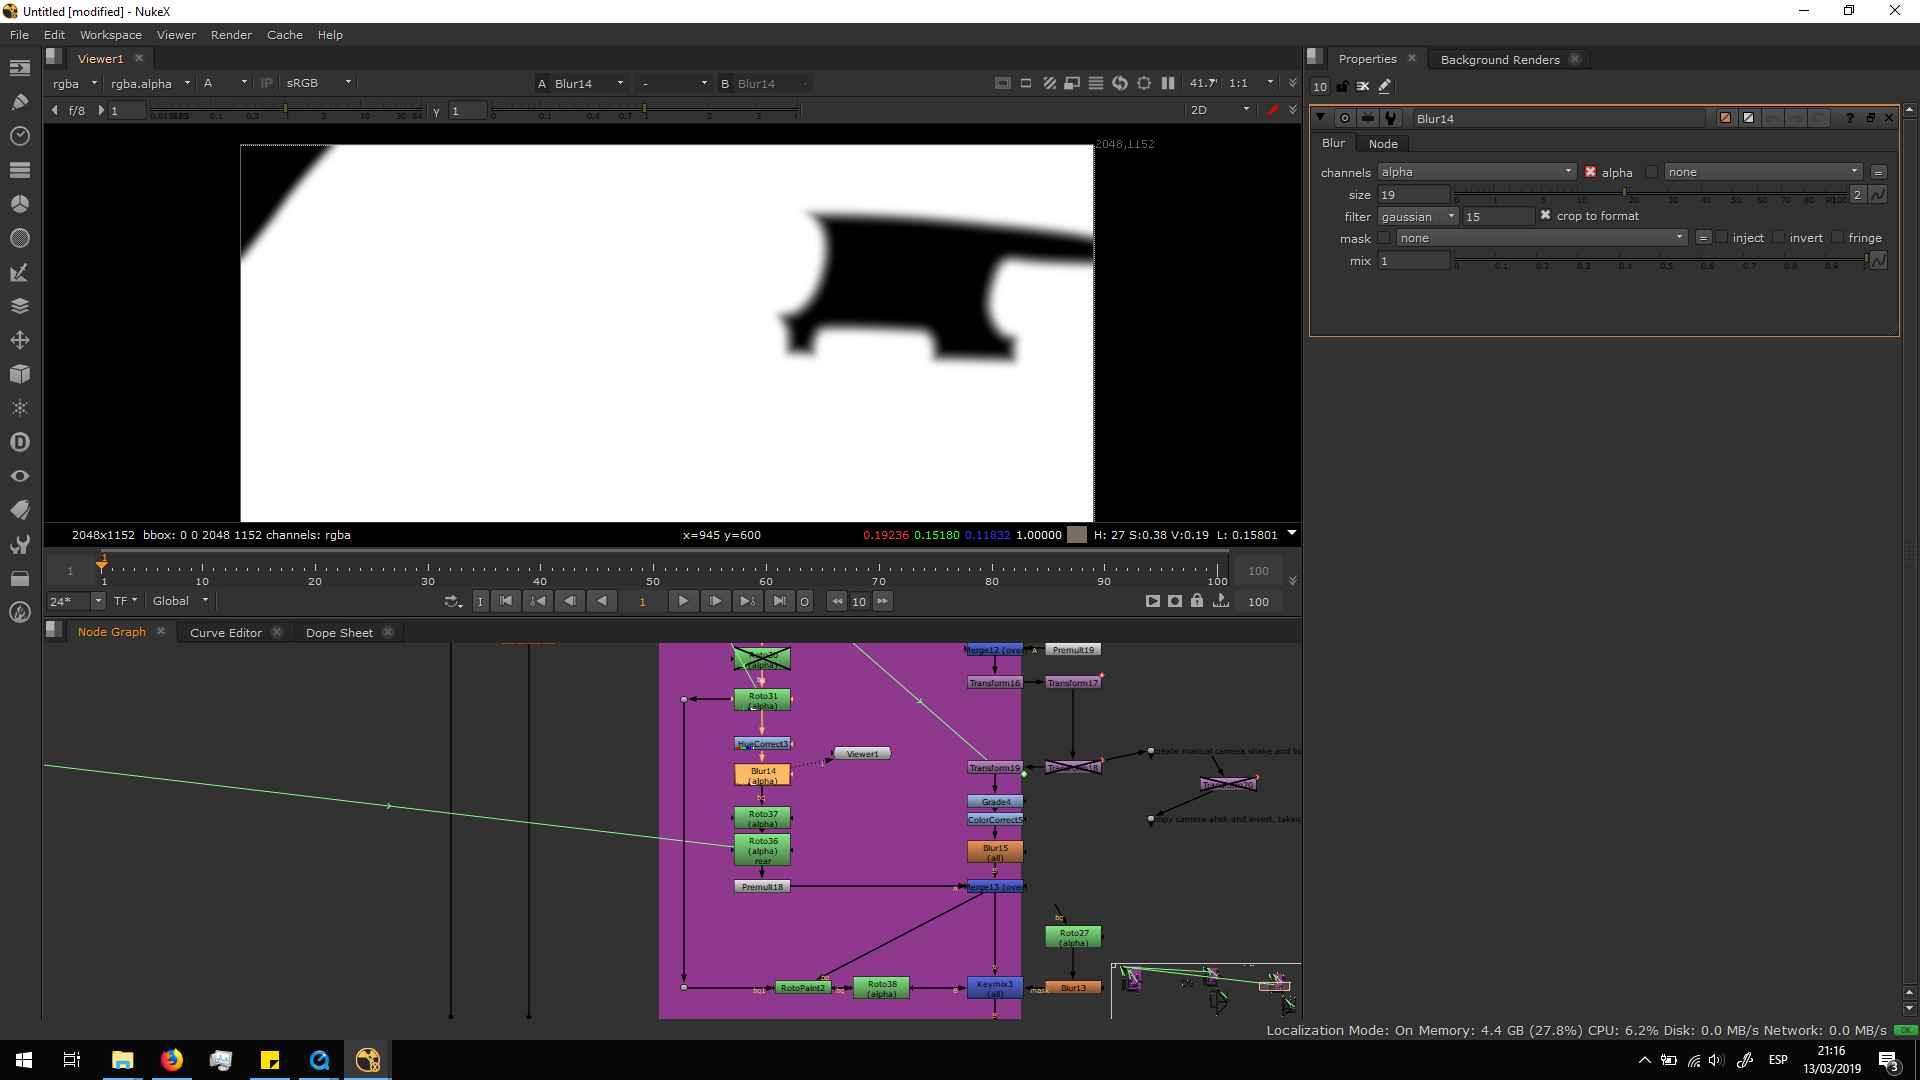
This is useful to blend the hair of the woman into the roto, since it is an organic shape and the edges are scattered. Therefore, I did another roto to isolate the area in which we want that soft edges in the alpha channel.

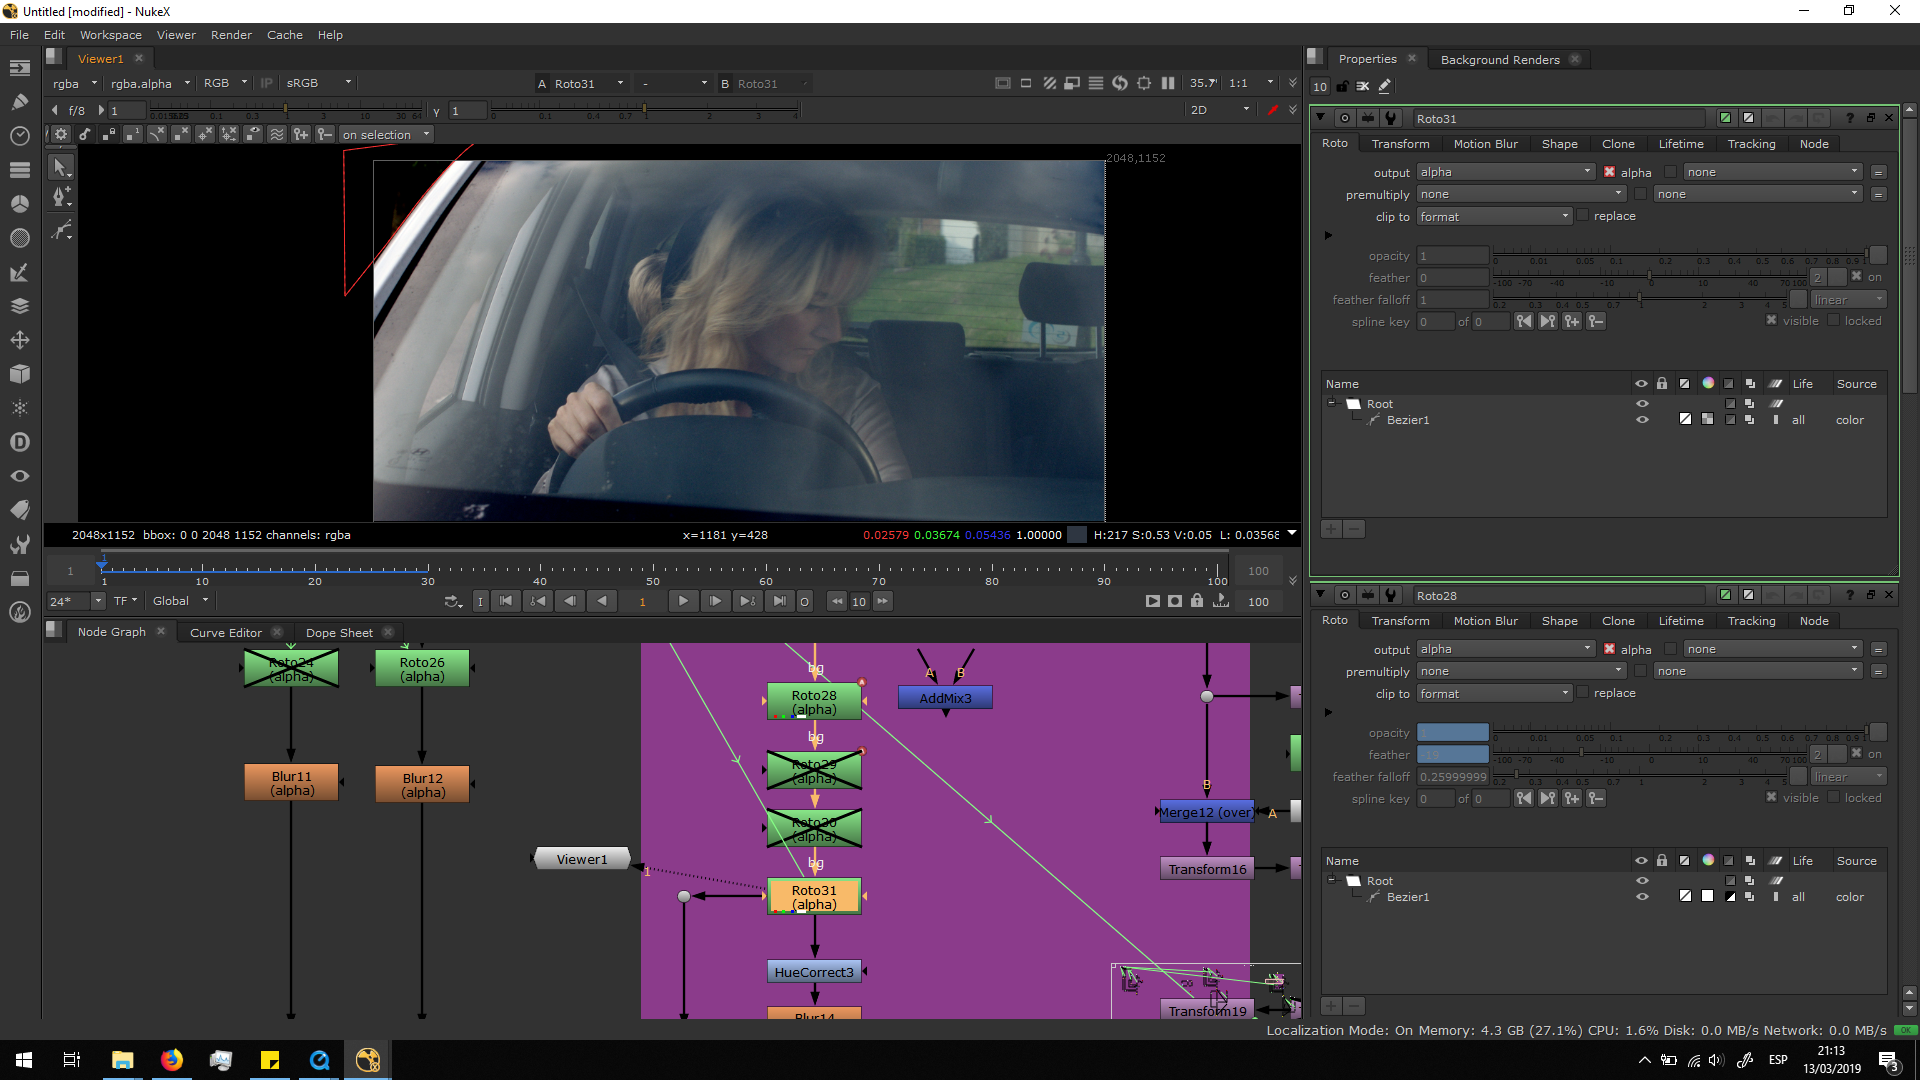
And then I added a roto with several beizers animated frame by frame, in order to bring back the alpha in those parts in which we do want sharp edges. 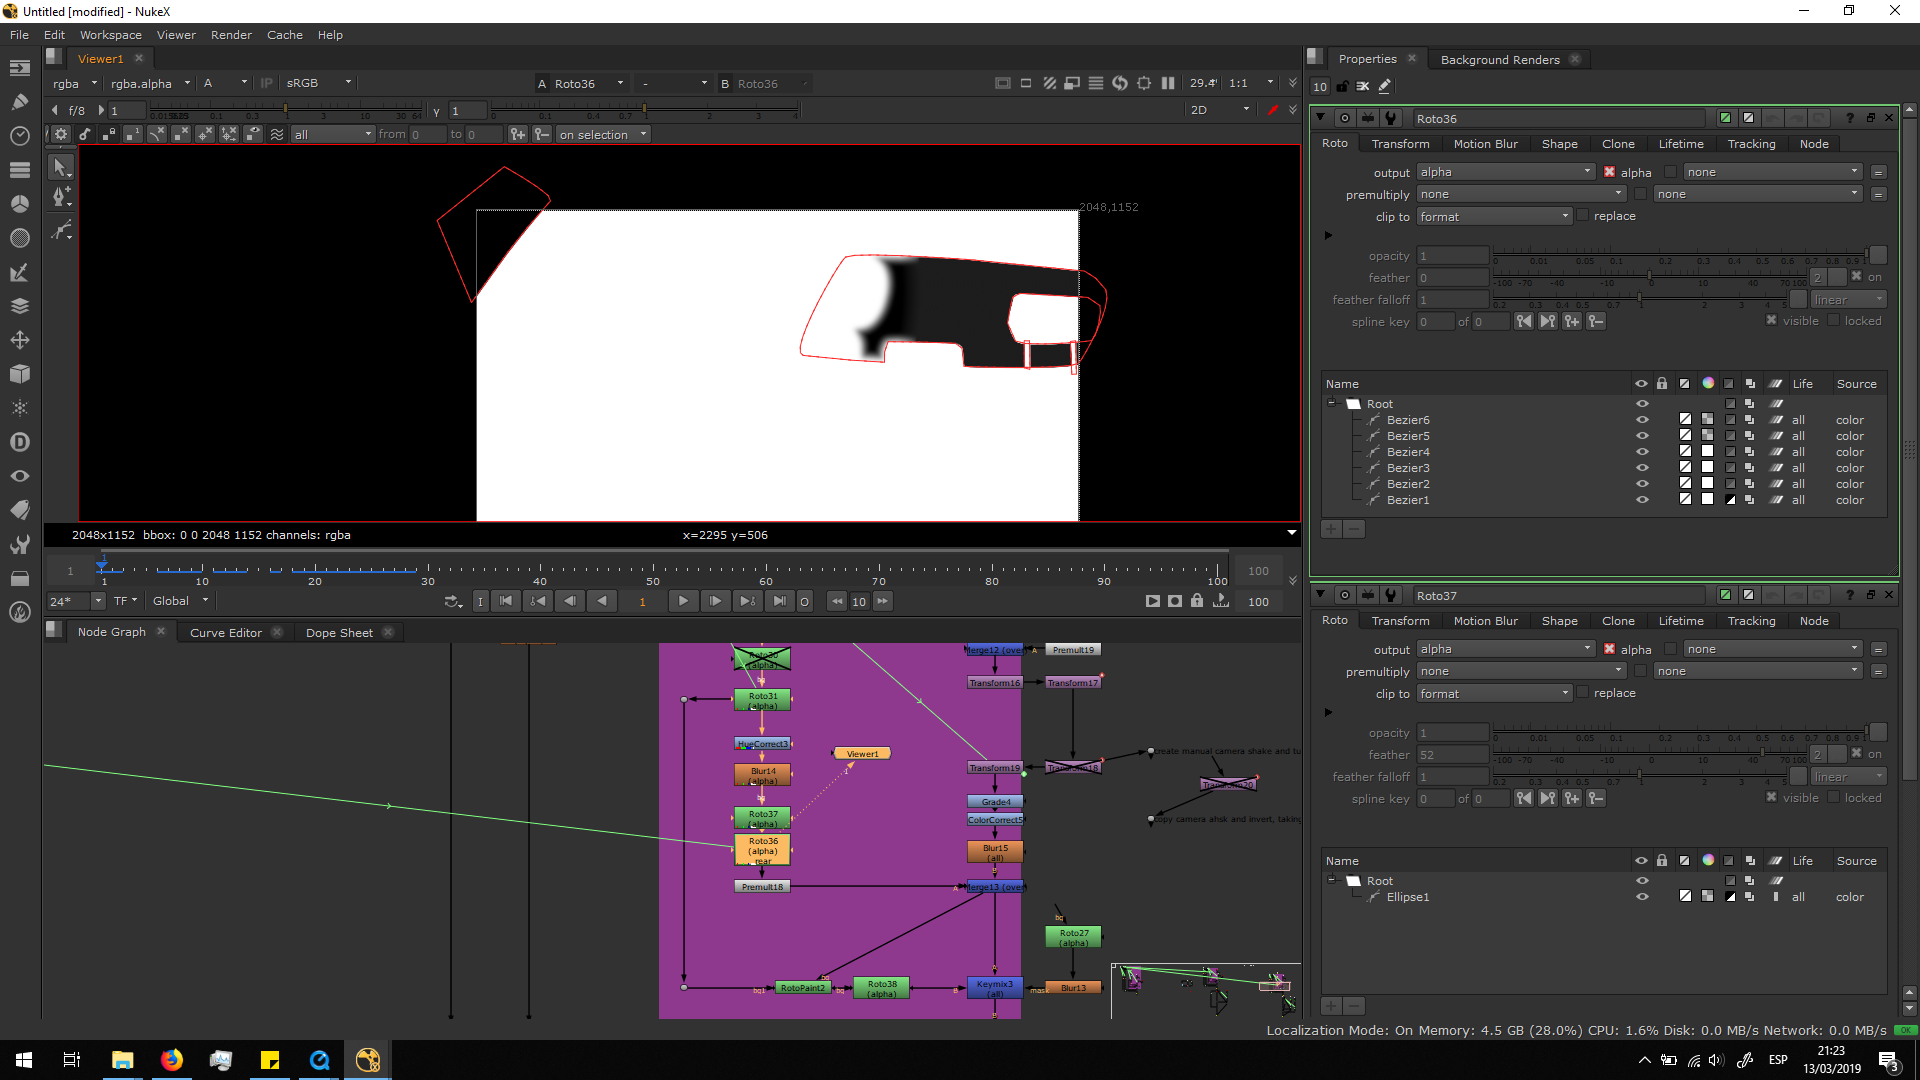 Finally, I added a premult note to preview the alpha channel.
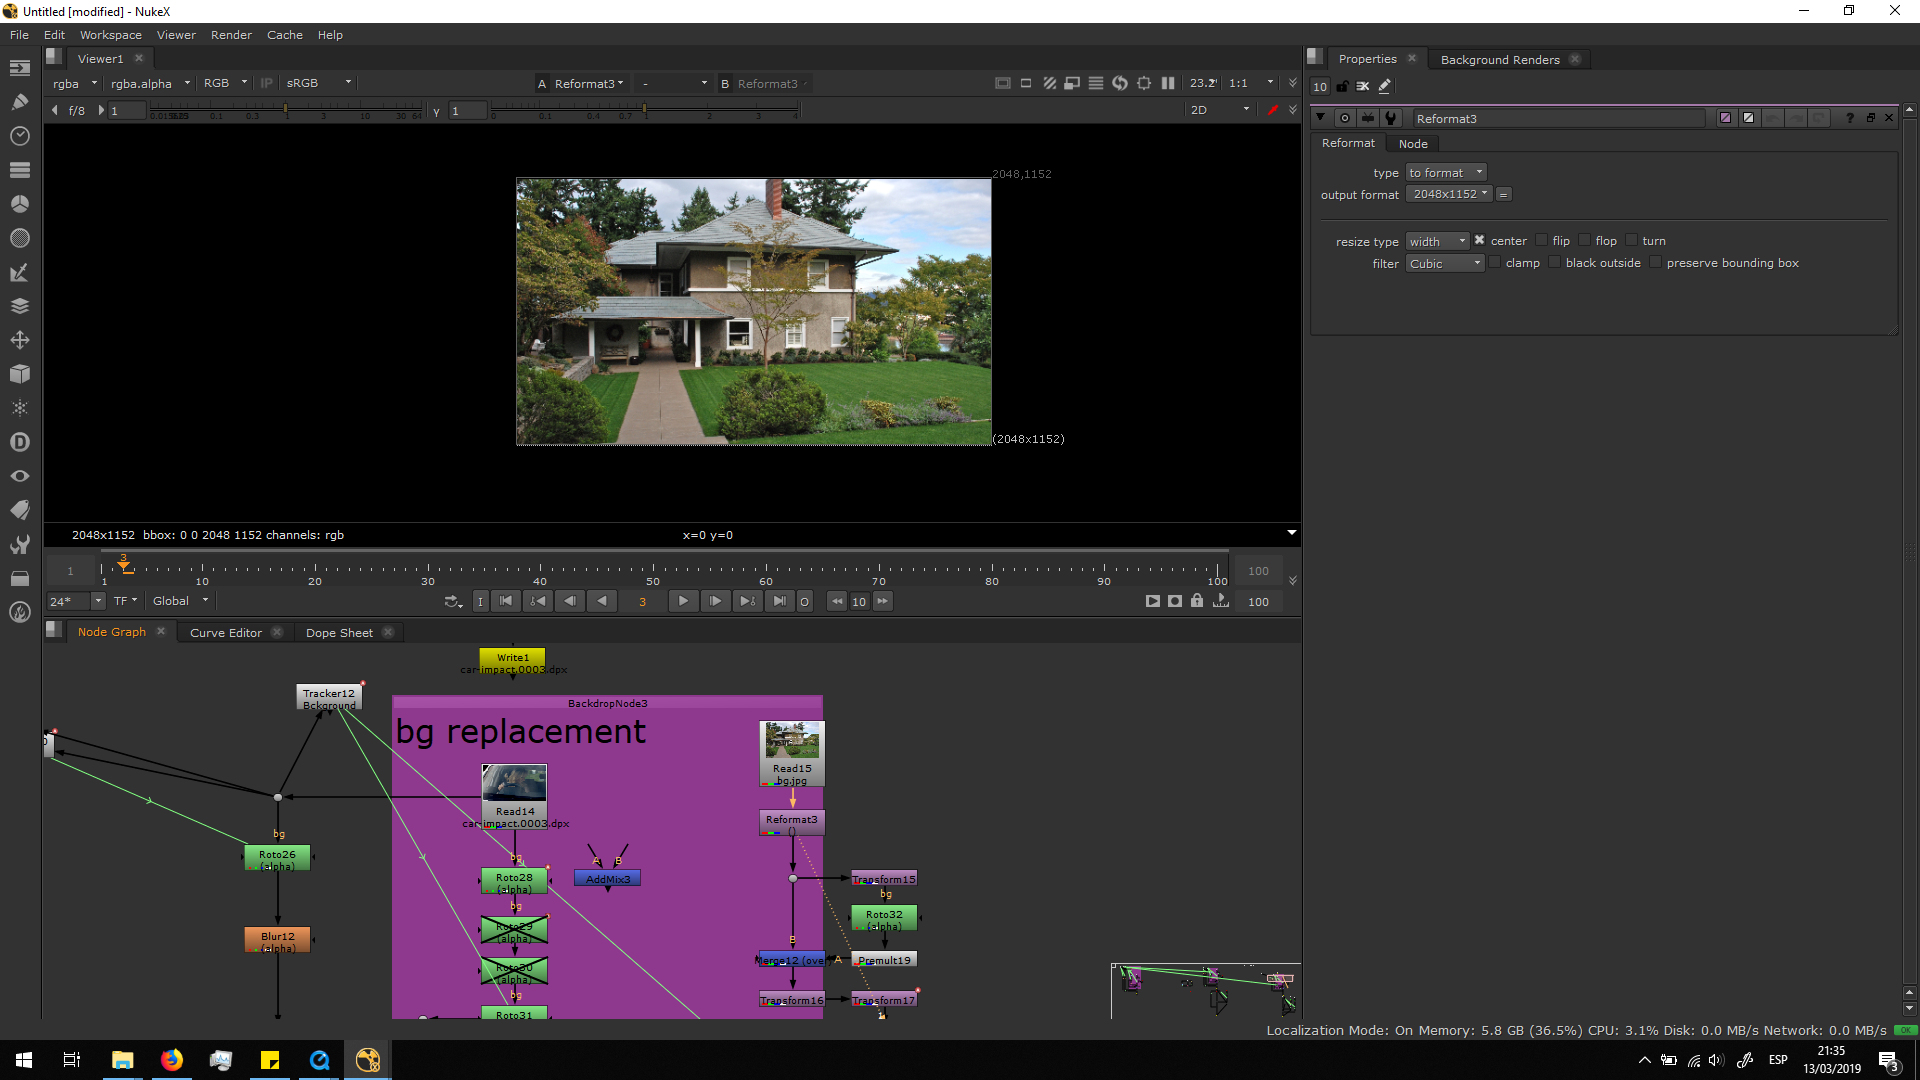
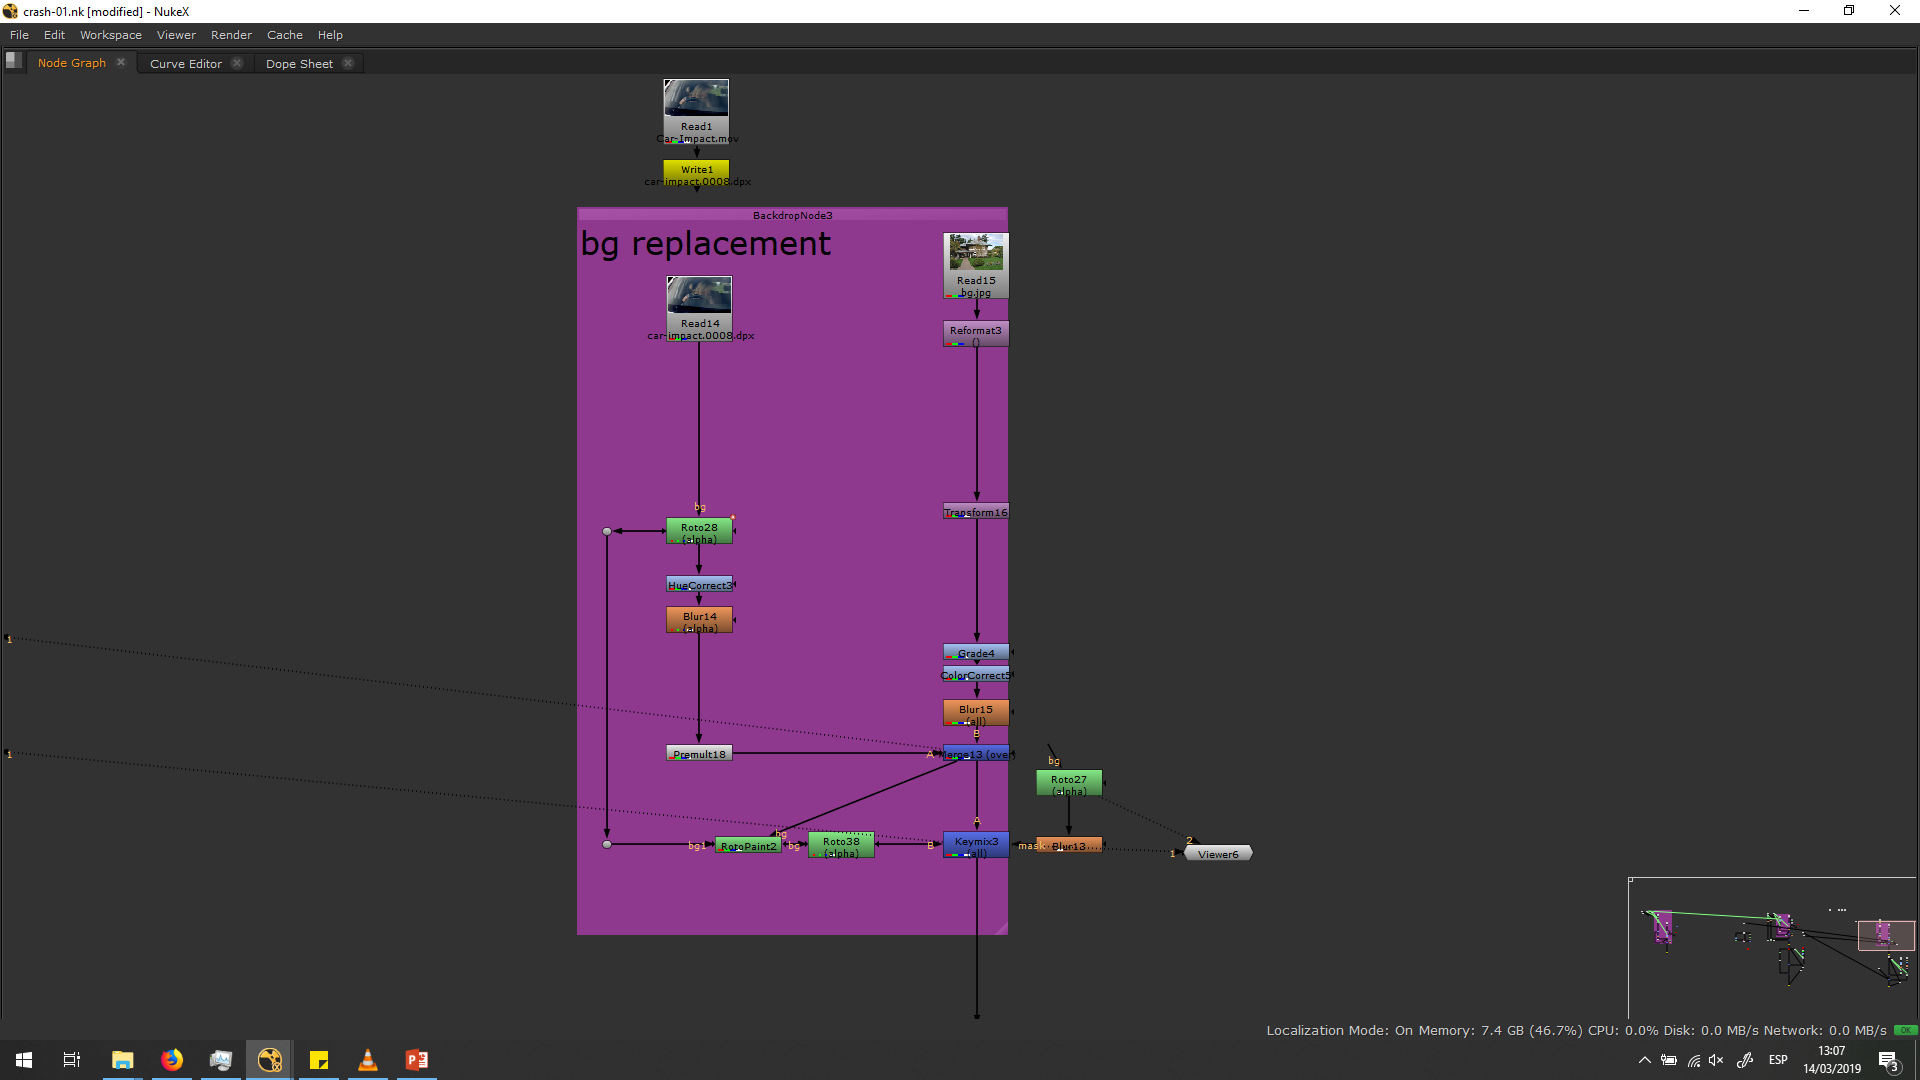
Generate a new background
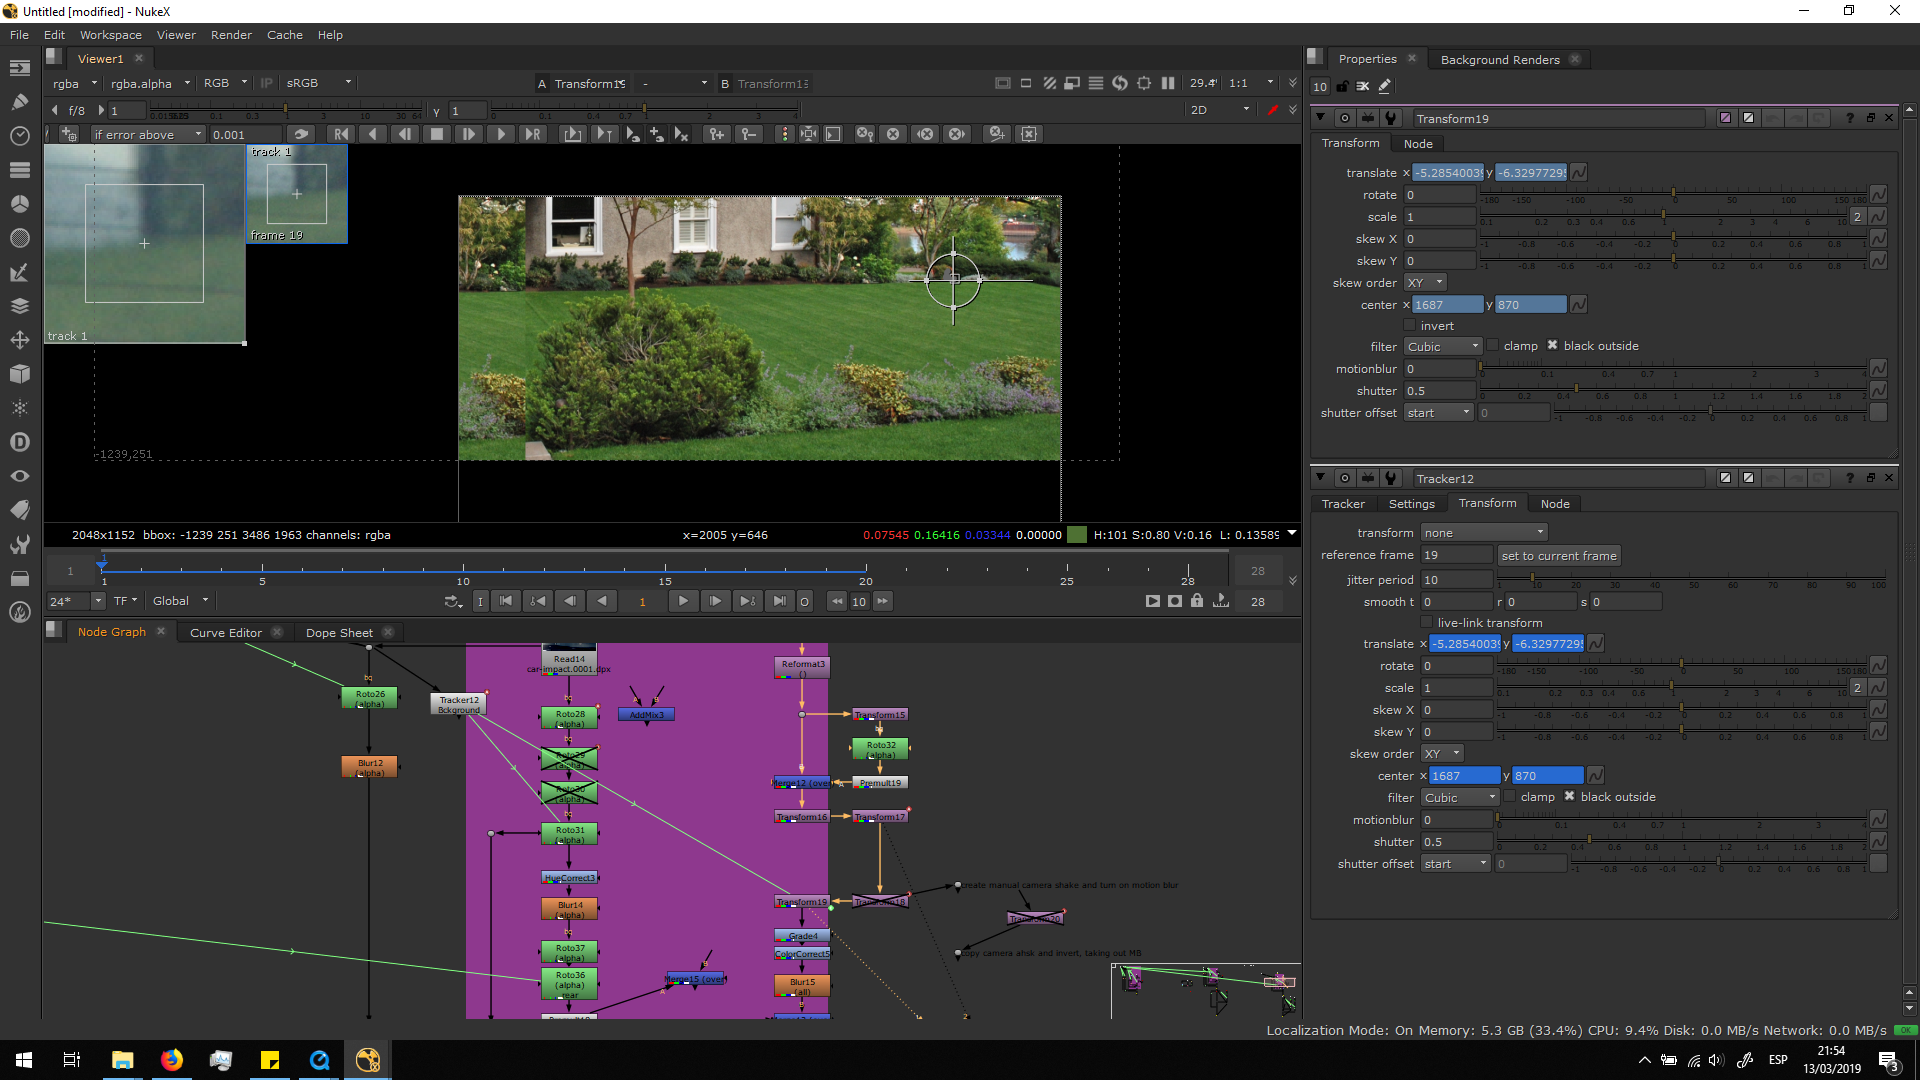
In order to have a background which maintains the horizontal direction, we needed to sear for a new background in Internet, with a high-resolution and the correct conditions to be blended. I found this image.
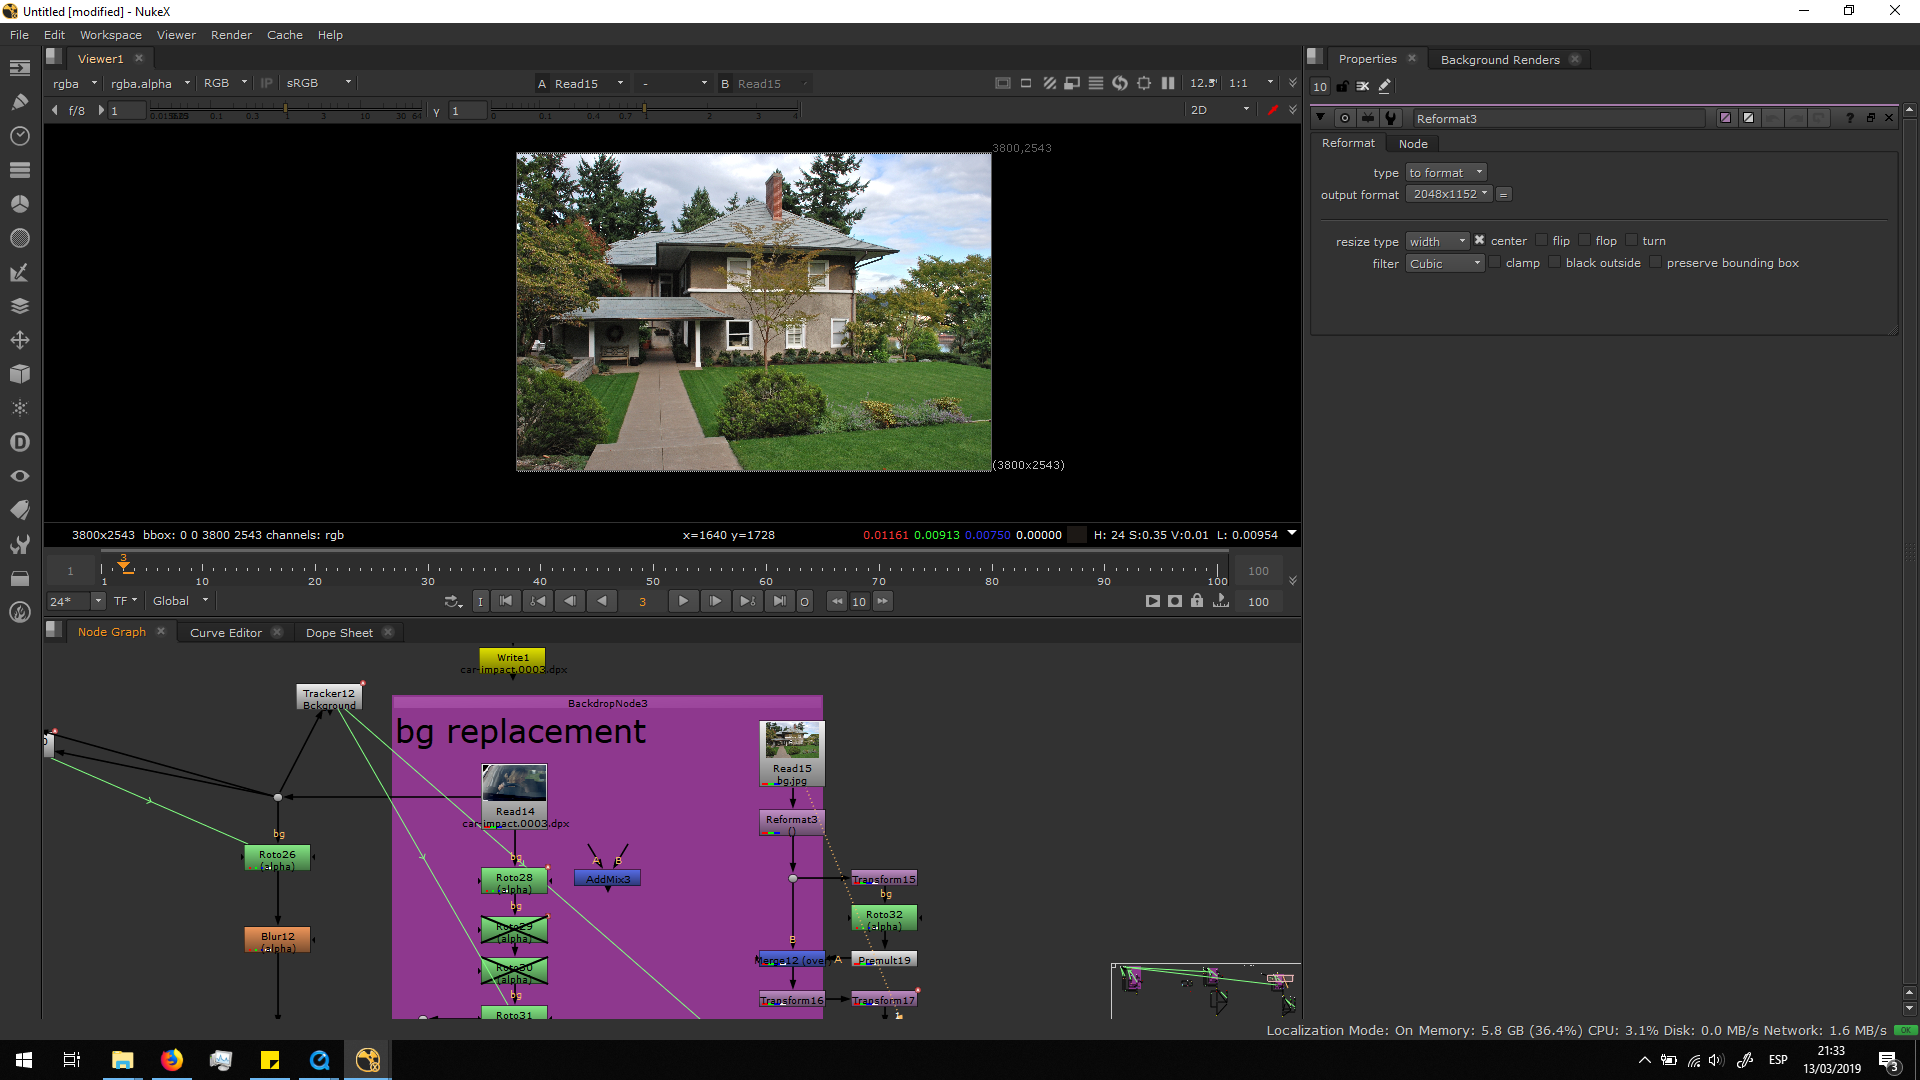
Then, I add a reformat note to make the image match with the original footage format.
I added a transform note to make it bigger and place it correctly in the background.
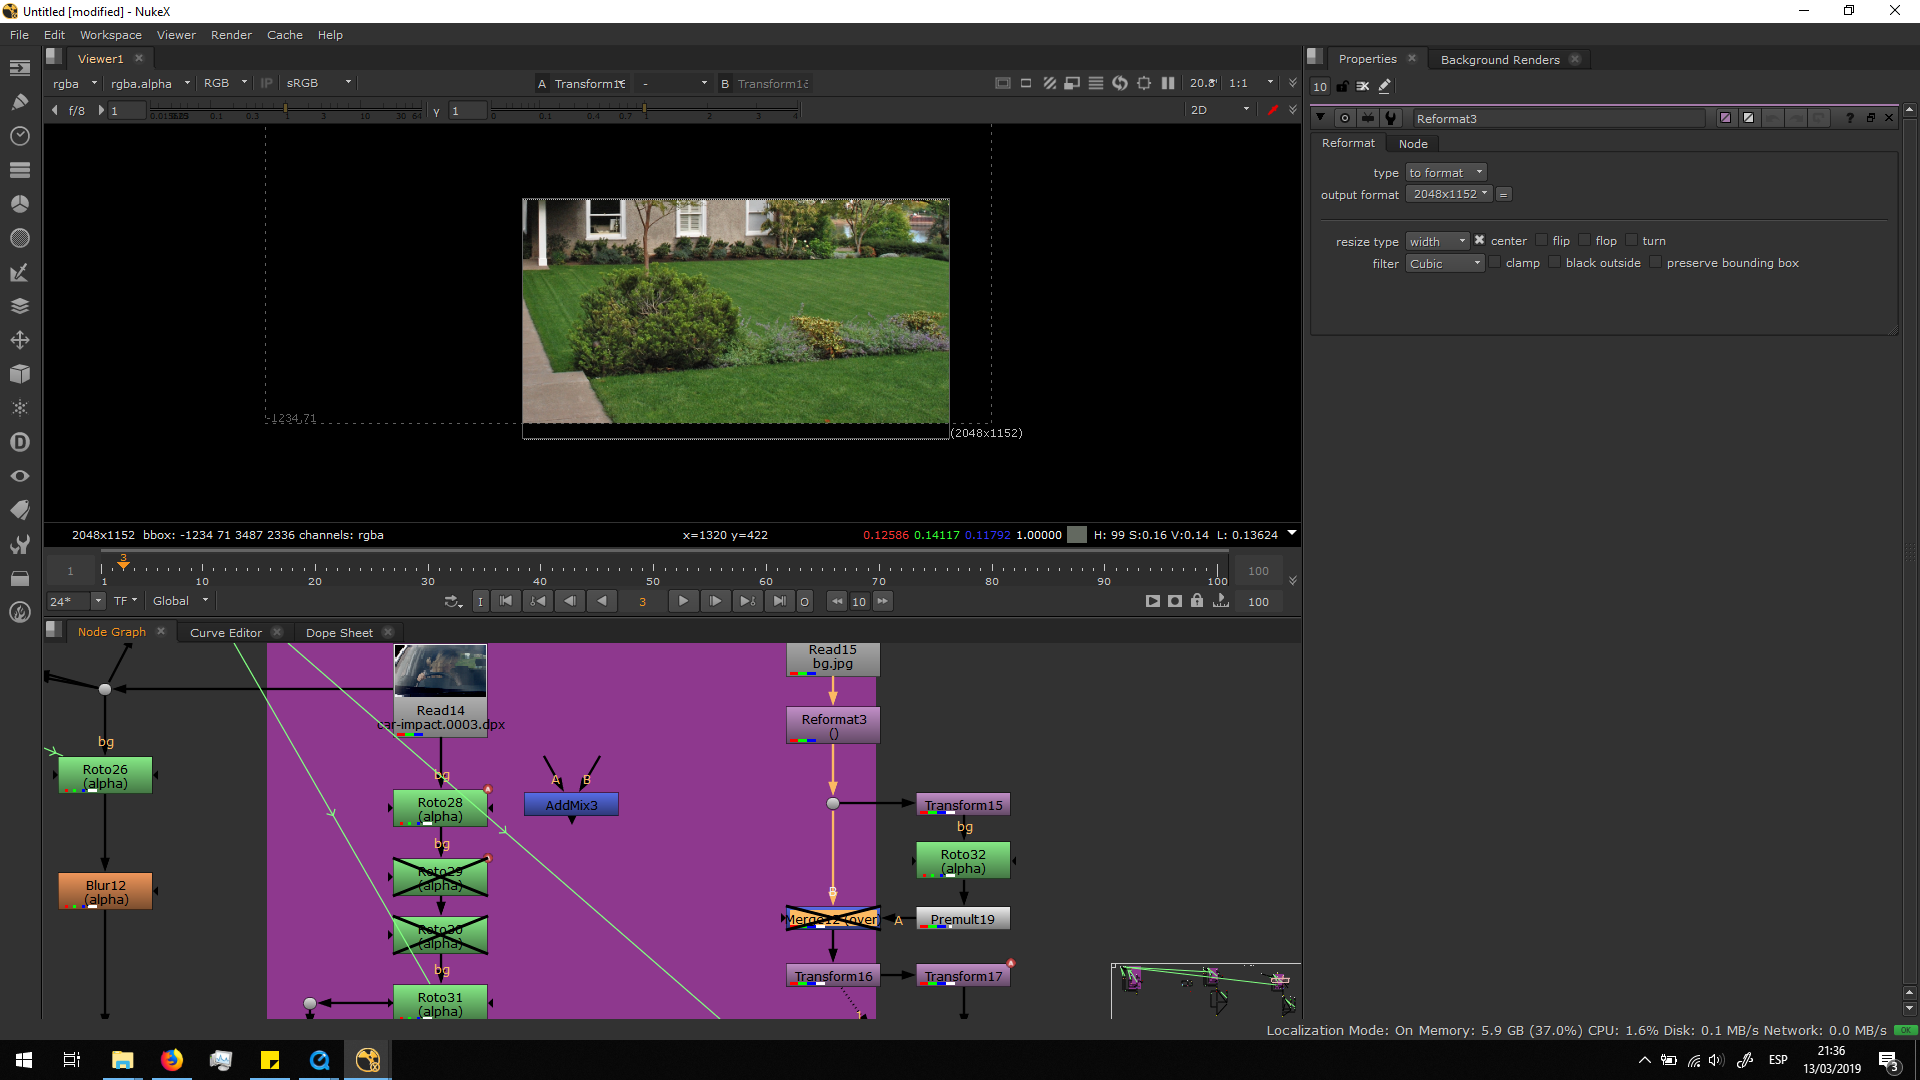
I am going to add a merge note to see step by step how it looked.
 As we can see, it looks a bit awkward in the left corner. Therefore, I added a dot after the reformat note, in order to add a transform note to move the image to the left, do a roto, and merge it over the other background, having this result.
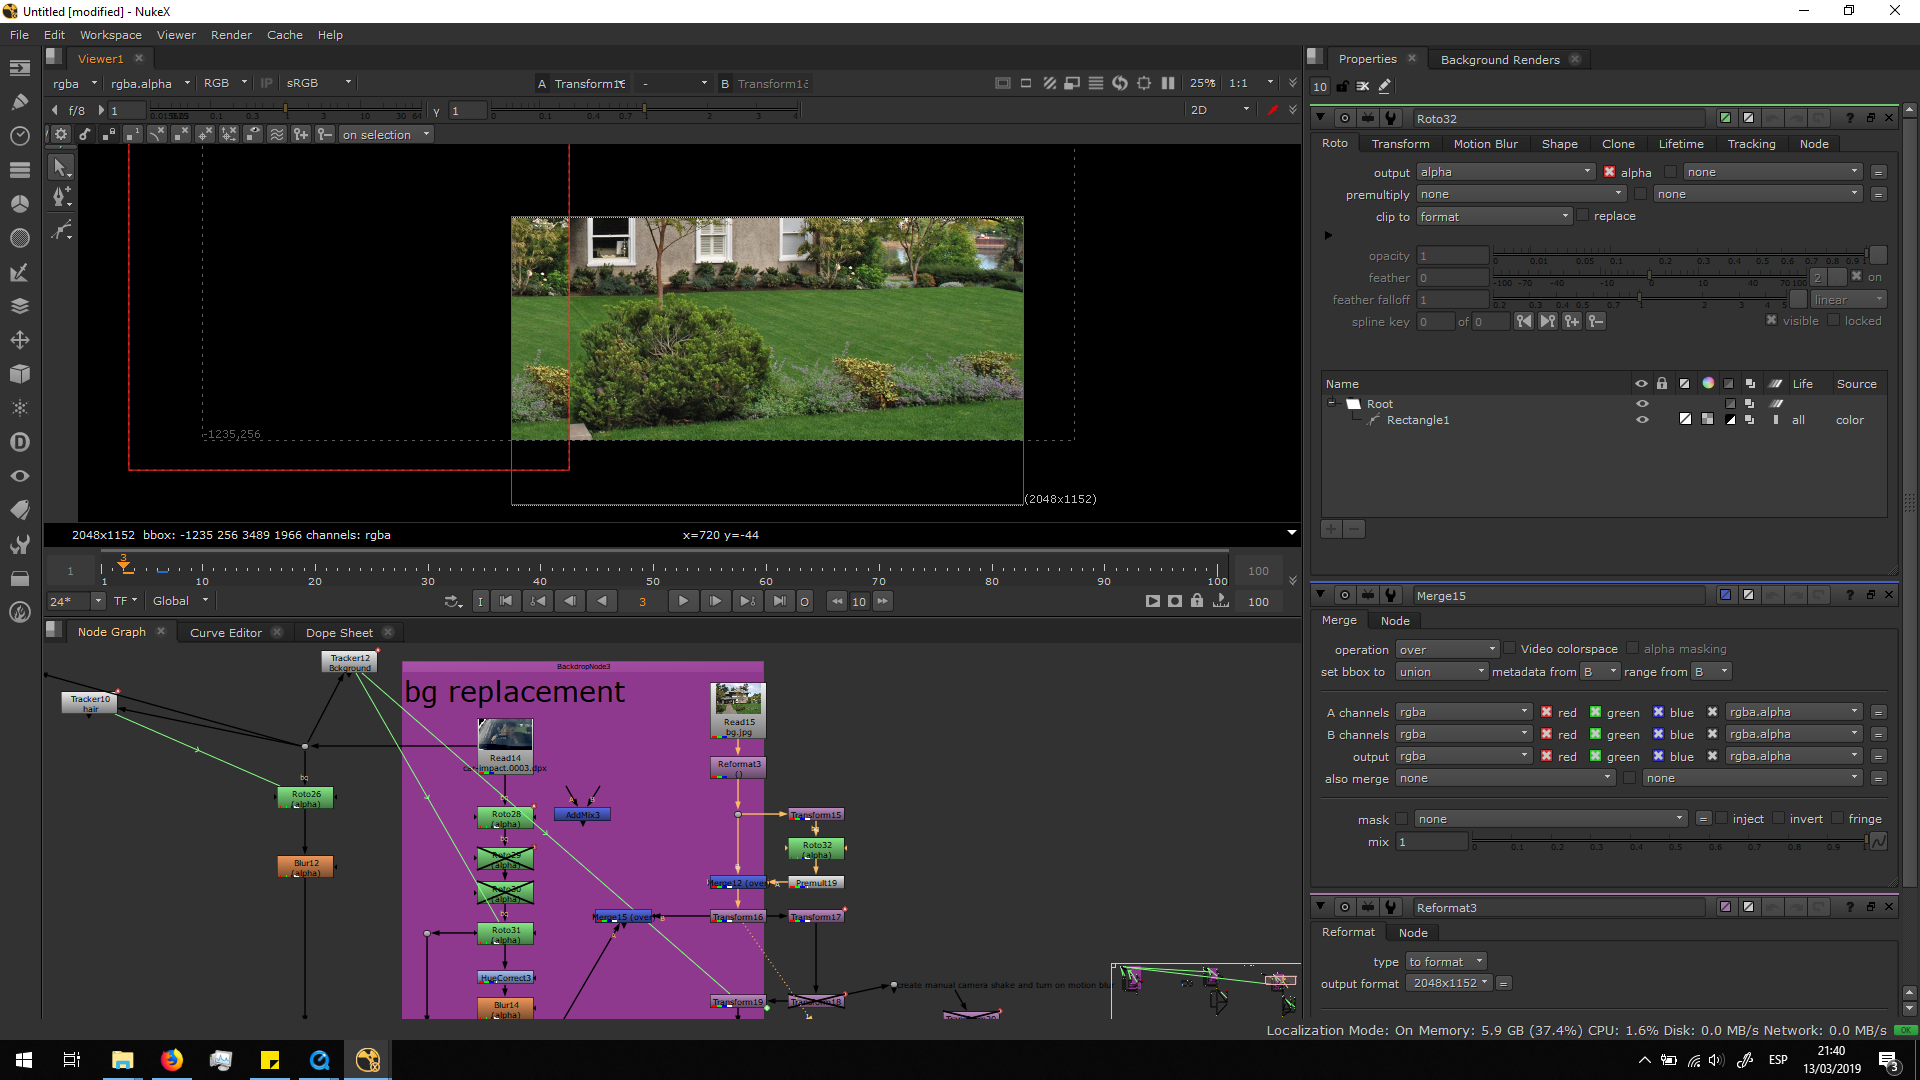
In this way, we can see more plants in the background and it does not look so awkward.
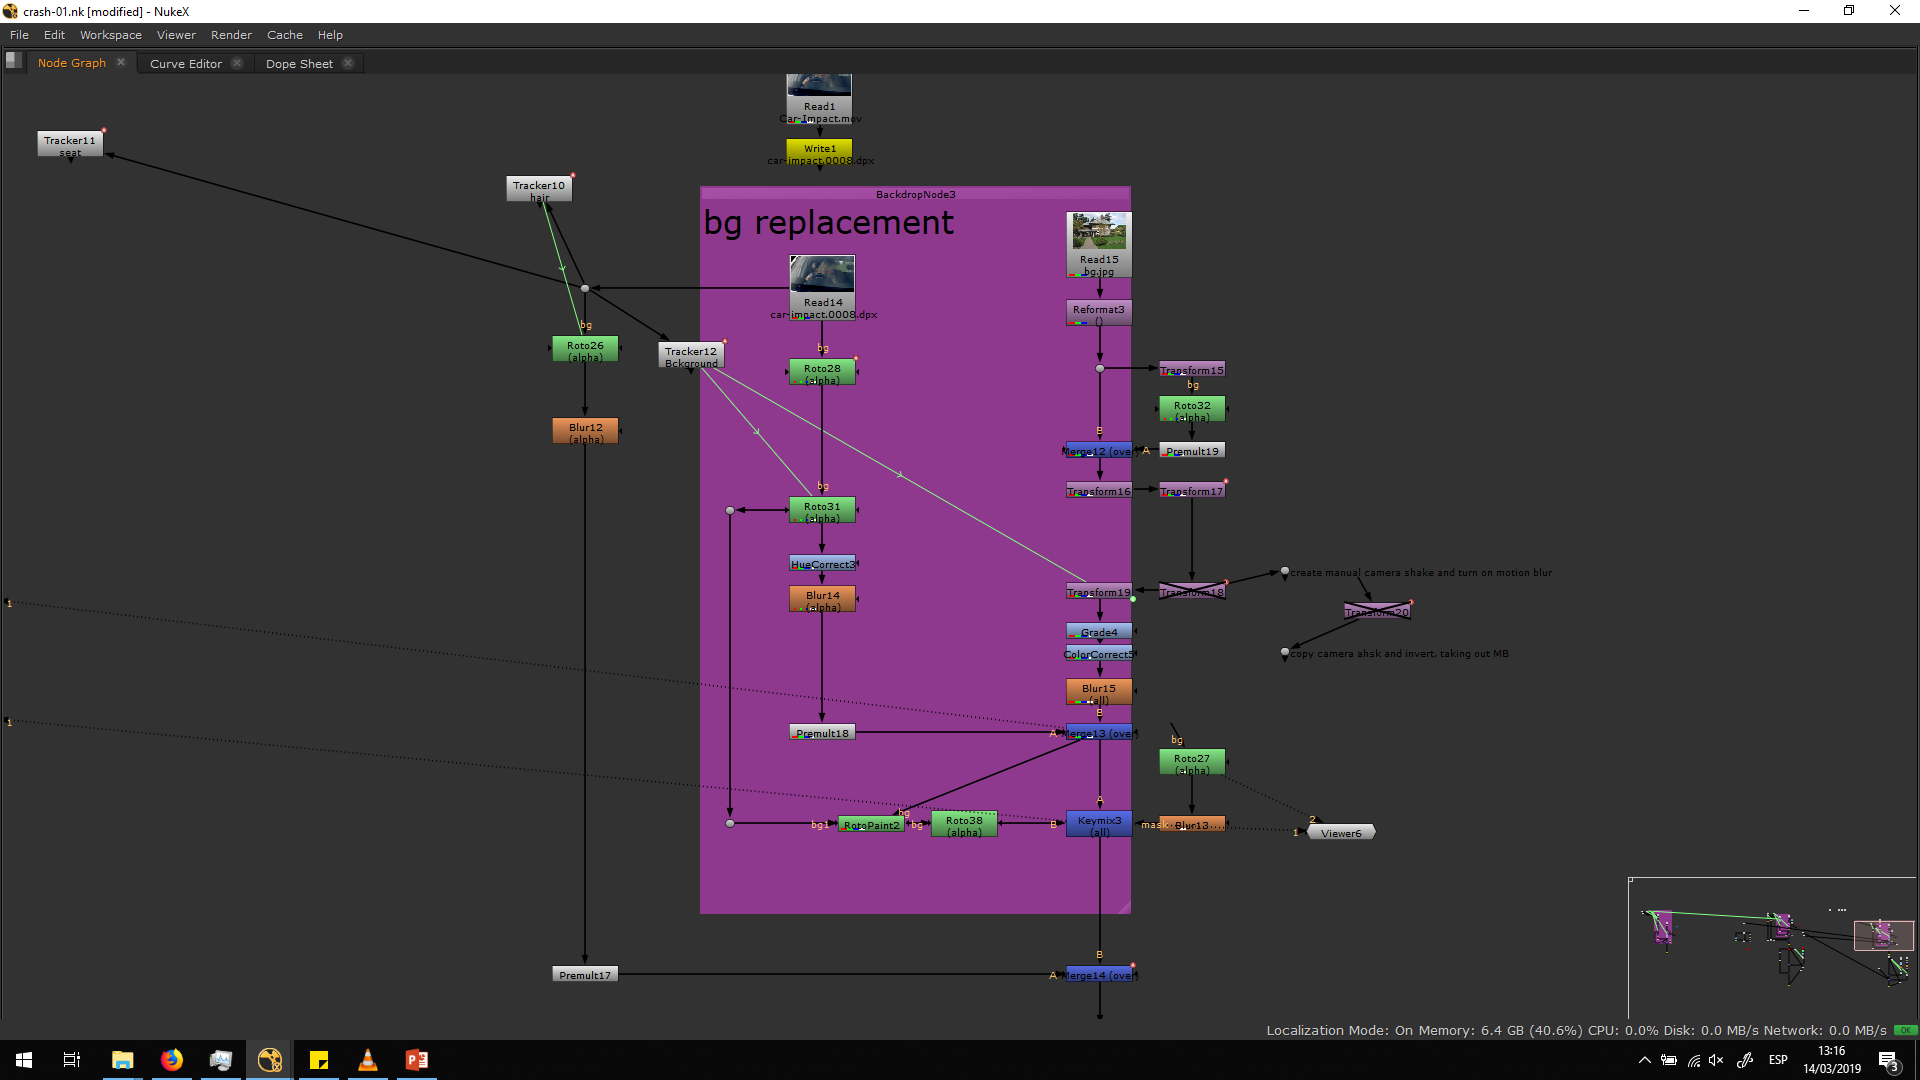
If we would have previewed the footage now, it will still look a bit unnatural since the camera moves and shakes. When the camera shakes, everything is seen very blurry, and that motion blur did not affect to our background, since it has no movement.
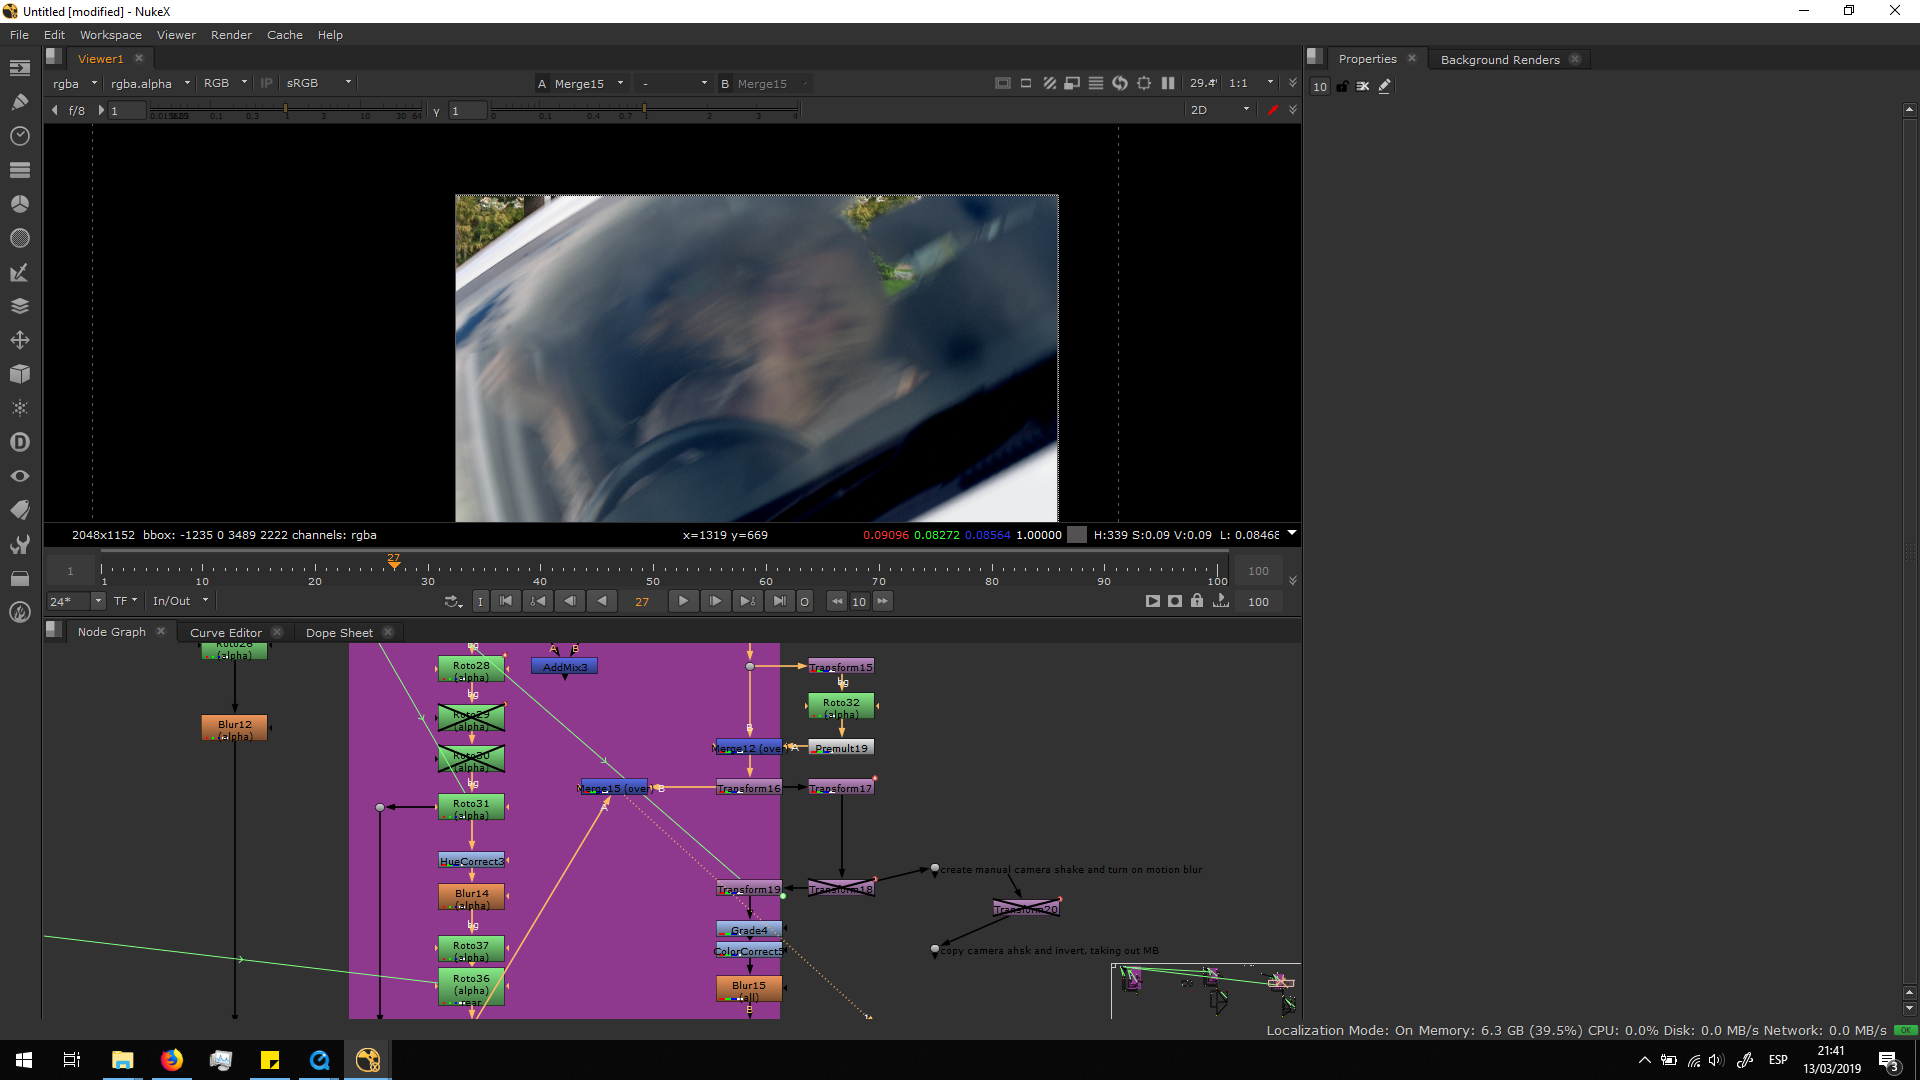 In order to fix that, I added a transform note, and with that I moved the background in the same direction as the direction of the blur of the real footage, in that part in which the camera moves. Then, I add motion blur in the transform note, increasing and decreasing it depending in the blur of the original image.
By taking the real image as a reference, I could obtain a more natural look.
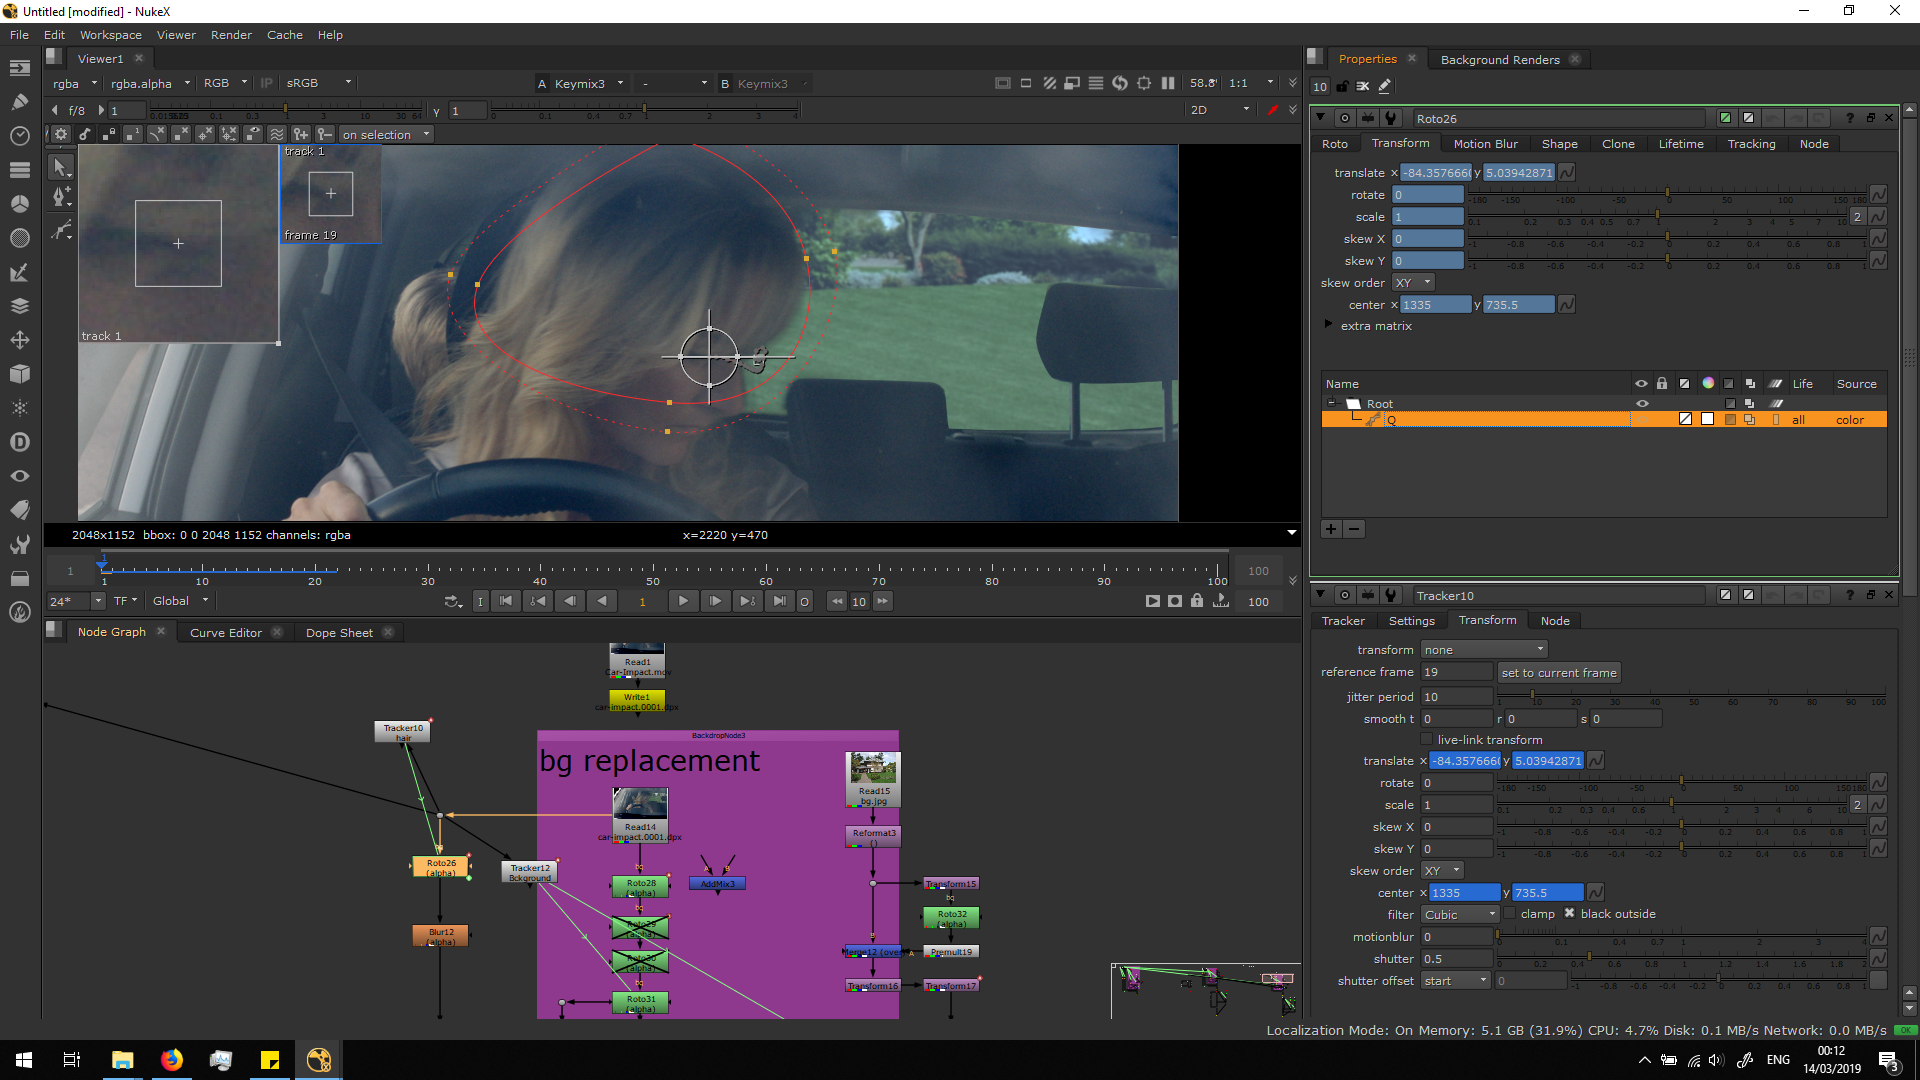
Also, the camera had some movement at the beginning of the footage, since it is recorded with hand camera and not a tripod. In order to add that little shake in the background, I did a tracker in the background of the real footage. I decided to do the tracker in the background and not in the car because they might not move at the same speed and distance because of the parallax effect.
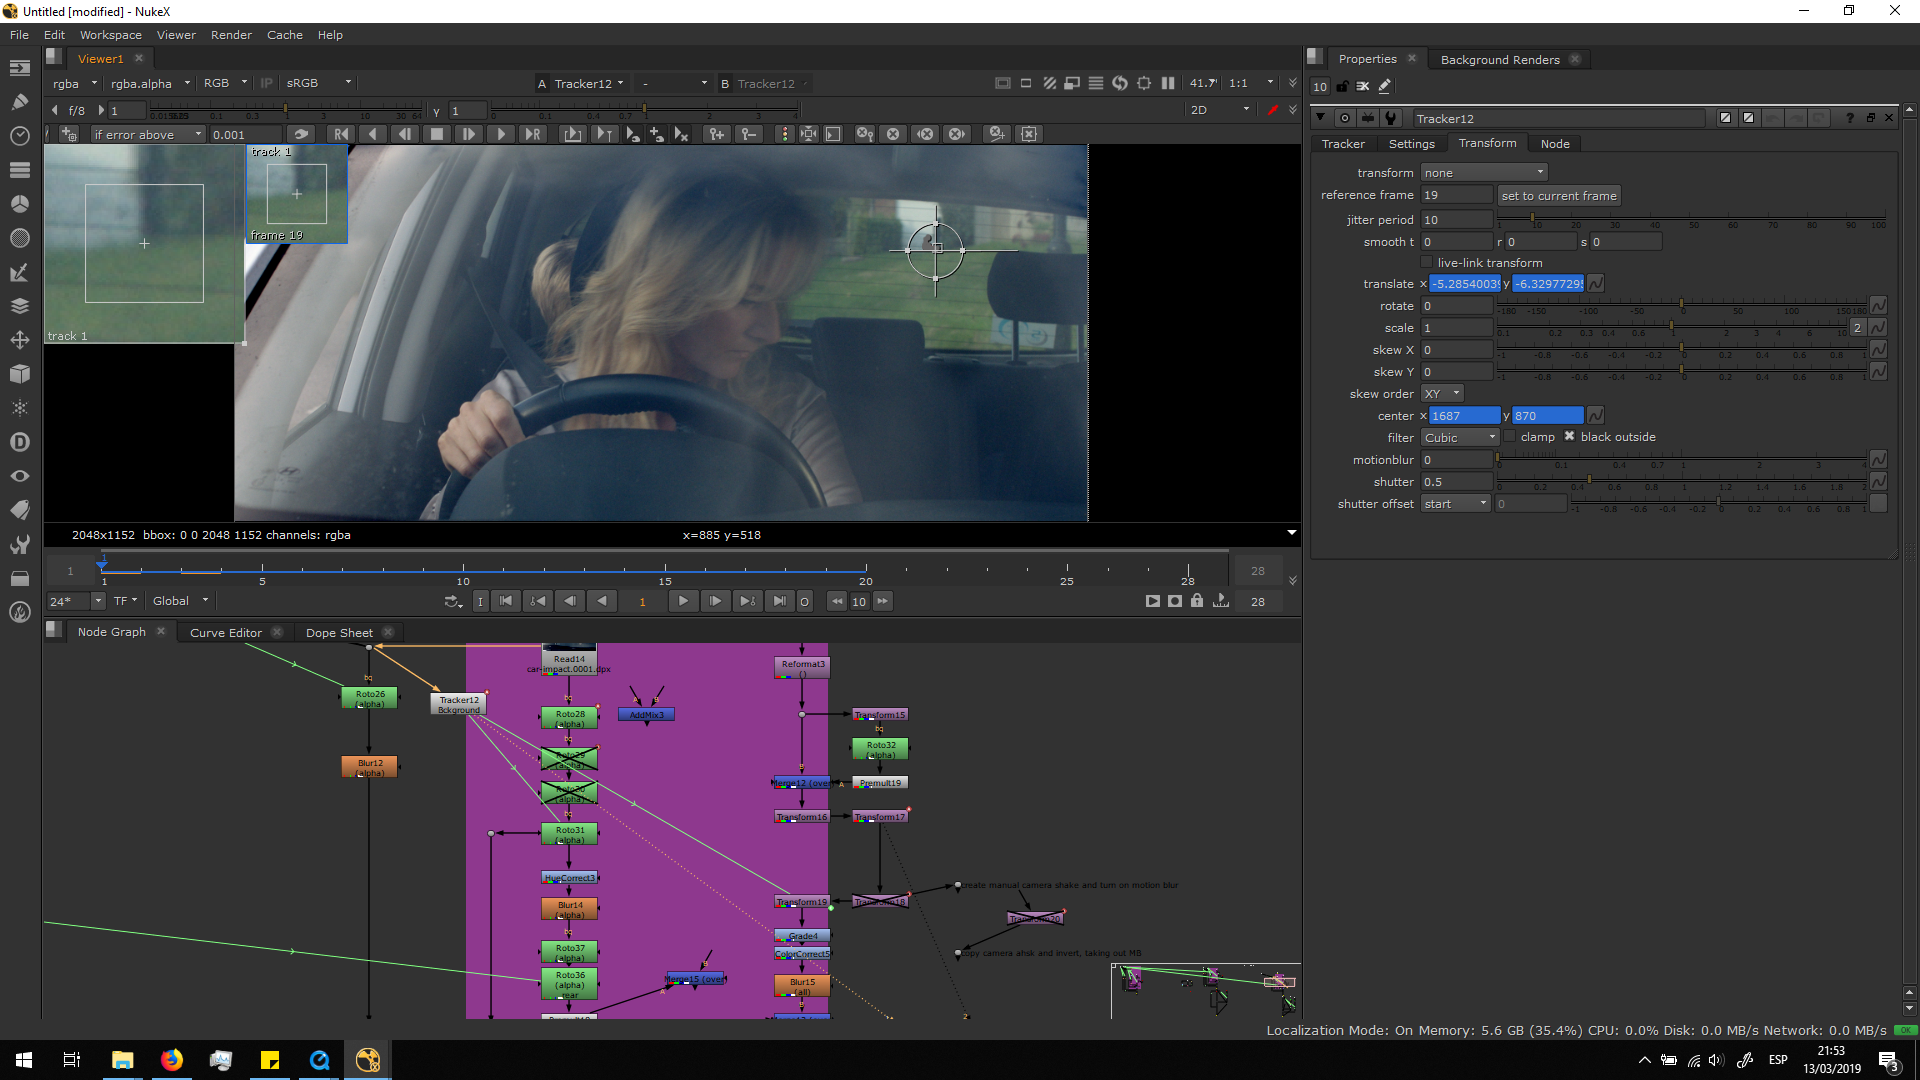
Once the track was done, I added a transform note and I copied the transform from the tracker into the background.
Finally, the movement of the background is finished and it matches the original footage correctly.
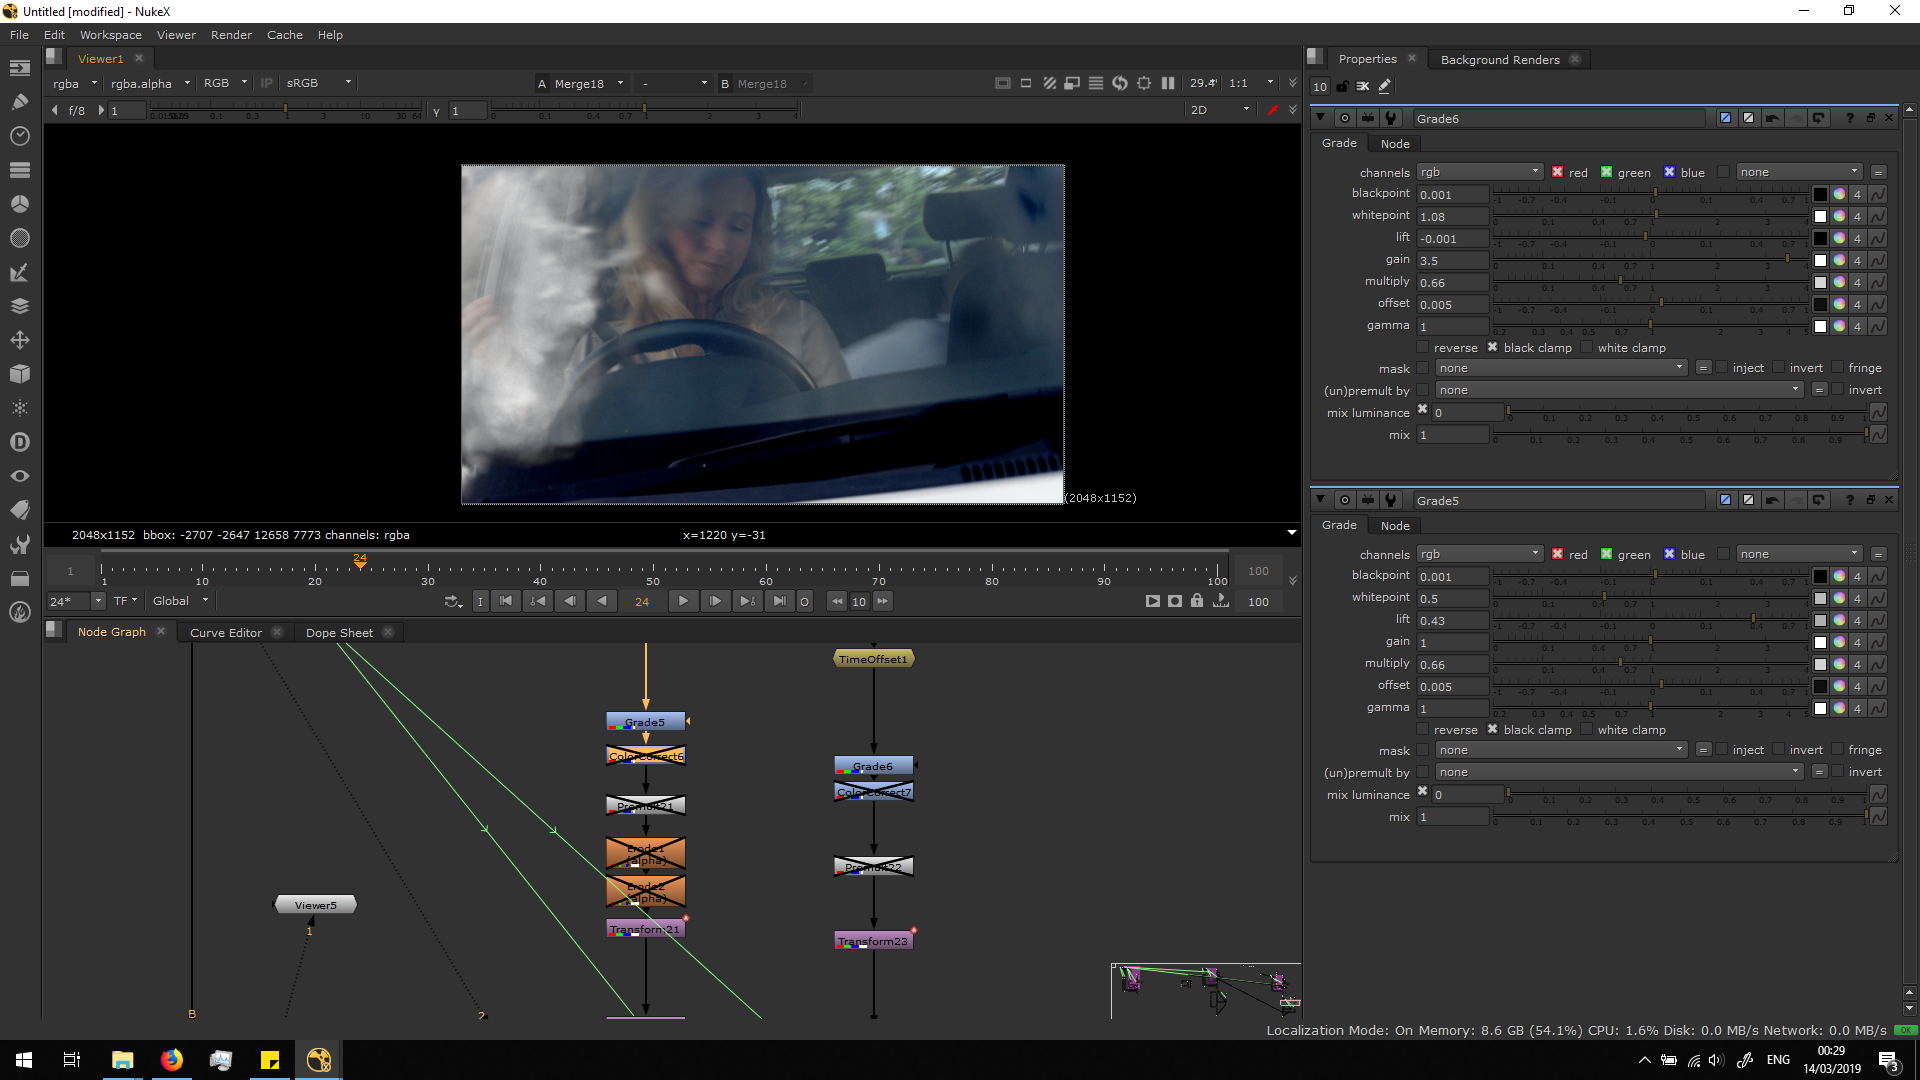
But, as we can see, there is a huge difference of tone between the new background and the footage. We will need to adjust this by grading the image according to the footage. Therefore, I added a grade note to the background, sampling the blackpoint in the darkest part of the footage and the brighter part of the footage for the gain and the whitepoint. Finally I shifted the lift to make it darker. We can always play with this parameters, sampling different pixels in order to make it reach the aspect that we want.
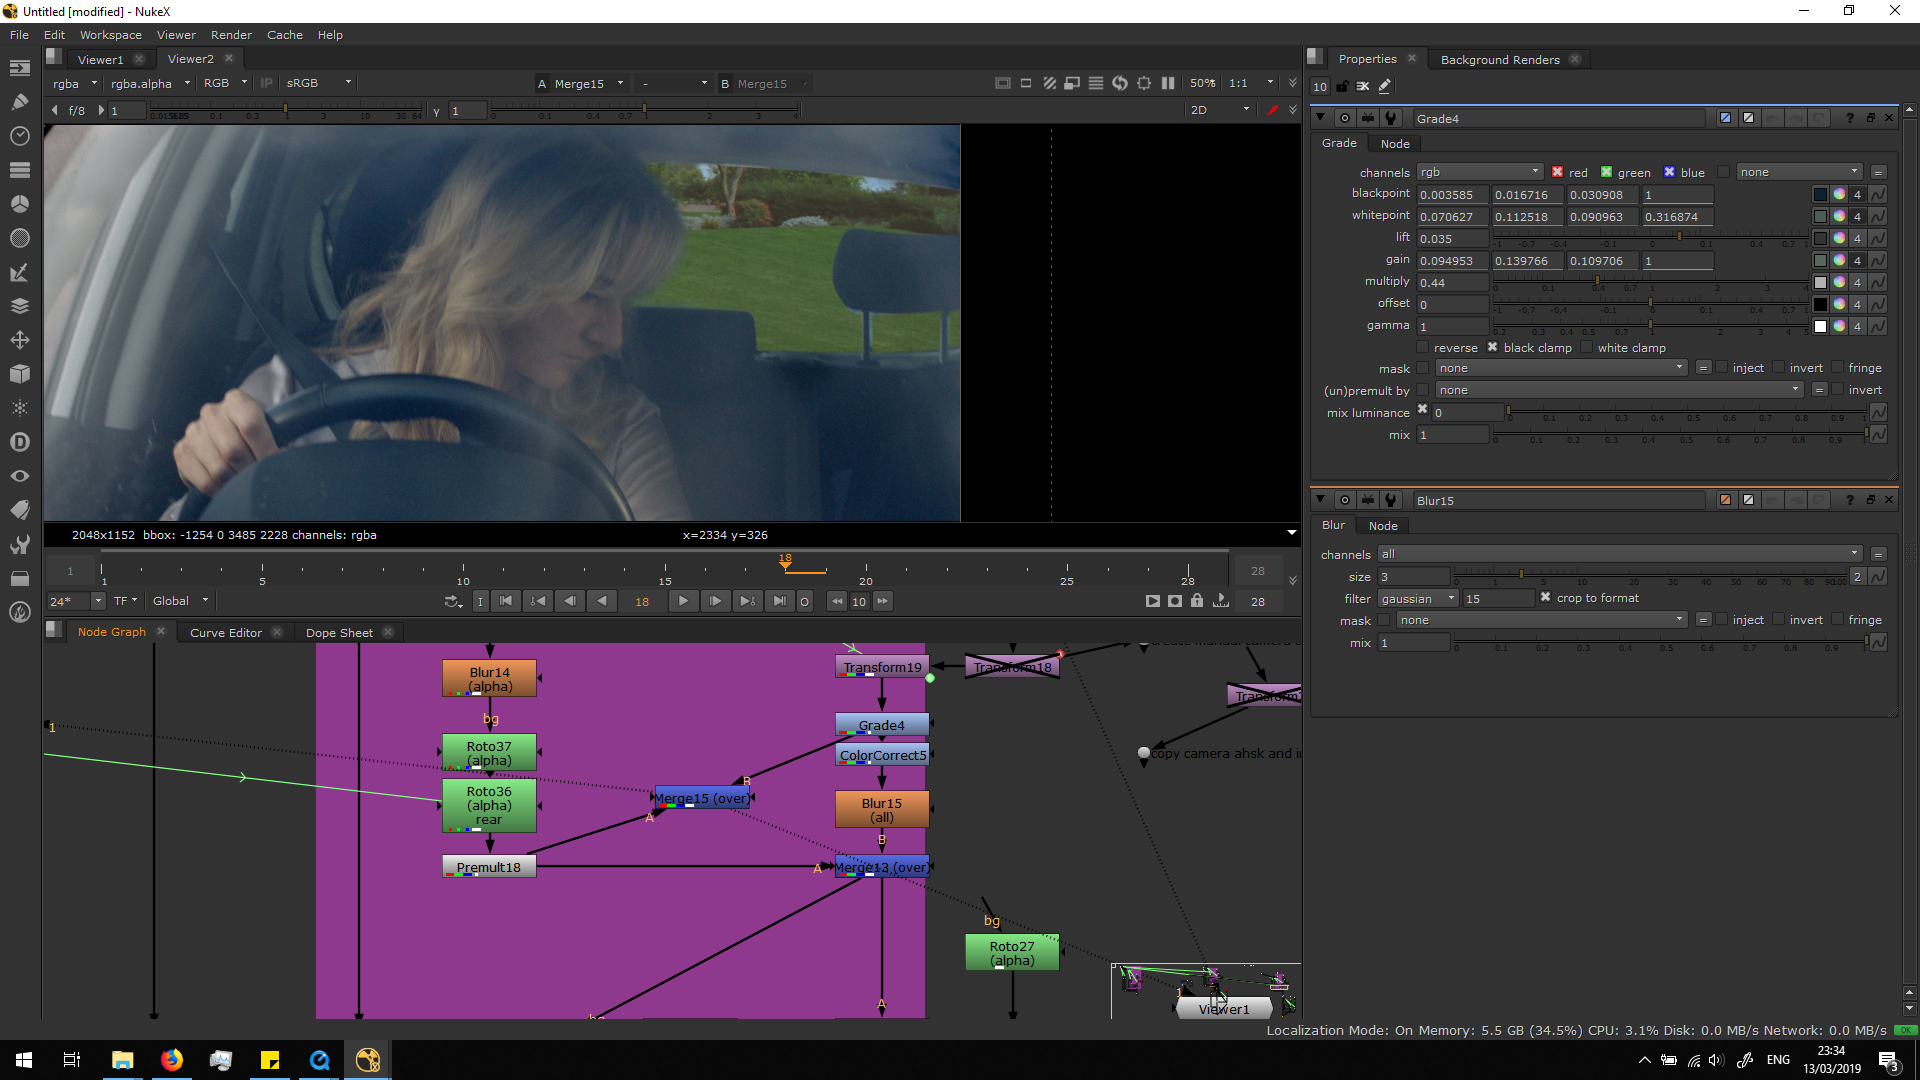
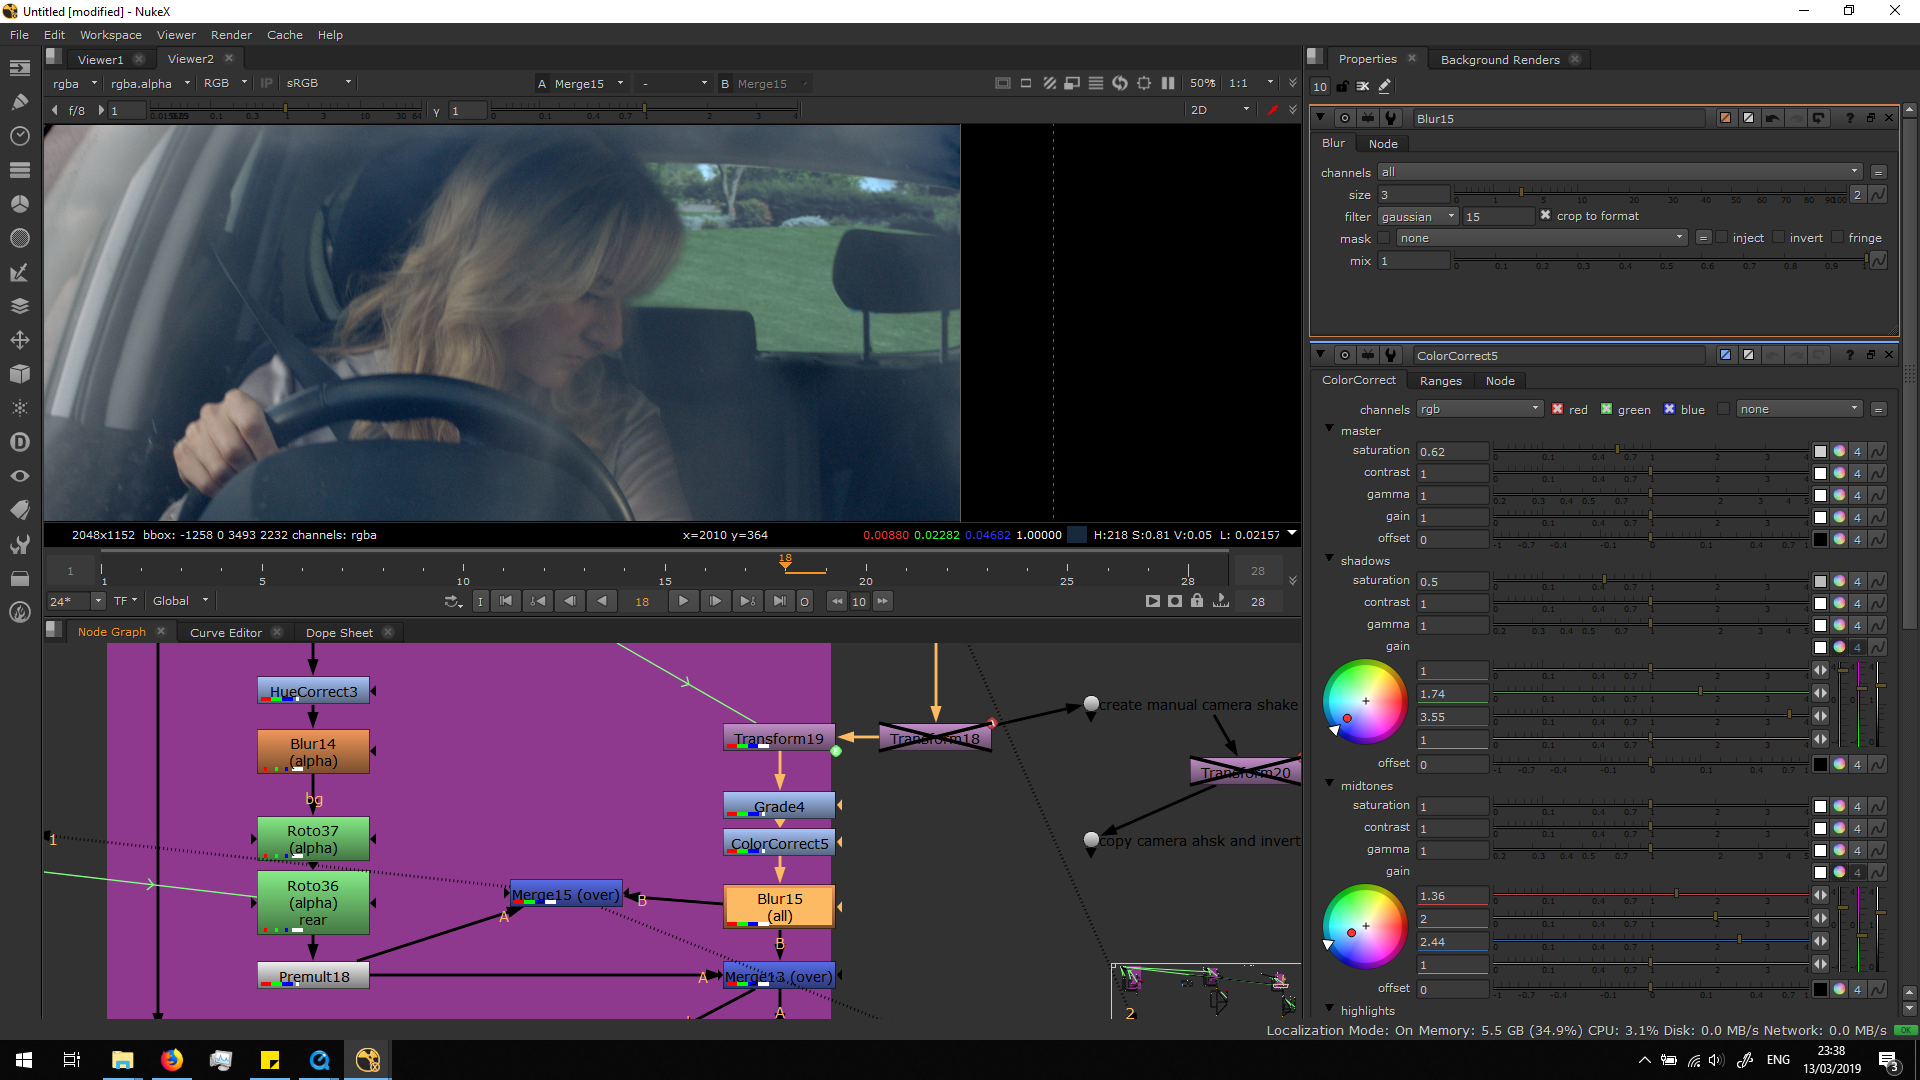
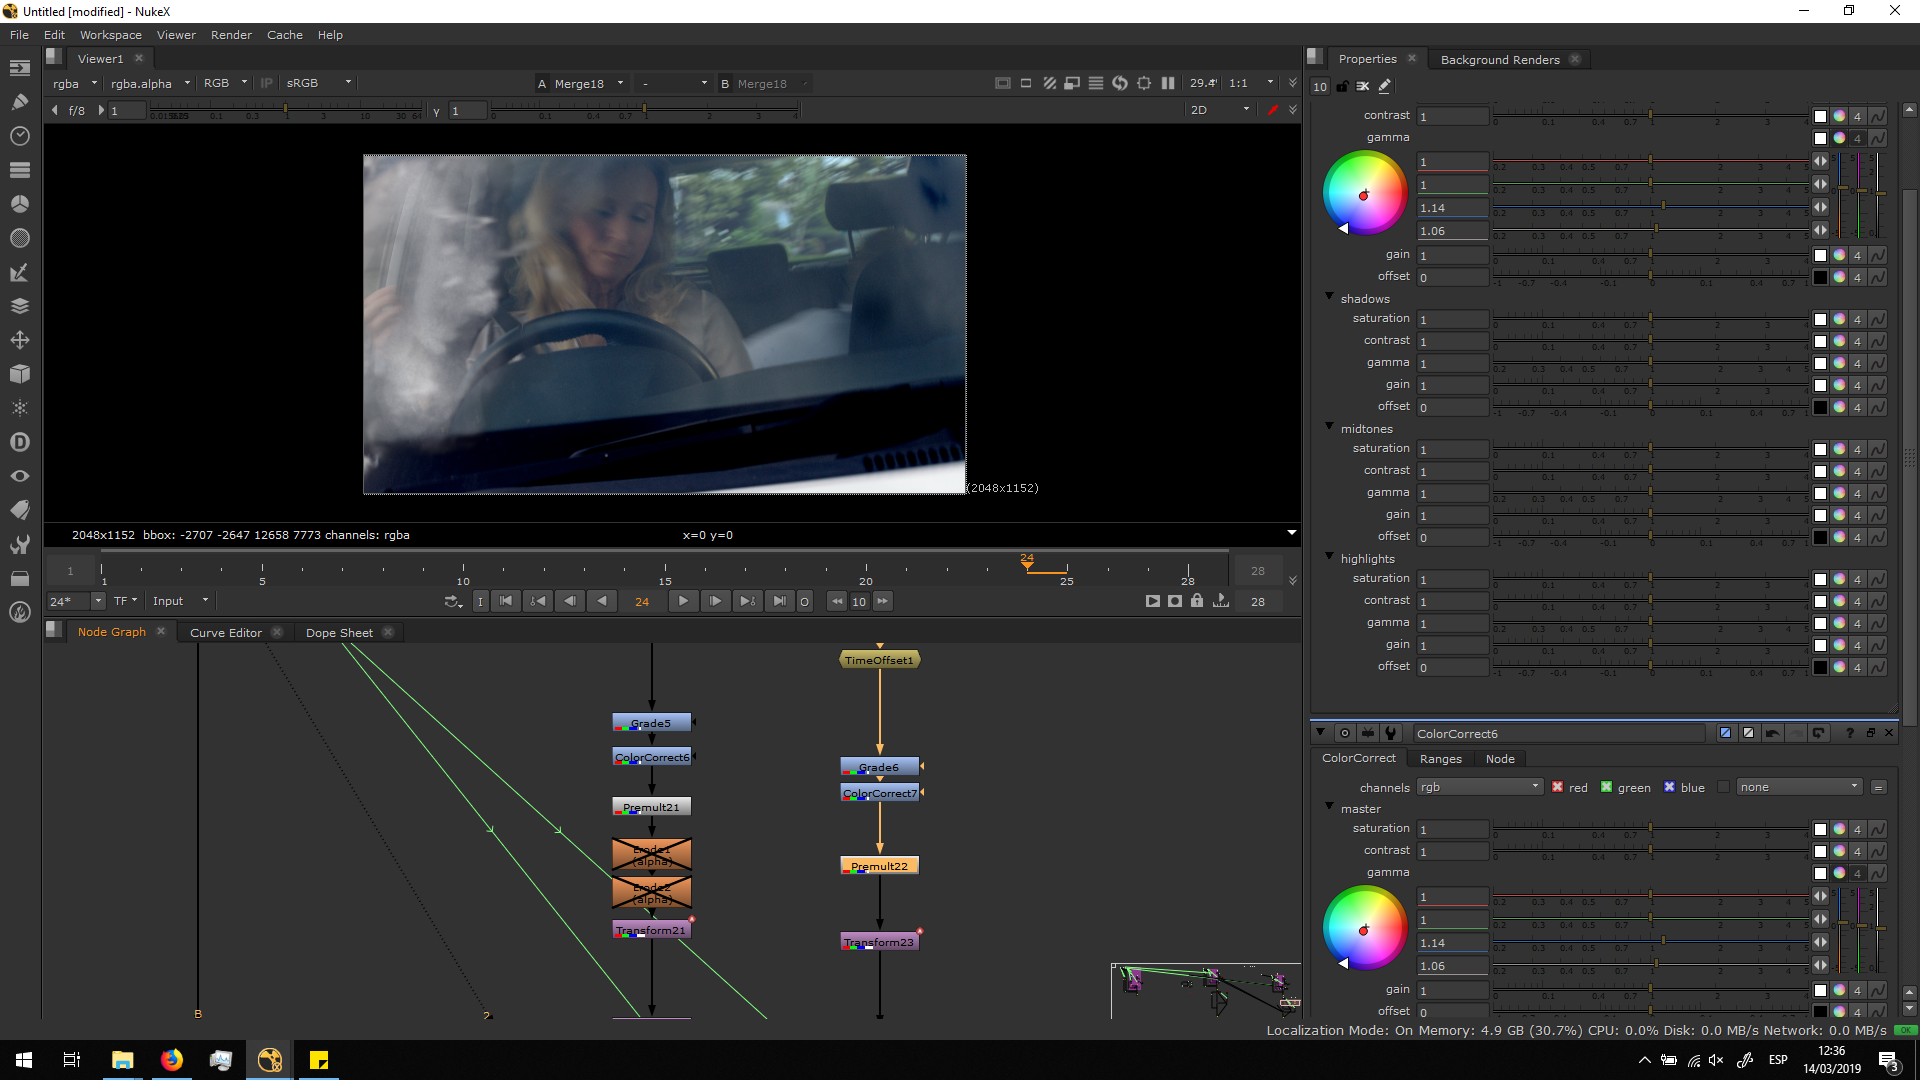
Then, I added a color correct, playing with different parameters to make the image more bluish, as the foreground.
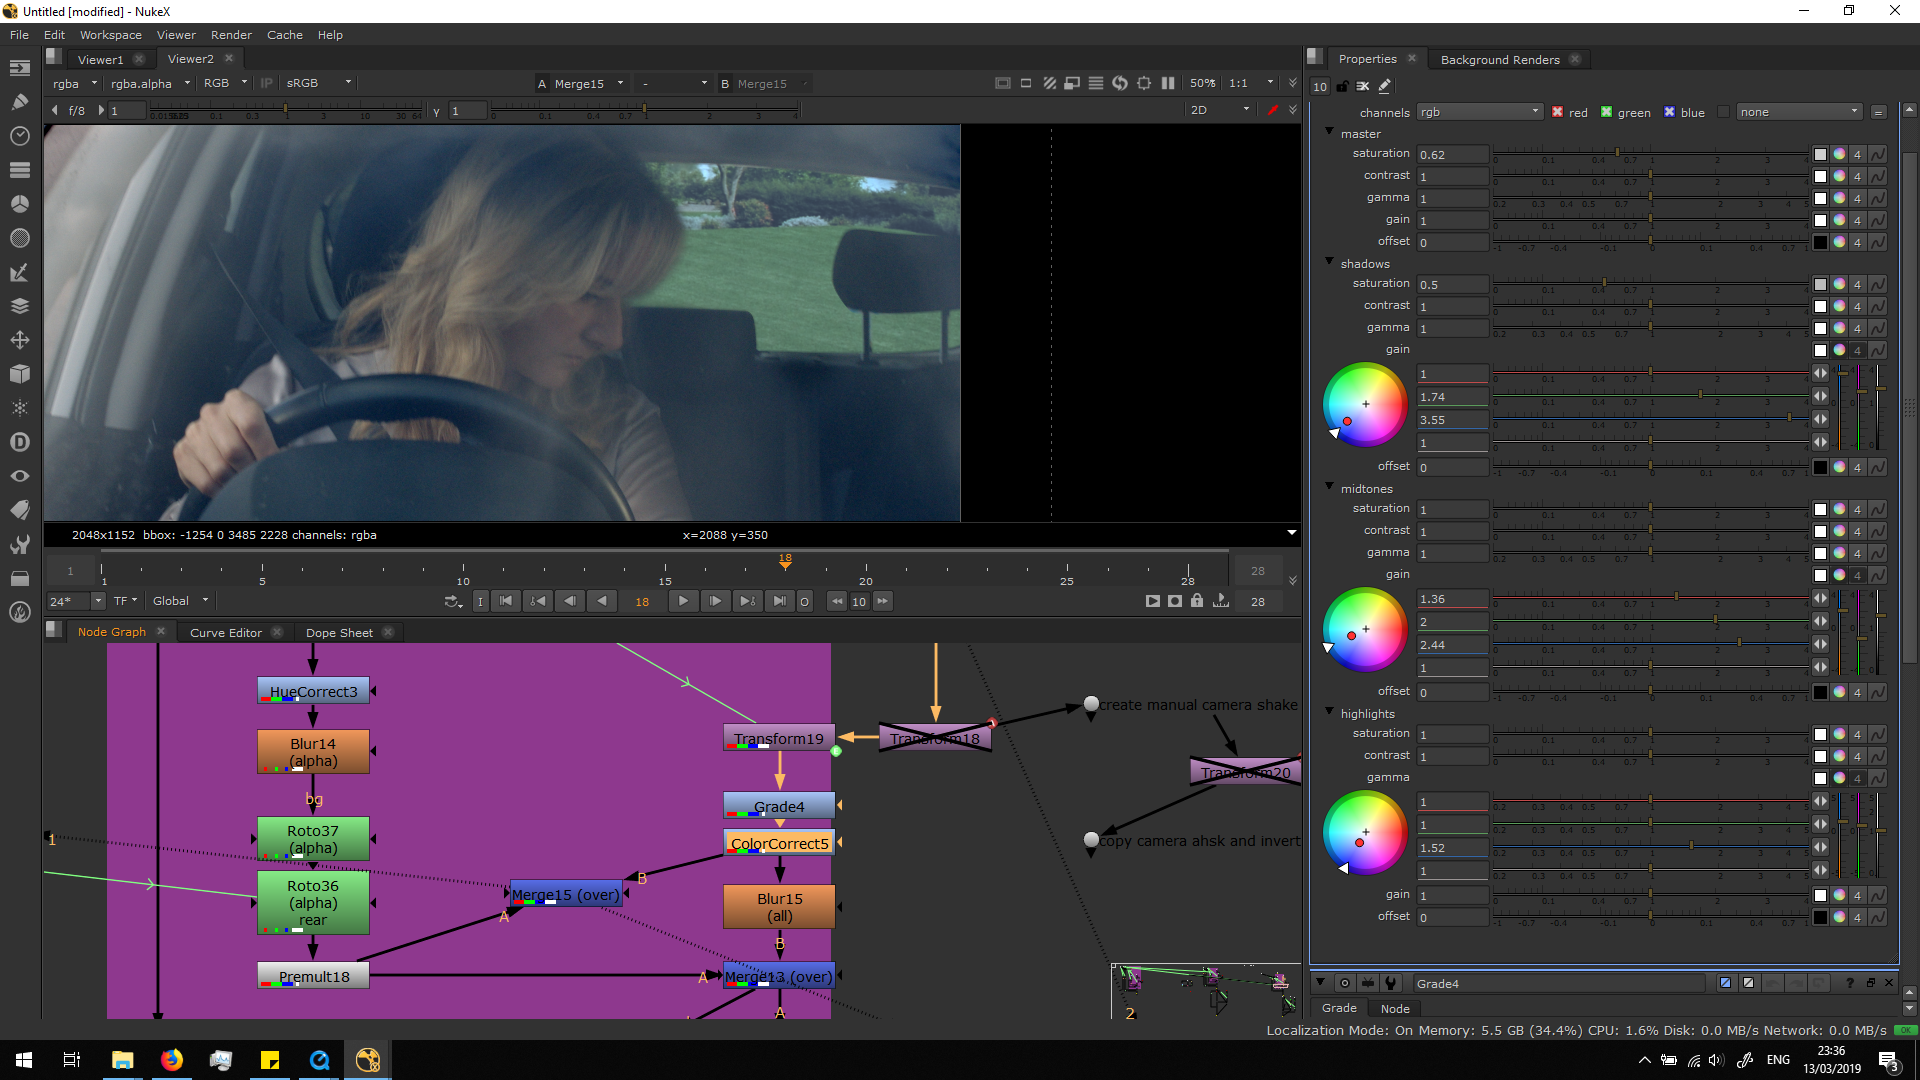
Finally, I added a blur note. In the original footage, the focus of the camera is ed in her, and therefore, the background is a bit blur. Since the image is completely sharp, we will need to add a blur note in order to make the background blur as the real one.
Refine the roto and the blending
If we play the footage, we can now see how the roto is behaving. In this case, we observe huge changes in the edges of the hair of the woman, because the roto is animated frame to frame, so it’s aspect changes.
 It would be really difficult ton do a perfect roto for the hair. In order to solve this, I decided to do a roto painting. The roto painting allow us to paint the alpha channel flame to frame, and if we do it with a blur brush it will be easier to blend it together with the background. Basically, it makes a rostoscopy but with a brush instead of a beizer curve. This will allow us to have a more organic roto.
Therefore, I added a roto painting right before the blur in the rotos, and I painted frame to frame from that alpha channel. 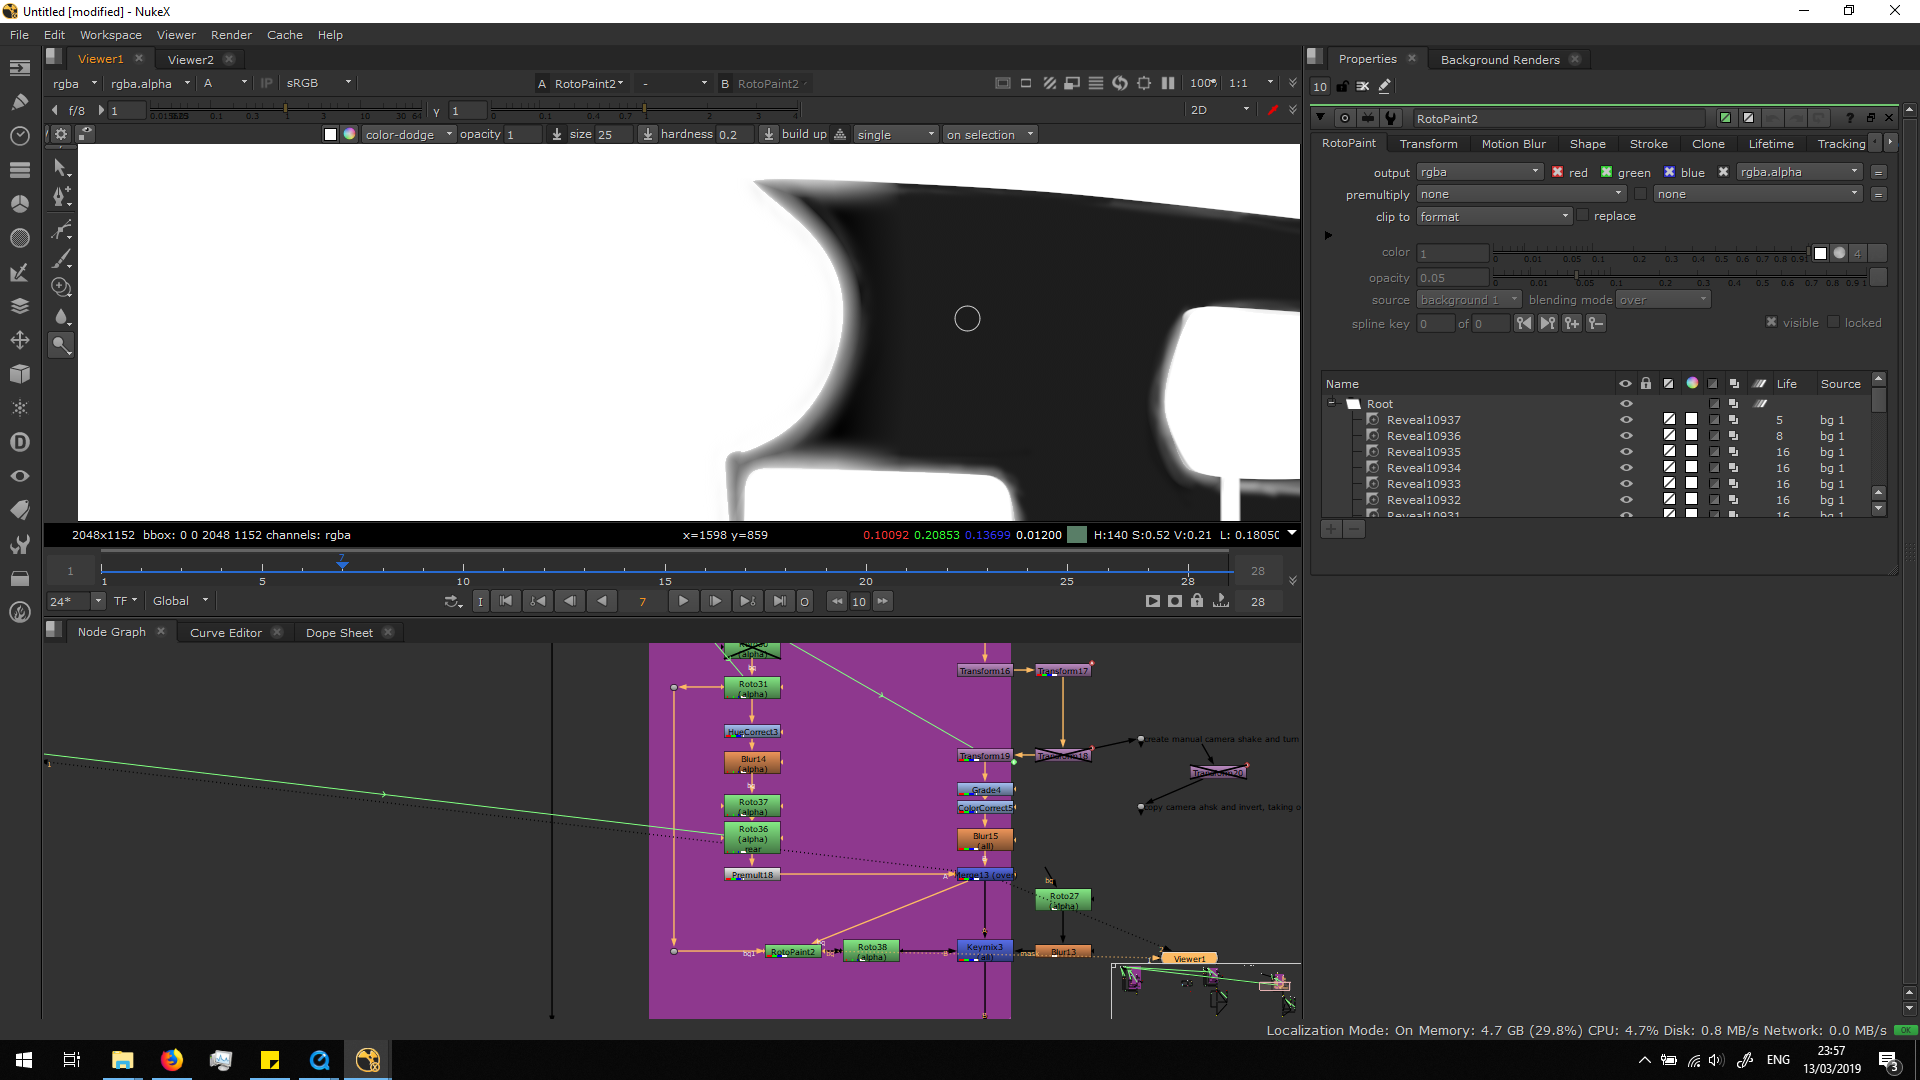
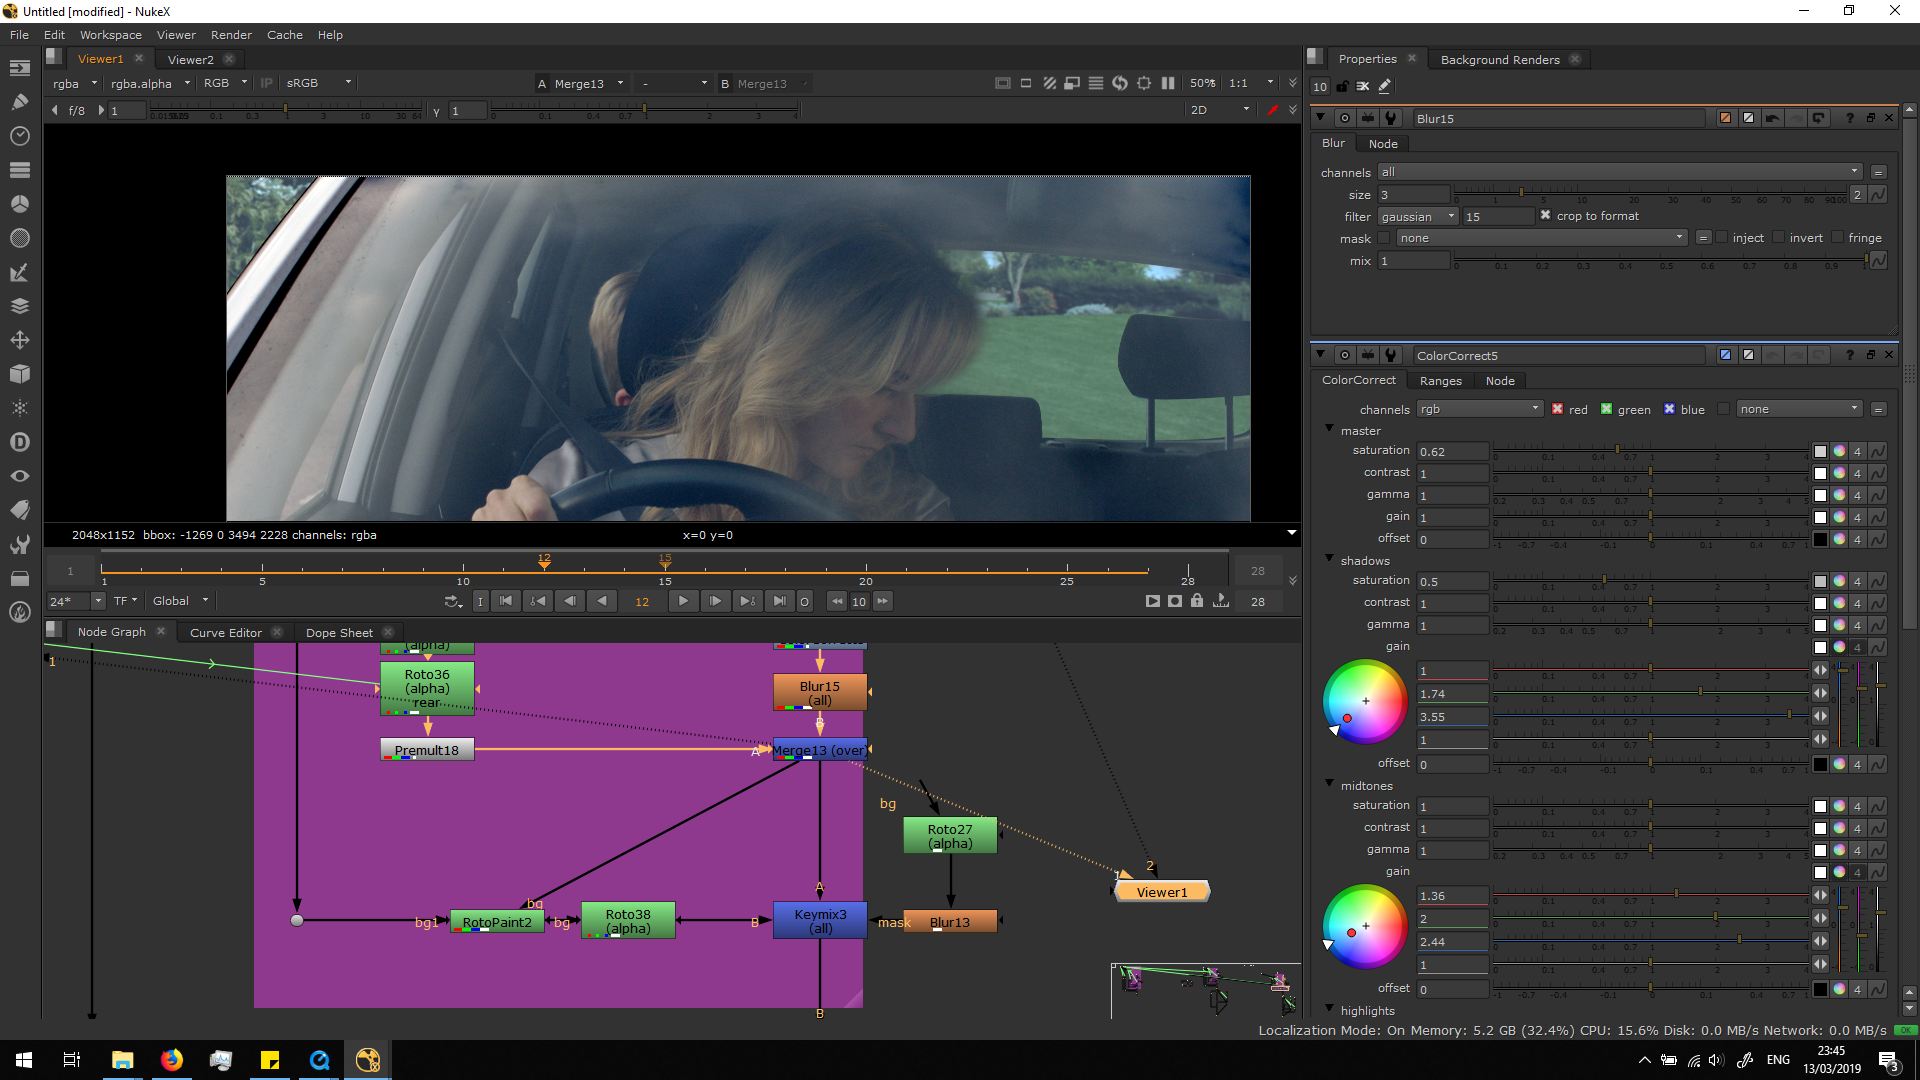
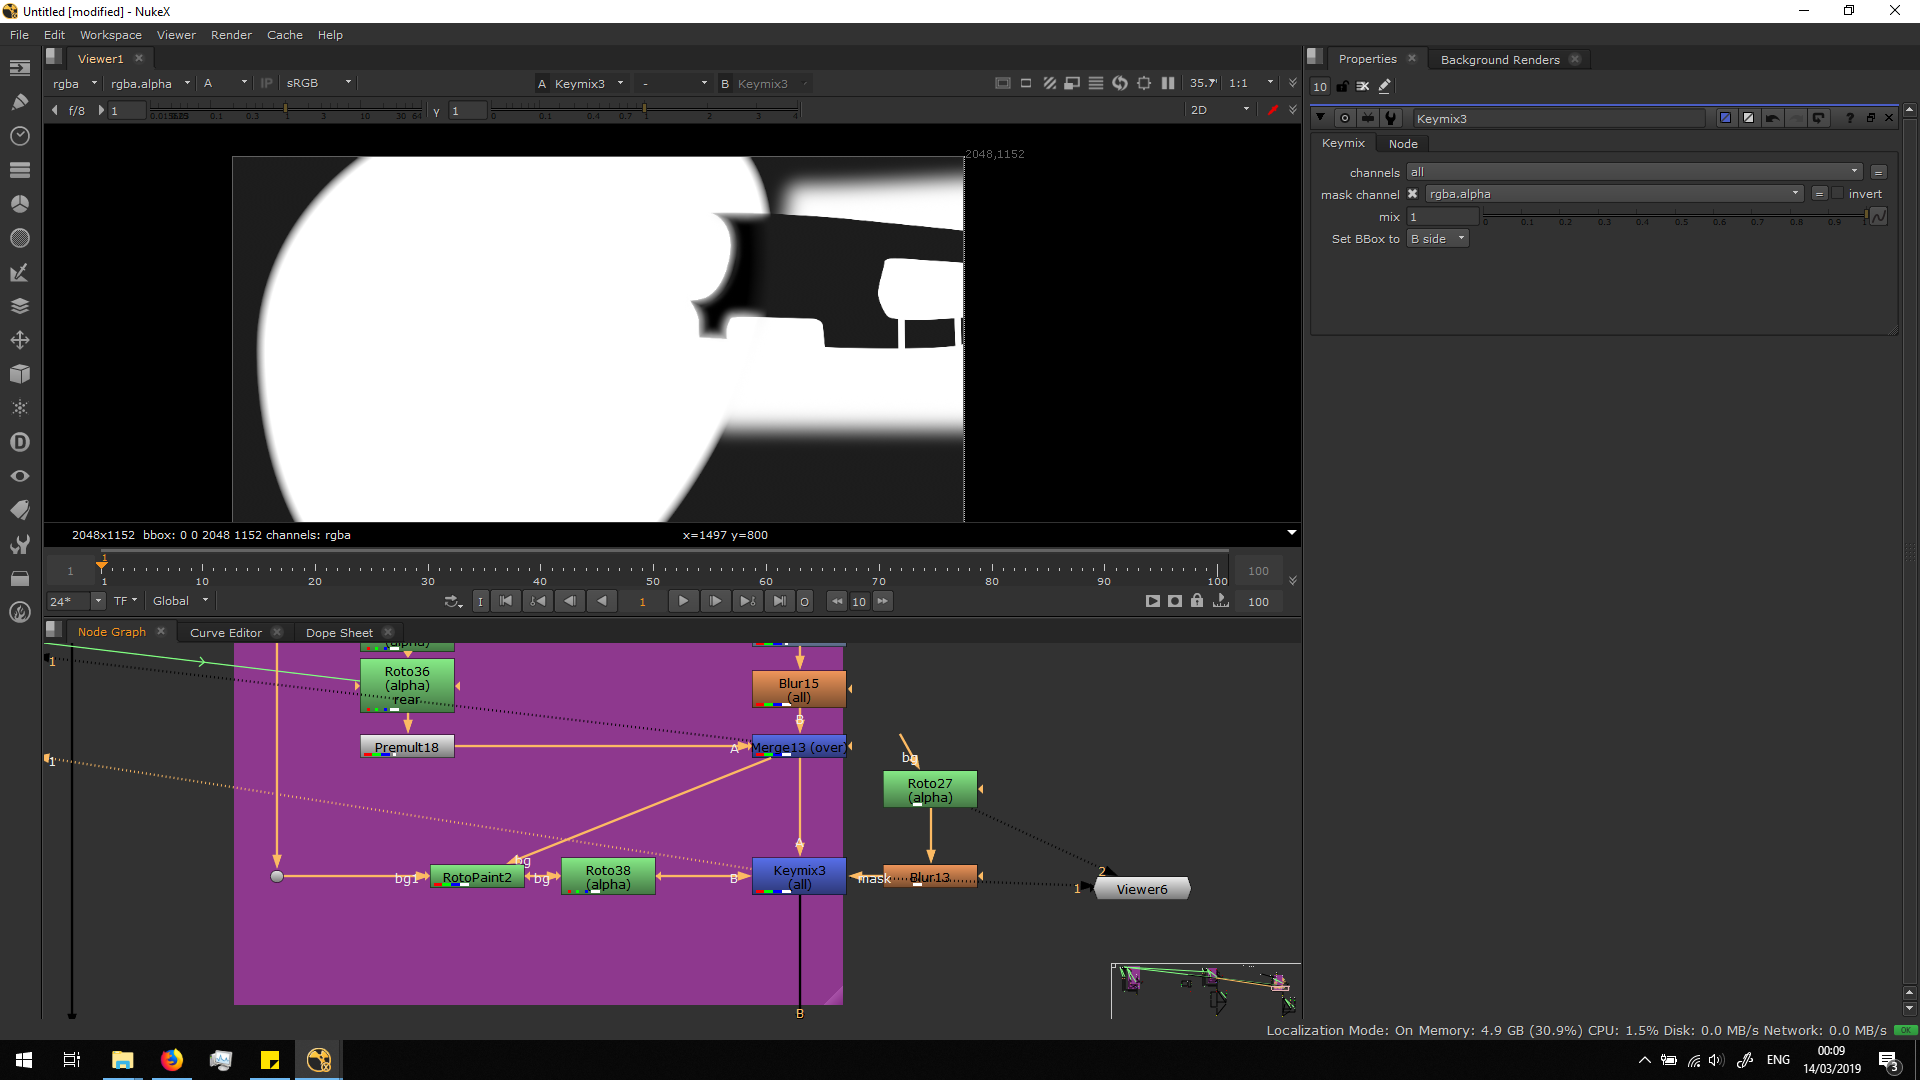
At first, I did the roto painting for the whole car area, but then I saw that it was only working for the hair area, so I masked the rest out. For that, I added a keymix to mix the alpha channel of the roto painting with the one we had before, adding a mask to mask out the area of the car settings from the roto painting, having this final result.
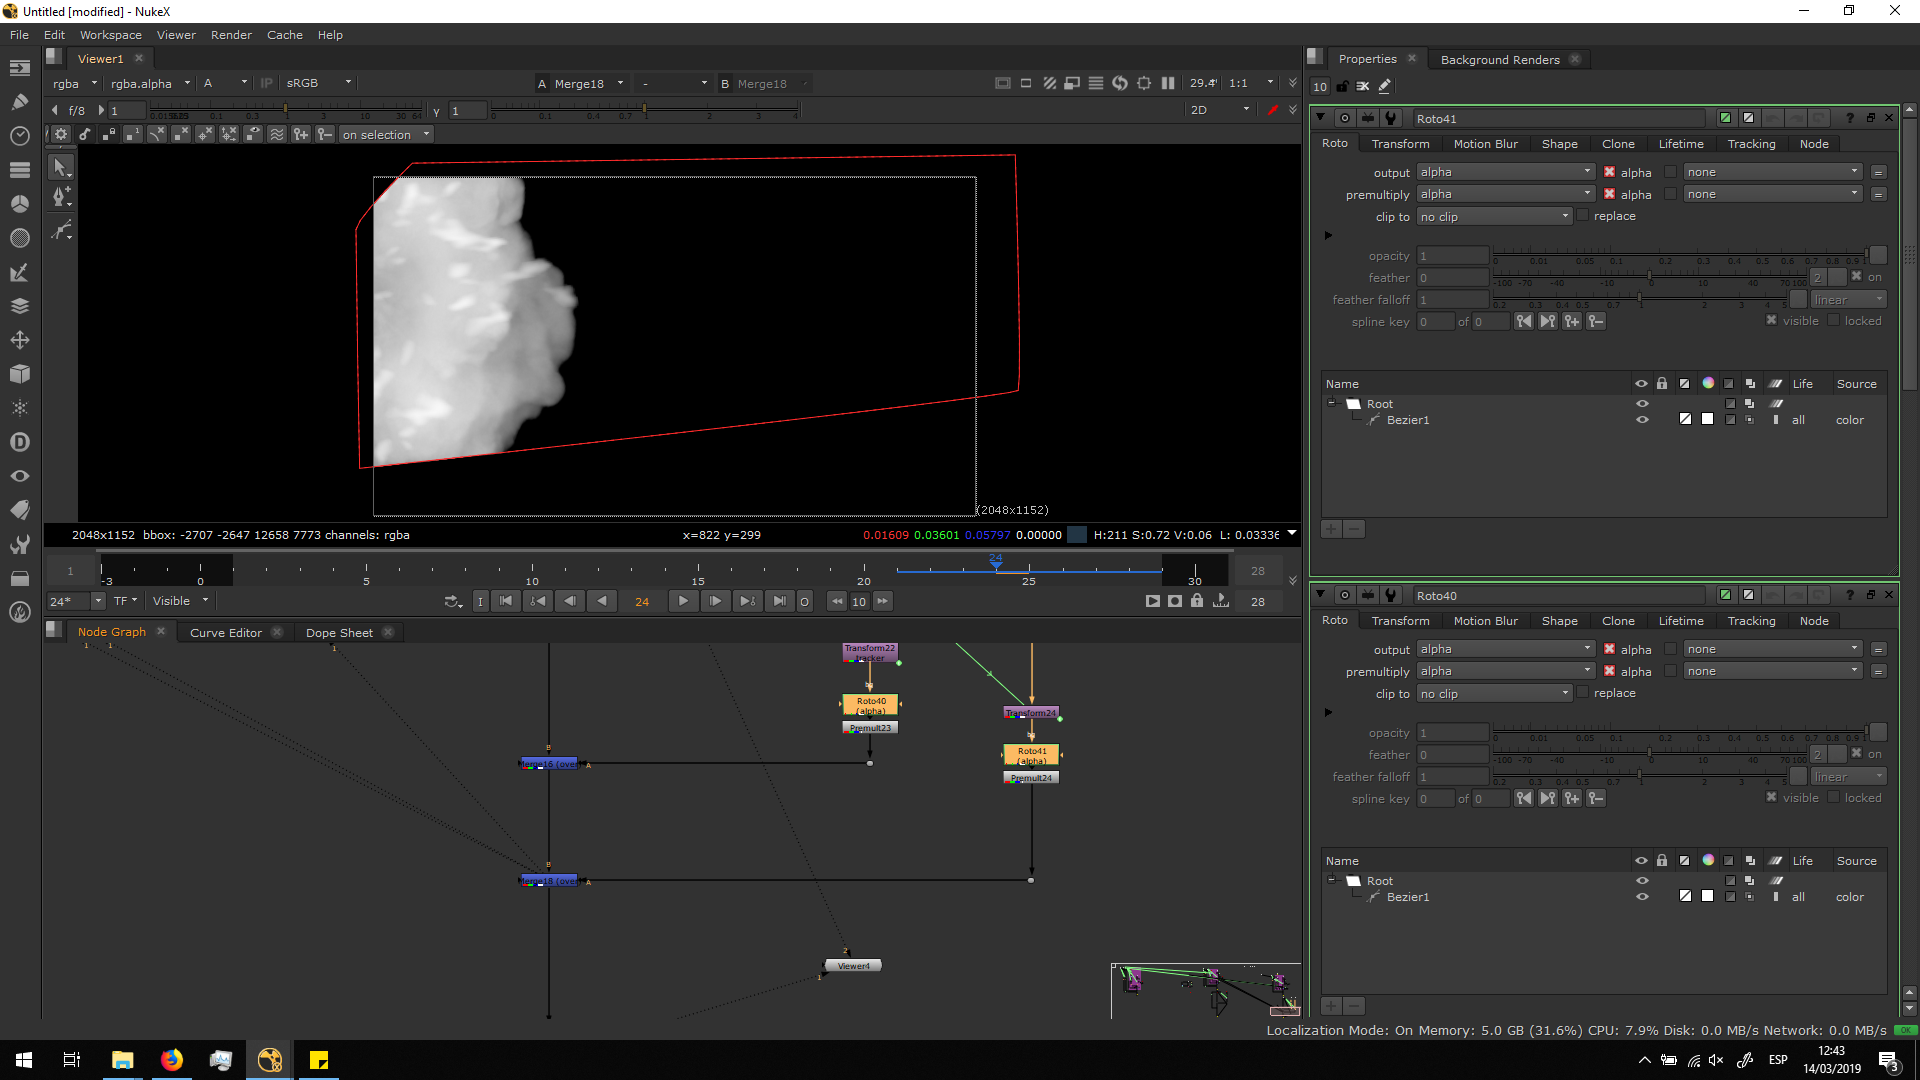
 Finally, in order to soften even more the limit between the hair and the background, I added another roto from the original footage with a lot of feather.
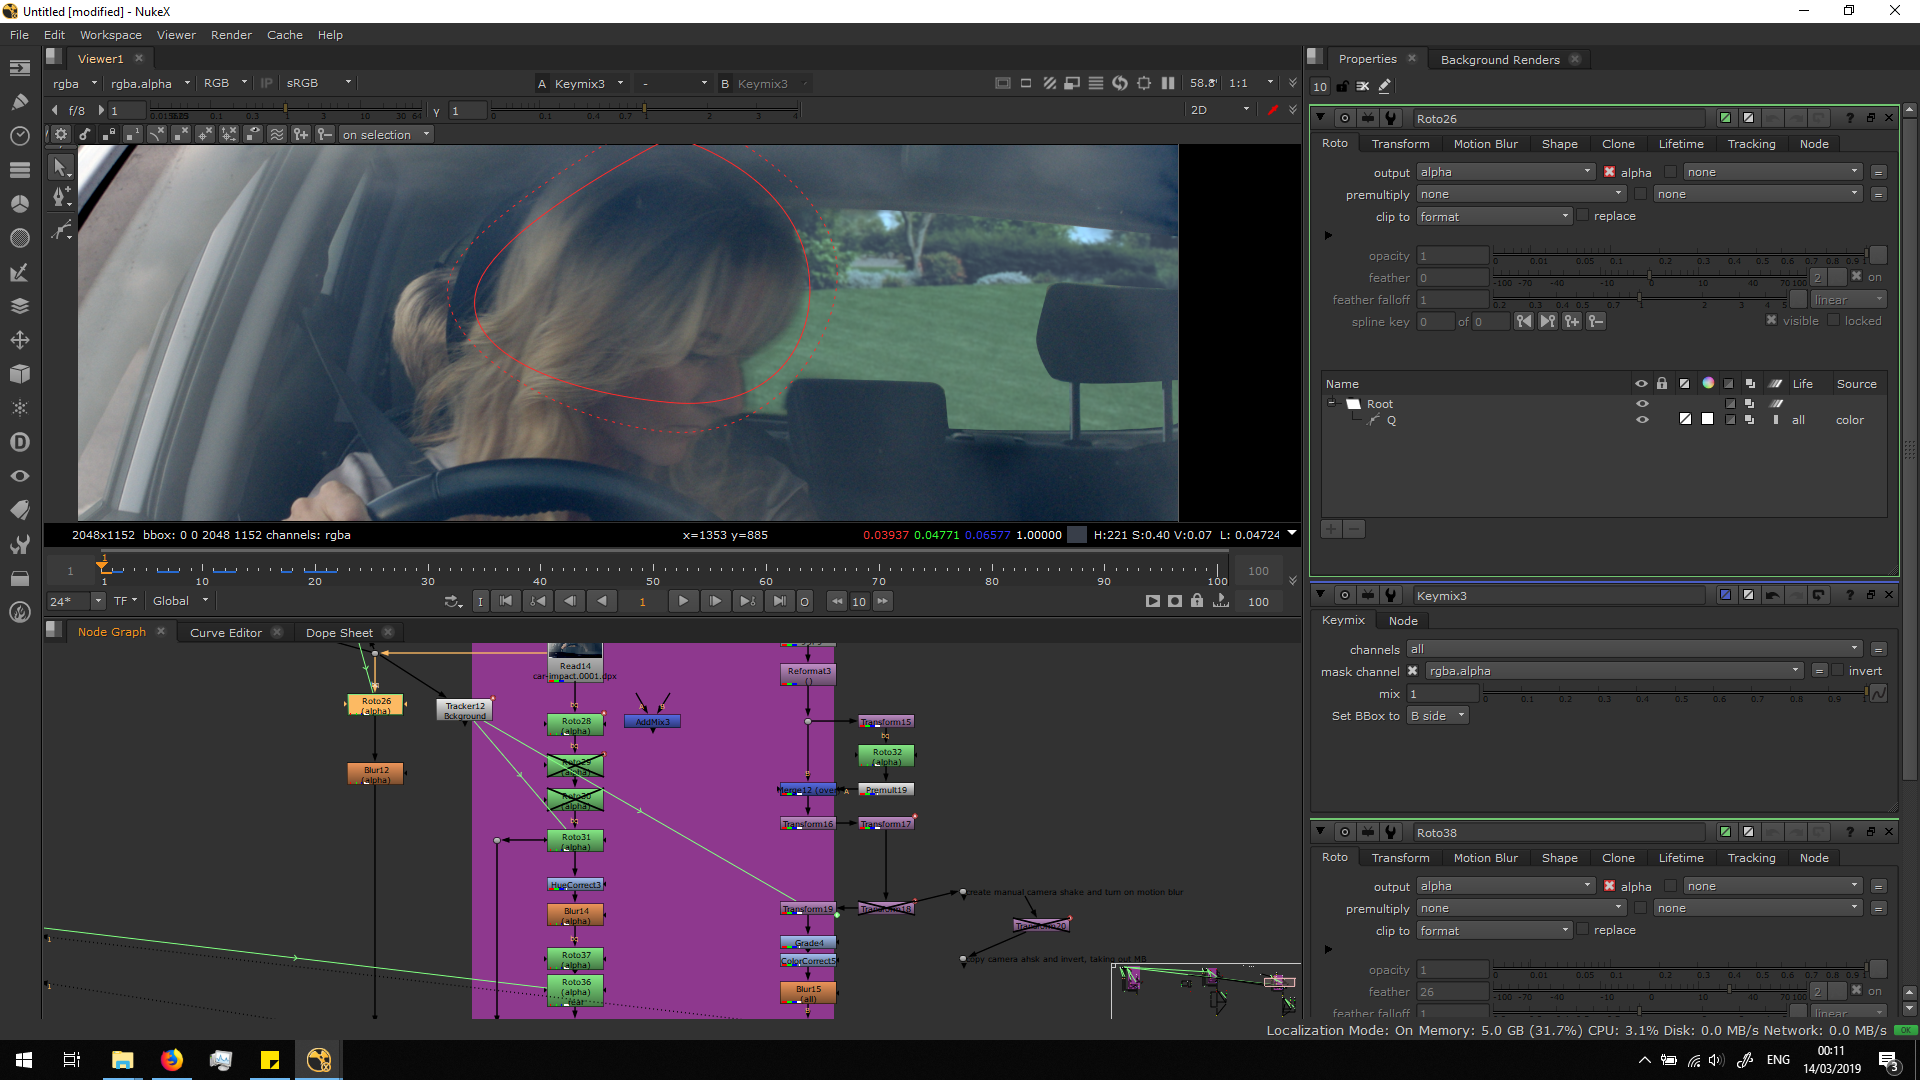
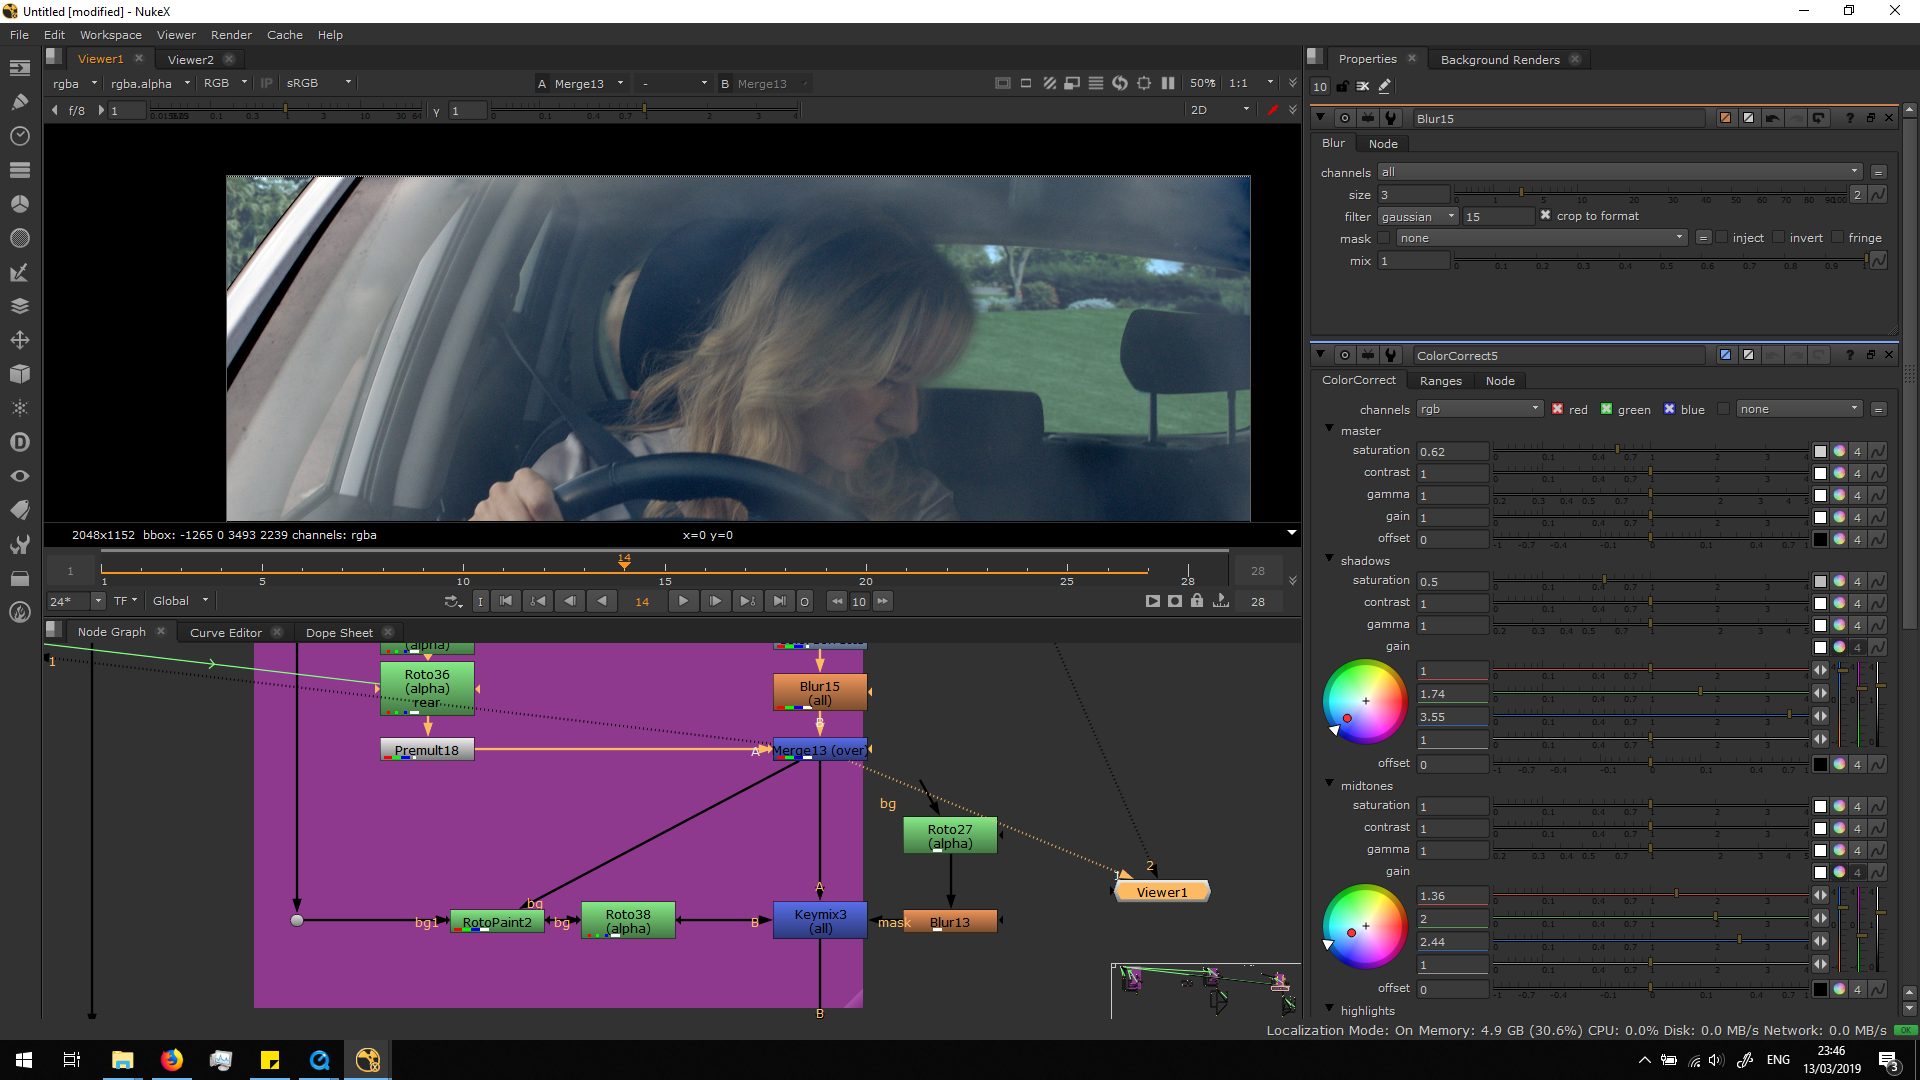
Then, I tracked the hair of the woman, in order to link the transformation with the transformation of the roto.
 Then, I added a blur note for the alpha channel in order to smooth the mask much more.
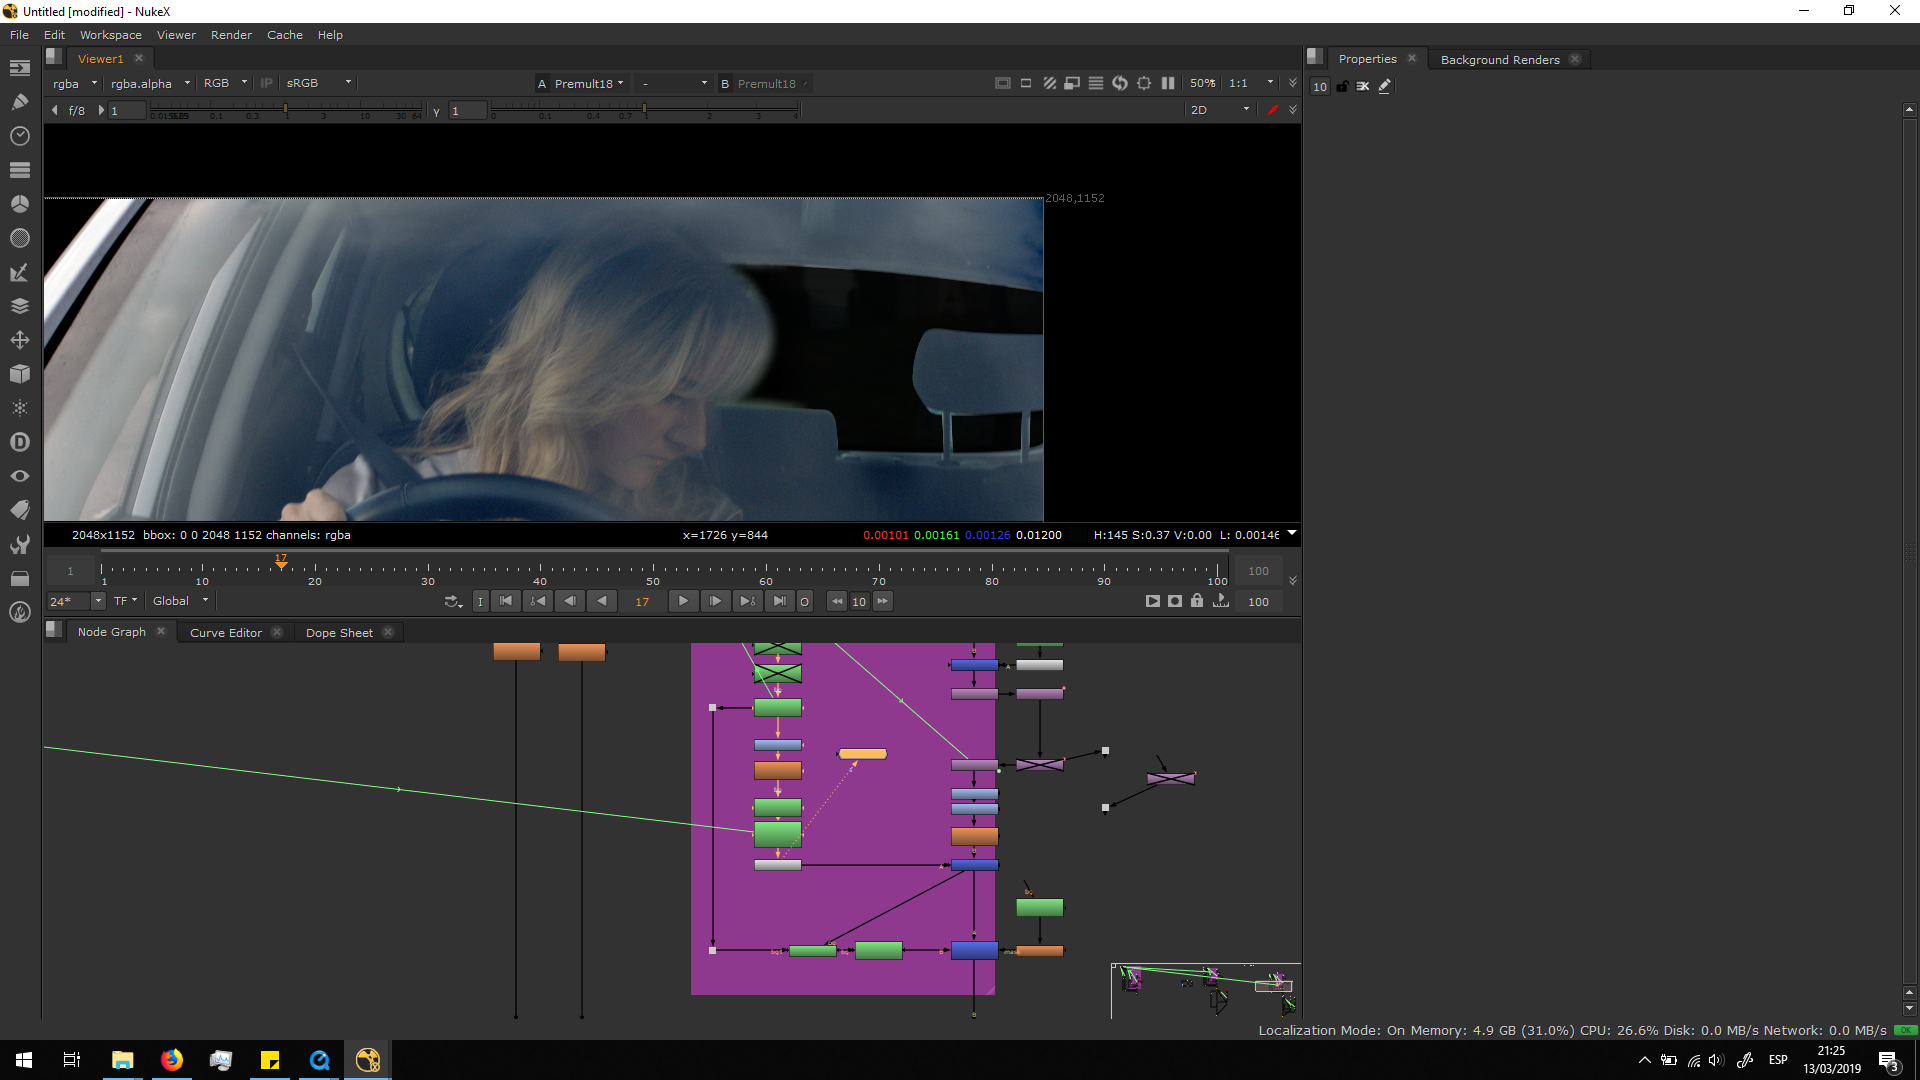
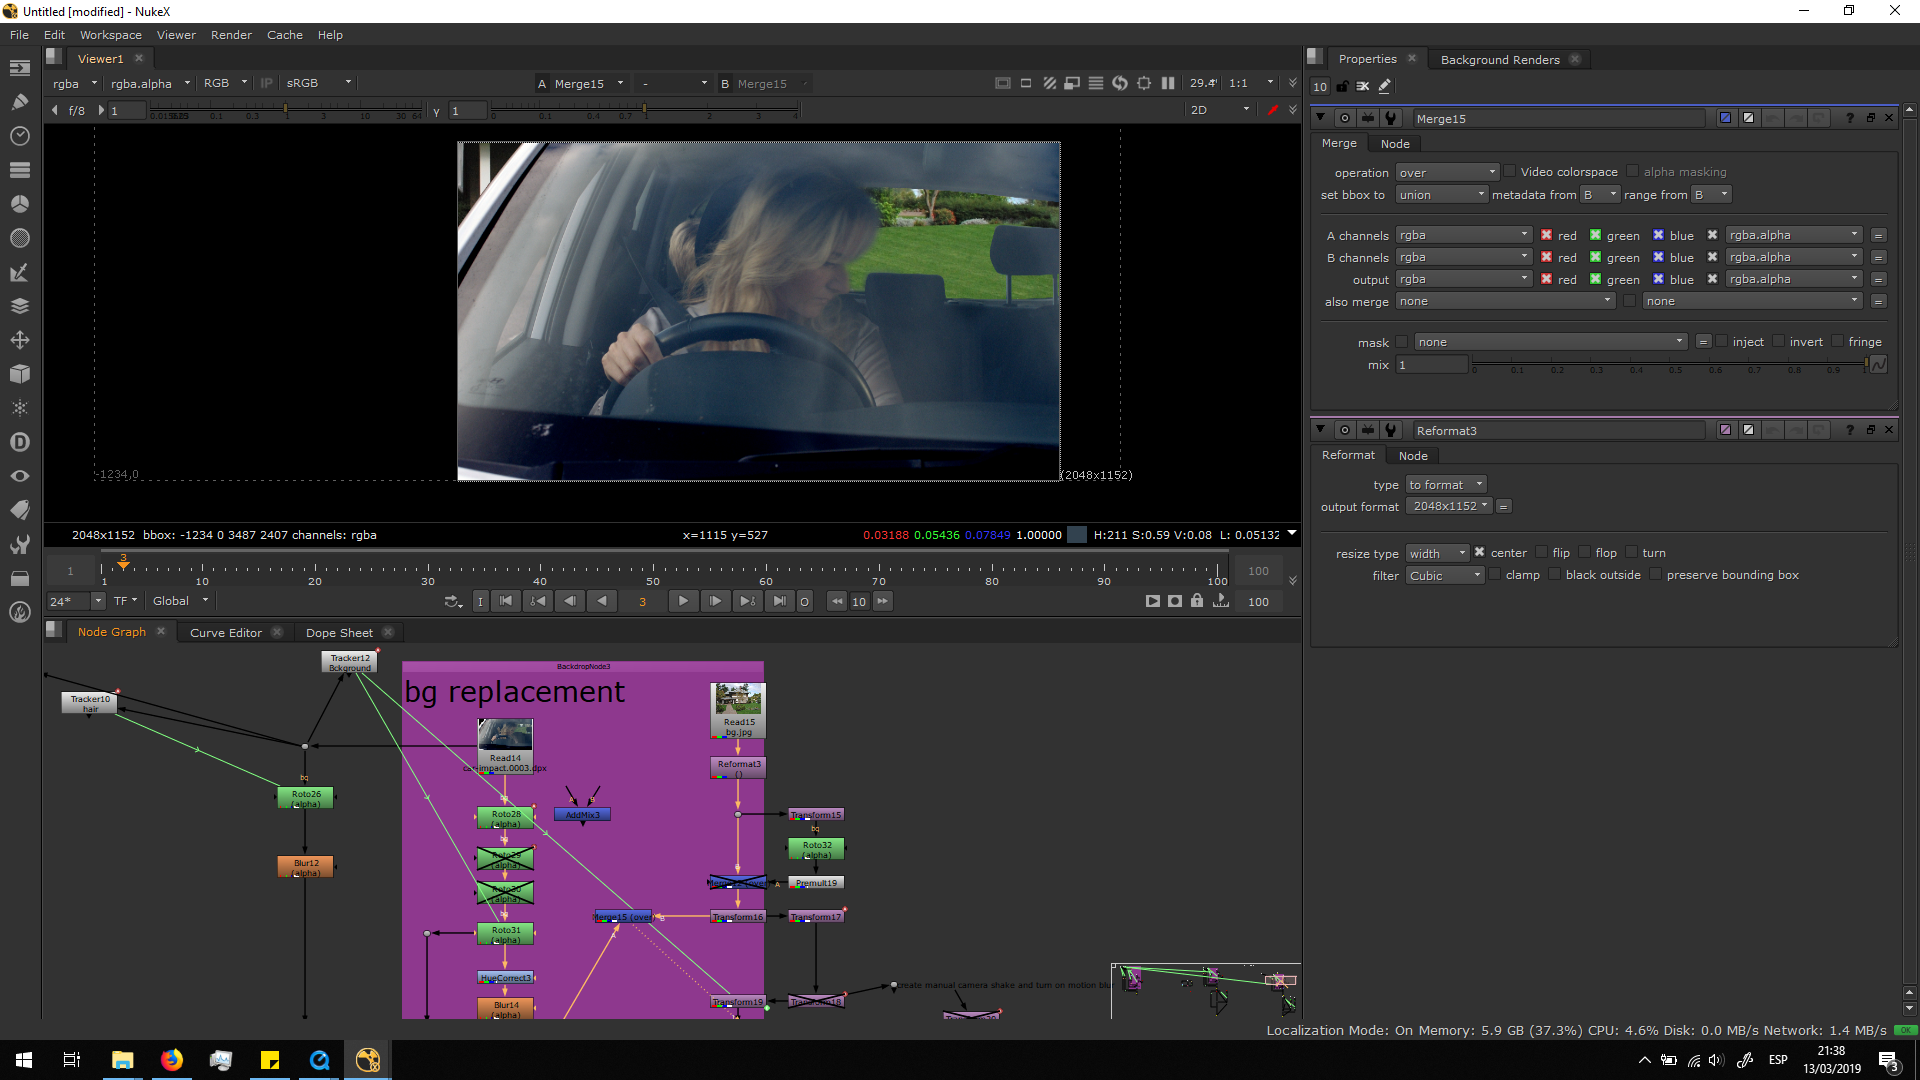
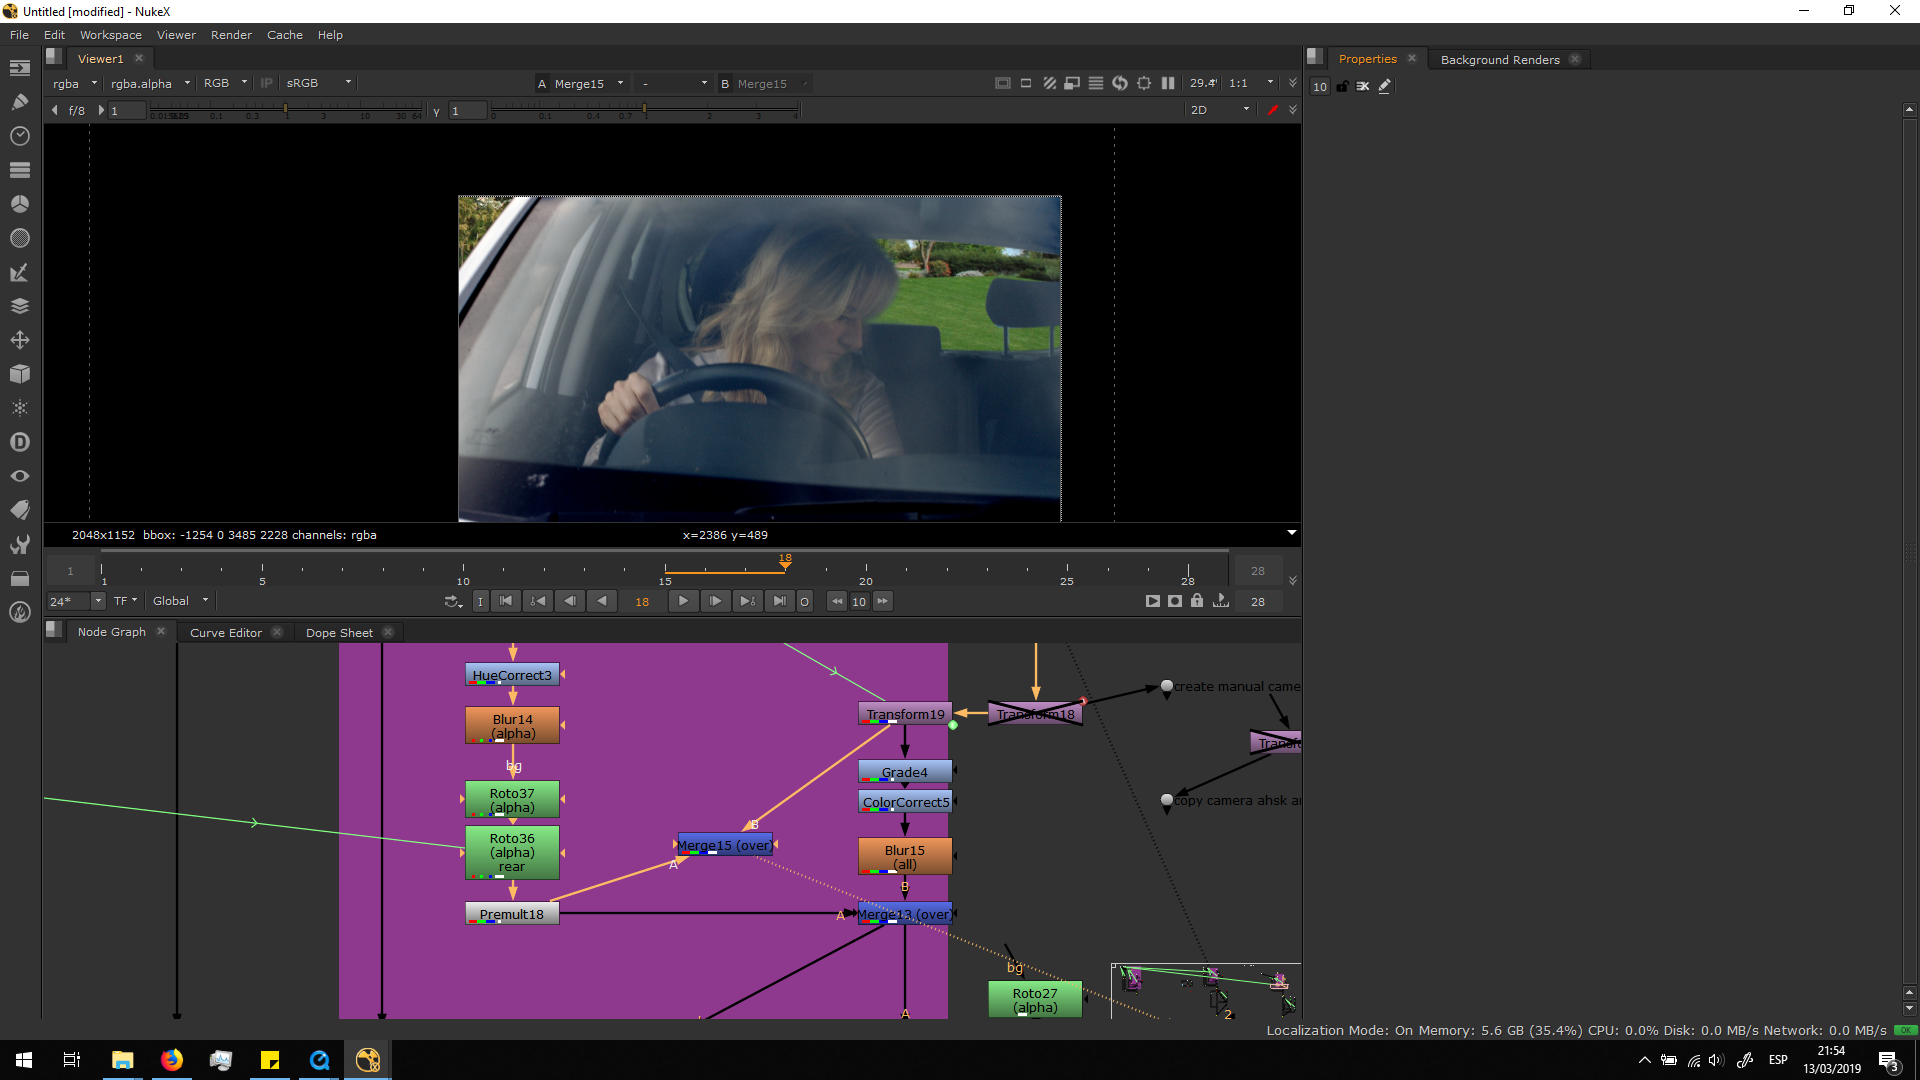
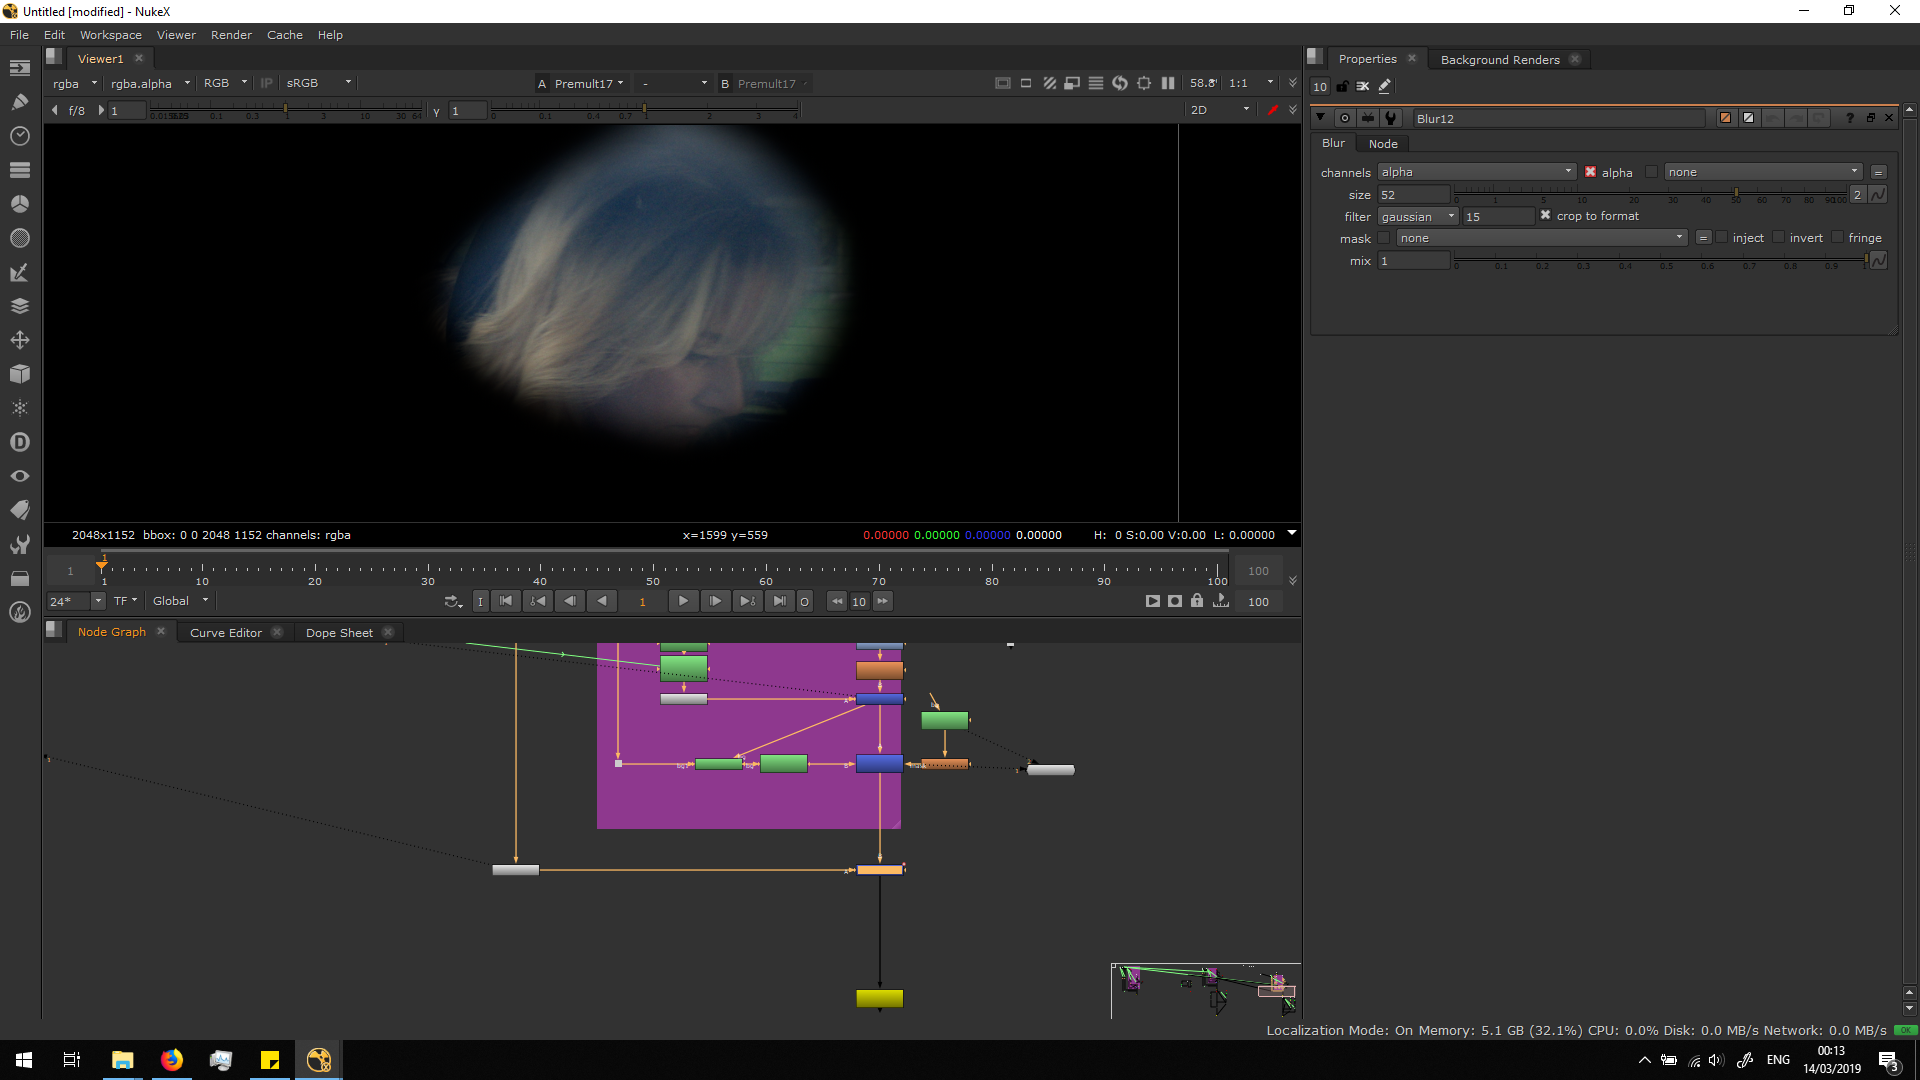
 Finally, I premultiplied the image and merge it over the background.
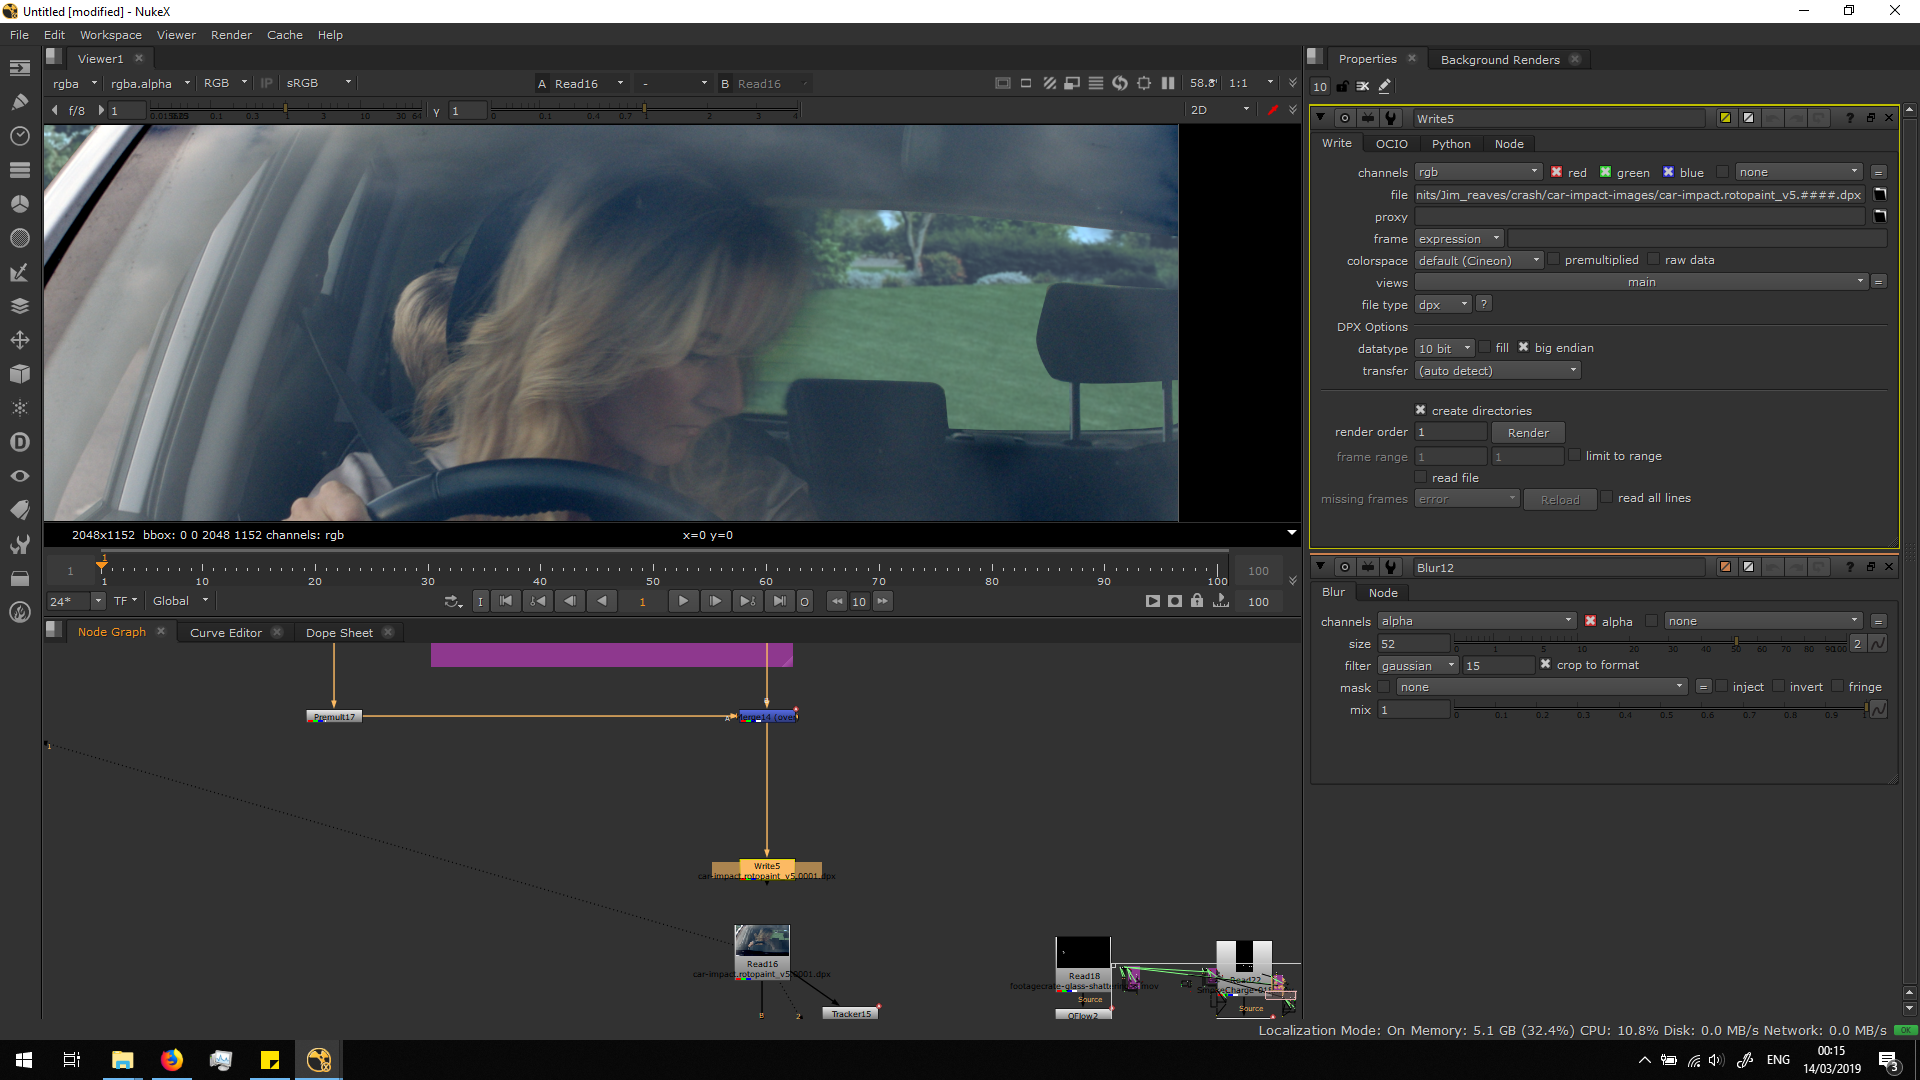
 As the roto painting is really hard to process, I exported the result footage in .dpx in order to continue working with an already rendered image sequence.
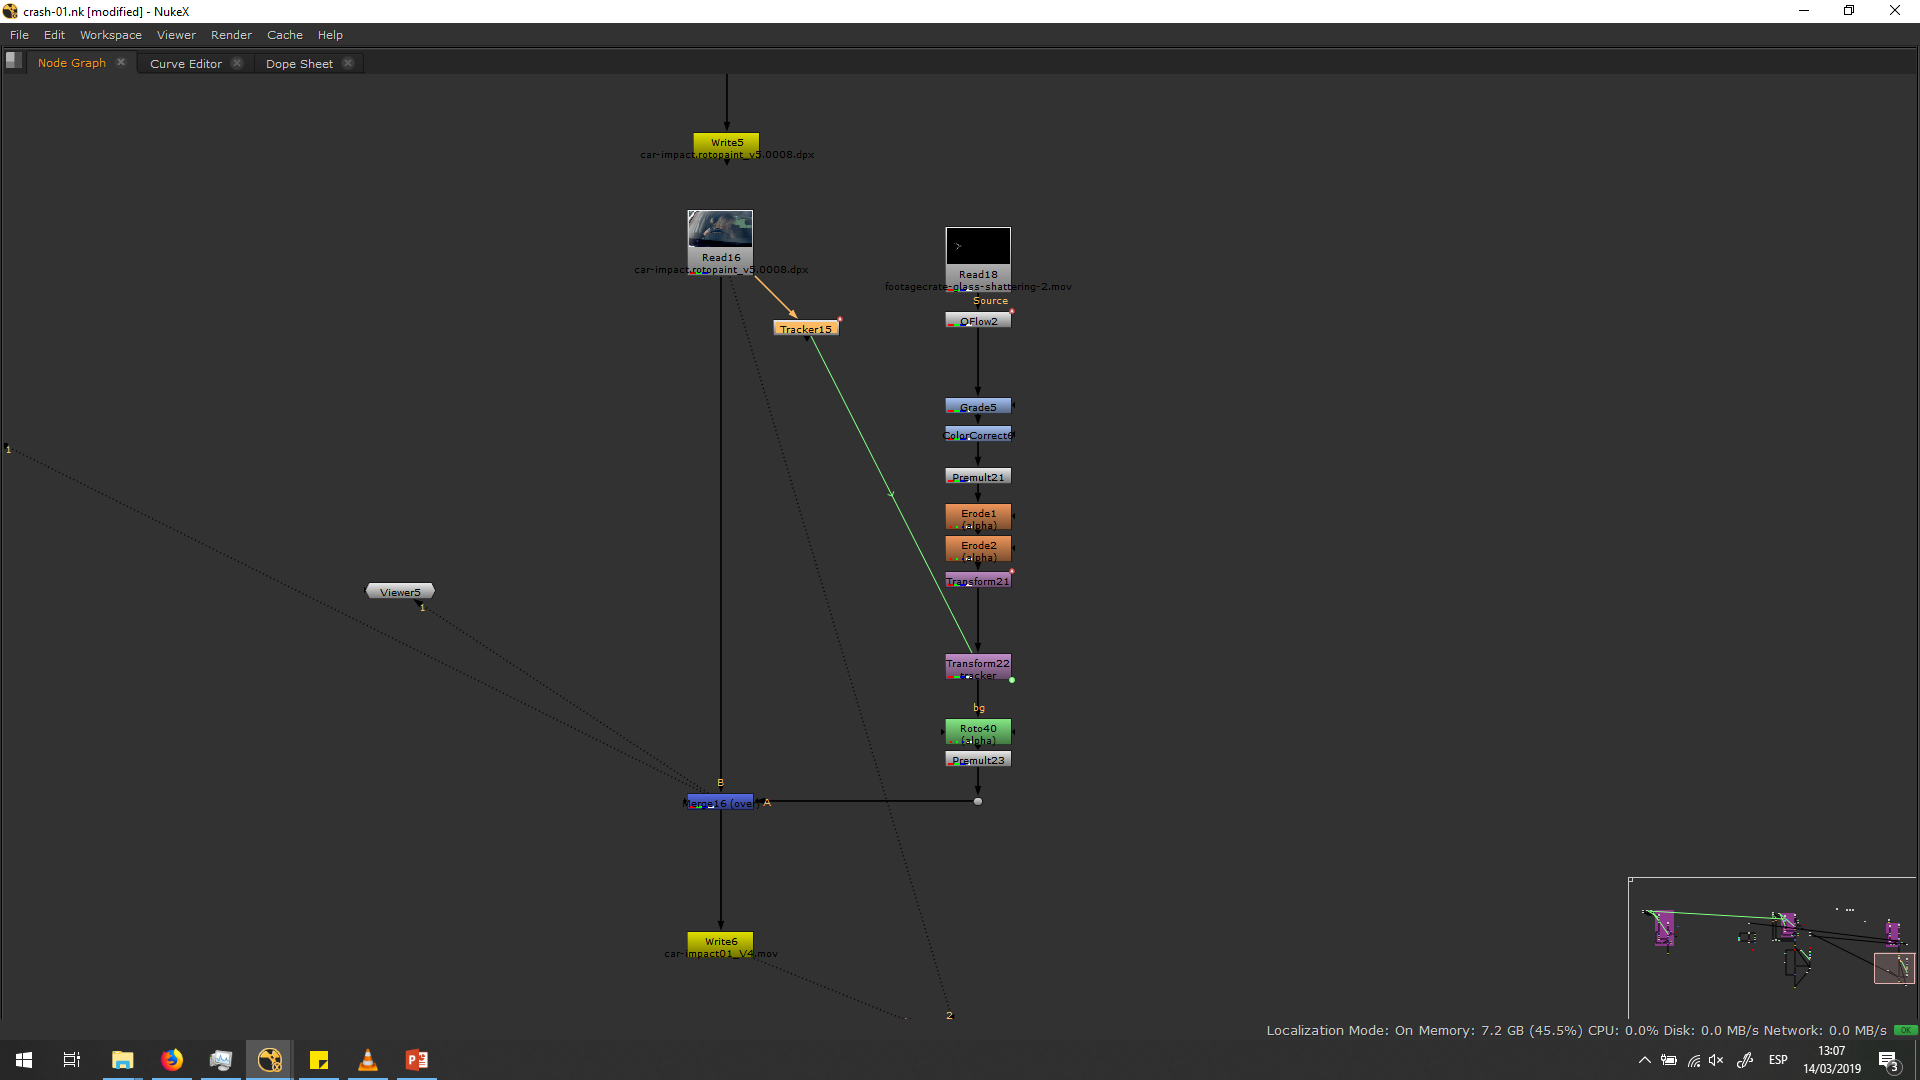
Add glasses and dust
Once we have our background and foreground settled, we can start adding the elements we were asked to.
I decided to add some smashing glass and dust.
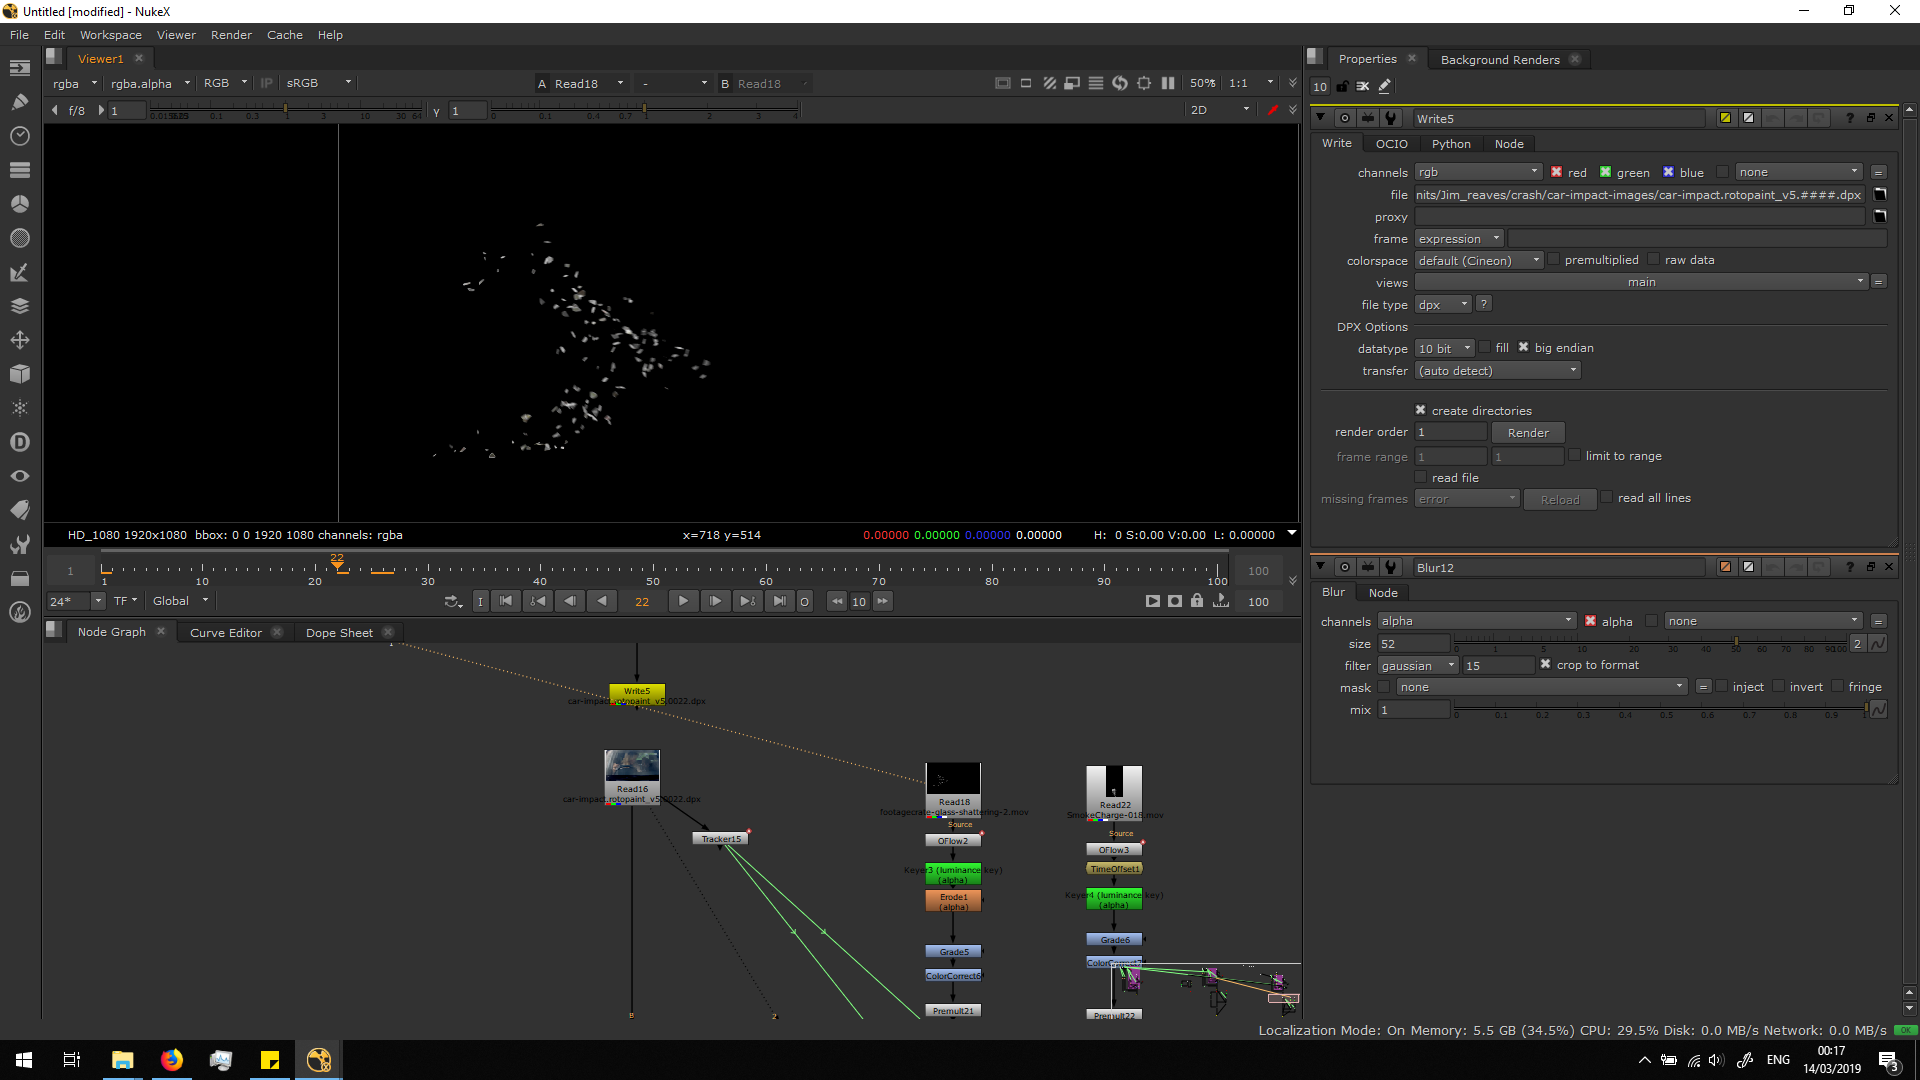
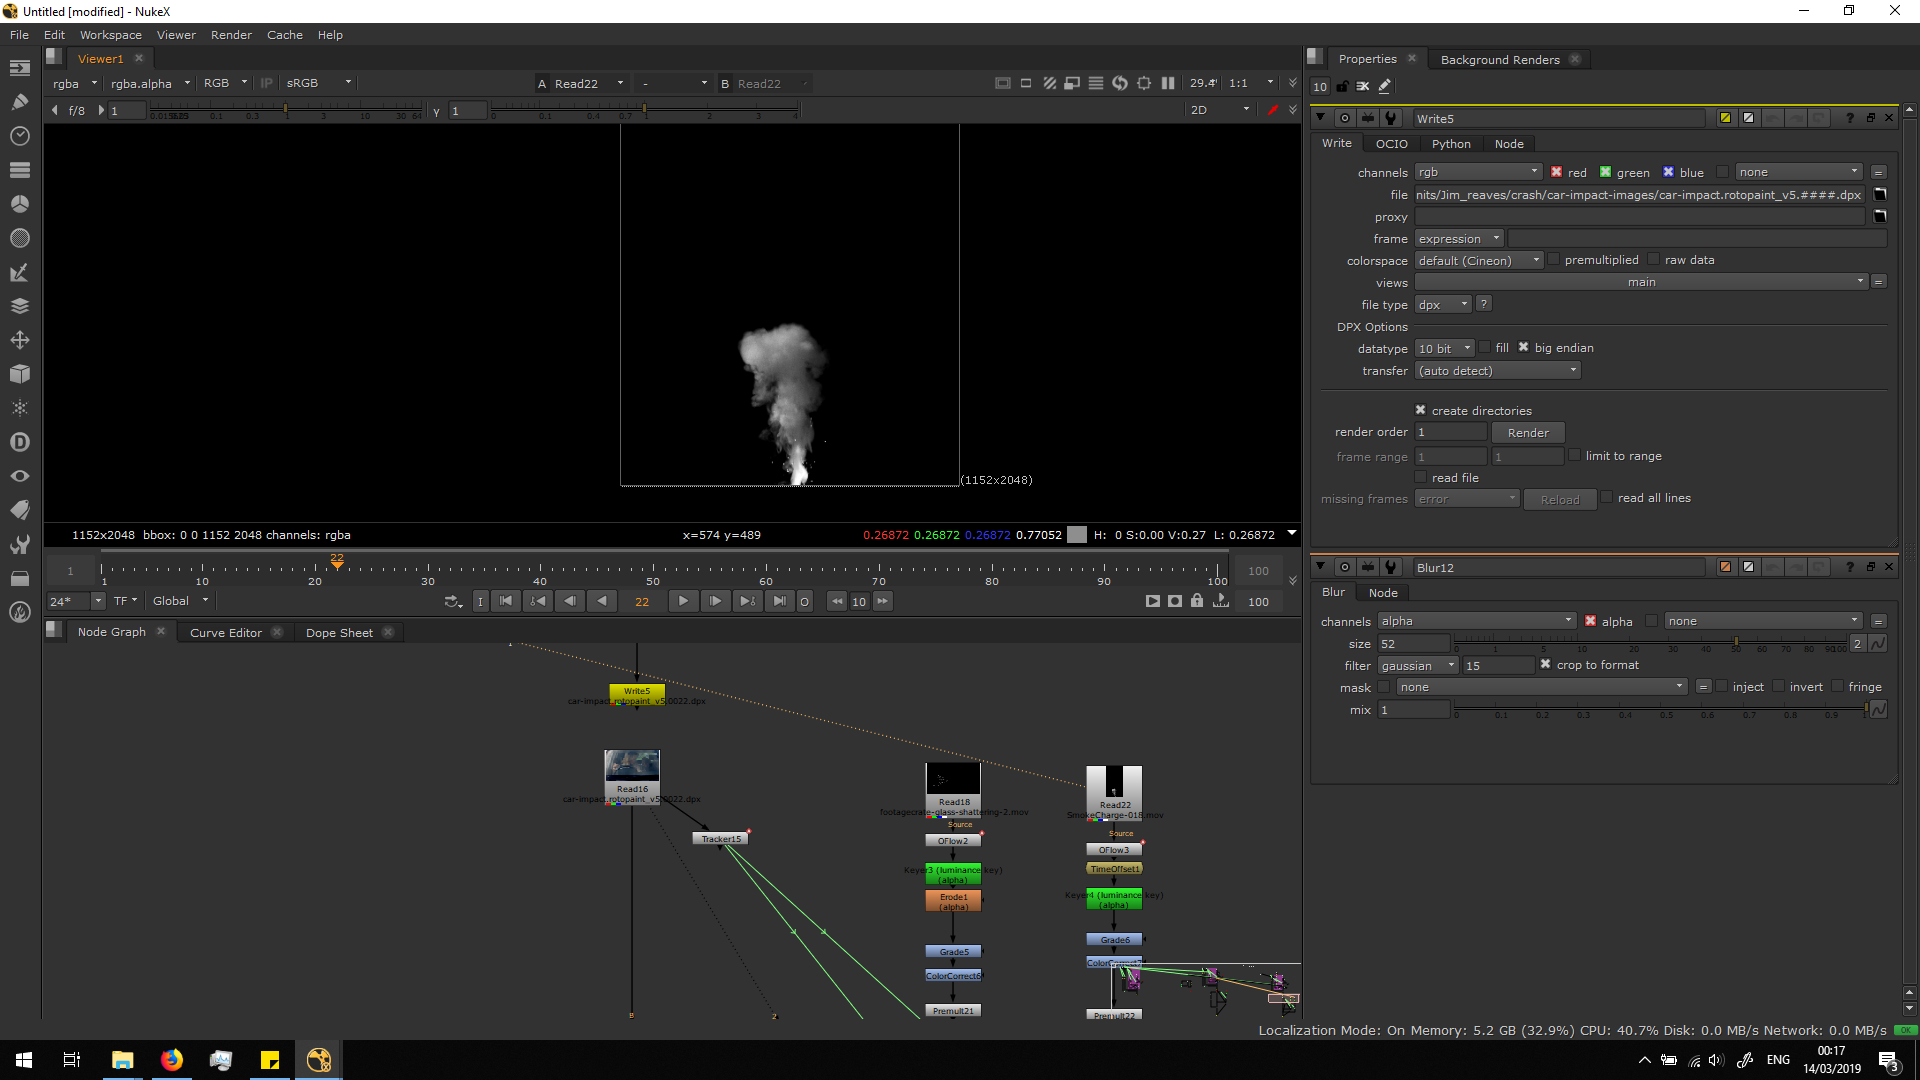
The first thing we will make, is adding a Time offset note, in order to make the FX elements movement start at the same time of the crash. Also, I added an Oflow note in order to change the output speed of the FX element according to the speed of the original footage. 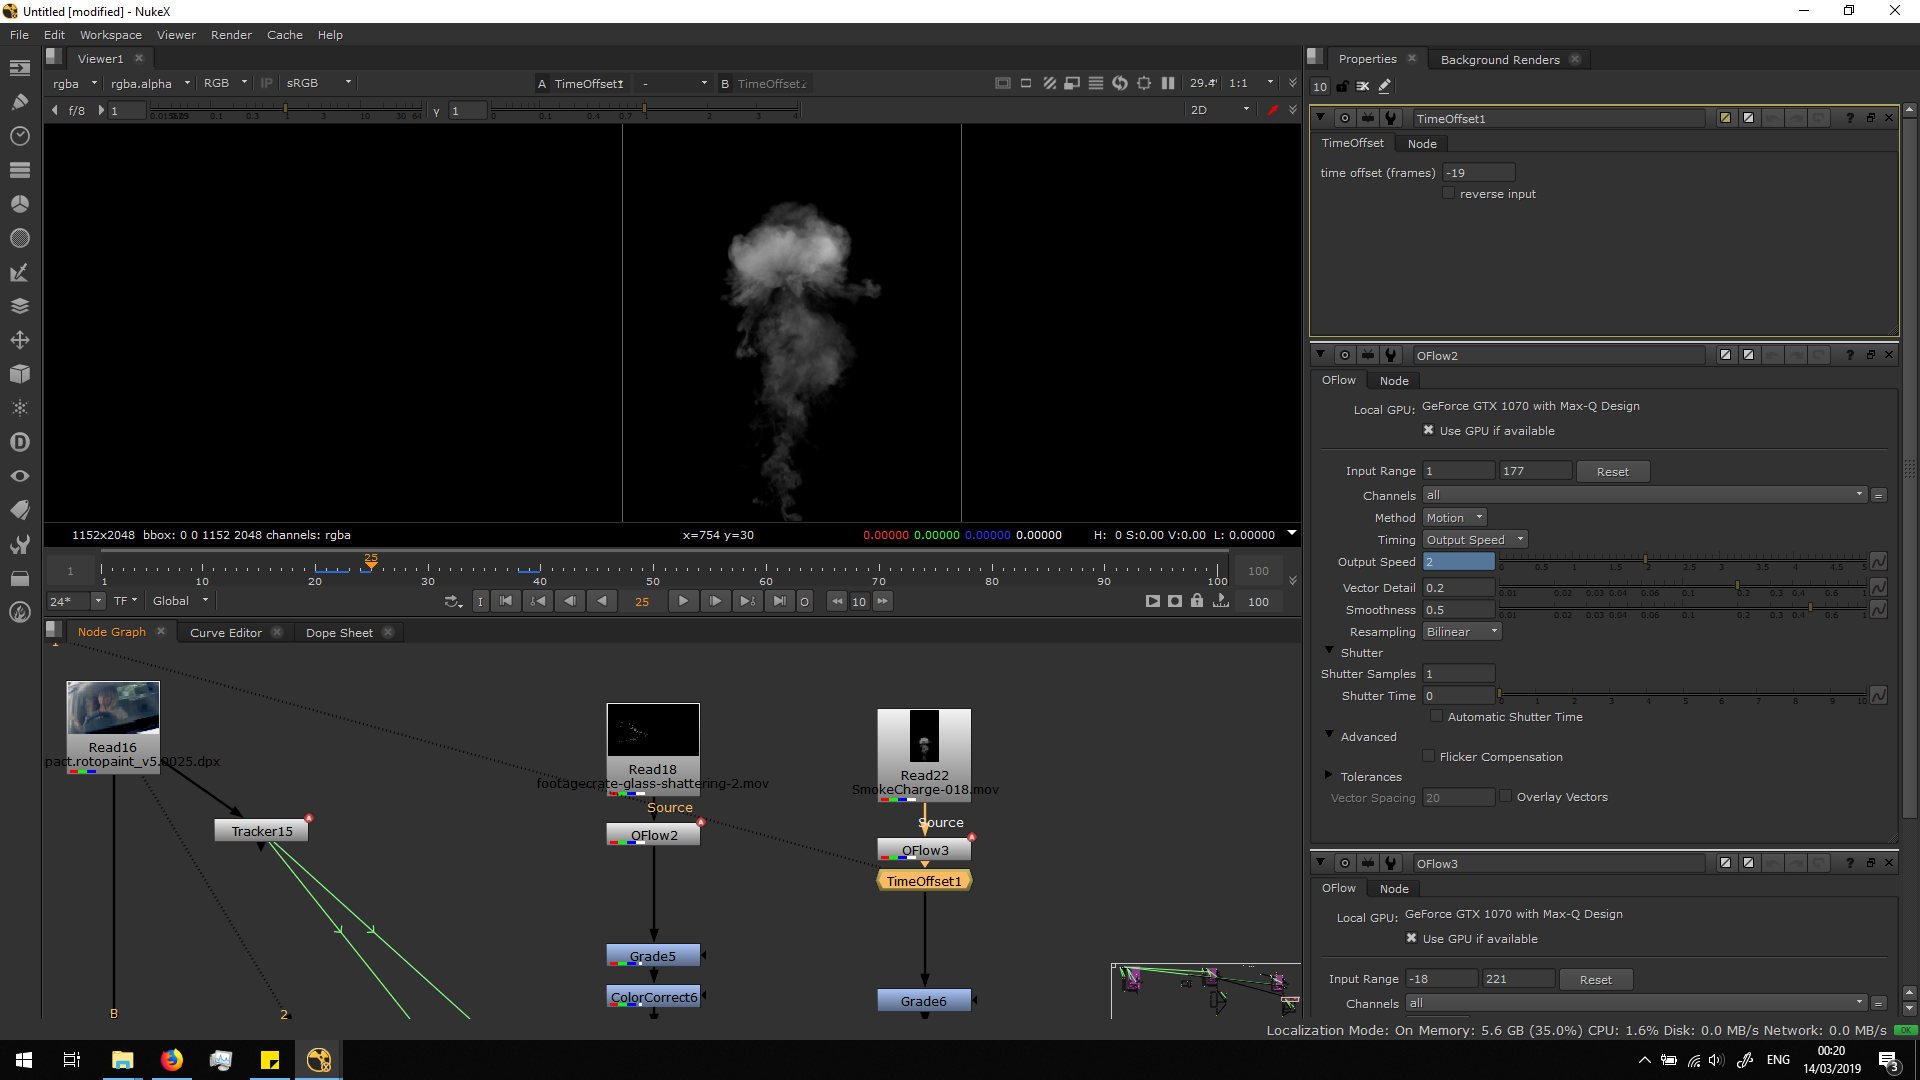
Then, I premultiply them and merge them over the footage in order to see how they look.
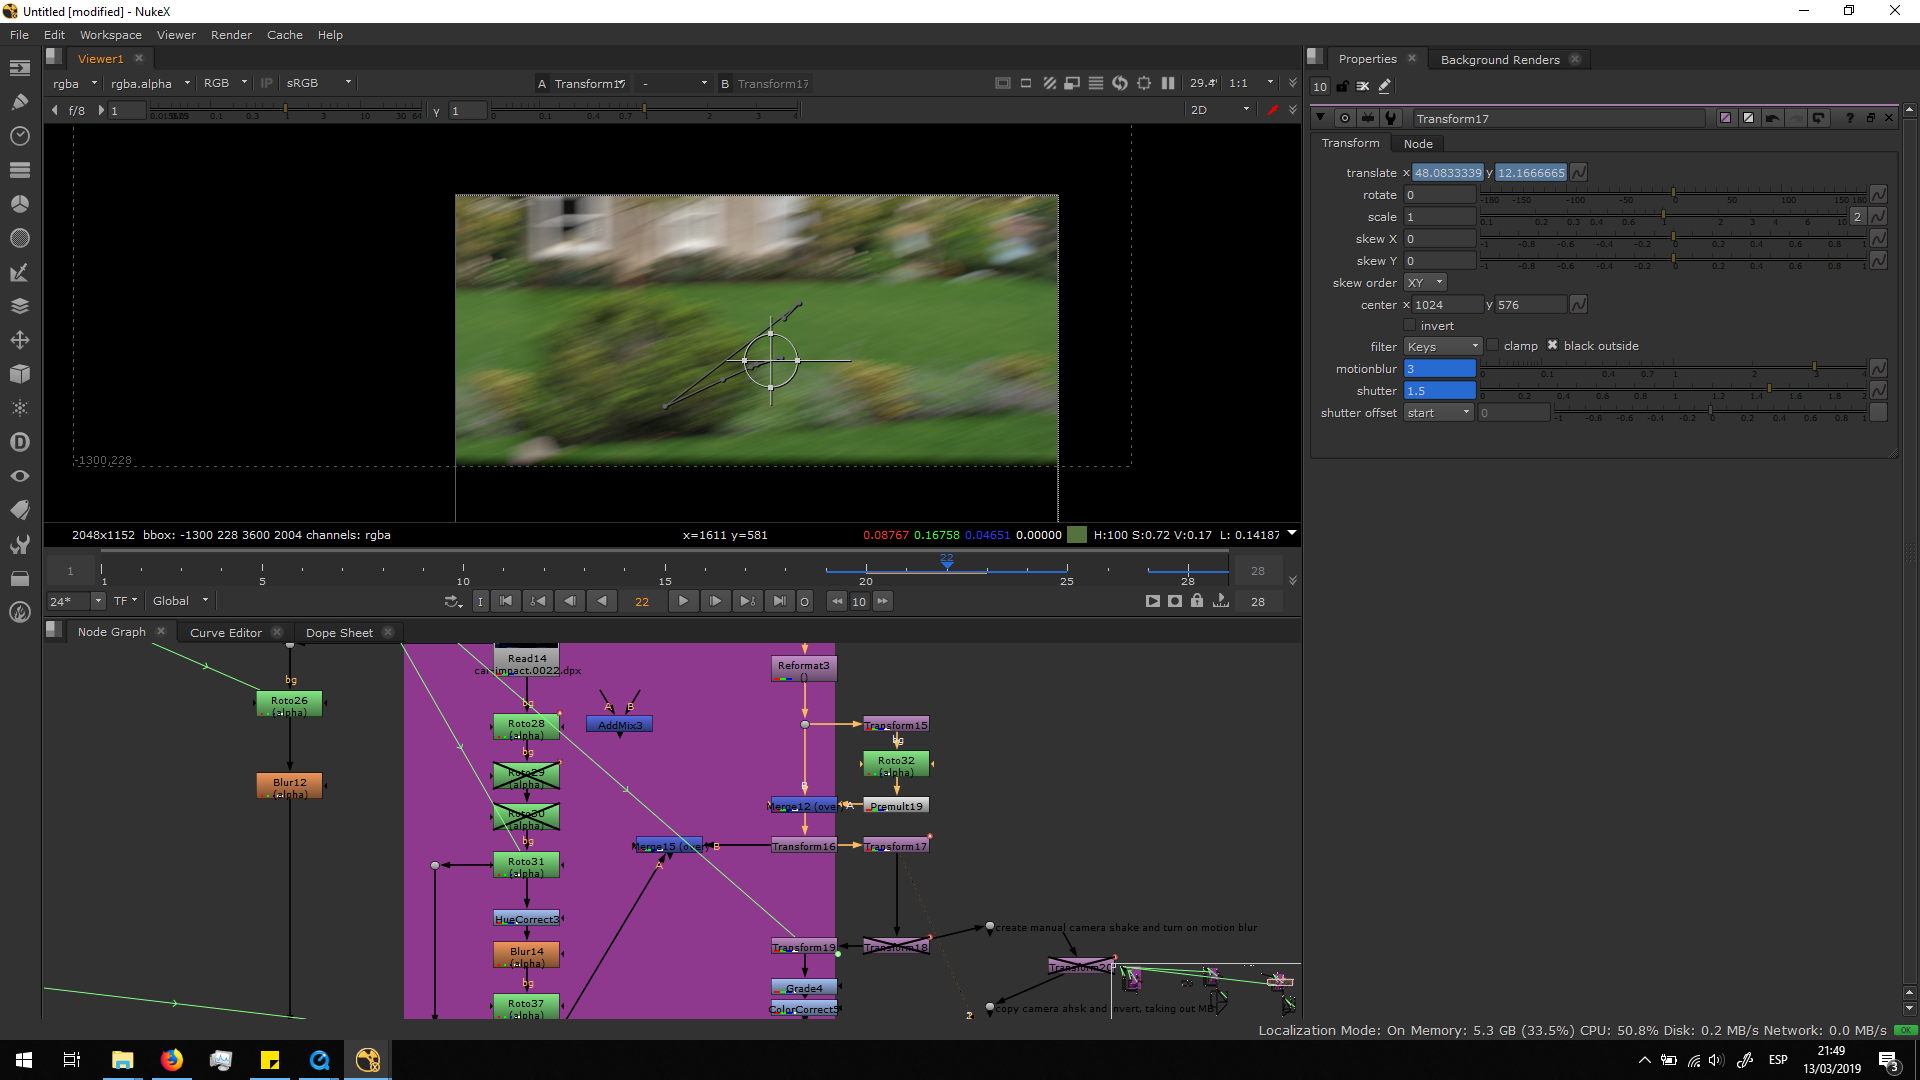
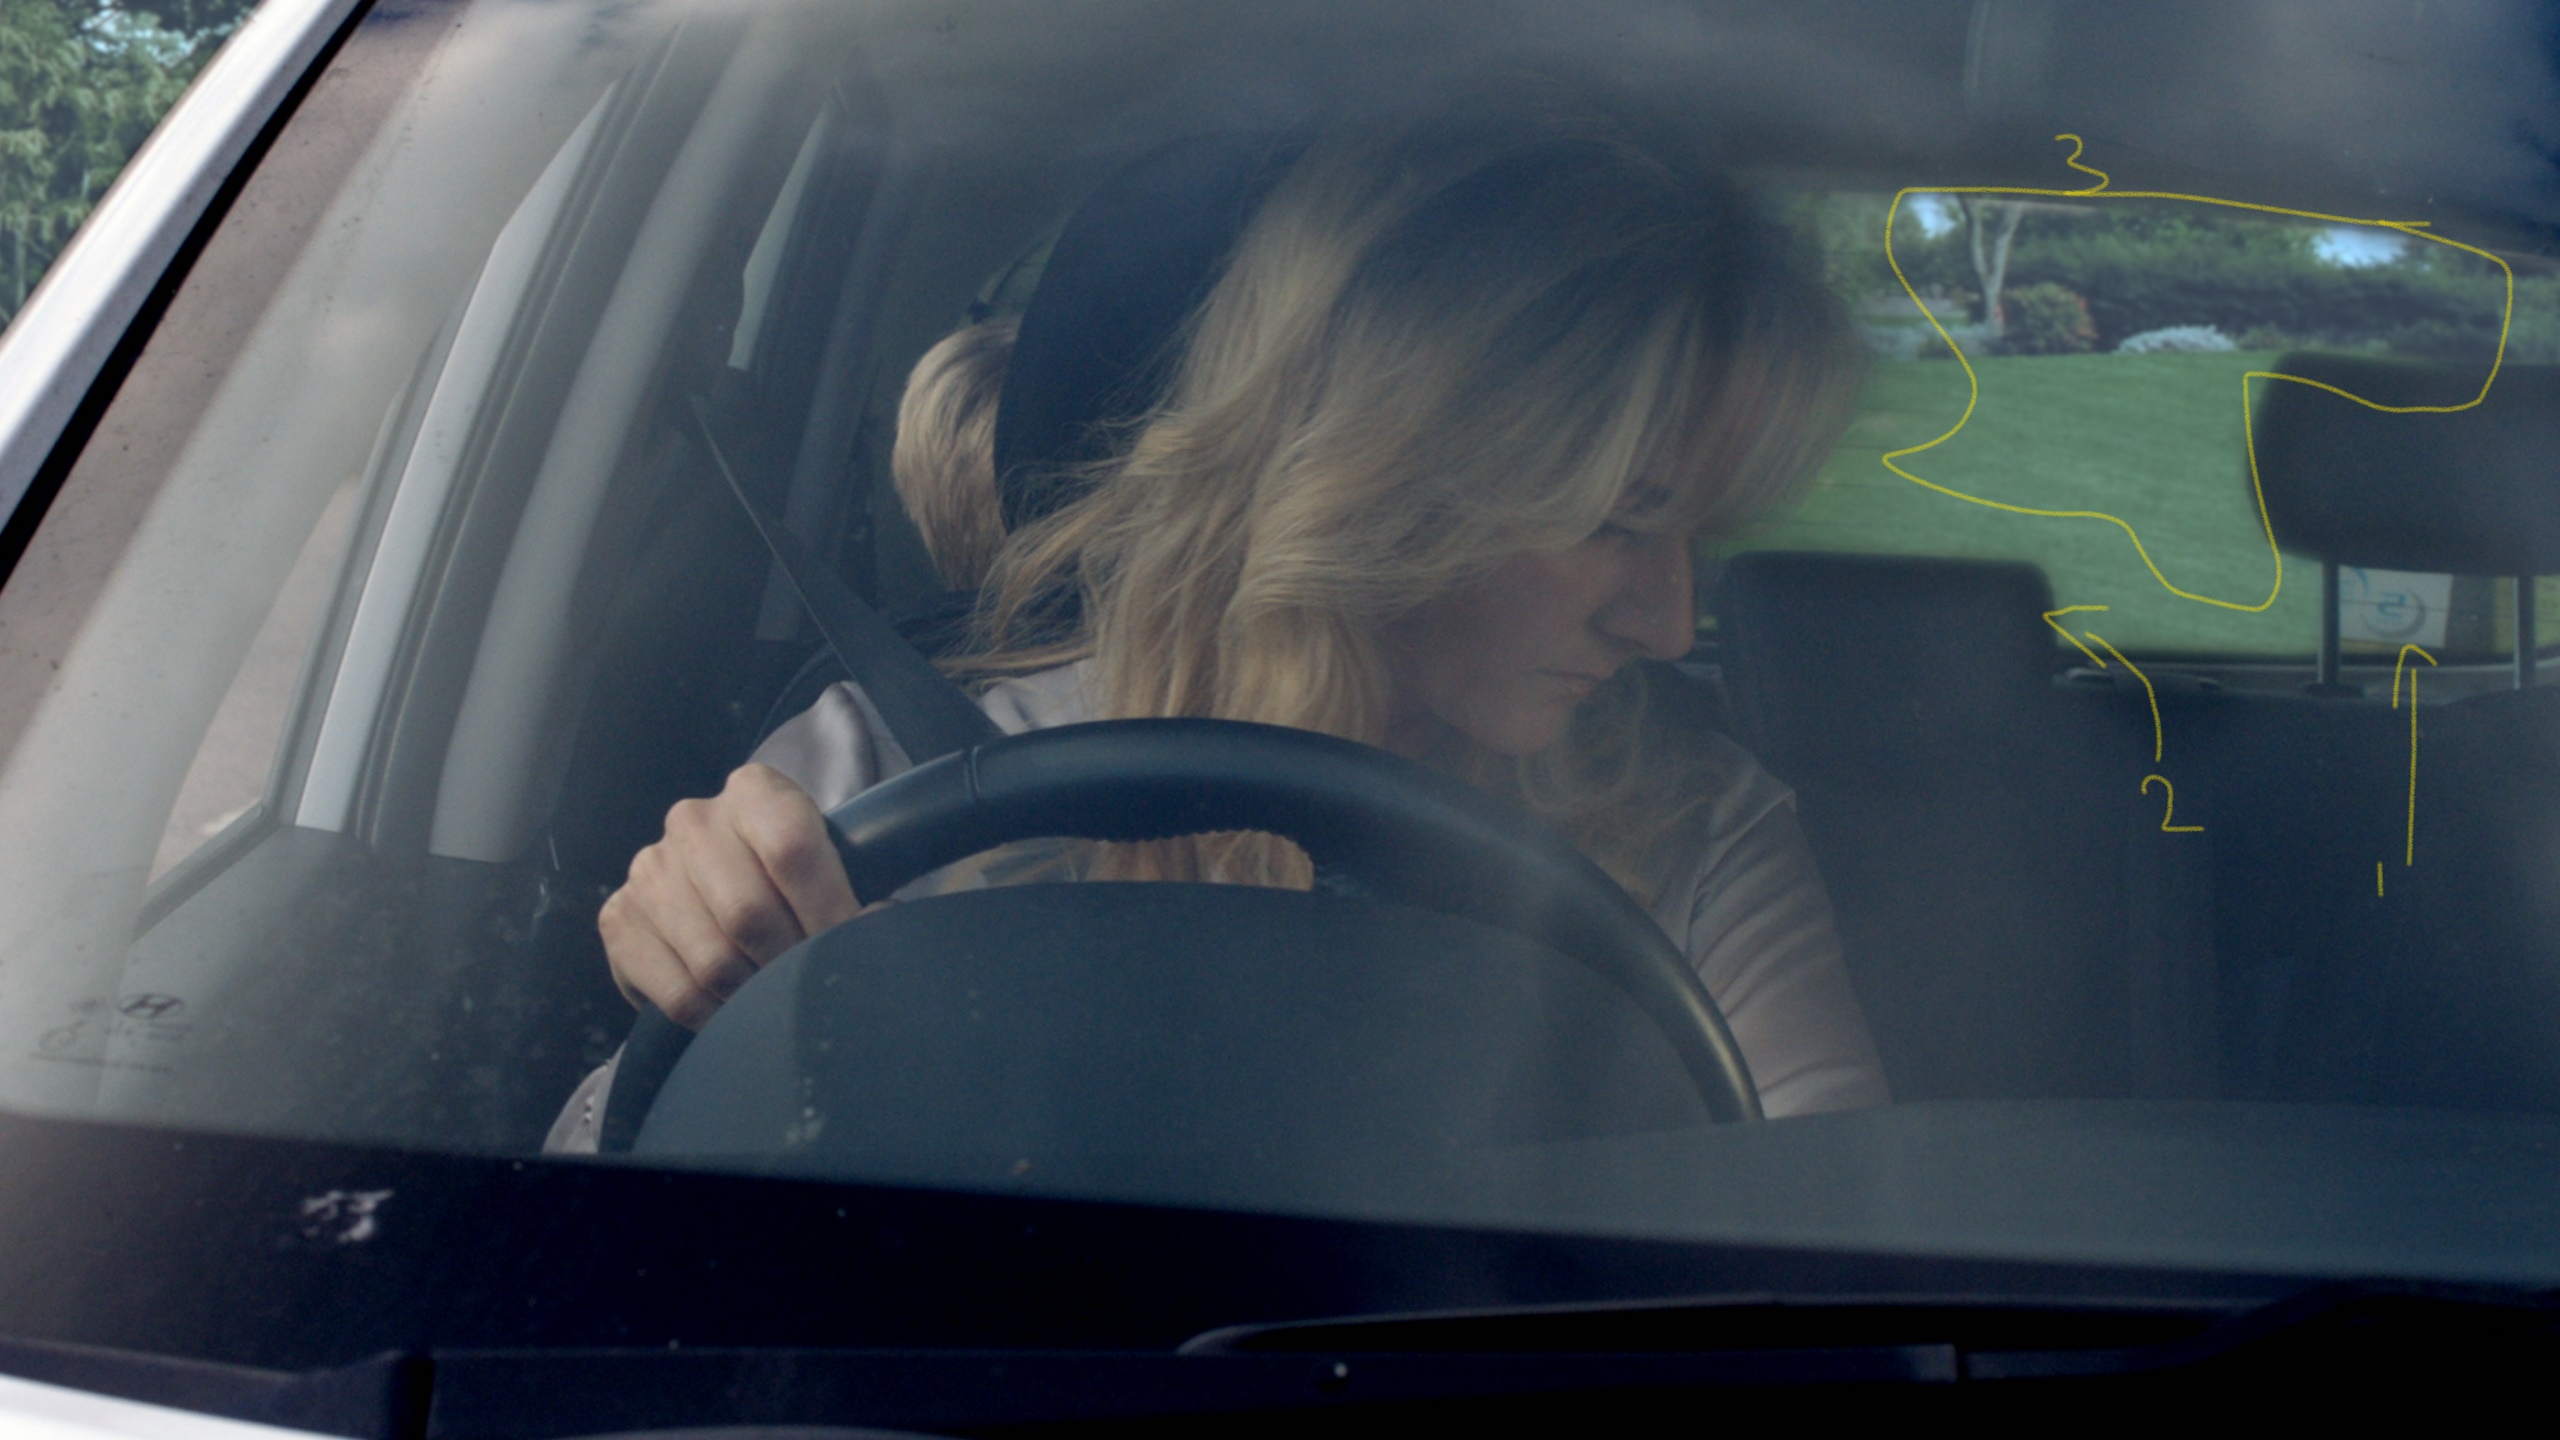
The first thing that obviously needs to be done is transforming the footage and adjusting it in order to make it appear at the right size and from the ring part of the frame, in the same direction as the hitting. We can also animate the transformation, in order to adjust the VF elements to the movement of the camera.
 Actually, to make it follow the movement of the car more accurately, I did two tracking points in the window of the car, one to define the transformation and the other to define the rotation.
 Then, I attached the transformation of the trackers into another Transformation notes for the VX elements.
 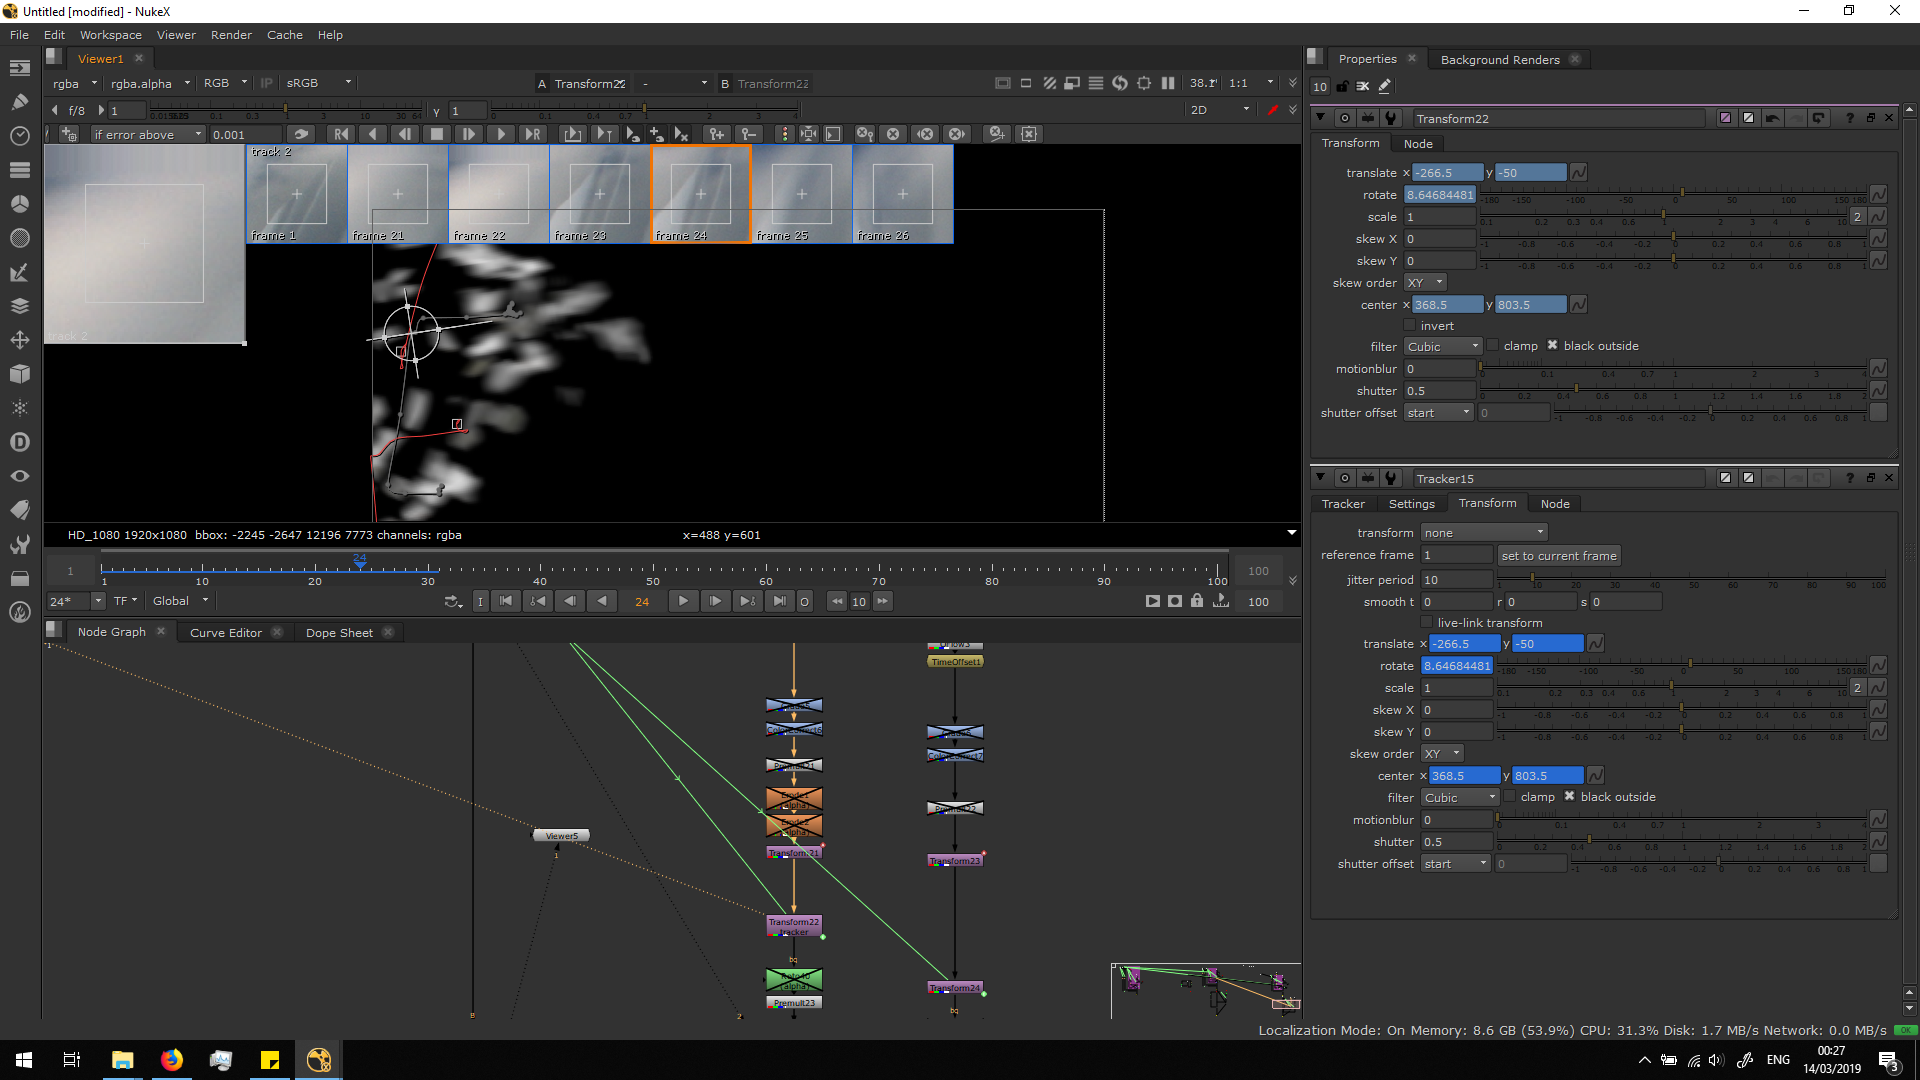 Now that the FX elements are positioned, we can grade them to make it look better, adjusting the parameters as we consider.
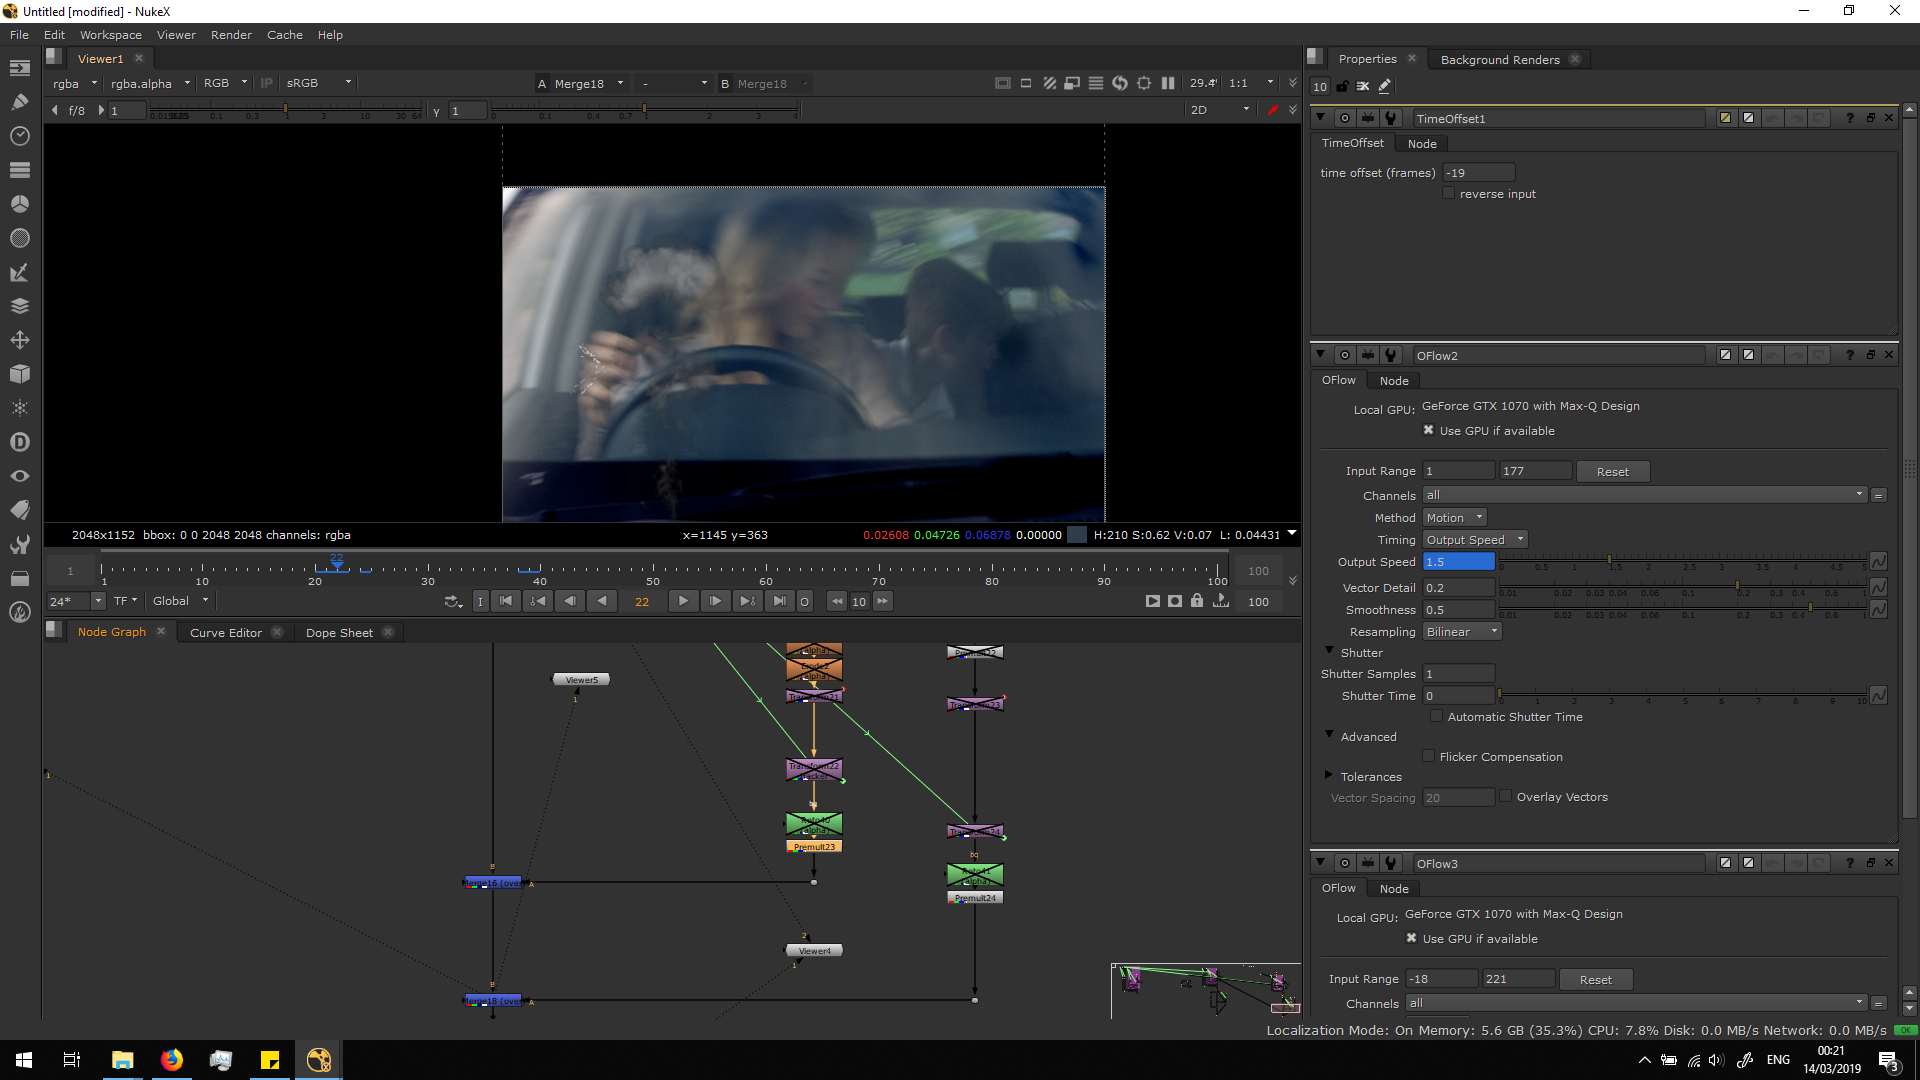
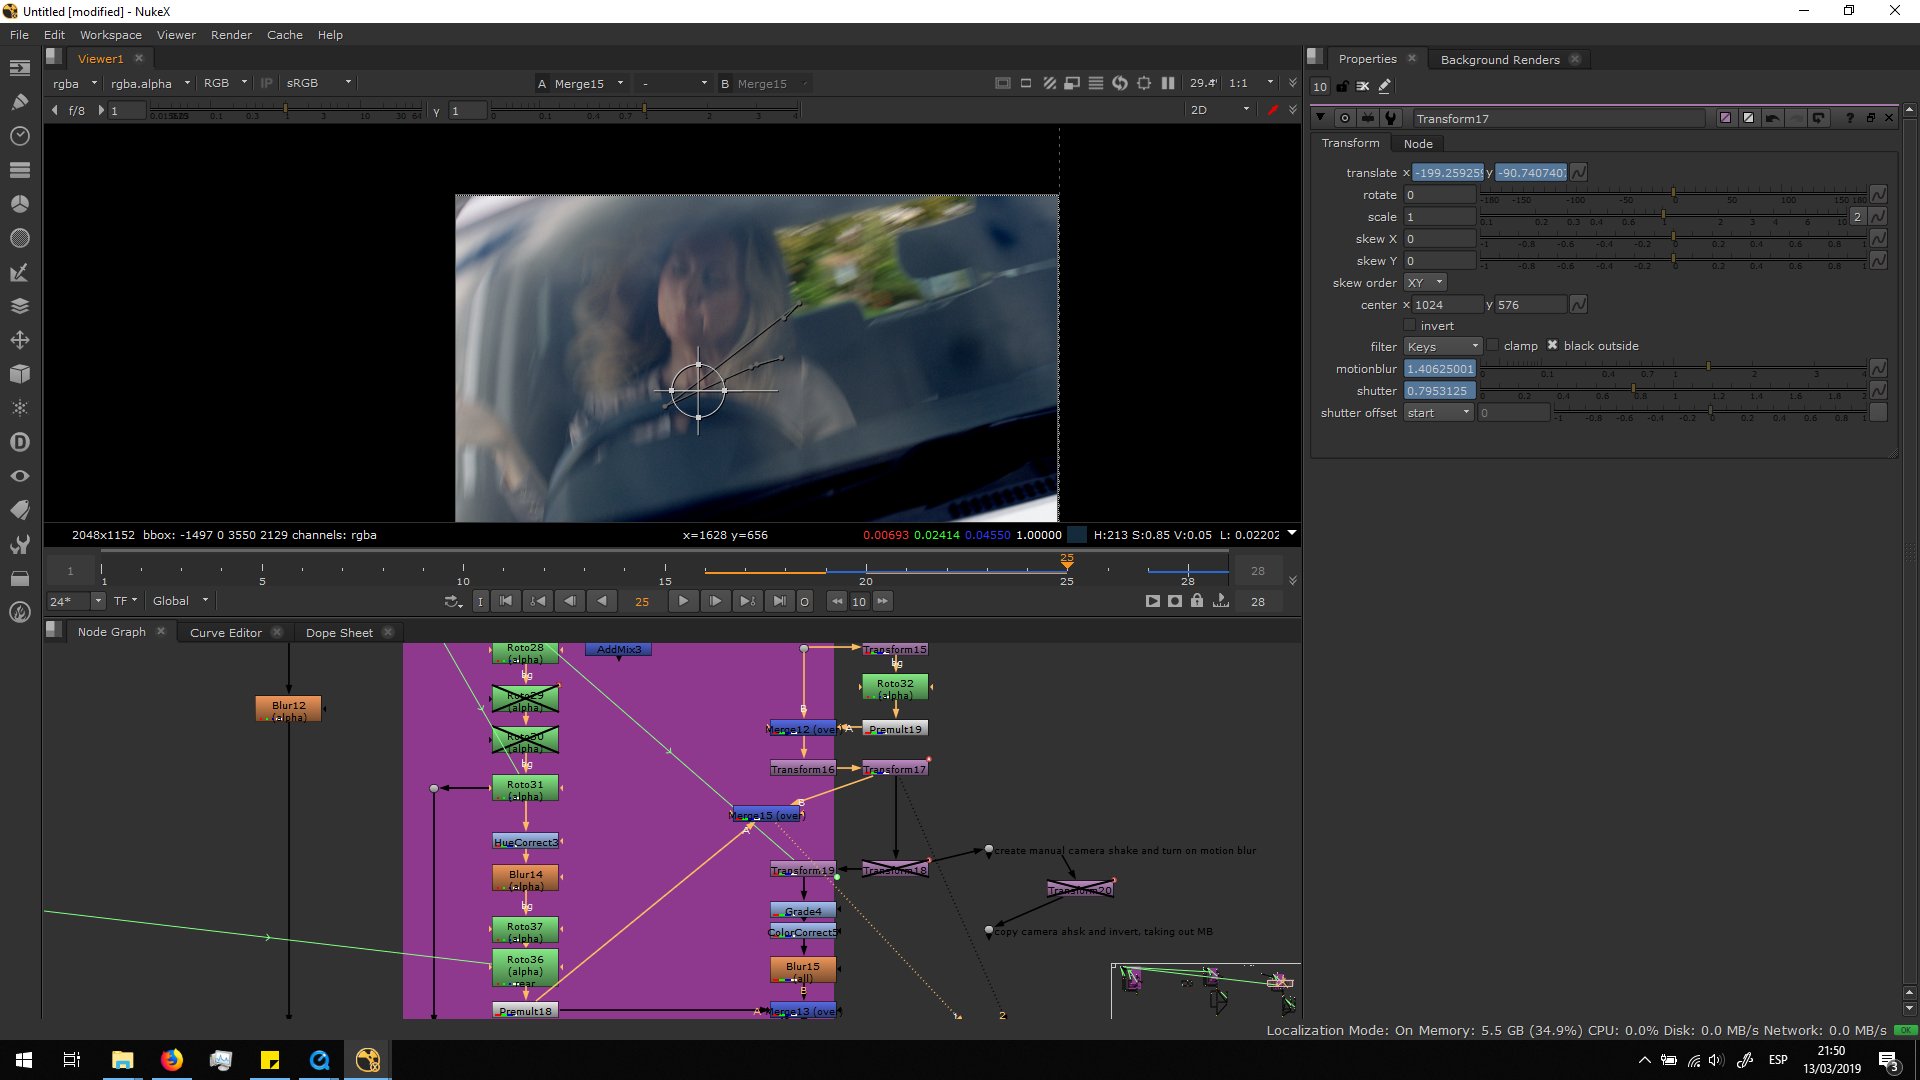
Then, I also added some color correct in order to make them look cooler, as the general shot.
 Then, I added a premult note after the grade. If we grade with not premult, the grade would affect to the whole area.
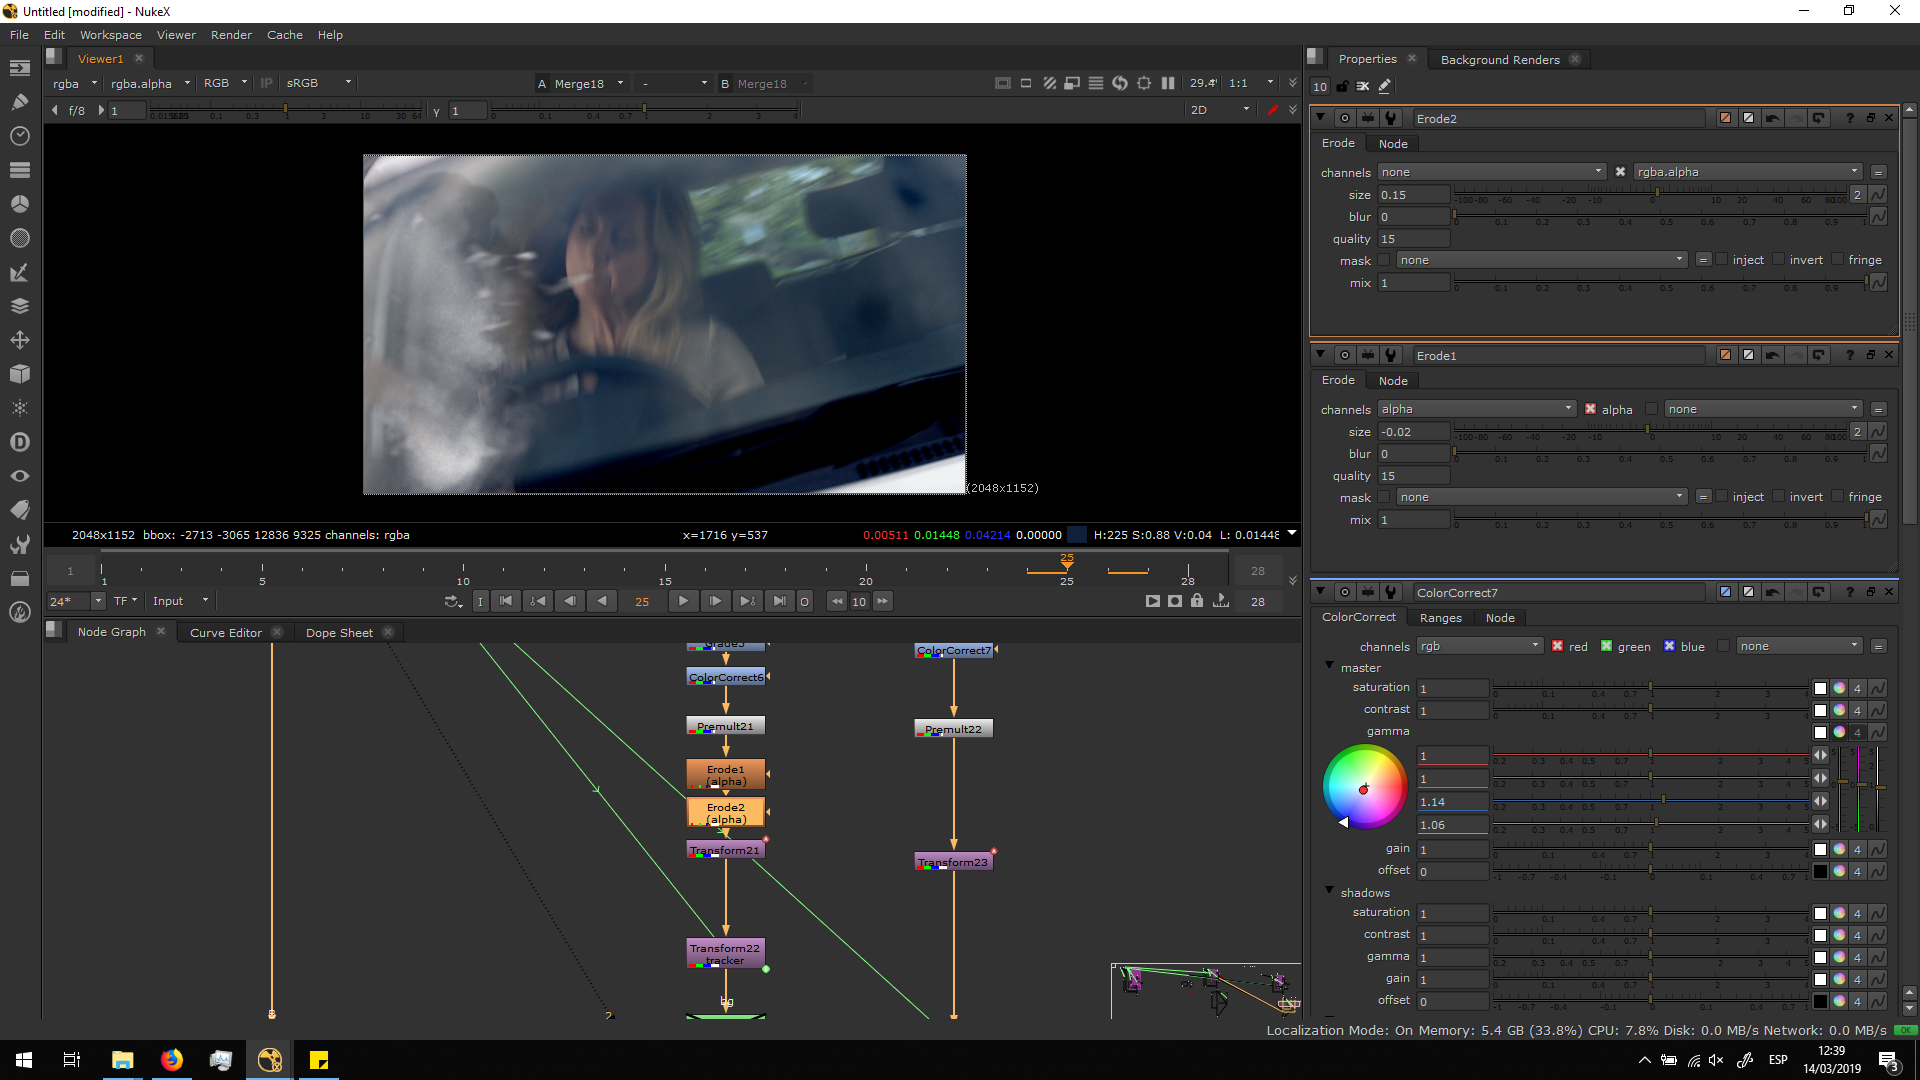
 Then, I added some Erode filters in the alpha channel of the glass, in order to shift the edges and blend it better, getting rid of the black edges.
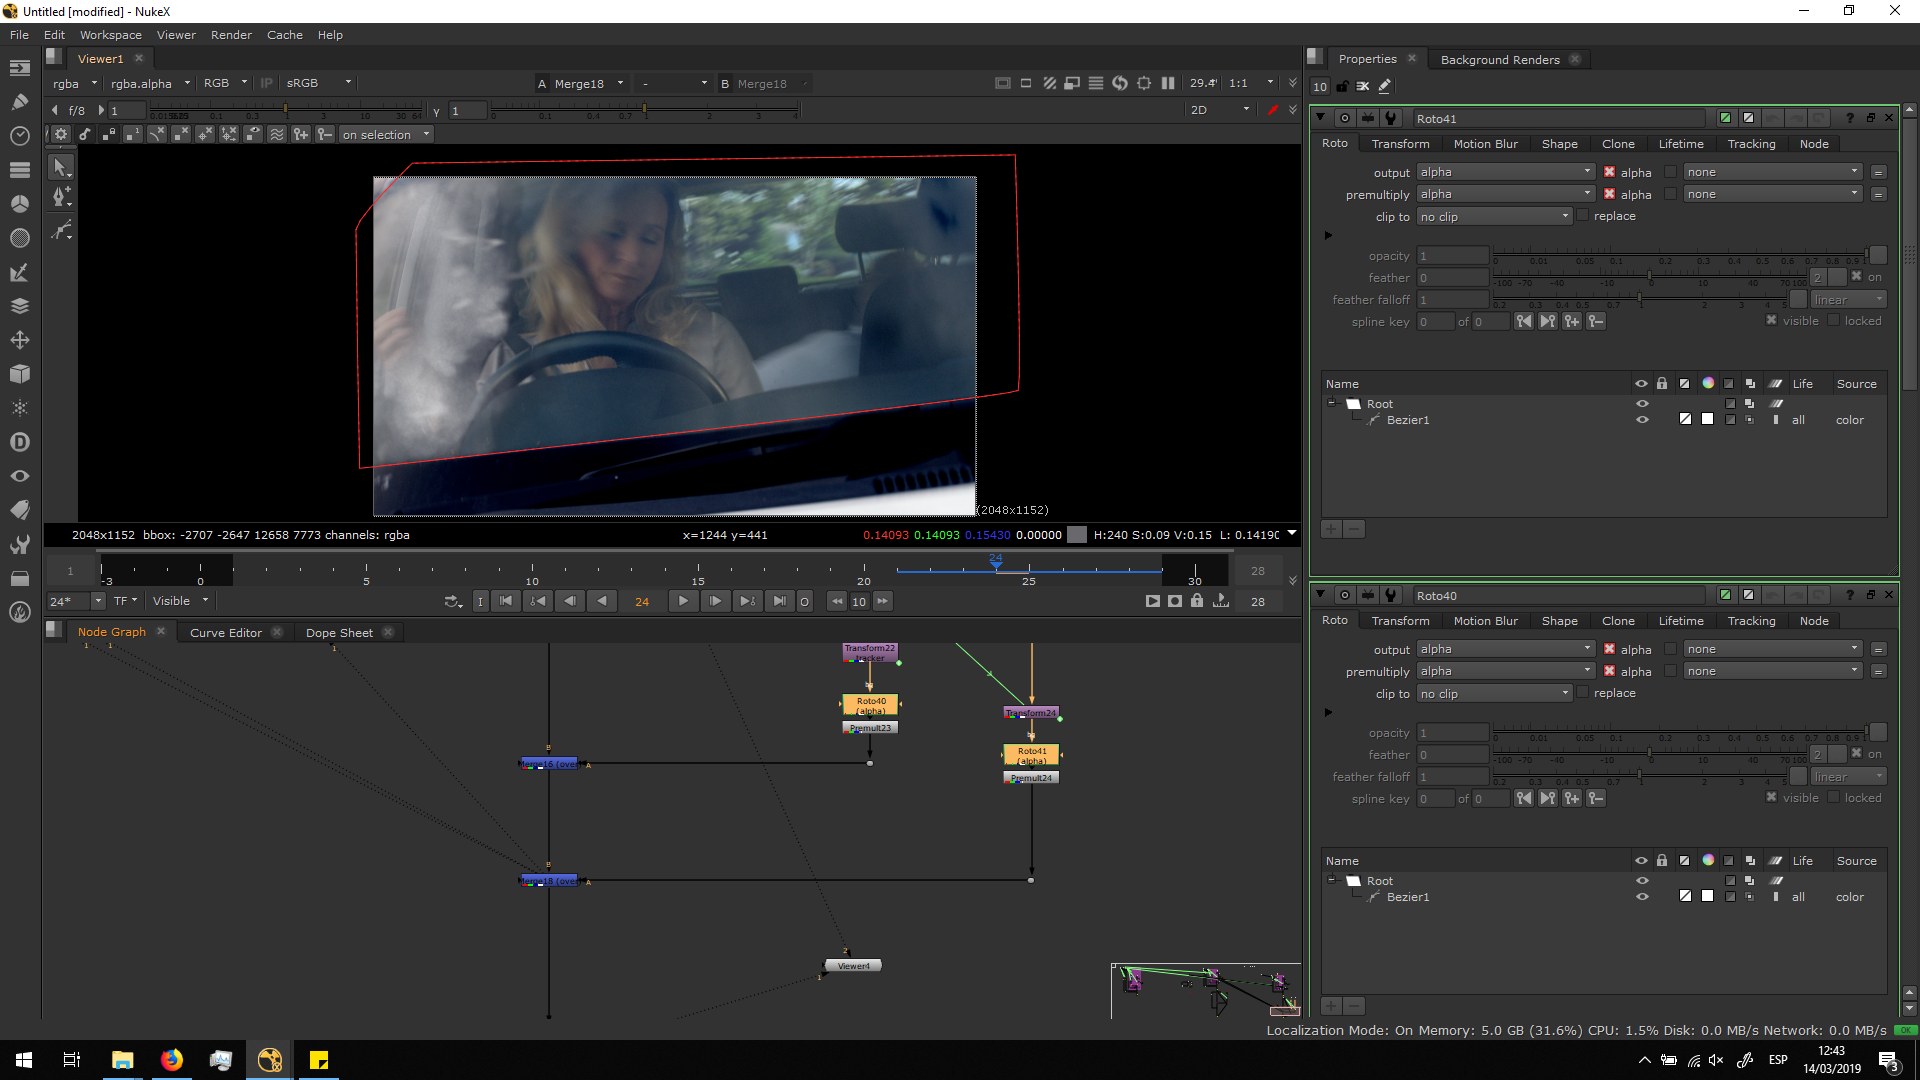
Finally, I did a roto to limitate the edges of the window, so the dist and glasses are always seen as they were inside of the car. I copied the same roto for both FX elements.
 Finally, I premultiplied both FX elements and merge them over the edited .dpx footage. And then, it would be ready to be exported.
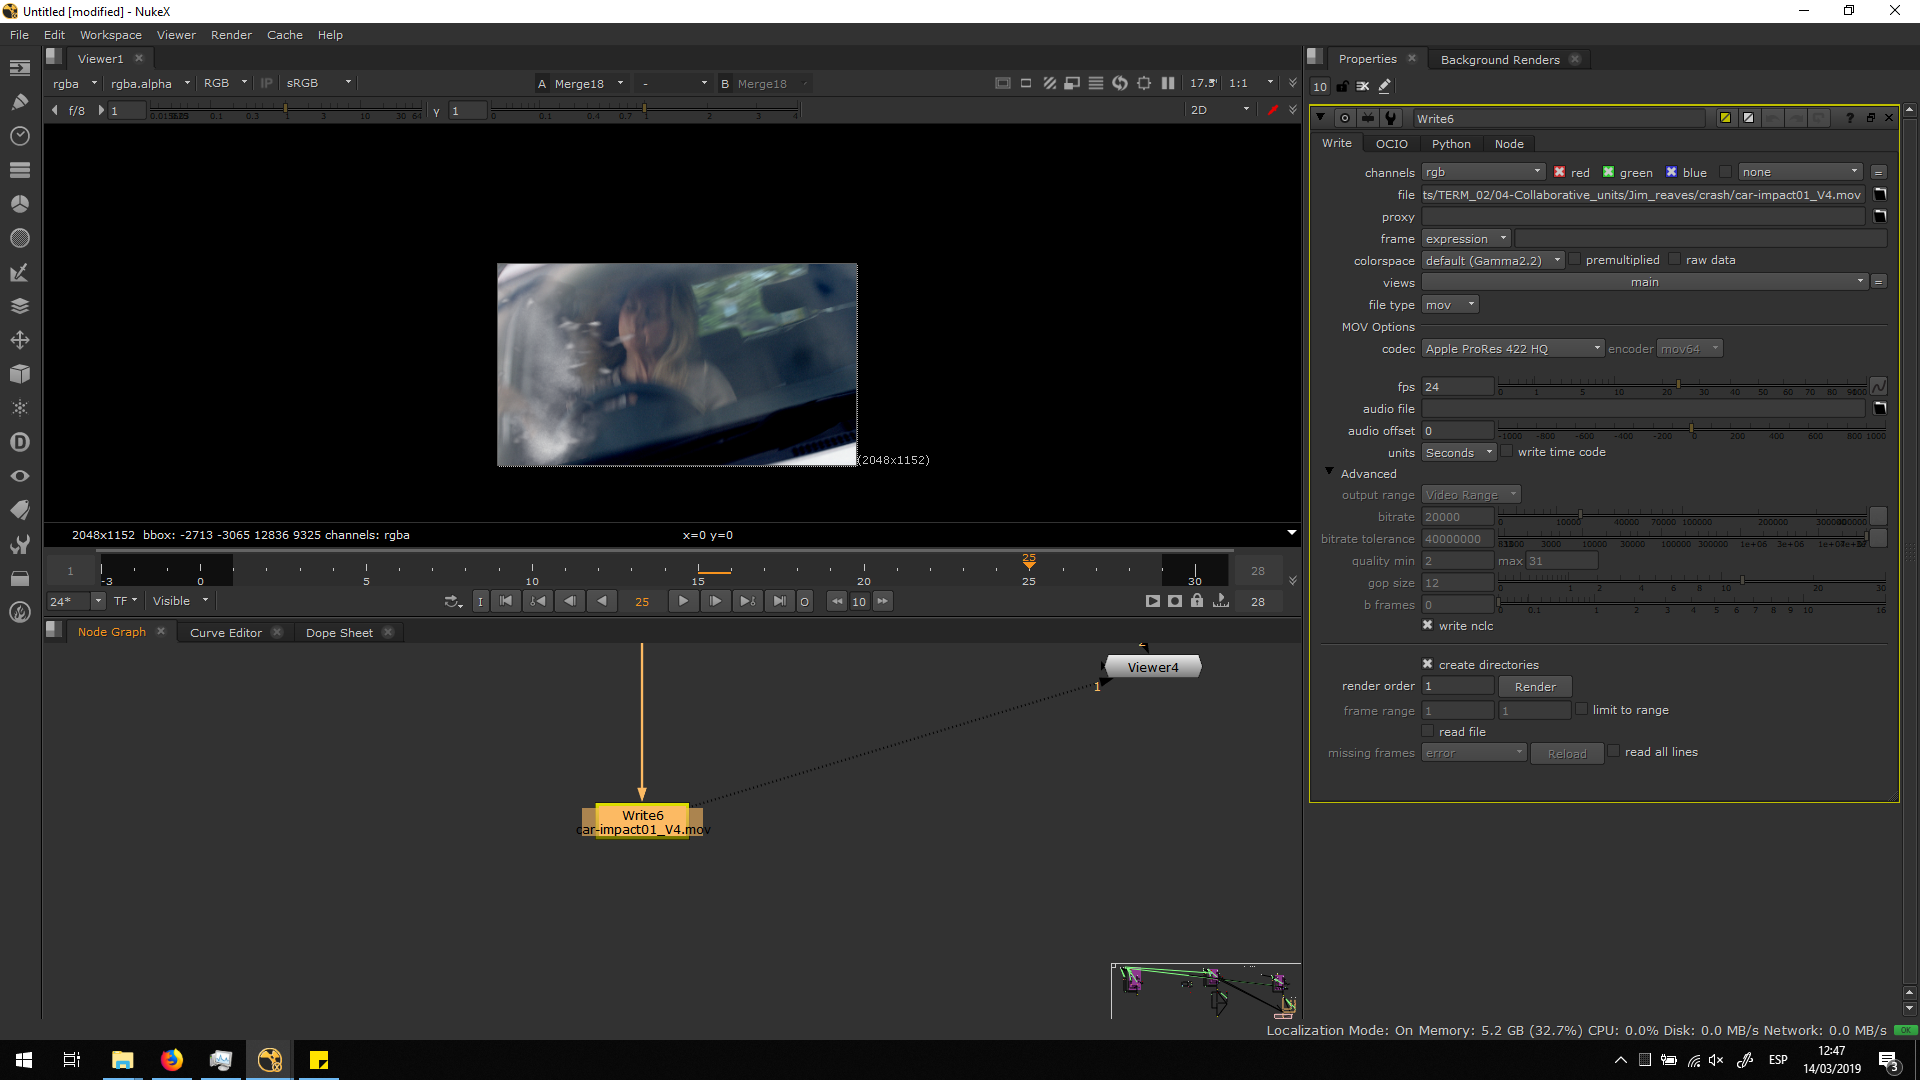
Export
Once we are happy with all the parameters setting, we can export the footage in Apple ProRes 244HQ as we were asked, matching the color space and FPS with the original footage.
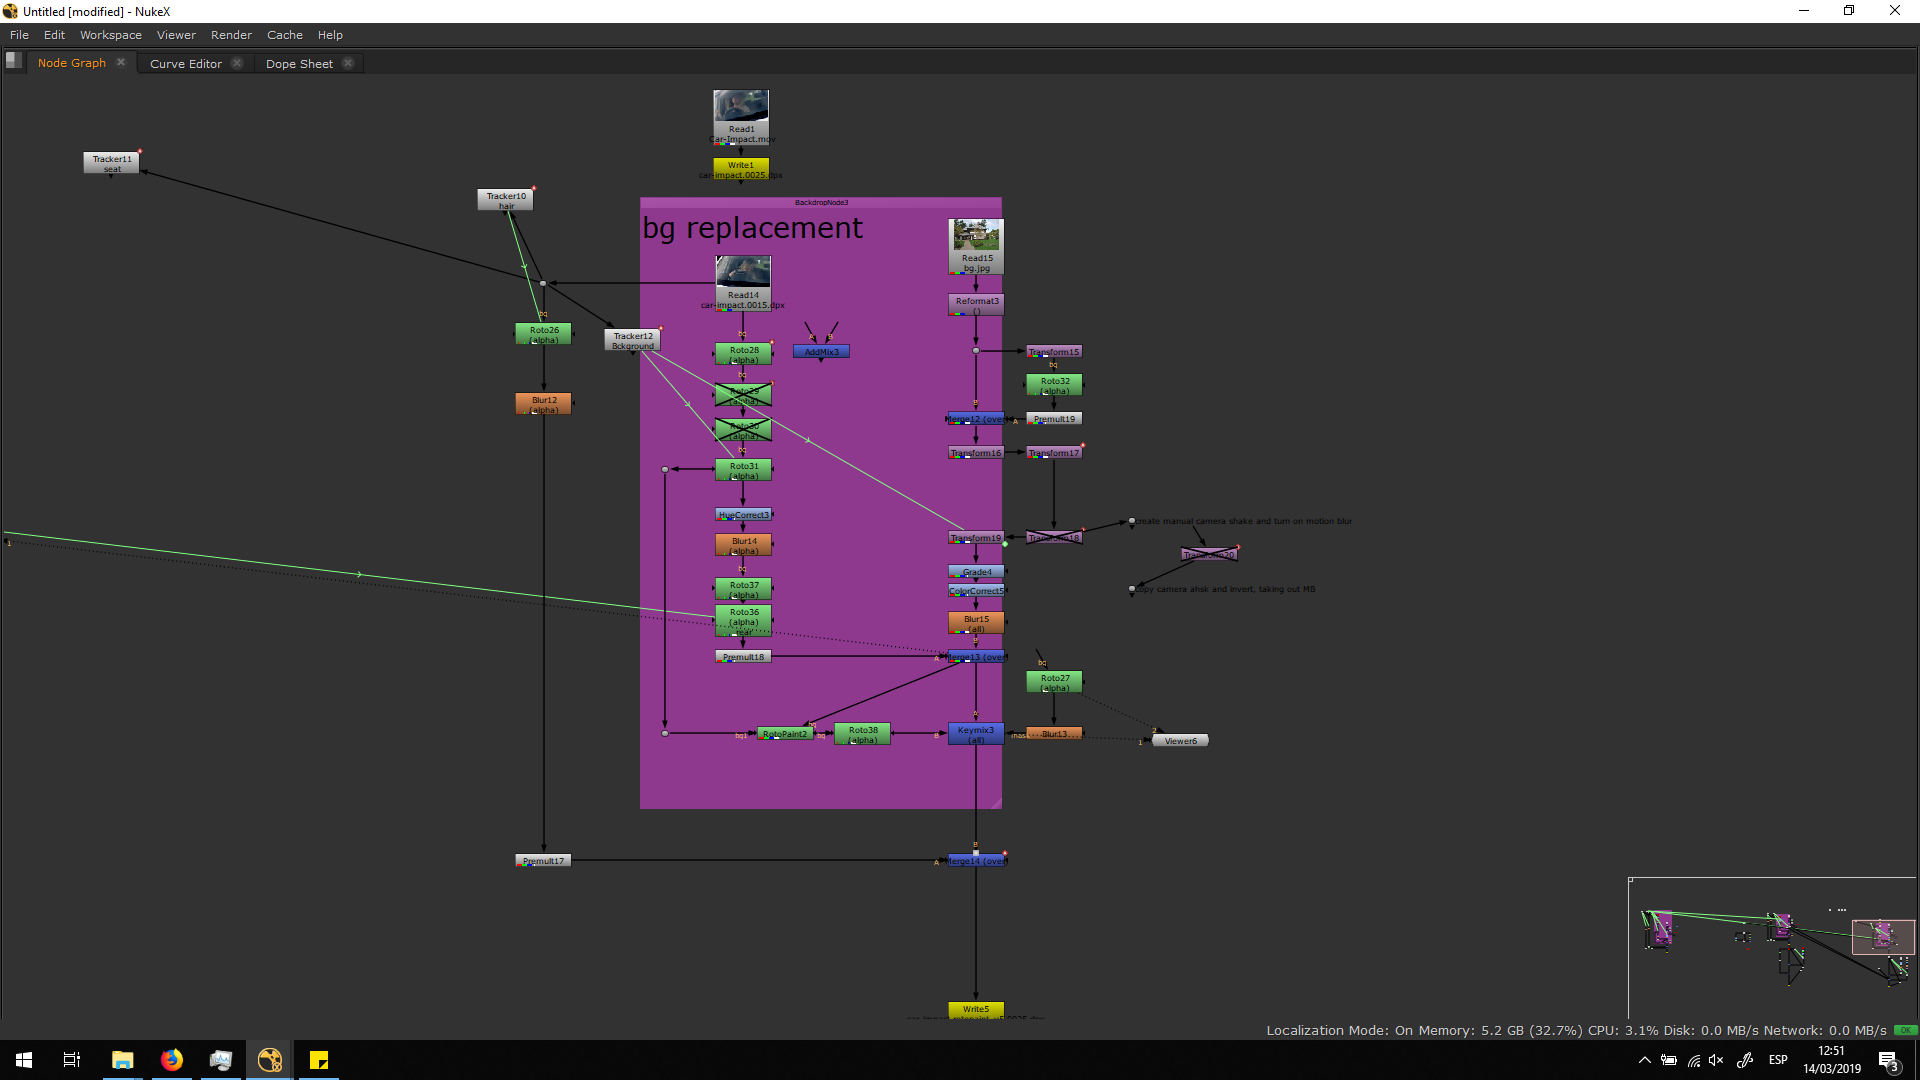
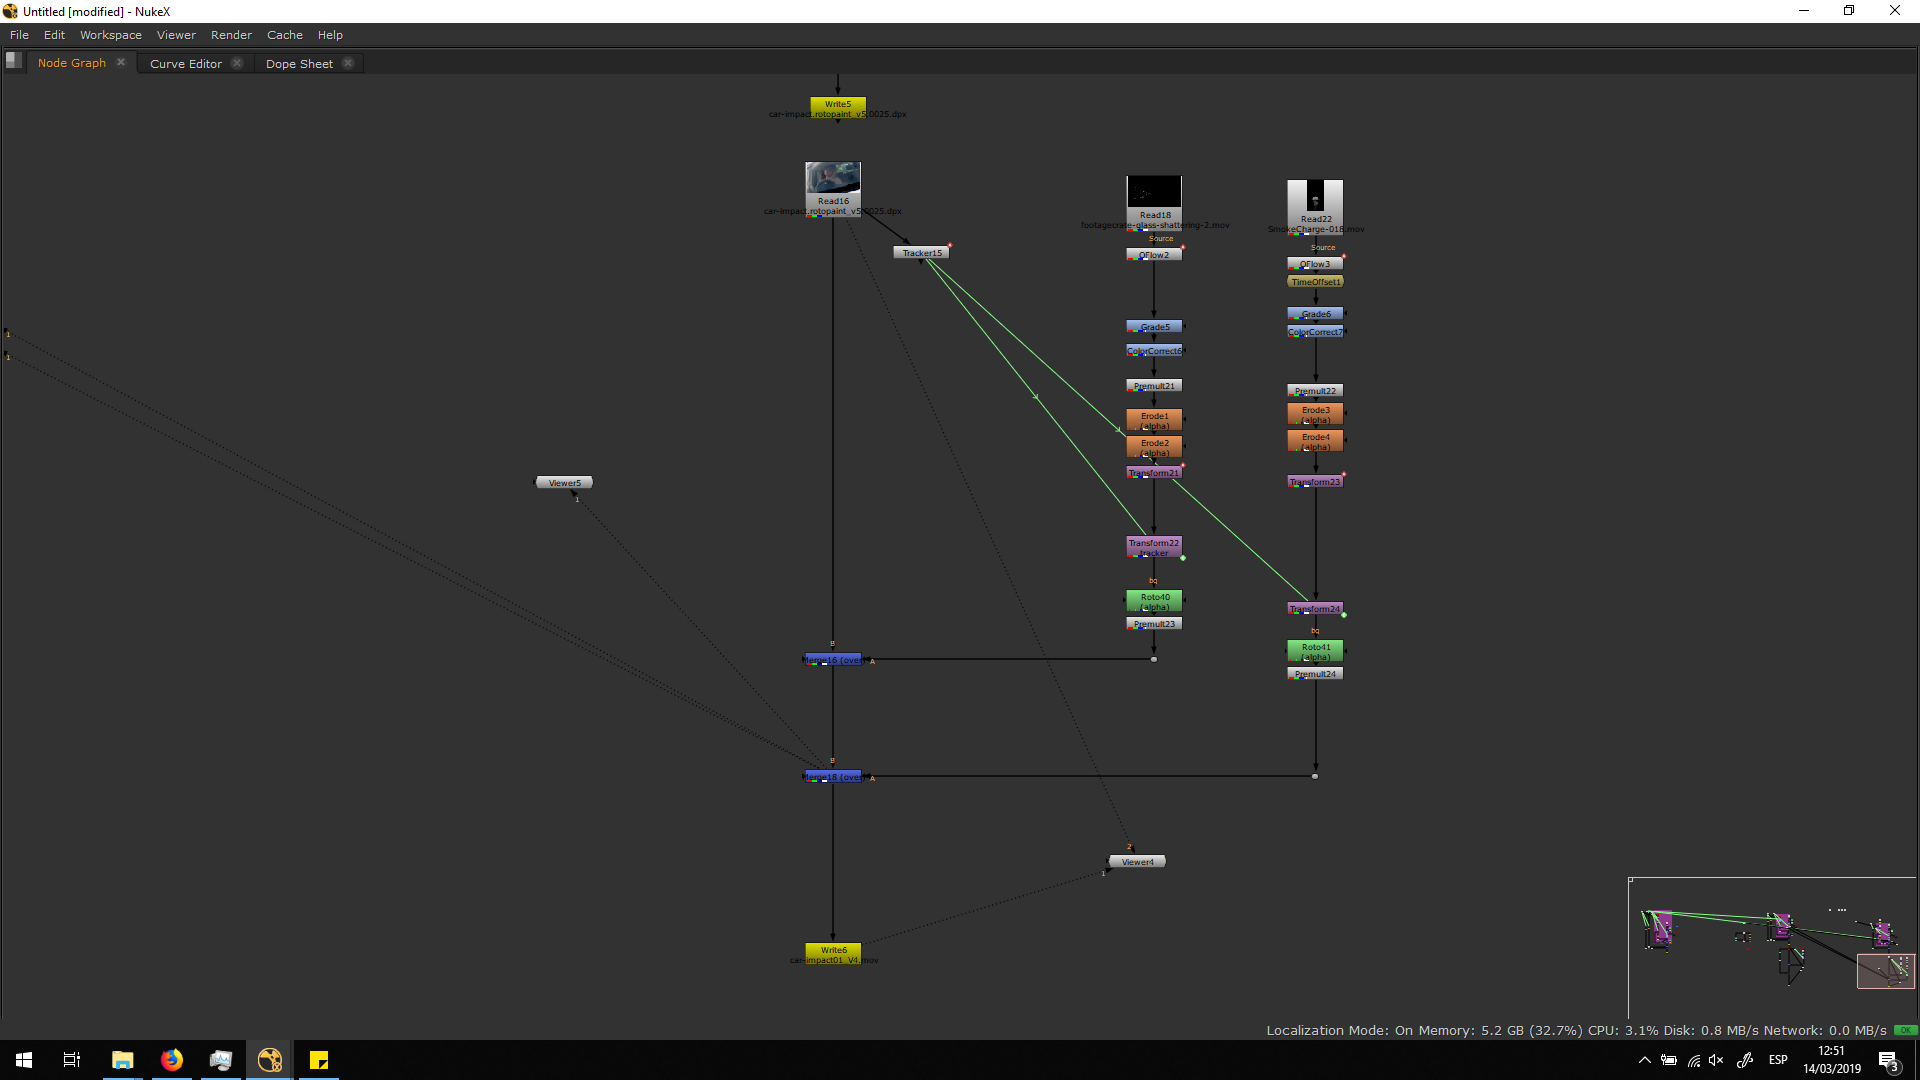
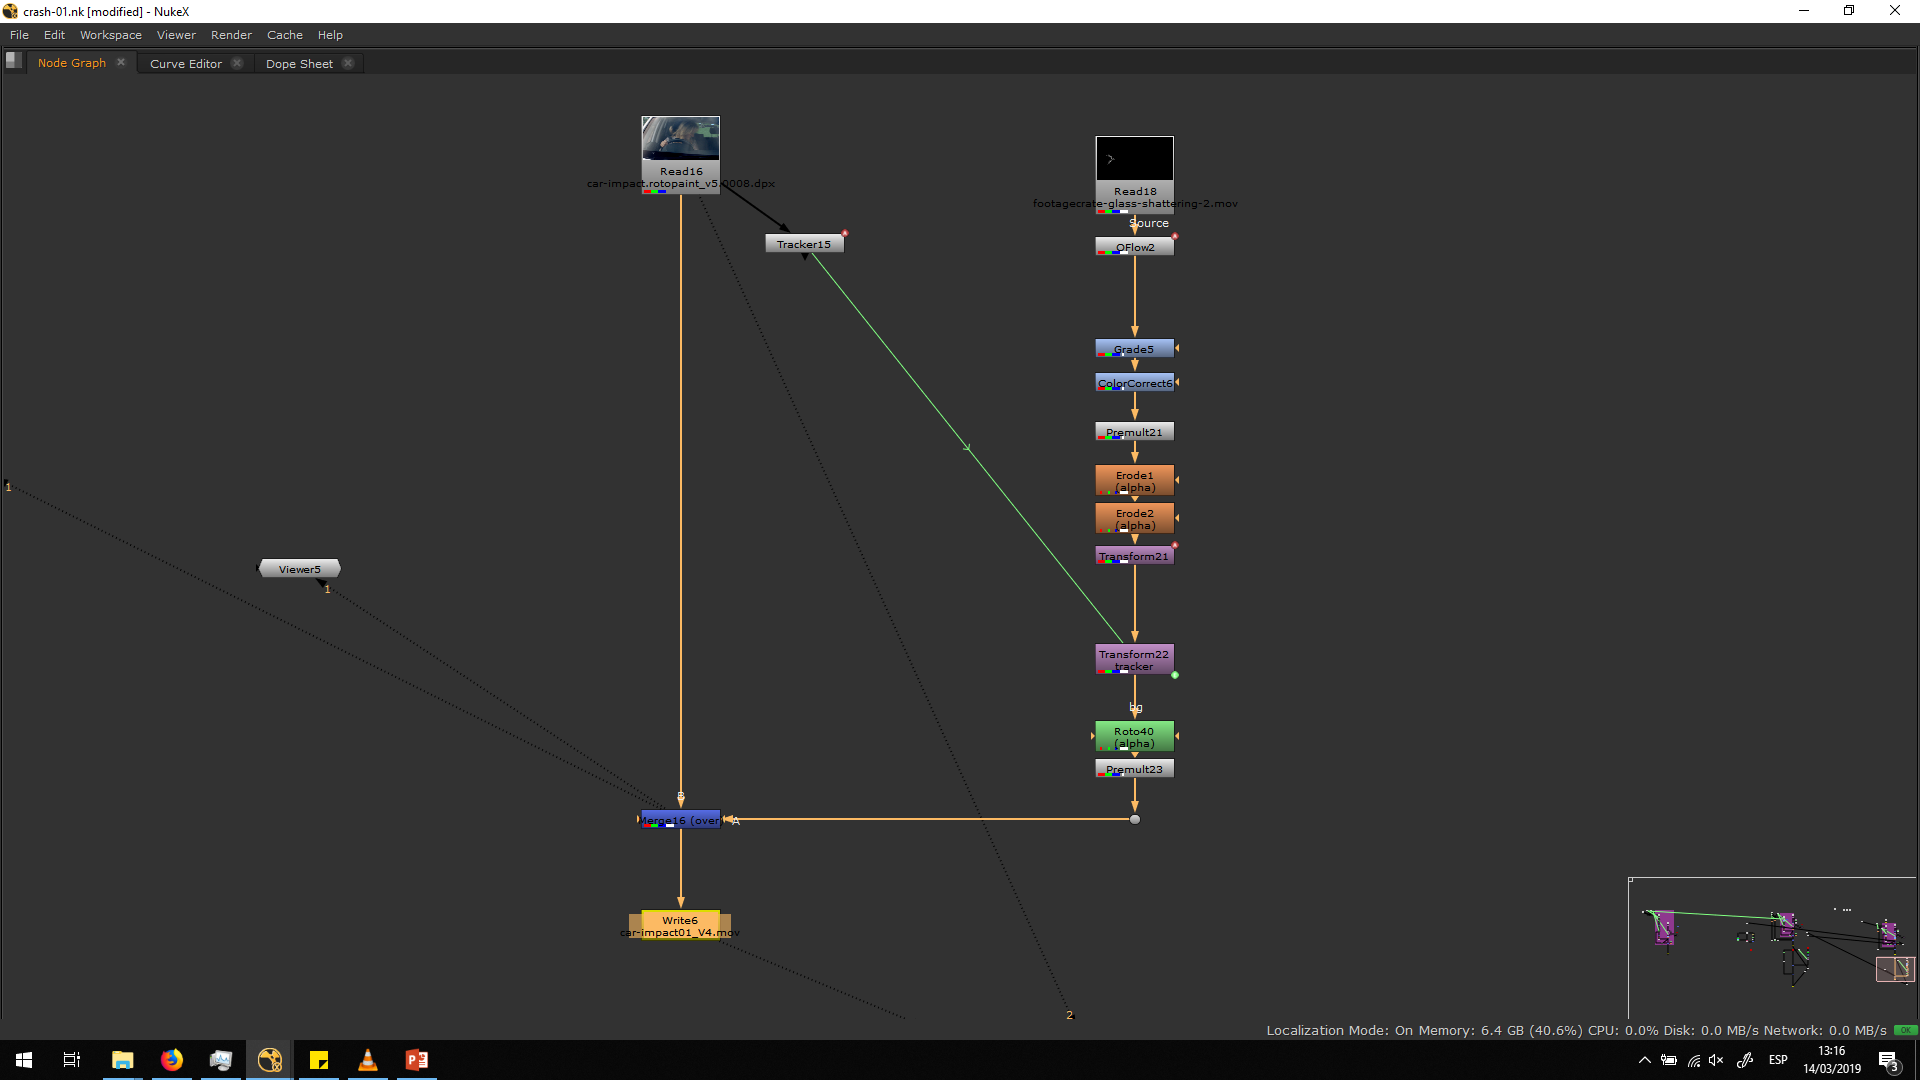
 Script overview
Corrections
This shot was the one which had most corrections, because of the difficulty of the roto. All the versions can be seen in the video on top.
First version
This is a still image of the first version.
In this first version, the script looked like this:
The roto was not refined, making the roto painting much more prominent. The problem with the roto painting was that, as it wa made by painting frame by frame, it came out to have a lot of irregularities, and it looked really unnatural. Over more, the left part of the car was not rotoed out, so the background could not be seen over it.
On the other side, the background wa placed as a still image with any kind of movement, which made it look highly unnatural.
Second version
In the second version, I fixed the roto making it more accurate and smooth. I settled the movement of the background, looking it to a tracking for the first half od the video and adding the transformation for the crash, with all the motion blur.
The script for this version looked like this:
For this version, I had the following corrections:
I was asked to clean up some issues and introduce more crash effects.
The issues to clean up were:
-
Remove that part that belongs to the original footage.
-
Try and remove/cleanup the blur that is happening around the interior edges in the back of the car, specifically the headrests and the metal rod of the headrest.
-
Try defocus and play a bit with colour grading.
-
When above has been fixed, add glass shards, dust, minor debris.
In order to adjust this issues, I did another roto with no blur and high detail for the back of the car. Also, I did the blurry roto for the hair, premultiplying and merging it over the other rotoes. Then, I refined the grade to make the background blend better.
Finally, I added the dust effect and increased the size of the glass.
All this process is detailed in the description above, since the third version was the last version of this excercise.
Difficulties and conclusion
I found really hard difficulties for this excercise. Doing a roto for the hair and for such a blurry movement is really hard. Therefore, I learned a lot of how to deal with rotoes of not-organic elements, and how to play with the grading and with the blur in order to blend two videos which cannot be blended by a sharp bezier curve.
Anyway, this roto could be made just because the background that we needed to place is the same color as the real background. If we would have the need to place a totally different background, the roto would have been almost impossible to make.
Fortunately, this video was only 28 frames long, and even so, we spent really long hours to make it look good. We could have made a much quicker job if it would have been shooted with a green screen, and also we would have obtained much better results. Therefore, now I understand the importance of thinking about all the little details of each shot, in order to avoid the need of fixing things that shouldn’t have been fixed in post-production. A good shooting work could save long hours of -p work, and give better results for the final export.
Even so, I am thankful to have solved this shot, because it is true that during our professional life we will also need to face shots that are not perfect, and fix mistakes that we were not supposed to fix. Usually working with not perfect shots makes us improve our skills much more than working with good ones.
