For this session of The Third Floor, we got an environment which belonged to the previs of the last movie of Spider Man. With that environment we needed t build the whole action of the story.
Organization
As we were going to work with this assets during the whole process, we decided to divide our work in different folders, well named.
We created a folder system divided in:
- Resources
- Vincent corrections
- External 3D model resources
- Graphics
- Other recources
- Working Files
- Maya files
- Premiere files
- Outputs
- Playblasts
- Final exports
Vinced insisted a lot in having the work well-organized and the shots named correctly. It might spend some of our time but we will spend more time working with no structure in a long-term.
Therefore, we took care about the name and organization os the whole project.
Planification
First of all, Anto and Adrian planified the scene overa 2D map.
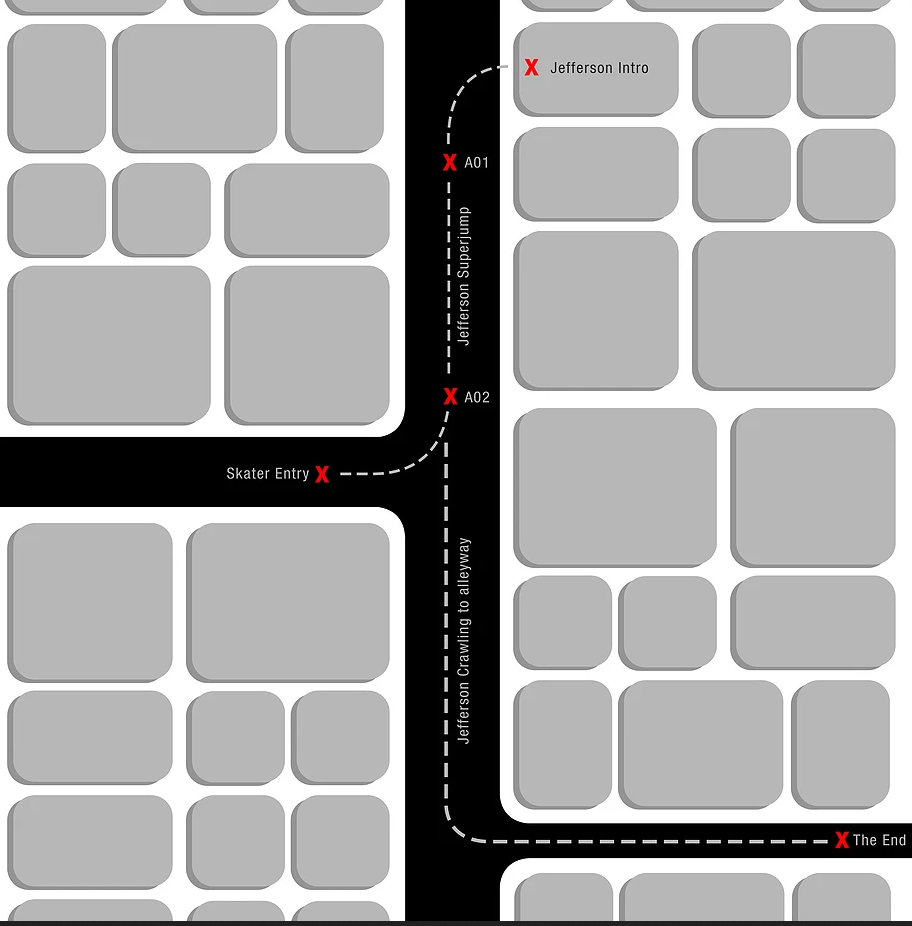
Then, they put the red crosses in the actual environment, in order to have it as a reference of the animation.
Blocking animation
Vincent recommend us to start animating from the master scene, and so we did.
Anto translated this map into the 3D environment. He created a crowd and the traffic jam. Then, he defined out character with a black hat, in order to diversify him from the crowd.
Then, he modelled the gun for the first antagonist, and the skate and the knife for the second antagonist.
Finally he did the animation of the whole action.
Shots
Adrian and me were the ones responsible to make the cameras. We both have an audiovisual background, so we have a close approach to cinema language. Therefore, we already had a rough idea in mind of which camera movements we wanted and how to use the film language to have a good storytelling. But still, we had a lot to improve.
Therefore, we took the maya scene once the animation was done. Anto taught us how to create a camera, set the lens, animate it and playbast from its view.
Adrian and me worked together in Maya deciding which shots to export. We still did not ha
Adrian was the one working with Maya, while I was working with Premiere in the computer next to him. This way of working enabled us to see how the shots looked as a sequence after exporting, and have a clearer idea if we wanted to add some shots or slightly change the shots as we wanted. Also, it was the way easier to see when we did a jump of edge, not following the 180 degrees law.
We ended up exporting multiple shots, naming them according to the action that they represented.
We ended up having this naming code.
- 001-MOOD-XX
- 002-JEFFERSON-XX
- 003-JUMP-XX
- 004-LANDING-XX
- 005-CHASING-XX
- 006-END-XX
Editing
After exporting all the shots we wanted, I did the editing in Premiere Pro, choosing which shots to use and discarding the shots which I consider they did not match completely with the sequence. I tried different shots and timings, altering the order on each shot to see how the looked better and came along with the storytelling. Finally, I exported the video we submitted for this first version of the blocking animation. The video can be found in Ftrack server from the university computers.
Corrections
After showing the video to Vincent, he gave us some corrections:
- Start with a black video and put the name of the movie
- Add another establishing shot and give it more time to be able to get the mood
- SHOT 1: Put more cars, so we can understand that there is a jam. Then, the camera movement scrolls and the audience can understand why: there is a jam because there is a riot.
- SHOT 2: Do not start the shot showing the pavement because is not interesting. He recommended to keep focusing on the crowd and then focus to the guy. Change the perspective. No leave blank space, if there is space we should filling it by putting more people in the background. We always need to drive the eye where to look, because if there is nothing interesting the audience loses attention. We can put him going out and stopping seeing the crowd, so we understand he is already trapped.
- TIP: Start the animation in frame 100, so if we need to edit we have some space at the beginning.
- TIP: Use the Snipping tool
- SHOT 3: Show his face and then close up. Center the element at the same place in which the attention was before. Reframe the shot. Introduce better the camera and then go down to the can. The end of the shot is okay but starting is bad. The character decides to go to the crowd, so it is interesting to have a shot from behind his back showing the crowd.
- SHOT 4: We are focusing the attention on the right and in the next scene the right is empty. We do not need the start of the shot because the first interesting action is him looking suspicious. Put a bit more of a moment of thinking, showing his doubt and make see that he does not have a choice to go other way because he is going to feed the cat.
- SHOT 5: The character goes from moving left to right and not it moves right to left, so we should turn the camera or do dead center (we skipped the 180 degrees law). We should have the crowd on both sides so audience understands he cannot go back. We need a short lens to make the movement of wrapping around (18 to 25). We can maintain the tension a bit longer and overplay to build more tension, like putting two faces together. Augment the composition with more crowd in the background.
- Reference: Michael Bay. He always add stuff happening round the scene. He does a lor of spins. The images look flat because he uses long lenses.
- ADD SHOT: Of him walking through the crowd. Perspective lines going through him would make a stong composition
- SHOT 6: Experiment around frrom this action to the other one. It is not a common action, so just play around adding some brave shots like cenitals, or low angle shots.
- TIP: Do several shots, take all the shots and do our own edit. In this way we will have different persective sof how to solve the problem and we will knwo which one looks better
- TIP: Name stuff ans be consistent with your organization. Be organized on top of things.
- EXTRA SHOT: After shot 9. Add a close up of the face, because it is important the expression, as he just went through something difficult
- SHOT 10: We present the skater as something mysterious, but we are missing coming back to the main character face . The skater is not really recognizable. We could do a shot of the face, then the knife, then go back to the scared face, so we understand the danger.
- CHASING SHOTS: Make a shot towards him, then his face and then impact.
- SHOT 14: After he is hit he should struggle more.
- SHOT 16: Extend the menace in the alley. More different shots
- END SHOT: Cenital shot not showing the cat and showing him approaching.
- END SHOT: More tension in that frist shot when we still do not know what Jefferson is doing.
- END SHOT: Then, the final surprise, he turns and die. And the cat is finally shown.
- END SHOT: Then, skater’s reaction.
- END SHOT: Then finish on cat tuna can, Jefferson and skater. We can do a cenital shot, but do not move the camera too much, just slight elegant rotation.
- SHOT 17: The guy is going too fast, we should search top shots references.
References
Vincent gave us some references in order to help us with the improvements.
The first reference was the one of Michael Bay that we explained before, and it is well developed in this video.
Then, he reccomended us another video from the same channel, Every frame a painting, which spoke about the use of the movement in Akira Kurosawas movement. There we could learn about editing in movement, composition, mood from the weather, and camera movements.
Finally, in order to highlight the fact that we used too many shots in the jump scene, he put us this example of how is inconvenient to use too much information for a shot. We will need to try to fing the balance.
Task
For the next session, we will need to apply all the corrections of Vincent into our work, and do a second exportation with all the corrections. Also, along with the corrections, we will need to improve the work as we consider, applying all we have learned from this session.
